
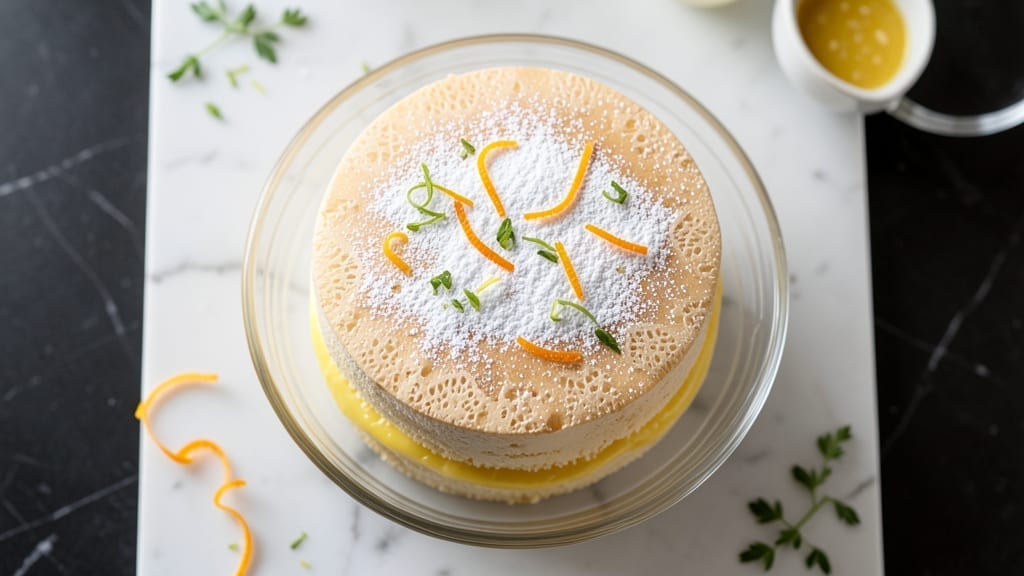
A 2-egg chiffon cake delivers that signature light-as-air texture without requiring a dozen eggs—just citrus zest and careful folding. The secret lies in whipping egg whites to stiff peaks and gently incorporating them into a delicate batter, creating a cake so tender it nearly dissolves on the tongue.
This recipe transforms simple pantry staples into a showstopper dessert with minimal effort, proving you don’t need complexity for perfect results.
The magic happens in the technique: folding the egg whites in three stages preserves their airiness, while a splash of citrus zest infuses bright, refreshing flavor without overpowering the delicate crumb.
Unlike traditional chiffon cakes, this version uses just two eggs while maintaining that signature moisture-retentive, cloud-like texture—no heavy density here. The cake bakes in a single layer, rising dramatically in the pan for an impressive finish.
What you’ll end up with is a golden, domed cake with a velvety crumb that stays moist for days, not dry or crumbly. The citrus notes add a subtle zing that pairs beautifully with fresh berries or a dusting of powdered sugar.
This isn’t just a cake—it’s a foolproof masterpiece that looks and tastes like it came from a patisserie, not your kitchen.
Perfect for special occasions or spontaneous dessert cravings, this recipe scales easily and keeps well for up to three days. The folding technique might seem intimidating at first, but I’ll walk you through every step to ensure restaurant-quality results—no baking experience required. Let’s get started!
Ingredients for 2 egg chiffon cake
Twelve ingredients, two eggs, and a technique that transforms ordinary into extraordinary chiffon cake.
| Ingredient | Amount | Notes |
|---|---|---|
| Large Eggs 🥚 | 2 whole | Room temperature for best volume |
| Granulated Sugar 🍚 | 1 ½ cups | Divided for whites and batter |
| Unsalted Butter 🧈 | ½ cup | Melted, cooled slightly |
| All-Purpose Flour 🌾 | 1 ½ cups | Sifted, spooned lightly |
| Lemon Zest 🍋 | 1 tbsp | Fresh, finely grated |
| Orange Zest 🍊 | 1 tbsp | Fresh, finely grated |
| Fresh Lemon Juice 🍋 | 2 tbsp | From 1 medium lemon |
| Vanilla Extract 🌿 | 1 tsp | Pure, high-quality |
| Salt 🧂 | ¼ tsp | Fine sea salt |
| Cream of Tartar 🍯 | ¼ tsp | Stabilizes egg whites |
| Vegetable Oil 🫒 | 2 tbsp | For greasing pan |
| Powdered Sugar 🍚 | ½ cup | For dusting (optional) |
The eggs are the foundation, so room temperature is non-negotiable—they whip to nearly triple volume when cold. Separate them carefully, ensuring not a trace of yolk contaminates the whites. For the citrus zest, organic lemons and oranges from the produce section at Whole Foods or a well-stocked grocery store yield the brightest flavor. The butter should be melted and cooled to 110°F—too hot and it will cook the flour, too cool and the batter won’t emulsify properly. Sift the flour twice for a light, aerated texture, and measure it by spooning it into the cup rather than scooping directly from the bag.
No cream of tartar? Substitute lemon juice at half the amount—it stabilizes the egg whites similarly. Running out of fresh citrus? Zest from a jarred blend works in a pinch, though it lacks the vibrant punch of fresh. For the sugar, Domino brand is my go-to for its fine grain and consistent performance. The vanilla extract should be pure—Nielsen-Massey or McCormick are reliable choices. If you’re baking in a high-altitude area, increase the sugar by 1/4 cup to compensate for the reduced air pressure. The powdered sugar is optional but adds that signature patisserie finish—use Confectioners’ sugar for the smoothest texture.
Store the cake in an airtight container at room temperature for up to 3 days, though it’s best enjoyed fresh. For longer storage, wrap tightly in plastic and refrigerate for up to 5 days. The texture remains tender when kept this way, but the citrus flavors intensify slightly over time. To serve, dust generously with powdered sugar and slice with a serrated knife—dip the knife in hot water between slices to prevent crumbling. This cake freezes beautifully too; wrap individual slices in plastic wrap and freeze for up to 3 months—thaw at room temperature before serving.
Why You’ll Love This Recipe
- Just Two Eggs: I swear by this—no separating whites, no overmixing, just crack, whisk, fold. That lemon zest? It’s the secret that makes the whole thing brighter than a spring morning.
- Light Yet Rich: The butter keeps it tender, but the eggs give it that signature airiness. Honestly, it’s the kind of cake that feels fancy without tasting heavy—like a hug from your favorite baker.
- Weeknight Magic: No one’s waiting for hours in the oven. This bakes in under 40 minutes, so you can pull it out, slice it, and have dessert ready while dinner simmers. (Yes, even on a Tuesday night.)
- Budget-Friendly Luxury: Uses basic pantry staples—no specialty ingredients, no waste. The leftovers? They disappear just as fast as the first slice, but the cost won’t break the bank. My wallet thanks me.
Step-by-step instructions for fluffy citrus chiffon cake
Mastering chiffon cake requires precision—here’s how to achieve that signature light, airy texture with citrus brightness.
Prepare the Egg Whites for Maximum Volume
Separate the 2 whole large eggs carefully, ensuring not a trace of yolk contaminates the whites. Place the whites in a spotless, grease-free bowl—the slightest fat residue prevents proper whipping. Add the cream of tartar and salt to the whites and whisk lightly to dissolve.
Using a stand mixer fitted with the whisk attachment, beat the egg whites on low speed until frothy. Gradually increase to medium-high speed and begin adding the 1.5 cups granulated sugar in a slow, steady stream. This gradual incorporation creates stable, glossy meringue with peaks that hold their shape when the whisk is lifted.
Continue whipping until the meringue forms stiff, glossy peaks that stand upright when the whisk is lifted. The meringue should be thick enough to hold its shape but still smooth. This process typically takes 5-7 minutes—don’t rush it. The meringue is the foundation of your chiffon’s signature lightness, so take your time to achieve perfect volume.
Combine Yolk Mixture and Fold in Meringue
In a separate bowl, melt the 0.5 cup unsalted butter in a heatproof bowl over barely simmering water, then cool it slightly. In the same bowl, whisk together the egg yolks, remaining 0.5 cups granulated sugar, lemon zest, orange zest, fresh lemon juice, vanilla extract, and the cooled melted butter until smooth and fully combined.
Gently fold one-third of the meringue into the yolk mixture using a spatula, cutting through the center to maintain air incorporation. Then fold in the remaining meringue in two additions, being careful not to deflate the batter. The batter should be thick but still pourable—it should ribbon off the spatula slowly. This careful folding creates the chiffon’s signature airy texture without collapsing the structure.
Prepare and Pour the Batter
Preheat your oven to 325°F. Grease a 10-inch tube pan thoroughly with 2 tablespoons vegetable oil, then dust lightly with flour, tapping out any excess. Line the bottom with parchment paper, leaving an overhang to help with removal.
Pour the batter into the prepared pan immediately, smoothing the top with a spatula. Tap the pan gently on the counter 2-3 times to remove any air bubbles. The batter should reach about ¾ of the way up the pan—chiffon cakes don’t fill completely like bundt cakes. Place the pan in a water bath by setting it in a larger roasting pan filled with 1 inch of hot water—this creates the moist environment chiffon needs to rise properly.
Bake with Precision Timing
Bake for 45-50 minutes until the top springs back when touched lightly and a toothpick inserted near the center comes out clean. The cake should pull away slightly from the sides of the pan, indicating proper rise. Chiffon cakes are delicate—don’t overbake, or they’ll become dense.
Remove from the oven and let cool in the pan for 10 minutes, then invert onto a wire rack to cool completely. The cake will continue to set as it cools, developing that signature light, airy texture. Once fully cooled, you can remove the parchment paper and gently loosen the cake from the pan if needed. For presentation, dust the top with powdered sugar if desired, though the citrus flavors should shine without it.
Pro Tips For Making 2 Egg Chiffon Cake
- Whisk Eggs Cold: Start your eggs straight from the fridge—room temperature eggs lose structure faster in chiffon cake. After separating, chill the whites in the fridge for 10 minutes while you mix the yolks with sugar and butter. Trust me, this prevents sad, flat peaks when you fold.
- Sift Flour Twice: Chiffon cake relies on lightness, so don’t cut corners here. Sift the flour before measuring, then sift it again directly into the bowl with the lemon zest. This aerates the batter and keeps the texture airy—no lumps, no dense cake.
- Fold Like You Mean It: Use a spatula, not a spoon, and work in the center, gently sweeping the batter from the bottom up. Stop when you see streaks of white—overmixing collapses the air bubbles you just created. And for the love of cake, don’t scrape the bowl.
- Preheat Pan Properly: Your tube pan should be hot—350°F for 15 minutes before baking. Cold pans cause uneven rising, and chiffon cake needs that initial heat to lift. Line it with parchment after preheating, or it’ll stick like glue. No one wants to fight a chiffon cake.
Pro cooking tips for this dish
Egg White Mastery
The egg whites are where the magic happens, so treat them like royalty. Use a spotless, grease-free bowl—even a trace of fat will prevent proper whipping. I swear by my KitchenAid stand mixer with the whisk attachment for consistent results.
Start on low speed to avoid splatter, then gradually increase to medium-high as you add sugar. The key is patience: whip until you get stiff, glossy peaks that hold their shape when you lift the whisk. If you rush this step, your cake will collapse like a deflated balloon. 🥚
Three-Stage Folding
Folding the meringue into the yolk mixture is an art, not a science. First, gently fold in one-third of the meringue using a flexible spatula, cutting through the center to maintain air pockets. Then add the remaining meringue in two equal additions, always folding from the bottom up.
Think of it like tucking in a blanket—you want to preserve every bit of air. Overmixing here will deflate your cake faster than a hot air balloon with a leak. I like to use a silicon spatula because it’s gentle on the delicate batter.
Water Bath Secrets
Chiffon cakes rely on moisture to rise properly, so the water bath is non-negotiable. Place your tube pan in a larger roasting pan filled with 1 inch of hot water—this creates a steamy environment that helps the cake climb.
I use a 10-inch Wilton tube pan because it has a tight seal, but any quality pan will work. The water should be hot but not boiling when you add the pan. If the water boils vigorously, it can cause the cake to sink instead of rise.
Keep an eye on it, and add more hot water if needed during baking. 💧
Precision Timing
Bake at 325°F for 45-50 minutes—no more, no less. The cake is done when it springs back when touched lightly and a toothpick comes out clean. Overbaking is the enemy of chiffon cake; it turns dense and dry faster than you can say “disaster.”
I set a timer and check every 5 minutes starting at 40 minutes. The moment it’s done, remove it from the oven and let it cool in the pan for 10 minutes before inverting. This resting time is crucial for setting the texture properly. 🕒
Pan Prep Matters
Grease your pan thoroughly with 2 tablespoons vegetable oil, then dust lightly with flour and tap out the excess. I use coconut oil for greasing because it has a neutral flavor and high smoke point. The parchment paper on the bottom prevents sticking and makes removal a breeze.
If you skip this step, your cake might stick like glue, and trust me, you don’t want to spend 20 minutes prying it loose. A well-prepped pan is half the battle. 🧽
Citrus Zest Tricks
Fresh citrus zest makes all the difference, so don’t skimp. Use a microplane to get fine, even zest—no chunks! I like to zest 1 lemon and 1 orange for the brightest flavor. If you’re using store-bought zest, look for organic brands like Whole Foods 365 for the best quality.
The zest should be finely grated and mixed into the yolk mixture before folding. A little goes a long way, so measure carefully. Too much zest can make the cake taste bitter, and you don’t want that happening to your beautiful creation. 🍊
Nutrition facts
Frequently asked questions
Why does this recipe use only 2 eggs?
The secret lies in the technique! Traditional chiffon cakes use many eggs for structure, but this recipe achieves the signature light texture by whipping the egg whites to stiff peaks and folding them carefully into the yolk mixture. The citrus zest adds natural leavening, while the water bath during baking creates steam for extra lift. Fewer eggs mean less fat, resulting in a tender, moist crumb that stays fresh for days.
Can I make this cake without a tube pan?
Yes, but the shape will differ. Use a 9-inch round or square cake pan instead, but grease it thoroughly and line the bottom with parchment. The cake will rise less dramatically than in a tube pan, but the texture will remain light and airy. For a dome effect, place the pan on a baking sheet during the water bath step.
What if my egg whites won’t whip to stiff peaks?
This usually happens if the whites are cold or contaminated with fat. First, ensure your bowl and whisk are completely clean. Use room-temperature eggs and add the sugar gradually while whipping. If they still struggle, try adding 1/4 teaspoon cream of tartar (already in the recipe) or a pinch of salt to stabilize them. Avoid overmixing the yolks, as fat can transfer to the whites.
How do I store and serve the cake?
Keep the cake in an airtight container at room temperature for up to 3 days or refrigerate for 5 days. For serving, dust with powdered sugar or top with fresh berries. Use a serrated knife dipped in hot water between slices to prevent crumbling. The cake freezes beautifully too—wrap slices individually and freeze for up to 3 months.
Can I substitute the citrus zest?
Fresh zest is ideal, but in a pinch, use 1 teaspoon bottled citrus zest (like Whole Foods 365) or 1/4 teaspoon citrus extract. For flavor, you could also add 1/2 teaspoon vanilla bean paste** or a pinch of cinnamon, though the bright citrus notes are signature to this recipe. Never skip the zest entirely—it adds the signature zing!

- 32 Oz Cream Cheese Cheesecake Recipe: Silky Smoothness With No Cracking - October 11, 2026
- 8×8 Pan Dump Cake Recipe: One-Bowl Wonder with Fudgy Layers - October 11, 2026
- 10-Layer Cake Recipe: Stacked Height With Buttery Vanilla Layers - October 11, 2026