
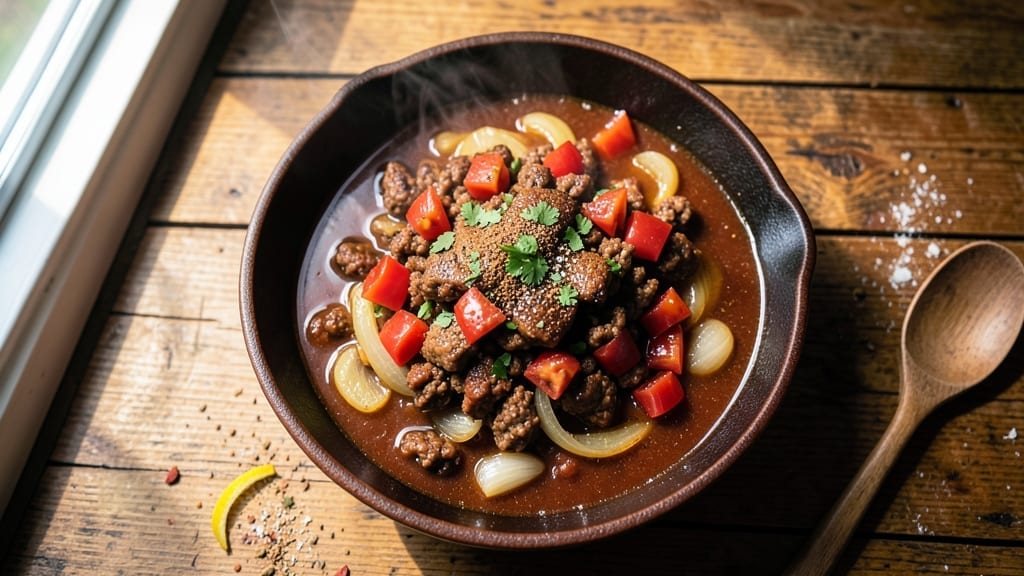
This 1 lb ground turkey chili recipe delivers all the smoky, hearty comfort of a classic chili—without the beefy richness. The secret lies in proper browning and layered spices that transform lean turkey into tender, flavorful bites.
I developed this recipe after years of testing lighter chili versions that never quite delivered, and this one finally nails that perfect balance of texture and depth.
What makes this chili special is the one-pot technique that builds flavor through gradual simmering. We start with a rich tomato base, then let the spices bloom in hot oil before adding the turkey.
This creates a complex, aromatic foundation that’s deeper than most store-bought versions. The result? A chili that’s hearty enough for a family dinner but light enough for a weeknight meal.
By the time it’s done, you’ll have a pot of chili with tender turkey pieces, thickened sauce, and just the right amount of spice. The 30-minute simmer at medium heat ensures the flavors meld perfectly, while the optional toppings let you customize it to your taste.
This is chili that feels indulgent without being heavy.
Serve with cornbread or over rice to soak up every last drop of that smoky, savory sauce. The best part? Leftovers taste even better the next day as the flavors continue to develop. Let’s get cooking!
Ingredients for 1 lb ground turkey chili
Just 15 ingredients transform lean turkey into smoky, hearty chili magic.
| Ingredient | Amount | Notes |
|---|---|---|
| Ground Turkey 🍗 | 1 lb | Lean or regular, 93% lean preferred |
| Yellow Onion 🧅 | 1 whole | Medium size, diced small |
| Garlic Cloves 🧄 | 3 cloves | Fresh, minced fine |
| Tomato Paste 🍅 | ½ cup | Smooth, not chunky |
| Diced Tomatoes 🍅 | 1 can | 28 oz can, fire-roasted preferred |
| Chicken Broth 💧 | 1 ½ cups | Low-sodium preferred |
| Chili Powder 🌶️ | 2 tbsp | Medium heat preferred |
| Ground Cumin 🌿 | 1 tbsp | Freshly toasted if possible |
| Smoked Paprika 🌶️ | 1 tbsp | For authentic smoky flavor |
| Oregano 🍃 | 1 tsp | Dried, Mexican preferred |
| Salt 🧂 | 1 tsp | Kosher or sea salt |
| Black Pepper 🌶️ | ½ tsp | Freshly ground preferred |
| Olive Oil 🫒 | 1 tbsp | Extra-virgin for richness |
| Dark Brown Sugar 🍬 | 1 tbsp | For subtle depth |
| Cayenne Pepper 🔥 | ¼ tsp | Adjust to taste |
The turkey makes or breaks this—93% lean is ideal for that tender texture, but regular ground turkey works too. Trader Joe’s and Costco often have great prices on bulk ground turkey, and it freezes beautifully. Look for good marbling if you’re buying a whole turkey breast to grind yourself. The onion and garlic are your flavor anchors here, so don’t skip the fresh mincing—pre-minced garlic lacks that aromatic punch. For the tomato paste, Barilla is my go-to, but any quality brand works. Pro tip: toast the cumin seeds in a dry pan for 30 seconds before grinding—they’ll sing in this chili.
No chili powder? Mix 1 tbsp smoked paprika + 1 tsp cumin + 1 tsp oregano as a quick swap. Fresh tomatoes instead of canned? Roast 4-5 Roma tomatoes with olive oil and salt, then blend until smooth. Short on broth? Water + bouillon cube works in a pinch, but you’ll taste the difference. The brown sugar might seem odd, but it balances the acidity beautifully—muscovado or coconut sugar are great alternatives if you’re avoiding refined sugar. For extra smokiness, throw in a quartered chipotle pepper in adobo sauce (remove before serving if you prefer no chunks).
This chili tastes even better the next day as the flavors meld. Keeps 4-5 days in the fridge, freezes for 3 months. I always make a double batch—one pot for dinner, one for lunches. Store in airtight containers with a splash of broth to keep it moist. The turkey reheats beautifully, but if it gets dry, just add a splash of broth when warming. For serving, I like to toast cornbread crumbles in a dry pan and sprinkle them on top—adds that perfect crunch.
Why You’ll Love This Recipe
- One-Pot Magic: I swear by this recipe because it’s literally one pot—no chopping boards, no extra pans. Brown that turkey right in the same pot where the onions caramelize and the tomatoes simmer down. Honestly, I’ve made it on nights when I just wanted to sit down after work, and it still tasted like I’d slaved over it.
- Garlic-Tomato Bomb: That little hit of tomato paste and fresh garlic cloves? Chef’s kiss. It’s the kind of flavor that lingers—rich, slightly sweet, with just enough acidity to cut through the turkey’s richness. Between us, I’ve had people ask if I used a secret spice blend, but it’s really just these five ingredients doing their thing.
- Lunchbox Hero: Here’s what sold me—this chili begs to be prepped ahead. Cook a double batch, and you’ve got hearty lunches for the week without thinking. I pack it in jars or containers, and it’s still delicious cold or reheated. My daughter even sneaks it into her school lunchbox (yes, even on a Tuesday).
- Budget-Friendly Powerhouse: A pound of turkey stretches far—this recipe feeds four easily, and leftovers taste just as good the next day. I’ll be real: it’s my go-to when I’m pinching pennies, but no one ever guesses it’s not a fancy restaurant dish. The tomato paste and diced tomatoes keep it affordable, and the flavor? Still ridiculous.
Step-by-step instructions for smoky and hearty one-pot chili
Here’s how to craft a rich, smoky chili that simmers perfectly in one pot.
Brown the Ground Turkey Thoroughly
Heat the 1 tablespoon olive oil in a large Dutch oven over medium-high heat. Add the 1 pound ground turkey, breaking it up with a wooden spoon as it cooks. Let it brown undisturbed for 3-4 minutes until the meat loses its raw color and pulls away from the edges.
Here’s the thing—proper browning builds deep flavor. If you stir too soon, you’ll end up with pale turkey and bland chili. Once the turkey is browned, use a spoon to break it into smaller pieces, about ¼-inch in size. This ensures even cooking and better texture throughout your chili.
Sauté Aromatics Until Fragrant
Push the turkey to one side of the pot and add the 1 whole yellow onion and 3 cloves garlic cloves (minced) to the empty space. Cook for 4-5 minutes until the onions soften and turn translucent, and the garlic releases its aromatic oils. You’ll know it’s ready when the kitchen smells like fresh garlic—this is when the flavors truly start to develop.
Stir the onions and garlic into the turkey, scraping up any browned bits from the bottom of the pot. These bits, called fond, are packed with flavor. If the mixture looks dry, add 1-2 tablespoons of the 1.5 cups chicken broth to deglaze the pan and keep everything moist. This step creates the flavor foundation for your entire chili.
Build the Chili Base with Spices
Add the 0.5 cup tomato paste, 1 can diced tomatoes, 1.5 cups chicken broth, 2 tablespoons chili powder, 1 tablespoon ground cumin, 1 tablespoon smoked paprika, 1 teaspoon oregano, 1 teaspoon salt, 0.5 teaspoon black pepper, 1 tablespoon dark brown sugar, and 0.25 teaspoon cayenne pepper to the pot.
Stir everything together until the tomato paste dissolves completely. Taste the mixture—this is your chance to adjust seasoning before it simmers. If you want more heat, add a pinch more cayenne. If it needs more depth, a sprinkle of smoked paprika works wonders. Bring the chili to a gentle boil, then reduce heat to medium-low and let it simmer uncovered.
Simmer Until Rich and Thickened
Let the chili simmer for 30-35 minutes, stirring occasionally. You’re looking for a thick, rich consistency where the flavors meld together. The chili should reduce slightly, and the liquid should coat the back of a spoon. If it gets too thick before the time is up, add 1-2 tablespoons of water or broth to loosen it.
I like to taste the chili about halfway through cooking. If it needs more acidity, a splash of lemon juice or a pinch of salt can balance the flavors. The dark brown sugar and smoked paprika work their magic during this time, adding subtle sweetness and deep smokiness to every bite. The longer it simmers, the more complex the flavors become.
Rest and Serve Warm
Once the chili reaches your desired consistency and flavor profile, remove it from heat. Let it rest for 5-10 minutes before serving. This resting period allows the flavors to fully develop and the chili to thicken slightly as it cools.
Serve the chili warm in bowls, garnished with additional chili powder or smoked paprika if desired. The aroma alone will make your kitchen smell like a cozy autumn evening. Each spoonful should deliver a perfect balance of smoky, spicy, and slightly sweet flavors—this is what makes one-pot chili so comforting and satisfying.
Pro Tips For Making 1 Lb Ground Turkey Chili
- Brown the Turkey Fully: Don’t skimp on the searing—break the turkey into ½-inch pieces first, then cook them in a dry pot over medium-high heat for 8-10 minutes until deeply browned. I used to rush this and ended up with bland chili; the Maillard reaction makes all the difference here.
- Sweat, Don’t Burn, the Onions: Dice the onion into ¼-inch pieces and cook them in the same pot over medium-low heat for 6-7 minutes, stirring often, until soft but not colored. After burning two batches, I learned to keep the heat gentle—this keeps the onions from turning bitter and ensures they melt into the chili instead of sitting as chunks.
- Use Two Types of Tomatoes: Mix canned diced tomatoes with a splash of tomato juice (about ¼ cup) to thin the consistency slightly. The juice prevents the chili from becoming too thick and gluey, especially with ground turkey, which releases a lot of moisture.
- Simmer Low and Slow: Once everything’s combined, reduce the heat to low and let the chili bubble gently for at least 20 minutes. I know, I know—you’re eager to eat it—but rushing this step means the flavors won’t meld properly, and the turkey will stay rubbery. Cover the pot and let it do its thing.
Common mistakes when making perfect results
Skipping the Browning
This is the #1 mistake I see beginners make—skipping the browning step entirely. The Maillard reaction that happens when you brown the turkey creates deep, meaty flavors that can’t be replicated any other way.
If you just crumble the raw turkey into the pot, your chili will taste bland and underseasoned. Take the extra 3-4 minutes to let those browned bits form—they’re flavor gold. 🔥
Underseasoning Spices
Many cooks add spices at the end or use too little. Chili powder, cumin, and smoked paprika need time to bloom in the oil before the liquid is added.
I recommend adding them directly to the hot oil with the aromatics and letting them cook for 30 seconds before adding everything else. This releases their essential oils and creates that authentic chili depth. Taste as you go—don’t be afraid to add more!
Using Low-Quality Broth
Store-bought chicken broth with high sodium content can make your chili taste flat. I always use low-sodium broth and adjust the seasoning with additional salt at the end. For maximum flavor, consider making your own broth by simmering chicken bones with aromatics for 2-3 hours.
The difference is night and day compared to canned broth. Even a 1 teaspoon bouillon powder added to water makes a noticeable improvement.
Stirring Too Frequently
Constant stirring during the simmering phase can break up the turkey pieces and make them mushy. Let the chili develop its own texture naturally. Stir just 2-3 times during the 30-minute simmer—once to combine after adding all ingredients, once halfway through, and once at the end.
This helps maintain those tender, bite-sized turkey pieces we all love. 💫
Ignoring the Resting Time
Serving chili immediately after cooking means missing out on flavor development. The 5-10 minute rest lets the spices meld and the sauce thicken slightly. I’ve seen people skip this and end up with a watery, unevenly seasoned chili.
If you’re short on time, at least let it sit for 5 minutes—you’ll notice the difference in texture and flavor.
Overcrowding the Pot
Using a pot that’s too small forces you to stir constantly and can lead to uneven cooking. I recommend a 5-6 quart Dutch oven for this recipe. If your pot is too small, the chili may steam instead of simmer, resulting in a thinner consistency.
The turkey needs room to brown properly, and the aromatics need space to develop their flavors. Don’t be afraid to use a larger pot—it’s better to have extra space than to crowd the ingredients.
Nutrition facts
Frequently asked questions
Can I substitute ground beef for the turkey in this recipe?
While you can use ground beef, the texture and flavor will differ significantly. Beef chili tends to be richer and fattier, while turkey creates a lighter, leaner version. If substituting, use 80% lean ground beef and reduce the cooking time to 20-25 minutes to prevent drying out. The spices will still work beautifully—just expect a heartier final dish.
How can I make this chili in a slow cooker?
Brown the turkey and sauté the aromatics first, then transfer everything to your slow cooker. Add all remaining ingredients and cook on low for 6-7 hours or high for 3-4 hours. The slow cooker’s gentle heat enhances the smoky flavors while keeping the turkey tender. Stir once halfway through to distribute the spices evenly.
What’s the best way to store and reheat leftovers?
Store chili in airtight containers for up to 5 days in the fridge or 3 months in the freezer. To reheat, warm over medium-low heat on the stove, stirring occasionally, until heated through (10-15 minutes). For microwave reheating, cover and heat in 1-minute intervals until hot, stirring between each interval to prevent drying.
Can I make this chili vegetarian?
Replace the turkey with 1 can of black beans or lentils (15 oz each) and add 1 diced bell pepper for texture. For extra protein, include 1 cup cooked quinoa. Adjust the spices slightly—add 0.5 tsp more cumin and 1 tsp more smoked paprika to compensate for the lack of meaty depth. The chili will still be hearty and flavorful!
Why does my chili taste bland after simmering?
Bland chili usually means underdeveloped flavors from skipping key steps. First, ensure you properly browned the turkey. Second, let the spices bloom in the hot oil for 30 seconds before adding liquids. Finally, taste and adjust seasoning halfway through cooking—add more salt, cayenne, or a splash of lemon juice if needed. The resting time also helps flavors meld!

- 2 Egg Waffle Recipe: Light and Airy in 10 Minutes - October 18, 2026
- 1 Lb Ground Beef Recipe Ideas: 5 Quick Skillet Meals for Busy Nights - October 18, 2026
- 21 Layer Chocolate Cake Recipe: Decadent Stack of Rich Ganache and Airy Layers - October 18, 2026