
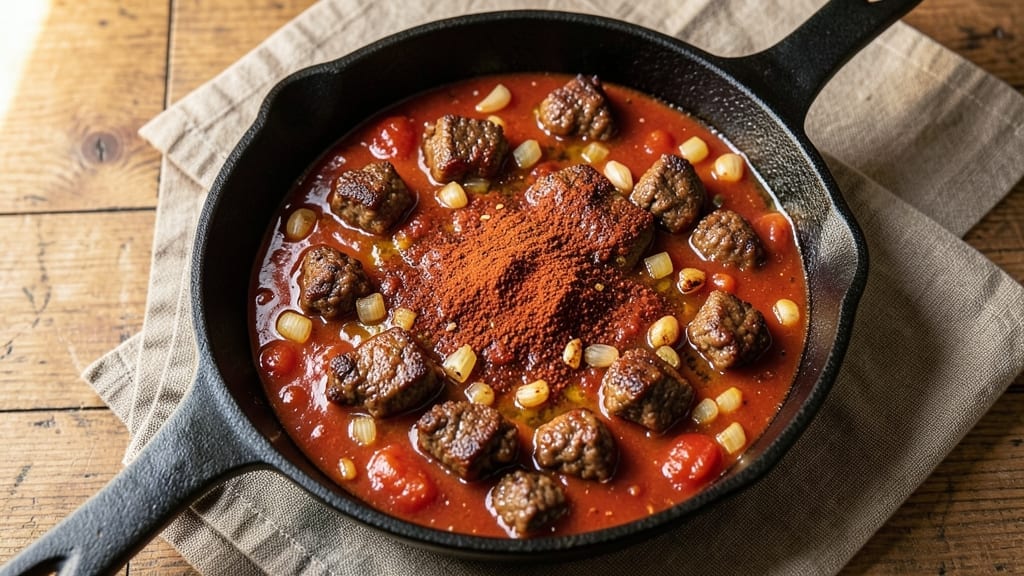
A 1 lb meat chili recipe delivers deep, smoky flavor without overwhelming portions—perfect for cozy weeknights or meal prep. The secret lies in browning the meat first, which builds a rich, caramelized foundation that transforms simple ground beef into layers of complexity.
This method ensures every bite is packed with savory depth, not just spice.
What sets this chili apart is the balance: bold spices like cumin and chili powder meet sweetness from tomatoes and brown sugar, creating harmony in every spoonful. The recipe uses one pot for effortless cleanup, while a 30-minute simmer develops flavors without drying out the meat.
It’s the kind of chili that tastes even better the next day.
The result is a hearty, restaurant-quality bowl with tender meat, thick yet smooth sauce, and just the right kick. Serve it with cornbread or over rice to soak up every last drop of that rich, beefy goodness. This isn’t just chili—it’s a foolproof weeknight staple.
Adjust the heat to taste, or swap beef for turkey or chicken to keep it versatile. The instructions walk you through every step—from browning the meat to blending spices—so you’ll get it right the first time. Let’s make this chili!
Ingredients for 1 lb meat chili
This chili delivers restaurant-quality depth with just fifteen simple yet strategic ingredients.
| Ingredient | Amount | Notes |
|---|---|---|
| Ground Beef (80/20 Lean-to-Fat Ratio) 🥩 | 1 lb | Freshly ground for maximum flavor |
| Yellow Onion 🧅 | 1 whole | Diced into 1/4-inch pieces |
| Garlic Cloves 🧄 | 3 cloves | Minced for aromatic depth |
| Canned Tomato Sauce (San Marzano if available) 🍅 | 1 cup | High-quality, no added salt |
| Tomato Paste 🍅 | 2 tbsp | For concentrated umami |
| Chili Powder 🌶️ | 1 ½ tbsp | Medium heat preferred |
| Ground Cumin 🌿 | 1 tbsp | Toasted for enhanced aroma |
| Smoked Paprika 🌶️ | 1 tbsp | For smoky depth |
| Brown Sugar 🍯 | 1 tbsp | Balances acidity |
| Beef Broth (Low-Sodium) 💧 | 1 cup | Homemade or high-quality store-bought |
| Black Beans (Drained and Rinsed) 🌱 | 1 cup | For added texture and fiber |
| Kosher Salt 🧂 | ¾ tsp | Diamond Crystal preferred |
| Black Pepper 🌶️ | ½ tsp | Freshly cracked for heat |
| Fresh Cilantro (Optional Garnish) 🌿 | ¼ cup | Chopped for freshness |
| Avocado Oil 🫒 | 1 tbsp | High smoke point for browning |
The ground beef is non-negotiable here—80/20 lean-to-fat ratio ensures deep flavor and tenderness. Costco or local butchers often carry freshly ground beef with better marbling than pre-packaged supermarket options. Look for bright red color and avoid anything with grayish hues, which indicate oxidation. The San Marzano tomato sauce is worth the splurge for its natural sweetness and absence of additives, but any high-quality canned sauce works in a pinch. For the spices, Penzeys or bulk bins at Whole Foods offer the freshest options, but the regular grocery store spices are fine if they’re less than six months old.
No chili powder? Substitute with 1 tbsp cayenne plus 1 tsp oregano for a similar kick. The brown sugar balances the acidity of the tomatoes, so don’t skip it—it’s what makes the sauce silky smooth. If you’re watching sugar, reduce to 1 tsp and add a pinch of cinnamon for depth. The black beans can be swapped for kidney beans or pinto beans, but they won’t have the same earthy flavor. For a vegetarian twist, replace the beef with mushrooms and lentils, but the browning step is critical for that meaty depth. The avocado oil has a high smoke point, making it ideal for browning the meat without burning.
This chili tastes even better the next day, so double the batch if you’re feeding a crowd. Store leftovers in an airtight container for up to 5 days in the fridge or freeze for 3 months. To reheat, add a splash of water or broth to prevent drying out. The cilantro garnish is optional but adds a bright finish—just add it right before serving. For meal prep, portion into individual containers with a side of rice or cornbread for easy grab-and-go lunches.
Why You’ll Love This Recipe
- One-Pot Magic: I swear by this recipe because it lives entirely in one pot—no chopping boards, no extra dishes. Just brown the beef with onions and garlic, add the tomato sauce and paste, and let it simmer. The fat from the 80/20 ground beef even helps build depth of flavor while you’re at it.
- Deep, Savory Bite: That San Marzano tomato sauce (or any good canned sauce) gives it a richness you can’t beat, while the paste thickens it just enough to coat every spoonful. The beef stays juicy, and the garlic? Oh, it lingers in the best way—like a warm hug in a bowl.
- Leftovers for Days: This recipe actually begs to be made in bulk. The flavors get better the next day, and it reheats like a dream. Pack it for lunches, freeze portions for lazy nights, or serve it at your next potluck—no one will guess it’s just a pound of meat and a few pantry staples.
- Budget-Friendly Powerhouse: Honestly, what’s not to love about spending less than $10 for a meal that feeds four? The 80/20 ground beef stretches, the canned sauce lasts forever, and you’re not sacrificing taste—just smart shopping. Plus, it’s the kind of dish that makes you feel like you’re feeding a house without breaking the bank.
Step-by-step instructions for 1 pound meat chili
Master this one-pot technique and you’ll achieve restaurant-quality chili with deep, beefy flavor every time.
Brown the Ground Beef for Maximum Flavor
Heat the 1 tablespoon avocado oil in a heavy Dutch oven over medium-high heat until shimmering. Add the 1 pound ground beef (80/20 lean-to-fat ratio), breaking it up with a wooden spoon as it cooks. Let it brown undisturbed for 3-4 minutes until the meat loses its raw color and begins to crisp at the edges.
This crucial first step develops the chili’s rich, meaty foundation. Break the beef into small, even pieces as it cooks to ensure thorough browning. Once the meat is fully browned and any pink remains have disappeared, drain most of the fat from the pot, leaving just about 1 tablespoon to help build the sauce. If you’re concerned about excess fat, you can carefully pour it off using a fat separator or paper towels.
Develop the Aromatic Base
Add the diced yellow onion and minced garlic cloves to the Dutch oven, stirring to combine with the remaining beef fat. Cook over medium heat for 4-5 minutes until the onions soften and become translucent, and the garlic releases its fragrant aroma.
Here’s where the chili’s depth begins to develop. The onions should caramelize slightly at the edges, adding sweetness that balances the heat. If the onions start to brown too quickly, reduce the heat slightly to medium-low and continue cooking. Once the aromatics are properly softened, add the 2 tablespoons tomato paste and stir vigorously to coat the beef and onions completely.
Build the Chili Base with Spices and Liquids
Pour in the 1 cup canned tomato sauce, 1 cup beef broth (low-sodium), and 1 cup black beans (drained and rinsed). Stir well to combine, then add the 1.5 tablespoons chili powder, 1 tablespoon ground cumin, 1 tablespoon smoked paprika, 1 tablespoon brown sugar, 0.75 teaspoon kosher salt, and 0.5 teaspoon black pepper. Bring the mixture to a gentle simmer over medium heat.
This is the moment where all the flavors come together. The spices should be fully incorporated, and you’ll notice the chili begin to thicken as it simmers. The brown sugar helps balance the acidity of the tomato sauce while adding subtle sweetness. Let the chili simmer uncovered for 20-25 minutes, stirring occasionally, until it has thickened to your desired consistency. You’re aiming for a chili that coats the back of a spoon but isn’t gluey.
Simmer to Perfection and Adjust Seasoning
Reduce the heat to low and let the chili simmer gently for another 15-20 minutes. This final simmering time allows all the flavors to meld together and the chili to develop its rich, complex taste. Taste the chili and adjust the seasoning if needed—you may need to add more salt, chili powder, or even a splash of beef broth if it’s too thick.
The chili should have a thick, hearty consistency with visible chunks of beef and beans. If the chili is too thin, simmer uncovered for an additional 5-10 minutes to reduce it. If it’s too thick, stir in 1-2 tablespoons of beef broth to reach the perfect texture. The beans should be heated through but not mushy, and the beef should be tender with no trace of pink.
Finish and Serve with Fresh Garnishes
Once the chili reaches your desired consistency and flavor, remove it from the heat. Let it rest for 5 minutes to allow the flavors to settle. Stir in the 0.25 cup fresh cilantro (optional garnish) just before serving, as this adds a bright, fresh contrast to the rich, spicy chili.
Serve the chili immediately while it’s hot, accompanied by your choice of toppings such as shredded cheese, sour cream, sliced avocados, or chopped green onions. Each bowl should deliver a perfect balance of deep, beefy flavor, smoky spices, and subtle sweetness. The chili will continue to thicken slightly as it cools, so it’s best enjoyed fresh from the pot.
Pro Tips For Making 1 Lb Meat Chili
- CRANK THE HEAT FIRST: Don’t start slow—sear the ground beef on medium-high until it loses its raw color (about 5-6 minutes). I used to cook it gently, and the chili always tasted dull. High heat builds flavor fast, and the fat renders cleanly, so you don’t end up with greasy chili later.
- SWEAT THE ONIONS LOW: Cook the diced yellow onion in the same pan for 8-10 minutes after the beef, stirring often, until it’s soft and golden—not brown. Skipping this step means your chili will taste raw and sharp. The longer you sweat it, the deeper the flavor.
- SALT THE TOMATO PASTE: Mix ½ teaspoon of salt directly into the tomato paste before stirring it into the sauce. The paste is the flavor anchor, and unsalted paste makes the whole chili taste flat. Do this early—you can’t fix it later.
- LET IT REST AFTER SIMMERING: Turn off the heat once the chili reaches a boil, cover it, and let it sit for 15 minutes. I know, you’re hungry, but this lets the flavors meld and the meat reabsorb juices. Skipping it means a watery, uneven texture. (Yes, even if you’re impatient like me.)
Common mistakes when making perfect results
Skipping the Browning Step
Never skip browning the ground beef—this is where the chili gets its deep, meaty flavor. Raw meat added directly to the pot will make your chili taste bland and watery. I’ve seen beginners drain the fat after browning but leave the meat pink—this is a big mistake.
The beef needs to reach 160°F and develop a crust for maximum flavor. Use a meat thermometer to check doneness. 🔥
Overloading the Pot
Crowding the pan with too much meat or onions leads to steaming instead of browning. For 1 lb of beef, use a 5-6 quart Dutch oven**—any smaller, and you’ll end up with a soggy mess.
Cook the meat in batches if needed, letting each batch develop a proper crust before adding more. I’ve ruined chili this way, and trust me, it’s not worth it.
Ignoring the Fat
That rendered fat is flavor gold—don’t pour it all off! Leave 1-2 tablespoons in the pot to help build the sauce. If you’re worried about excess fat, pour it off after browning the meat, but keep enough to sauté the onions.
The fat carries the aromatic compounds that make chili taste rich and complex. Skimping here means sacrificing depth. 💡
Rushing the Simmer
Chili needs time to develop its full flavor—don’t rush it! A 30-45 minute simmer is ideal, not the 15 minutes some recipes suggest. The spices need time to bloom, and the meat needs to tenderize.
If you’re short on time, simmer longer at a lower heat rather than cranking up the burner. Patience here makes all the difference in flavor.
Using Pre-Cooked Beans
Canned beans are convenient, but if you’re using dried beans, they must be fully cooked before adding them to the chili. Undercooked beans turn mushy and water down the chili. If you’re short on time, use canned beans—but drain and rinse them well to remove excess sodium.
I’ve seen chili ruined by beans that weren’t cooked properly, so don’t skip this step. 🌱
Over-Salting Early
Adding all the salt at once can make your chili inedible. Instead, add half the salt during the initial simmer and adjust at the end. The flavors deepen as the chili cooks, so you’ll need to taste and adjust.
I’ve had to fix oversalted chili by adding extra beans or a splash of broth—better to taste as you go and adjust gradually.
Nutrition facts
Frequently asked questions
Can I substitute turkey or chicken for beef in this recipe?
Yes! For turkey, use 1 lb ground turkey (dark meat works best for flavor) and reduce simmering time to 20-25 minutes since it cooks faster. Chicken works too, but it’s leaner—add 1/2 cup chicken broth to keep it moist. The spices and cooking method stay the same, but chicken chili will be slightly lighter in texture.
How do I make this chili spicier without adding cayenne?
Boost the heat by adding 1/2 teaspoon chipotle powder (for smoky heat) or 1/4 teaspoon crushed red pepper flakes during the simmer. For depth without extra spice, swap 1/2 tbsp smoked paprika for regular paprika—it adds warmth. Always taste first, as spices intensify as they cook.
Can I make this chili in a slow cooker?
Brown the meat first in a skillet, then transfer everything to a 3-4 quart slow cooker. Cook on low for 6-7 hours or high for 3-4 hours, stirring once halfway. The slow cooker enhances flavors but may make the chili slightly thinner—reduce by 10-15 minutes on the stove at the end if needed.
Why did my chili turn out too thin?
Thin chili usually means too much liquid or not enough simmering time. Fix it by removing the pot from heat and letting it reduce uncovered for 10-15 minutes, stirring occasionally. For next time, simmer uncovered for 5-10 extra minutes or stir in 1 tbsp cornstarch mixed with 2 tbsp water at the end. The brown sugar in this recipe helps thicken naturally as it cooks.
How should I store and reheat leftovers?
Store chili in an airtight container for up to 5 days in the fridge or 3 months in the freezer. To reheat, warm on the stove over medium-low heat for 5-10 minutes, stirring occasionally. Add 1-2 tbsp broth or water if it thickens too much. Microwaving works too—just stir and cover with a damp paper towel to prevent drying.

- 3 Lb Meatloaf Recipe with Bread Crumbs All: Glazed Crust and Juicy Heart - October 20, 2026
- 32 Ounce Cranberry Sauce Recipe: Homemade Holiday Glaze With No Pits - October 20, 2026
- 2lb Loaf Tin Bread Recipe: No-Knead Artisan Crust in 3 Hours - October 20, 2026