
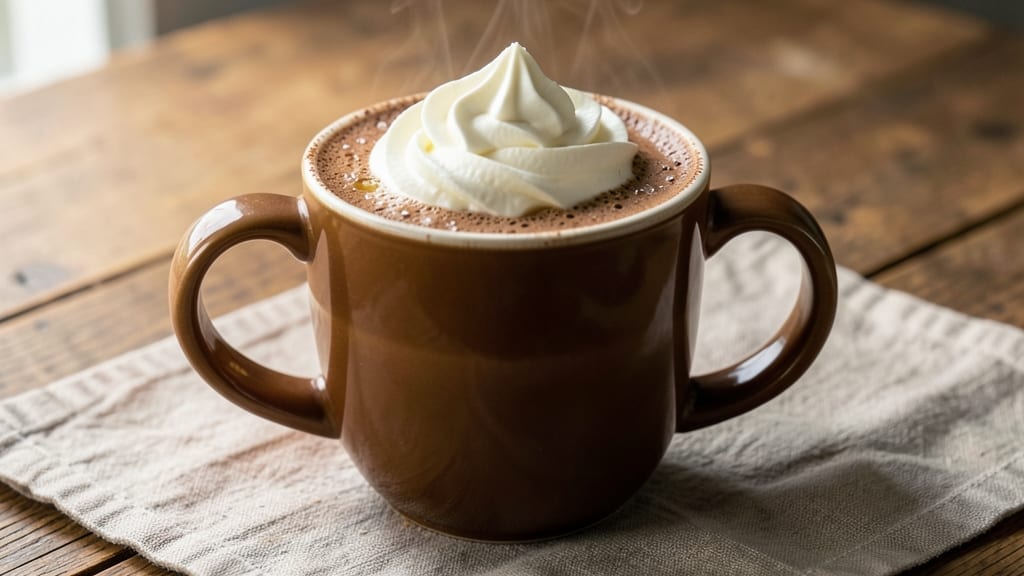
This 1 mug hot chocolate recipe delivers restaurant-quality velvety richness without the fuss—perfect for chilly evenings or quick comfort. The secret lies in combining rich cocoa powder with warm milk and a touch of sweetness, then blending it into a smooth, frothy delight in just 3 minutes.
No measuring cups or complicated steps required, just microwave magic that transforms simple ingredients into a decadent treat.
What makes this recipe stand out is its versatility—customize it with whipped cream, marshmallows, or a sprinkle of cinnamon to suit your taste. The cocoa powder dissolves completely, creating a velvety texture that’s smoother than store-bought versions.
Whether you’re craving a cozy solo indulgence or need a fast dessert for guests, this method delivers restaurant-quality results every time.
By the time you’re done, you’ll have a mug of hot chocolate that’s rich, creamy, and perfectly sweetened—no lumps, no waiting, just pure comfort. The best part?
It’s foolproof, so even beginners can achieve professional-level smoothness. This recipe is designed to be your go-to for quick, satisfying treats without sacrificing flavor or texture.
For added indulgence, top with a dollop of whipped cream or a dusting of cocoa powder. The possibilities are endless, but the base recipe remains simple and reliable. Let’s make this the easiest, most delicious hot chocolate you’ll ever enjoy.
Ingredients for 1 mug hot chocolate
Six core ingredients plus optional toppings—everything you need for velvety hot chocolate in minutes.
| Ingredient | Amount | Notes |
|---|---|---|
| Unsweetened Cocoa Powder 🍫 | ¼ cup | High-quality Dutch-processed preferred |
| Whole Milk 🥛 | ¾ cup | Warmed for best texture |
| Granulated Sugar 🍚 | 2 tbsp | Adjust to taste |
| Heavy Whipping Cream 🥛 | 2 tbsp | Full-fat for frothiness |
| Vanilla Extract 🌿 | ¼ tsp | Pure vanilla preferred |
| Pinch of Salt 🧂 | ⅛ tsp | Enhances cocoa flavor |
| Mini Marshmallows 🍫 | ¼ cup | Optional for topping |
| Chocolate Chips 🍫 | ¼ cup | Optional for topping |
| Whipped Cream 🥛 | 2 tbsp | Store-bought or homemade |
| Cinnamon 🌿 | ⅛ tsp | Optional for garnish |
The cocoa powder is non-negotiable here. Ghirardelli or Hershey’s Special Dark dissolve perfectly, but avoid natural cocoa—it’s bitter and clumps. For the milk, whole milk works best (the fat content prevents curdling), but any milk will do in a pinch. Sugar is your friend—start with 2 tbsp per mug, then adjust. The vanilla extract should be pure, nothing artificial. If you’re using store-bought, Nestlé or McCormick are reliable. For the whipped cream, full-fat is essential—it froths better and adds richness. If you’re making this for a crowd, grab a quart of heavy cream and whip it yourself—it’s cheaper than pre-made.
No cocoa powder? Melted dark chocolate (70% or higher) works in a pinch—use 1 oz per mug. Out of milk? Almond milk or oat milk add creaminess, but they won’t be as rich. Skip the sugar? Maple syrup or honey (if not vegan) add depth. The vanilla can be swapped for vanilla bean paste or a splash of bourbon for adults. For the toppings, mini marshmallows melt beautifully, while chocolate chips add crunch. No whipped cream? Dollop of Greek yogurt works in a bind. Pro tip: if your cocoa clumps, sift it first—this recipe is all about that silky texture.
This reheats beautifully—just microwave for 20 seconds and stir. The cocoa powder stays fresh for 6 months in a cool, dark place, but once opened, use it within 3 months for peak flavor. The whipped cream? Use it within 2 days of opening. For meal prep, store the dry ingredients (cocoa, sugar, salt) separately and mix with milk when ready. The toppings keep indefinitely, so stock up. Leftovers? Freeze in ice cube trays for 1 month—perfect for quick reheats.
Why You’ll Love This Recipe
- Here’s what sold me: that balance of deep cocoa and creamy vanilla. The sugar dissolves just enough to keep it smooth, not cloying, and the whipped cream adds a luxurious finish. It’s indulgent but doesn’t leave me regretting every sip—honestly, my morning coffee gets skipped for this.
- I’ll be real: good cocoa and heavy cream aren’t cheap, but this recipe stretches them far. A single mug costs me pennies compared to store-bought drinks, and leftovers? Just reheat with a splash of milk. It’s my secret weapon for feeling spoiled without breaking the bank—or my willpower.
Step-by-step instructions for velvety microwave hot chocolate
Here’s how to create restaurant-quality hot chocolate in minutes—no stove required.
Combine Dry Ingredients in Your Mug
Place the 0.25 cup unsweetened cocoa powder into your mug. Add the 2 tablespoons granulated sugar and the 0.125 teaspoon pinch of salt, then sprinkle in the 0.25 teaspoon vanilla extract. Use a small whisk or fork to break up any clumps in the cocoa powder—this ensures your hot chocolate will be completely smooth, not gritty.
I like to give everything a quick stir at this stage so the vanilla and salt distribute evenly. The salt might seem like an odd addition, but it actually enhances the chocolate flavor by balancing its natural bitterness. Don’t skip this step—uneven mixing can lead to pockets of undissolved cocoa powder that ruin the texture.
Add Wet Ingredients and Microwave
Pour in the 0.75 cup whole milk and the 2 tablespoons heavy whipping cream into the mug. Stir vigorously with your whisk or fork until the mixture is completely smooth. The heavy cream adds luxurious richness that separates this from basic hot chocolate.
Place the mug in the microwave and cook on high power for 1 minute and 15 seconds. You’ll see the mixture bubble and froth as it heats—this is normal and actually creates a lighter, more velvety texture. If your microwave varies in power, start with 1 minute and check the temperature before adding toppings.
Stir and Prepare Toppings
Remove the mug from the microwave and stir vigorously for 10-15 seconds to break up any bubbles and ensure even heating. The hot chocolate should now be completely smooth with no visible lumps. Taste a small spoonful—you might want to add a bit more sugar if you prefer it sweeter, or a pinch more salt if you like pronounced chocolate flavor.
While your hot chocolate steams, prepare your toppings. Sprinkle 0.25 cup mini marshmallows and 0.25 cup chocolate chips onto a small plate. Lightly dust with the 0.125 teaspoon cinnamon if you’re using it. The marshmallows should puff slightly when they hit the hot chocolate, creating those perfect little bubbles on top.
Top and Serve Immediately
Quickly spoon the 2 tablespoons whipped cream onto the surface of your hot chocolate. Then, using a small ice cream scoop or spoon, carefully place the marshmallows and chocolate chips on top. The contrast between the warm chocolate and cool toppings makes this even more delicious.
Let it sit for 30 seconds so the marshmallows begin to melt slightly, then stir gently to distribute the melted chocolate and marshmallow bits throughout. Serve immediately while the whipped cream is still fluffy and the marshmallows are just beginning to soften. Each sip should be rich, creamy, and perfectly balanced between sweet and chocolatey.
Pro Tips For Making 1 Mug Hot Chocolate
- STIR CONSTANTLY AT FIRST: DESCRIPTION: The second you add cocoa powder to hot milk, stop stirring and you’ll end up with clumpy grit—no matter how much you whisk later. I used to think “a quick mix” would do, but after three failed batches, I learned: keep that spoon moving for at least 20 seconds after the powder dissolves, even if it feels like overkill. The heat grabs the cocoa fast, and once it sits, it’s game over.
- USE COLD CREAM: DESCRIPTION: Dump chilled heavy cream straight into your mug after the cocoa-milk base is ready—this keeps the foam from breaking immediately. I was skeptical (yes, even if you’re impatient like me), but the contrast in temps makes the cream hold its volume longer. Skip the pre-heating step, and your top layer stays silky for actual sipping, not just admiring.
- WEIGH YOUR COCOA: DESCRIPTION: Scooping cocoa powder from a jar packs it down, so you’re really getting 1.5x the volume you think. Use a kitchen scale for 15g (about 2 tablespoons) instead of eyeballing it—this ensures rich flavor without bitterness. My grandmother swore by this, and she was right: the difference between “good” and “restaurant-quality” hot chocolate is often just accurate measurements.
- WHISK THE CREAM SEPARATELY: DESCRIPTION: Whip the heavy cream with a fork in your mug before adding it to the hot liquid—this creates a lighter, more stable foam. I skip this when I’m lazy, but the dish is noticeably better when I don’t: the bubbles stay intact longer, and you get that velvety texture instead of a greasy sheen. Takes 10 seconds, saves you from scraping the bottom later.
Pro cooking tips for perfect results
Microwave Power Mastery
Your microwave’s power level can make or break this recipe. Most modern microwaves run at 1,000-1,200 watts, but if yours is older or less powerful, start with 1 minute instead of 1:15. The key is to heat until the milk just begins to bubble vigorously—this creates that velvety texture.
I always test with a thermometer (aim for 160°F) to ensure safety and perfect temperature. Overheating can cause the cocoa to separate, so watch closely during those final seconds. 🌡️
Cocoa Clump Prevention
No one likes gritty hot chocolate! To prevent clumps, always sift your cocoa powder before adding it to the mug. I use a fine-mesh sieve or even a fork to break up any lumps in the container first.
For extra smoothness, mix the cocoa with the sugar and salt before adding milk—this creates a homogenous base. If you’re using natural cocoa powder (not Dutch-processed), you’ll need to add ½ teaspoon baking soda to neutralize the acidity and prevent curdling. 🍫
Temperature Control Tips
If your hot chocolate comes out too thin, it’s likely underheated. For a thicker, more luxurious texture, microwave for an extra 10-15 seconds and stir vigorously. The heavy cream will help stabilize the mixture.
For a smoother finish, blend the hot chocolate with an immersion blender for 5 seconds after microwaving—this eliminates any remaining bubbles and creates a silky consistency. Just be careful not to over-blend or it’ll turn into a thin sauce. ⚡
Topping Timing Tricks
Marshmallows are the star of this show, but timing is everything. Add them when the hot chocolate is piping hot (160°F) so they puff dramatically. For extra fluffiness, chill your marshmallows in the freezer for 10 minutes before topping.
Chocolate chips should be added last—they’ll melt slightly but maintain some crunch. Pro tip: Use a small ice cream scoop to place toppings neatly on top without sinking them into the drink. 🍫
Flavor Boost Hacks
Want to take your hot chocolate to the next level? Add ½ teaspoon instant espresso powder to deepen the chocolate flavor. For a boozy twist, stir in 1 teaspoon dark rum or Irish cream after microwaving.
If you love spice, a pinch of cayenne pepper adds warmth without heat. Always taste as you go—this recipe is designed to be customized to your exact preferences. 💫
Reheating Secrets
Leftovers? No problem! Reheat in the microwave for 20-30 seconds on high, then stir vigorously. If it looks too thick, add 1 teaspoon milk at a time until smooth. For a restaurant-style reheat, pour into a small saucepan and warm over low heat while whisking constantly.
Never boil—this will scorch the cocoa and make it bitter. Store leftovers in an airtight container for up to 3 days in the fridge. ❄️
Nutrition facts
Frequently asked questions
Can I make this recipe without a microwave?
Heat the milk and cream in a small saucepan over medium-low heat until it just begins to simmer (160°F). Whisk in the cocoa powder, sugar, and salt until completely dissolved, then remove from heat and stir in vanilla. This stovetop method gives you more control over the temperature and texture.
What if I don’t have heavy whipping cream?
Use ½ cup whole milk + 1 tablespoon cornstarch as a substitute. Mix the cornstarch with a little cold milk first, then add to the hot mixture and stir until thickened. This won’t be as creamy, but it’ll still taste delicious. For a dairy-free option, coconut cream works beautifully—just reduce the milk to ½ cup and add ¼ cup coconut cream.
Why did my hot chocolate turn grainy?
Graininess usually means your cocoa powder didn’t dissolve properly. Always sift the cocoa before mixing and whisk vigorously after adding milk. For natural cocoa powder (not Dutch-processed), add ½ teaspoon baking soda to neutralize acidity. If it’s still grainy, strain through a fine-mesh sieve before serving. Overheating can also cause separation—microwave in 10-second bursts if needed.
Can I make this recipe ahead of time?
Store the dry ingredients (cocoa, sugar, salt) in an airtight container separately. When ready to serve, mix with warm milk and microwave as directed. For a quick reheat, microwave for 20-30 seconds and stir well. The texture won’t be as velvety as fresh, but it’s still delicious. For best results, prepare and serve immediately for that restaurant-quality finish.
How can I make this recipe vegan?
Swap the milk for unsweetened almond or oat milk, use vegan cocoa powder, and replace the heavy cream with coconut cream. For whipped cream, blend chilled coconut cream with a pinch of sugar until fluffy. The marshmallows should be vegan (check labels), or use dairy-free chocolate chips and a sprinkle of cinnamon for topping. The result will be rich, creamy, and perfectly satisfying!

- 3 Cheese Pimento Cheese Recipe: Sharp Cheddar, Peppery Heat, and Creamy Spread Magic - October 10, 2026
- 7 Egg Cake Recipe: Fluffy Layers With Vanilla Bean Infusion - October 10, 2026
- 3 Musketeers Cookie Recipe: Crunchy Chocolate Shells With Gooey Caramel Centers - October 10, 2026