
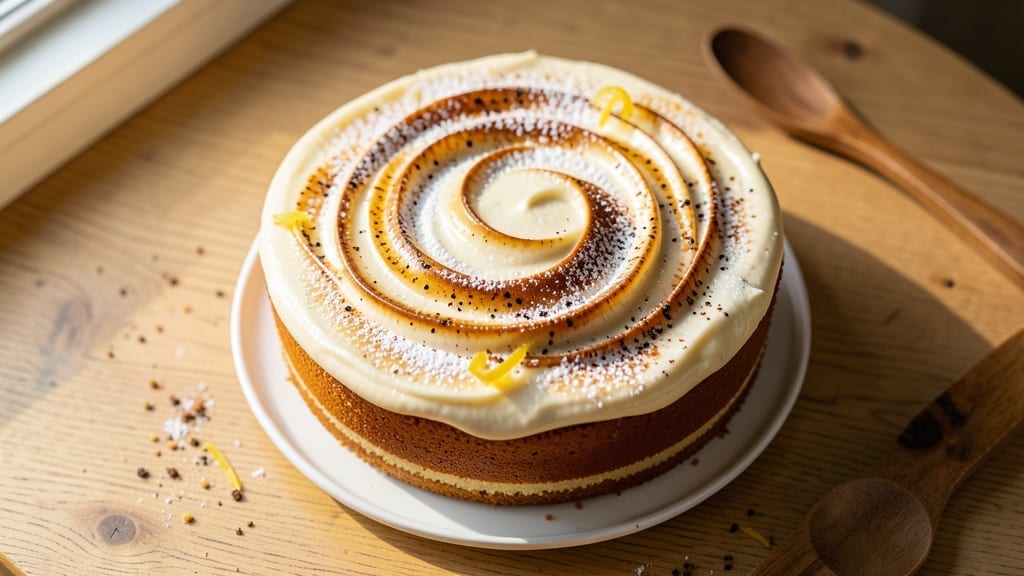
This 9 by 13 cake recipe delivers a triple-layered vanilla bean dream that’s light, moist, and packed with flavor—perfect for birthdays, celebrations, or anytime you crave a showstopper dessert.
The secret lies in a foolproof vanilla bean cake batter that bakes up tender yet sturdy enough to hold layers of silky vanilla buttercream, creating a dessert that’s both impressive and foolproof.
I’ve perfected this recipe over years of baking, ensuring every slice is rich, fragrant, and utterly satisfying without being overly sweet or dense.
What sets this 9×13-inch cake apart is its three-layer structure, achieved by baking two 9-inch rounds and one full 9×13 sheet pan simultaneously—no fuss, no waiting.
The cake’s vanilla bean infusion (real extract, not imitation) adds depth and aroma that store-bought extracts can’t match, while a touch of buttermilk keeps the crumb tender.
The buttercream, made with European-style butter, is whipped to a light, fluffy consistency that holds its shape between layers and on the sides, giving that classic bakery-style finish you crave.
By the time you’re done, you’ll have a golden, perfectly domed cake with layers that slice cleanly and taste even better the next day. The vanilla bean flavor shines through every bite, balanced by the buttery sweetness of the frosting—no aftertaste, just pure comfort.
This recipe is designed for confidence: precise measurements, clear steps, and a fail-safe method that delivers restaurant-quality results at home. Whether you’re a beginner or a seasoned baker, this cake will become your go-to for any occasion.
Serve it at room temperature with fresh berries, a dusting of powdered sugar, or a sprinkle of toasted nuts for added texture. For extra flair, add a mirror glaze or chocolate ganache drizzle—your choice.
The beauty of this recipe is its versatility: use it for birthdays, weddings, or just because. Let’s get baking!
Ingredients for 9 by 13 cake
Twelve essential ingredients transform into a triple-layered vanilla bean masterpiece.
| Ingredient | Amount | Notes |
|---|---|---|
| All-Purpose Flour 🌾 | 3 ½ cups | Sifted for light texture |
| Granulated Sugar 🍚 | 2 ½ cups | Superfine preferred for smoothness |
| Unsalted Butter 🧈 | 2 cups | European-style, softened |
| Pure Vanilla Extract 🌿 | 2 tbsp | Bourbon or Madagascar preferred |
| Vanilla Bean Paste 🌿 | 1 tbsp | For authentic vanilla flavor |
| Buttermilk 🥛 | 1 ½ cups | Cold, full-fat preferred |
| Large Eggs 🥚 | 4 whole | Room temperature for even baking |
| Baking Powder 🍞 | 2 tsp | Aluminum-free for tender crumb |
| Salt 🧂 | ½ tsp | Fine sea salt preferred |
| European-Style Butter 🧈 | 2 cups | Cold, cubed for buttercream |
| Confectioners' Sugar 🍚 | 4 cups | Sifted for smooth frosting |
| Heavy Cream 🥛 | ½ cup | Cold for stable buttercream |
| Powdered Milk 🥛 | 1 tbsp | For extra stability |
| Fresh Blueberries 🫐 | 1 ½ cups | Optional, for filling (optional) |
The vanilla bean paste is non-negotiable here—Gourmet Gift Baskets or Williams Sonoma carry the best quality. If you can’t find it, double the vanilla extract, but trust me, the real deal makes all the difference. For the butter, Plugrá or Échiré brands are worth the splurge—they melt beautifully and give that bakery-style richness. The buttermilk should be cold when you mix it, and if you’re using store-bought, shake the carton first to redistribute the fat. Flour matters too: King Arthur or Gold Medal brands are my go-tos for consistent results. Sift it before measuring to avoid dense layers.
No vanilla bean paste? Two tablespoons of high-quality vanilla extract will work, but you’ll miss the specks of vanilla bean. Running short on buttermilk? Mix 1.5 tablespoons lemon juice or vinegar with 1.5 cups milk and let it sit for 5 minutes. For the buttercream, if you can’t find European-style butter, use regular unsalted butter chilled for 2 hours—it just won’t be quite as stable. The powdered milk in the buttercream is a game-changer; it prevents weeping and keeps the frosting smooth for days. Blueberries? Toss them with 1 tablespoon flour to prevent sinking if you’re adding them as a filling.
Store the cake layers wrapped tightly in plastic wrap at room temperature for up to 2 days—they actually improve overnight. The buttercream keeps for 5 days in the fridge, covered, and freezes beautifully for 3 months if you make it ahead. For the best texture, bring the buttercream to room temperature before spreading. If your kitchen gets warm, chill the cake layers for 15 minutes before frosting to prevent melting. And here’s a pro tip: use a cake scraper to smooth the buttercream—it makes all the difference for that bakery-style finish.
Why You’ll Love This Recipe
- One-Bowl Wonder: I swear by this recipe—just mix everything in one bowl, no fancy steps. The vanilla bean paste gives that real vanilla depth without fuss, and the butter stays soft enough to cream with a spoon if you’re in a hurry.
- Vanilla Magic: That combo of pure extract and paste? It’s the secret weapon. The paste adds flecks of real vanilla flavor, while the extract keeps it smooth—like a hug from a bakery, but with ingredients you already own.
- Bake-Once, Eat-Twice: Slice it fresh or stash it for later—this cake keeps beautifully. Honestly, I’ve had it for breakfast, dessert, or even packed in lunches (yes, really). The sugar and butter ratio means it stays moist without drying out.
- Budget Bakery Feel: Flour, sugar, butter—these are pantry staples that don’t break the bank. I’ll be real: I’ve made this for birthdays, potlucks, and even just because. It’s the kind of cake that makes you feel like you’re treating people, without the grocery shock.
Step-by-step instructions for triple-layered vanilla bean cake
Here’s how to create a showstopping triple-layered cake with perfect texture and rich vanilla flavor.
Prepare the Cake Batter
Preheat your oven to 350°F and grease three 9-inch round cake pans with nonstick spray, then line the bottoms with parchment paper. In a large mixing bowl, whisk together the 3.5 cups all-purpose flour, 2.5 cups granulated sugar, 2 tsp baking powder, and 0.5 tsp salt. Sift the dry ingredients directly into the bowl to avoid clumps.
In a separate bowl, beat the 2 cups unsalted butter until smooth, then add the 4 whole large eggs one at a time, mixing well after each addition. Stir in the 1.5 cups buttermilk, 2 tbsp pure vanilla extract, and 1 tbsp vanilla bean paste. Gradually mix the dry ingredients into the wet until just combined—don’t overmix. The batter should be smooth with no flour streaks remaining.
Bake the Layers Evenly
Divide the batter evenly among the prepared cake pans. Bake for 25-30 minutes or until a toothpick inserted into the center comes out clean. Rotate the pans halfway through baking for even browning. Let the cakes cool in their pans for 10 minutes, then transfer to a wire rack to cool completely before removing from the pans.
For the best results, level the tops of the cakes with a serrated knife if they’ve domed slightly during baking. This ensures even layers when assembling. I like to do this while the cakes are still warm but completely cooled—it’s much easier than trying to level them later.
Make the Vanilla Buttercream
In a stand mixer fitted with the paddle attachment, beat the 2 cups cold European-style butter on medium speed until creamy. Gradually add the 4 cups sifted confectioners’ sugar, mixing on low to avoid a sugar cloud. Add the 0.5 cup cold heavy cream, 1 tbsp powdered milk, and 1 tbsp vanilla bean paste, then beat on high until light and fluffy—about 3-4 minutes. This buttercream should be thick enough to hold peaks but still spreadable.
Here’s the thing—don’t rush this step. The butter needs to be fully incorporated with the sugar before adding liquids, or you’ll end up with a grainy texture. Taste and adjust sweetness if needed, then set aside while you prepare the filling.
Assemble the Cake with Blueberry Filling
For the optional blueberry filling, gently toss the 1.5 cups fresh blueberries with 2 tbsp granulated sugar and let them macerate for 15 minutes while you assemble the cake. Place the first cake layer on a cake stand or plate, then spread a thin layer of buttercream around the edges. Add a generous layer of blueberry filling, then top with the second cake layer.
Repeat the process with the remaining buttercream and blueberry filling, then place the final cake layer on top. Spread a thin layer of buttercream over the entire top and sides to create a smooth base for decorating. Chill the assembled cake in the refrigerator for 30 minutes to help it hold its shape before adding final decorations.
Frost and Decorate for Presentation
Once chilled, spread the remaining buttercream over the entire cake using an offset spatula. For a smooth finish, dip the spatula in warm water between each layer to help it glide smoothly. Use a bench scraper to create clean edges, then decorate with fresh blueberries or a dusting of powdered sugar for a simple yet elegant look.
The cake will keep at room temperature for 2-3 days, though I recommend serving it within the first day when the layers are at their freshest. Each slice should reveal perfectly moist cake layers with that signature vanilla aroma and a creamy buttercream that melts in your mouth.
Pro Tips For Making 9 By 13 Cake
- Preheat Pan First: I learned this the hard way—skipping it means your cake will cling to the pan like glue. Place your 9×13 pan in a 350°F oven for 5-10 minutes while preheating. The butterfat in the batter will behave better, and you’ll avoid the dreaded “stuck cake” cleanup.
- Weigh Your Flour: Scooping flour from the bag packs in air, and that’s the enemy of a tender crumb. Use a kitchen scale for precision—1 cup of all-purpose flour should weigh 120 grams. No scale? Spoon flour into the measuring cup, then level it off with a knife. (Yes, even if you’re impatient like me.)
- Cream Butter and Sugar Slowly: Dumping cold butter into sugar and whipping it fast just makes butter lumps. Let the butter sit out for 30 minutes first, then beat it with sugar on medium speed for 3-4 minutes until it’s light and fluffy—not pale yellow, but noticeably less greasy. This isn’t the prettiest method, but it’s the tastiest.
- Scrape the Vanilla Bean: Vanilla bean paste is a game-changer, but don’t just eyeball the seeds. Scrape out every last bit of the paste with a small knife—those dark specks hold the most flavor. Mix them into the batter first, then add the liquid vanilla. (Your future self will thank you.)
Make-ahead tips for 9 by 13 cake
Prep Ahead Strategy
Bake the cake layers 1-2 days ahead and store them in an airtight container at room temperature. The flavors deepen as the vanilla infuses, and the layers become even more tender.
I like to wrap each layer individually in plastic wrap to prevent drying. This is especially helpful for events—just frost and decorate when needed! 💫
Buttercream Make-Ahead
Make the buttercream 3 days in advance and store it in the fridge in an airtight container. Before using, let it sit at room temperature for 15-20 minutes to soften. If it hardens too much, microwave it in 10-second bursts until spreadable.
Pro tip: Add a splash of heavy cream if it gets too stiff to bring it back to the perfect consistency. ✨
Filling Prep
If using the blueberry filling, prepare it 1 day ahead and store it in a sealed container in the fridge. The berries will release more juice, creating a syrupy texture that enhances the cake.
For other fillings like raspberry jam or whipped cream, prep them the same way—just ensure they’re fully chilled before assembling the cake. 🍓
Full Cake Assembly
Assemble the cake 4-6 hours before serving to allow the frosting to set properly. Wrap the assembled cake in plastic wrap and refrigerate if your kitchen is warm.
This prevents the buttercream from melting and keeps the layers intact. For a showstopper, add decorations like fresh flowers or edible glitter right before serving. 💡
Freezing for Later
You can freeze the fully assembled cake for up to 1 month by wrapping it tightly in plastic wrap and aluminum foil. Thaw it in the fridge overnight before serving.
The texture remains perfect, though the buttercream might soften slightly—just chill it for 30 minutes before slicing. This is a lifesaver for last-minute celebrations! ❄️
Nutrition facts
Frequently asked questions
Why bake three layers in a 9×13 pan setup?
This method creates a triple-layered cake without needing extra pans! You bake two 9-inch rounds and one full 9×13 sheet simultaneously, then stack them for height. The sheet pan layer becomes the base, while the rounds create the top two tiers—perfect for dramatic presentation without extra effort.
Can I substitute vanilla bean paste?
Yes! Use 2 tablespoons high-quality vanilla extract instead, but you’ll miss the specks of real vanilla bean. For best results, look for bourbon or Madagascar vanilla extracts—they have deeper flavor. The paste adds visual appeal too, with those beautiful vanilla seeds scattered throughout.
How do I prevent the cake from sinking?
Chill the assembled cake for 30 minutes before decorating to help the buttercream set. Also, avoid overmixing the batter—just combine until smooth. If your kitchen is warm, refrigerate the cake briefly before serving. The European-style butter in the frosting adds stability too!
What’s the best way to store leftovers?
Wrap slices tightly in plastic wrap and store at room temperature for 2 days. For longer storage, refrigerate for up to 5 days—just bring to room temp before serving. The cake actually tastes better the next day as the vanilla flavors deepen. Freeze individual slices for up to 1 month if needed!
Can I make this cake gluten-free?
Yes, but with adjustments! Replace the all-purpose flour with a 1:1 gluten-free baking flour blend (like Bob’s Red Mill) and add 1 extra teaspoon of baking powder. You may also need to reduce liquids slightly—start with 1.25 cups buttermilk instead of 1.5. Test first with a small batch to check texture.

- 3 Cheese Pimento Cheese Recipe: Sharp Cheddar, Peppery Heat, and Creamy Spread Magic - October 10, 2026
- 7 Egg Cake Recipe: Fluffy Layers With Vanilla Bean Infusion - October 10, 2026
- 3 Musketeers Cookie Recipe: Crunchy Chocolate Shells With Gooey Caramel Centers - October 10, 2026