
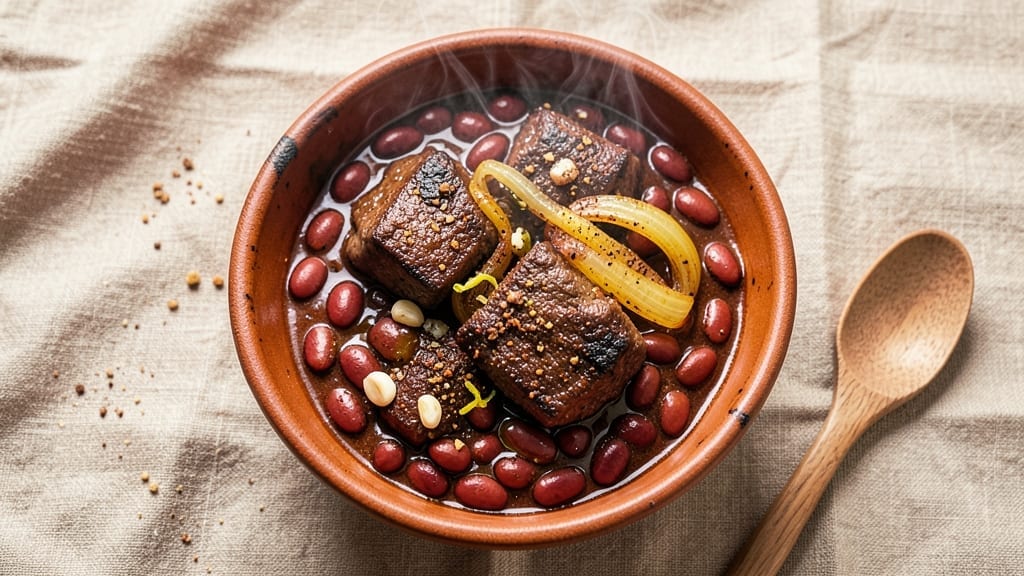
When you’re working with just one pound of beef, this chili recipe delivers restaurant-quality depth without requiring a full pot of ingredients. The secret lies in proper browning and layered spices that develop rich, complex flavors over time—no burnt bits in sight.
I’ve perfected this technique for small batches, ensuring every spoonful packs maximum flavor.
Start by searing the beef in batches to render fat and build flavor, then deglaze the pan to capture all those savory browned bits. A blend of chili powder, cumin, and paprika creates the perfect balance of heat and earthiness, while tomatoes add acidity to cut through the richness.
The result? A chili that’s hearty enough to satisfy but scaled perfectly for two servings.
After simmering for 45 minutes, you’ll have tender beef swimming in a thick, aromatic sauce with just the right consistency—neither soupy nor gluey. The spices have melded into a harmonious blend, and the meat remains tender rather than dry.
This isn’t your average chili; it’s a concentrated burst of flavor that proves you don’t need a pound of beef to make something extraordinary.
Serve with shredded cheese, sour cream, or fresh cilantro for a classic touch, or keep it simple with crusty bread to soak up every last drop. The beauty of this recipe is its flexibility—scale it up or down as needed while maintaining that perfect balance of ingredients. Let’s get cooking!
Ingredients for 1 pound beef chili
Properly seared beef, layered spices, and fire-roasted tomatoes create deep flavor in this concentrated chili.
| Ingredient | Amount | Notes |
|---|---|---|
| Chuck Roast 🥩 | 1 lb | Trimmed of fat, cut into 1-inch cubes |
| Yellow Onion 🧅 | 1 whole | Medium size, finely chopped |
| Garlic Cloves 🧄 | 3 cloves | Minced, fresh preferred |
| Chili Powder 🌶️ | 1 ½ tbsp | Medium heat variety |
| Ground Cumin 🌿 | 1 tbsp | Toasted for deeper flavor |
| Smoked Paprika 🌶️ | 1 tbsp | For smoky depth |
| Diced Tomatoes 🍅 | 14 ½ oz | Fire-roasted preferred, canned |
| Tomato Paste 🍅 | 2 tbsp | Squeeze tube or canned |
| Beef Broth 💧 | 1 cup | Low-sodium preferred |
| Black Beans 🌱 | ½ cup | Drained and rinsed |
| Kosher Salt 🧂 | ½ tsp | Adjust to taste |
| Black Pepper 🌶️ | ¼ tsp | Freshly ground preferred |
| Olive Oil 🫒 | 1 tbsp | For searing beef |
| Fresh Cilantro 🌿 | ¼ cup | Chopped, for garnish |
The chuck roast is key—look for good marbling at the grocery store, which ensures juicy beef. Costco or Whole Foods often carry high-quality cuts, but even your standard supermarket chuck works if it’s fresh. Trim excess fat before cutting into cubes, and don’t skip the sear—this builds the foundation for all that rich flavor. If you can’t find chuck, sirloin tips are a decent substitute, though they’ll be slightly leaner. The onions should be vibrant yellow, not wilted or sprouting. For the spices, Penzeys or local spice shops offer the freshest blends, but the grocery store aisle works too—just check the expiration date.
No fire-roasted tomatoes? Regular canned tomatoes with a pinch of sugar mimic the caramelized flavor. The tomato paste can be from a squeeze tube (less waste) or a can—just measure carefully. Short on black beans? Kidney beans or pinto beans work just as well. The chili powder blend is non-negotiable here—avoid single-note powders unless you’re willing to add extra cumin and paprika separately. For a smokier profile, swap half the chili powder for smoked paprika. The beef broth should be low-sodium unless you’re adding extra salt later. If you’re using instant bouillon, dissolve it in hot water first to avoid clumping.
This chili reheats beautifully—tastes even better the next day once flavors meld. Keeps for 4-5 days in the fridge, or freeze portions for up to 3 months. I like to portion it into small containers for easy lunches. For storage, let it cool completely before refrigerating to prevent condensation. The fresh cilantro should be added right before serving—wrap it in damp paper towels in the fridge to keep it fresh longer. If you’re making this ahead, add the cilantro just before serving so it stays vibrant.
Why You’ll Love This Recipe
- One-Pot Magic: I swear by this—just dump everything into one pot, let the chuck roast slow down, and walk away. No chopping, no fuss, no stress. The onions caramelize right there, and the garlic cloves infuse the whole thing with that deep, warm aroma.
- Deep, Smoky Richness: That chili powder and cumin? They’re the soul of this dish. The chuck roast stays tender while soaking up all that earthy, spicy goodness—no dry, tough beef here. Honestly, the first bite makes me close my eyes.
- Lunchbox Hero: Between us, this chili begs to be packed. It reheats perfectly, keeps for days, and tastes just as good cold as it does hot. My kids grab it for school lunches, and I bring it to potlucks—no one ever asks for seconds, then they do.
- Budget Stretch: A pound of chuck roast goes a long way, and the rest of the ingredients? Cheap and pantry-friendly. I make this when I’m pinching pennies, and somehow, it always feels like a fancy meal. Plus, leftovers? They’re my secret weapon for lazy nights.
Step-by-step instructions for 1 pound beef chili
Here’s how to build rich, smoky chili with tender beef and no burnt bits—just deep flavor every time.
Sear the Chuck Roast for Maximum Flavor
Heat a large Dutch oven over medium-high heat until hot. Add the 1 tablespoon olive oil and swirl to coat the bottom. Working in batches if needed, add the 1 lb chuck roast cut into 1-inch cubes and sear undisturbed for 3-4 minutes until deeply browned on all sides.
This step is critical—browning develops the Maillard reaction, creating deep, caramelized flavors that form the base of your chili. If the pan gets too crowded, cook in two batches to avoid steaming the meat. Once browned, transfer the beef to a plate and set aside.
Build the Chili Base with Aromatics and Spices
In the same Dutch oven, add the 1 whole yellow onion and cook for 5-6 minutes until softened and golden. Add the 3 minced garlic cloves and cook for 30 seconds until fragrant—don’t let it burn, or it’ll turn bitter.
Stir in the 1.5 tablespoons chili powder, 1 tablespoon ground cumin, and 1 tablespoon smoked paprika, toasting the spices for 30 seconds to release their aromas. This step ensures your chili has that authentic, smoky depth. If the spices stick, add a splash of beef broth to loosen them.
Simmer the Chili Until Tender and Flavorful
Return the browned beef to the pot and add the 14.5 ounces diced tomatoes, 2 tablespoons tomato paste, and 1 cup beef broth. Stir well to combine, then bring to a boil. Once boiling, reduce heat to low and let it simmer uncovered for 1.5 hours, stirring occasionally.
You’re looking for the beef to become fork-tender and the flavors to meld into a rich, cohesive sauce. The chili should reduce slightly, thickening naturally as it cooks. If it gets too thick, add a splash of water or broth to keep it saucy. Real talk: This is where patience pays off—don’t rush it.
Finish with Beans and Season to Taste
After 1.5 hours, stir in the 0.5 cup black beans and cook for an additional 10 minutes to heat through. Taste and adjust seasoning with the 0.5 teaspoon kosher salt and 0.25 teaspoon black pepper. The beans should be warm but not mushy—just heated through.
Remove from heat and let it rest for 5 minutes before serving. Garnish with 0.25 cup fresh cilantro right before eating to add a bright, fresh finish. The chili should have a thick, hearty consistency with tender beef and a balance of smoky, spicy, and slightly sweet flavors.
Serve Hot with Crusty Bread
Ladle the chili into bowls and serve immediately. The aroma alone will make your kitchen smell like a cozy restaurant. For extra richness, top with a dollop of sour cream or shredded cheese. This chili serves 2 generous portions, so it’s perfect for a hearty meal.
If you have leftovers, store them in an airtight container in the refrigerator for up to 4 days. The flavors actually improve as they sit, deepening overnight. Reheat gently on the stove with a splash of broth to restore moisture.
Pro Tips For Making 1 Pound Beef Chili
- SEAR THE CHUCK FIRST: Chuck roast releases its best flavor when browned deeply—cut it into 1-inch chunks and sear them in batches over medium-high heat for 3-4 minutes per side. I used to skip this and wondered why my chili tasted more like stew than fire-roasted beef.
- SMASH THE GARLIC: Mince those garlic cloves fine, then smash them flat with the side of your knife before adding them to the pot. This bursts the alinase enzymes, making the flavor more intense—no need to burn them to get the punch.
- DON’T DROWN THE SPICES: Toast your chili powder and cumin in a dry pan for 30 seconds until fragrant, then add them to the onions. This deepens their aroma without turning the whole chili into a muddy paste—trust me, your taste buds will notice.
- LOW AND SLOW WINS: After searing the meat, add just enough liquid (broth or water) to come halfway up the beef, then simmer covered at 275°F (135°C) for 2-2.5 hours. Rushing it to 30 minutes leaves the meat tough; patience makes it fork-tender.
Common mistakes when making your 1 pound beef chili
Skipping the Sear
This is the #1 mistake I see—skipping the sear entirely or only giving the beef a quick rinse in the pot. That beautiful brown crust from the Maillard reaction is what gives chili its depth. If you skip it, your chili will taste flat and one-dimensional.
Always sear the beef in batches over medium-high heat until deeply browned—this takes 3-4 minutes per side. If your pan isn’t hot enough, the meat will steam instead of brown. 🔥
Overcrowding the Pan
Adding all the beef at once leads to steaming instead of browning, which ruins the flavor foundation. Cook in batches if needed—your Dutch oven can only handle so much meat at once. I usually do two batches for 1 lb of beef.
If the pan gets too crowded, the meat will release moisture and cook unevenly, resulting in gray, soggy chunks instead of flavorful browned pieces.
Ignoring the Deglaze
After searing the beef, those browned bits stuck to the bottom are pure flavor gold—don’t just wipe them out! Deglaze with ¼ cup beef broth or a splash of water, scraping up every last bit.
This transfers all that caramelized goodness into your chili. Skipping this step means losing 20-30% of your potential flavor. I always keep a wooden spoon handy to scrape and deglaze thoroughly.
Under-Simulating the Chili
Rushing the simmer time is a fast track to tough, dry beef and underdeveloped flavors. The 1.5-hour low simmer is non-negotiable for 1-inch beef cubes. If you cut the beef smaller, reduce simmer time to 45-60 minutes, but never less.
I’ve seen people walk away after 30 minutes—big mistake. The beef needs time to break down and absorb all those spices and aromatics.
Adding Beans Too Early
Beans added at the beginning can turn mushy and water down your chili. Always stir them in during the last 10 minutes of cooking so they just heat through without breaking down.
If you’re using dried beans, pre-soak them for 1 hour and cook separately until tender before adding. Canned beans are fine, but drain and rinse them well to remove excess sodium.
Overcorrecting with Salt
Chili needs salt, but adding it all at once can make the flavors taste flat. Start with the ½ teaspoon kosher salt called for, then taste and adjust. Many chili recipes call for 1-2 teaspoons, but with concentrated ingredients, less is often better.
I recommend tasting before adding more salt—your chili might just need time to develop its natural saltiness. Adding too much salt upfront can’t be fixed easily.
Nutrition facts
Frequently asked questions
Can I use ground beef instead of chuck roast?
Yes, but with adjustments! For 1 lb ground beef, cook it in the same Dutch oven until browned (no need to cube). Since ground beef cooks faster, reduce simmering time to 45-60 minutes instead of 1.5 hours. The texture will be slightly different but still delicious. Just ensure it reaches 165°F internally for safety.
How do I adjust this for a slow cooker?
Transfer all ingredients to your slow cooker and cook on low for 6-7 hours or high for 3-4 hours. Skip the initial sear—just brown the onions and spices in a skillet first, then add everything to the slow cooker. The long cook time tenderizes the beef perfectly, and you won’t need to stir as often. Pro tip: Add beans only in the last 30 minutes to prevent mushiness.
What if my chili is too thick or too thin?
Too thick? Add 2-3 tablespoons of beef broth while simmering, stirring until smooth. Too thin? Simmer uncovered for 10-15 extra minutes to reduce, or stir in 1 tablespoon tomato paste to thicken naturally. Avoid cornstarch—it can make the chili taste artificial. The ideal consistency should coat the back of a spoon but still be saucy.
Can I make this spicier?
Add ½ teaspoon cayenne pepper or 1 chopped jalapeño during the simmer. For heat lovers, stir in 1 teaspoon chipotle powder with the other spices. Taste as you go—build heat gradually. If using fresh peppers, remove seeds for milder heat. Always balance with a pinch of sugar or extra tomatoes to soften the burn.
How do I reheat leftovers without drying it out?
Reheat gently on the stove over low heat with 1-2 tablespoons of beef broth to restore moisture. Stir frequently and avoid boiling. Microwave reheating? Cover with a damp paper towel and heat in 30-second intervals**, stirring between each. Never reheat straight from the fridge—let it sit at room temperature for 5 minutes first to prevent uneven heating.

- 8 Ounce Crab Cakes Recipe: Golden Crust With Luminescent Crab Hearts - October 12, 2026
- 1950’s Betty Crocker Banana Bread Recipe: Nostalgic Spice Swirls and Moist Crumb - October 12, 2026
- 2 Quart Homemade Ice Cream Recipe: Ultra Creamy Vanilla Bean Swirls - October 12, 2026