
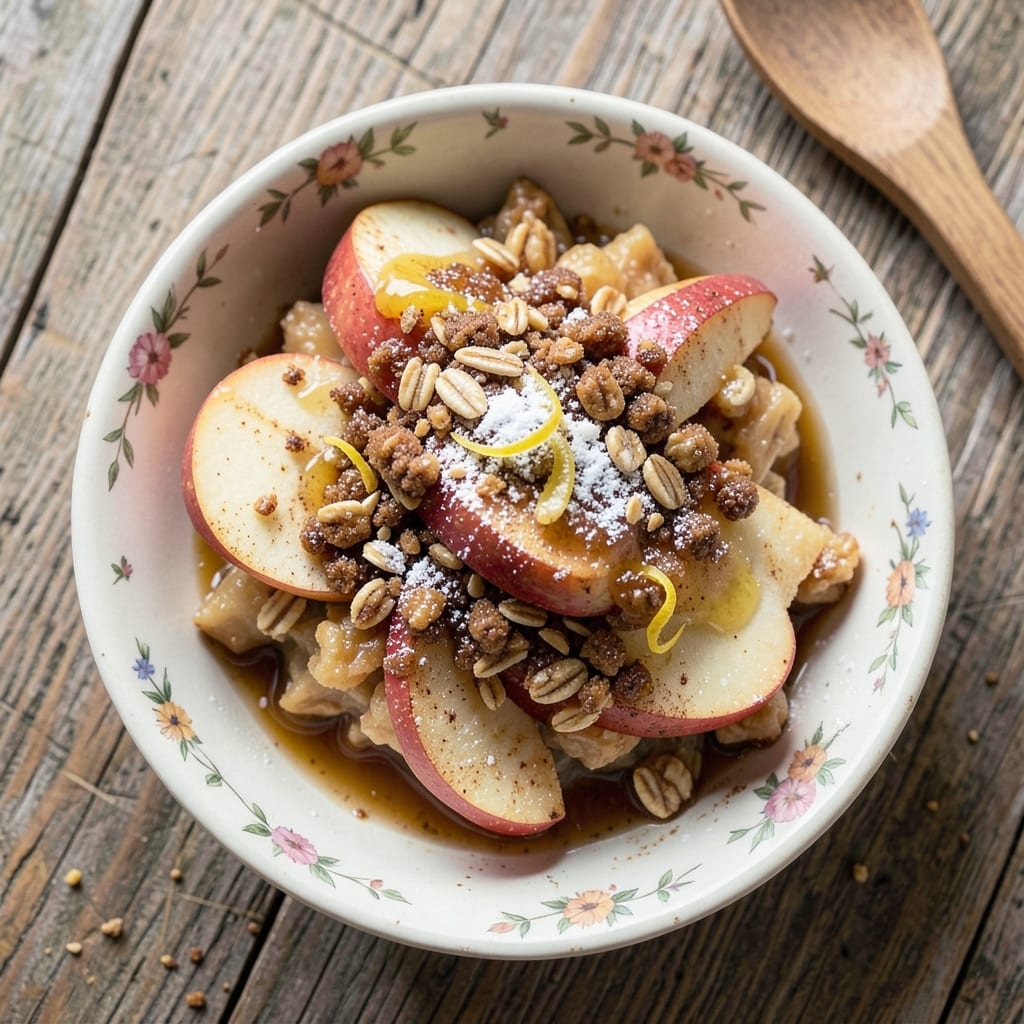
This 1 serving apple crisp recipe lets you enjoy all the cozy charm of a classic dessert—no leftovers, just warm spiced apples under a golden oat crumble, ready in 20 minutes.
This recipe proves you don’t need a crowd to enjoy apple crisp; it’s designed for portion control, with every bite offering tender fruit and buttery crunch. The secret lies in balancing cinnamon, brown sugar, and a touch of lemon to brighten the filling while the topping stays light yet satisfying.
What makes this recipe special is its efficiency—no mixing bowls or complex techniques, just a single ramekin and 15 minutes of prep.
The filling combines sliced apples with just enough sugar and spices to caramelize beautifully, while the topping uses a simple mix of oats, flour, and butter that browns to a perfect crunch.
The result is a dessert that feels indulgent yet stays within single-serving portions, making it ideal for a cozy night in or a quick treat after dinner.
By the time it emerges from the oven, you’ll have a warm, spiced apple filling with a crispy, buttery topping that’s impossible to resist. The aroma alone—cinnamon, caramelized apples, and toasted oats—will fill your kitchen, while the texture delivers the perfect contrast: soft, spiced fruit under a golden, crunchy shell.
Serve it warm with a scoop of vanilla ice cream or a dollop of whipped cream for the ultimate comfort dessert.
Perfect for meal prep or spontaneous cravings, this recipe scales effortlessly for larger batches while keeping the single-serving focus intact.
Whether you’re cooking for one or adapting it for a crowd, the principles remain the same: tender apples, a crispy topping, and 20 minutes to a dessert that tastes like home.
Ingredients for 1 serving apple crisp
Here’s everything you need to make this single-serving apple crisp—just 12 ingredients for cozy dessert magic.
| Ingredient | Amount | Notes |
|---|---|---|
| Honeycrisp Apples 🍎 | 1 medium | Peeled, cored, sliced thin |
| Light Brown Sugar 🍚 | 2 tbsp | Packed lightly for sweetness |
| Granulated Sugar 🍚 | 1 tbsp | Balances brown sugar flavor |
| Ground Cinnamon 🌿 | ½ tsp | Freshly ground for warmth |
| Lemon Juice 🍋 | ½ tsp | Freshly squeezed, brightens flavor |
| Old-Fashioned Rolled Oats 🌾 | ¼ cup | Not quick oats for texture |
| All-Purpose Flour 🌾 | 1 tbsp | For binding topping |
| Light Brown Sugar 🍚 | 1 tbsp | For topping sweetness |
| Ground Cinnamon 🌿 | ¼ tsp | Doubles filling spice |
| Unsalted Butter 🧈 | 2 tbsp | Cold, cubed for crunch |
| Vanilla Ice Cream 🍦 | ½ cup | Optional serving suggestion |
| Salt 🧂 | ⅛ tsp | Kosher or sea salt |
The apples are the star, so pick Honeycrisp or Fuji—they hold up best to baking. Trader Joe’s or Whole Foods usually carry pre-washed bags, but if you’re buying whole, grab a couple extra for snacks. Slice them paper-thin with a mandoline or sharp knife—even thickness ensures even cooking. The lemon juice is non-negotiable; it keeps the apples from browning while adding that bright pop of flavor that makes this taste like fall in every bite. Pro tip: Toss the sliced apples with the lemon juice immediately after cutting.
No vanilla ice cream? Whipped cream or caramel sauce works just as well—this is your dessert, so make it your own. Running low on brown sugar? White sugar plus 1/4 tsp molasses mimics the flavor. The oats are key for that perfect crunch—quick oats work in a pinch, but old-fashioned give you that rustic texture. Butter matters here too: European-style (like Plugrá) stays rich and flavorful when baked. And if you’re worried about the topping getting too sweet, trust me—the apples balance it out perfectly.
Prep the apples and topping ingredients ahead, then assemble right before baking—15 minutes of hands-on time tops. The ramekin goes straight from fridge to oven, so no preheating needed. Leftovers? None. This is designed to disappear in one sitting, but if you somehow have extras, it reheats beautifully in the microwave for 10 seconds—just cover it with a damp paper towel to keep the topping crisp. Store any topping mix in the fridge for up to 5 days in an airtight container.
Why You’ll Love This Recipe
- No Chopping Needed: I swear by this trick—just peel, core, and slice one apple into a bowl. No dice, no fuss, no extra bowls to wash. The Honeycrisp stays juicy and sweet without turning to mush.
- Sweet-Cinnamon Magic: That first bite? Warm, caramelized apples with a crunchy topping—like dessert and comfort food had a baby. The brown sugar and cinnamon turn the crisp into something dangerously addictive.
- Weeknight or Dessert Table: Serve it warm with vanilla ice cream for a fancy touch, or pack it cold for lunch the next day. Honestly, it’s my go-to when I need something quick but still feels special.
Step-by-step instructions for warm spice crunch in 20 minutes
Here’s how to create a single-serving apple crisp that’s crispy, spiced, and ready in record time.
Prepare the Apple Filling
Start by peeling, coring, and slicing the 1 medium Honeycrisp Apples into thin, even pieces. I like to cut them about ⅛-inch thick so they cook through evenly without turning mushy. Place the sliced apples in a small microwave-safe dish or baking dish.
In a small bowl, mix together the 2 tbsp Light Brown Sugar, 1 tbsp Granulated Sugar, 0.5 tsp Ground Cinnamon, and 0.5 tsp Lemon Juice. Pour this mixture over the apple slices and toss gently to coat them completely. The lemon juice brightens the natural sweetness of the apples while the cinnamon adds that warm spice aroma we all love.
Assemble the Crisp Topping
In a separate small bowl, combine the 0.25 cup Old-Fashioned Rolled Oats, 1 tbsp All-Purpose Flour, 1 tbsp Light Brown Sugar, and 0.25 tsp Ground Cinnamon. This is your crispy topping mixture. Cut the 2 tbsp Unsalted Butter into small cubes and add them to the dry ingredients. Using your fingers or a fork, work the butter into the oat mixture until it resembles coarse crumbs with some pea-sized butter pieces remaining.
This texture is crucial—it creates pockets of butter that melt and create that perfect crispy crust. Sprinkle the mixture evenly over the prepared apple slices in the dish. The topping should cover the apples completely but not so thick that it takes too long to bake.
Bake Until Golden and Bubbly
Place the dish in the microwave and cook on high power for 3 minutes. After the first minute, stop and stir the apples gently to redistribute any juices that might be pooling. This helps ensure even cooking and prevents any potential burning.
Let the dish sit for 1 minute after microwaving. The residual heat will continue cooking the apples slightly. Then, transfer the dish to a stovetop burner over medium heat. Cook for an additional 2-3 minutes, stirring occasionally, until the topping is golden brown and the apples are tender but not mushy. You’ll know it’s done when the edges of the topping are crispy and the filling is bubbling gently.
Serve Warm with Vanilla Ice Cream
Remove the dish from heat and let it cool for 2 minutes. The crisp will continue to set slightly during this time. Serve immediately while still warm, topped with 0.5 cup Vanilla Ice Cream. The contrast between the warm, spiced crisp and the cool ice cream is what makes this dessert truly special.
Enjoy your single-serving apple crisp right away. The warm spices, crispy topping, and tender apples will make you feel like you’ve just enjoyed a homemade dessert from your favorite bakery. The ice cream not only adds a delightful coolness but also helps balance the sweetness of the crisp.
Pro Tips For Making 1 Serving Apple Crisp
- USE A SMALL DISH: A standard 8-inch pie dish will make this too much for one serving—opt for a 6-inch ramekin or even a 12-ounce oven-safe mug. The crisp-to-filling ratio stays perfect, and you won’t end up with leftovers (or a fridge full of sad, half-eaten crisp the next day).
- PEEL THE APPLES: Honeycrisp apples have tough skins that don’t soften well, and you’re only making one serving. Take 5 minutes to peel them—no one wants to bite into a mouthful of chewy skin when the rest of the dish is tender. (Yes, even if you’re impatient like me.)
- TOSS WITH LEMON JUICE FIRST: Spritz the sliced apples with lemon juice before tossing them with sugar and cinnamon—it prevents browning and keeps the filling bright. I learned this the hard way when my crisp turned grayish halfway through baking. (Your future self will thank you.)
- BAKE UNTIL GOLDEN, NOT JUST BUBBLY: The topping will look done at 325°F when it’s still soft—keep it in 5–10 minutes longer until the edges are deep golden brown. That’s when the caramelization kicks in, not when it’s just “set.” (I know, I know—it’s tempting to pull it early, but resist.)
Essential equipment for 1 serving apple crisp
Single-Serving Ramekin
This 6-ounce ceramic ramekin is your best friend for this recipe—I use a Pyrex single-serve baking dish because it distributes heat evenly and handles the microwave-to-stovetop transition without cracking.
The shallow depth ensures even cooking of both the apples and topping. Look for one with slightly sloped sides to help with portion control and easy serving. 🍎
Mixing Bowl Essentials
A small microwave-safe bowl (about 1 cup capacity) is perfect for tossing the apples with sugar and spices. I prefer glass or ceramic over plastic because they won’t melt or warp under heat.
A 2-cup bowl works for the topping mix, but a 1-cup bowl is plenty if you work in batches. The key is finding bowls that fit comfortably in your microwave for quick tossing.
Butter Knife or Fork
You’ll need a small knife (like a paring knife) or fork to cut the 2 tbsp unsalted butter into pea-sized cubes. The goal is to distribute butter evenly through the oat mixture without melting it completely.
A dull butter knife works best—it’s easier to control the size of the cubes. If you’re short on time, use your fingers (clean hands only!) to break the butter into the mix.
Measuring Tools
Precision matters here, so grab a small measuring cup (for the 0.25 cup oats) and a 1/4 teaspoon measuring spoon (for the 0.25 tsp cinnamon). A spoon rest keeps your spices handy while you work.
For the 2 tbsp brown sugar, use a dry measuring spoon and level it off with a straight edge—packing it lightly ensures the right texture. A microplane comes in handy if you need to zest extra lemon for brightness.
Optional: Mandoline Slicer
While a sharp chef’s knife works fine, a mandoline slicer (set to ⅛-inch thickness) guarantees perfectly even apple slices every time. This prevents some pieces from cooking faster than others.
If you don’t own one, a serrated knife and a ruler for guidance will do—just stay consistent! The thinner the slices, the quicker they’ll cook through without turning to mush. 💡
Stirring Spoon
A small wooden spoon or silicon spatula is ideal for gently tossing the apples with their sugar mixture. Wood won’t scratch your ramekin, and silicone is heat-resistant if you need to transfer it straight to the oven (though we’re microwaving here).
Avoid metal spoons—they can react with acidic lemon juice over time. Keep it handy for stirring the topping mixture too!
Nutrition facts
Frequently asked questions
Can I use any apples for this single-serving crisp?
Not all apples work equally well! For the best texture and flavor, use firm, slightly tart varieties like Honeycrisp, Fuji, or Granny Smith. Avoid mealy apples like Gala or Red Delicious—they’ll turn mushy when baked. If you only have softer apples, slice them thinner and reduce baking time by 30 seconds.
Why does my topping turn out soggy?
Soggy topping usually means the butter melted too much before baking. To fix this, chill the topping mixture for 10 minutes before adding it to the apples, and use slightly larger butter cubes. Also, make sure your apples aren’t releasing too much liquid—pat them dry gently with a paper towel before assembling.
Can I make this crisp ahead of time?
Assemble the crisp (without baking) up to 24 hours ahead and store it uncovered in the fridge. When ready to bake, microwave it for 2 minutes (instead of 3) and finish on the stovetop. The flavors will actually deepen overnight, and the topping will crisp up beautifully. Just add ice cream right after baking for the best experience!
What if I don’t have old-fashioned oats?
Quick oats will work in a pinch, but they won’t give you that same rustic crunch. For a closer texture, pulse 1/4 cup quick oats in a food processor for 10 seconds to break them up slightly. Alternatively, use crushed graham crackers (about 1/4 cup crushed) mixed with the flour and spices—it creates a similar crumbly texture.
Is this recipe gluten-free?
Not as written, but you can easily adapt it! Replace the 1 tbsp all-purpose flour in the topping with 1 tbsp gluten-free 1:1 baking flour or 1 tbsp almond flour. For the best results, use certified gluten-free oats if you’re highly sensitive. The texture will be slightly different but still delicious—just expect a marginally less crisp topping.

- 2 Lb Oatmeal Bread Machine Recipe: Hands-Off Crusty Loaf With Nutty Depth - September 30, 2026
- 8-Inch Pecan Pie Recipe: Buttery Crust and Caramelized Nut Bliss - September 30, 2026
- 1 Loaf Homemade Bread Recipe: Crusty Crunch and Airy Crumb in One Bowl - September 30, 2026