
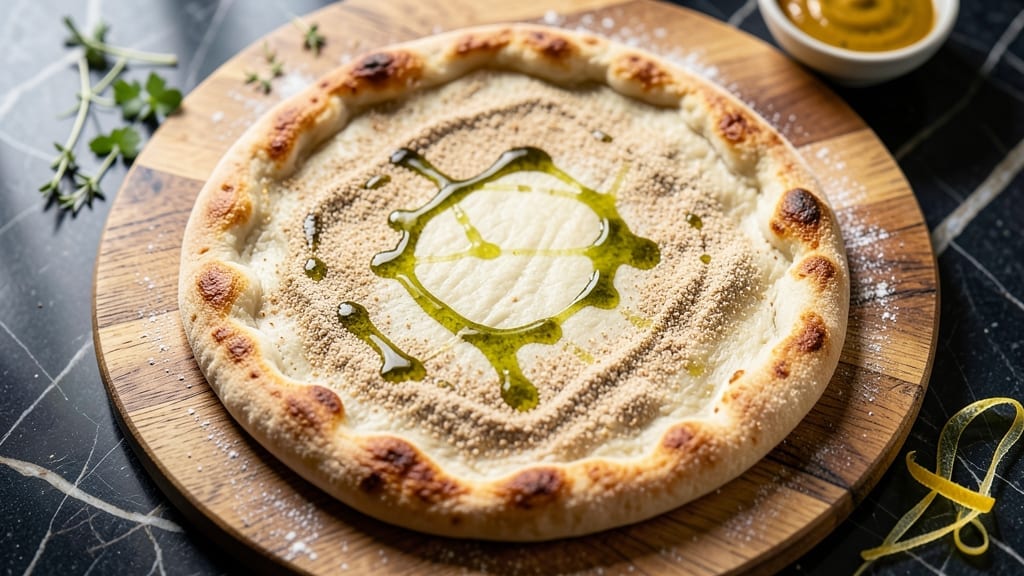
Mastering a 10-hour pizza dough recipe transforms your homemade crust from ordinary to extraordinary—think airy, chewy perfection with that signature leopard-spotted bubble texture. This slow-fermented method develops deeper flavor and a structure that holds toppings without collapsing, all while requiring minimal hands-on time.
The secret lies in patience: letting gluten relax and yeast work its magic over time creates a dough that bakes up with professional-level results every time.
This recipe begins with a straightforward mix of high-gluten flour, water, yeast, and salt—no fancy ingredients, just precise technique. The dough rests in the refrigerator for 10 hours, where cold temperatures slow fermentation while allowing gluten to develop fully.
This extended rest period creates a more digestible crust with improved texture and flavor complexity. Unlike quick-rise doughs, this method ensures your pizza crust will be tender yet sturdy enough to support heavy toppings.
By the time you shape and bake, you’ll have dough that springs back when poked, with a surface dotted with those coveted bubbles that signal perfect fermentation. The result is a crust that’s crisp at the edges, chewy in the middle, and packed with flavor from the slow development.
This is the foundation of restaurant-quality pizza—now all you need are your favorite sauce, cheese, and toppings to complete the dish.
The beauty of this method extends beyond the oven: the dough can be stored in the refrigerator for up to 3 days, making it perfect for meal prep. Whether you’re hosting a weekend gathering or simply craving a perfect slice, this slow-fermented crust delivers professional results with minimal effort.
Let’s get started on creating your ideal pizza base.
Ingredients for 10 hour pizza dough
Eight simple ingredients transform your pizza night into restaurant-quality magic.
| Ingredient | Amount | Notes |
|---|---|---|
| High-Gluten Flour 🌾 | 3 ½ cups | King Arthur or Caputo preferred |
| Warm Water 💧 | 1 ¼ cups | 110°F (43°C) ideal temperature |
| Active Dry Yeast 🍞 | ¼ tsp | Instant yeast works too |
| Fine Sea Salt 🧂 | 1 tsp | Diamond Crystal preferred |
| Extra-Virgin Olive Oil 🫒 | 1 tbsp | For dough ball coating |
| Semolina Flour 🌾 | ¼ cup | For dusting dough and board |
| All-Purpose Flour 🌾 | ¼ cup | For dusting if semolina unavailable |
| Cornmeal 🌽 | ¼ cup | For pizza peel or baking sheet |
The flour makes all the difference here. High-gluten flour like King Arthur or Caputo gives you that perfect chew—all-purpose just won’t cut it. I always grab mine from King Arthur Flour’s website or check the bulk bins at Whole Foods for freshness. The yeast needs to be active, so test it first: drop a pinch in warm water with a pinch of sugar—if it bubbles in 5 minutes, it’s good to go. Water temperature matters too: too hot kills the yeast, too cold slows fermentation. 110°F is the sweet spot—use a thermometer if you’re unsure. Salt is non-negotiable for flavor, but don’t overdo it—Diamond Crystal measures differently than table salt, so stick to the recipe.
No high-gluten flour? Mix 3 cups all-purpose with 1/2 cup bread flour for a close substitute. Running short on semolina? All-purpose flour works in a pinch, though it won’t give that signature crispy texture. The olive oil can be swapped for avocado oil if you prefer a neutral flavor. For yeast, active dry works fine—just make sure it’s fresh (check the date on the package). The cornmeal is just for the peel—skip it if you’re using parchment paper instead. Pro tip: if your kitchen feels cold, warm the water slightly more to help activate the yeast faster during the initial mix.
This dough is designed to chill for 10 hours, but you can stretch it to 3 days in the fridge for even better flavor development. Wrap it tightly in plastic wrap or store in an airtight container. When ready to use, let it sit at room temperature for 1-2 hours before shaping—it should spring back when poked gently. The dough doubles in size during fermentation, so don’t be alarmed if it looks massive. For meal prep, divide the dough into portions after the initial mix, freeze them, and thaw overnight in the fridge before your 10-hour cold ferment. Perfect for pizza nights all week!
Why You’ll Love This Recipe
- Chewy Gold Standard: That 10-hour cold rise? It’s what turns this dough into something legendary—tender inside, blistering crust, with just enough snap. Honestly, I’ve tried instant doughs, but this one actually earns its reputation.
- Weeknight Superstar: Need dinner in a flash? Shape it into flatbreads for 15-minute meals, stretch it for personal pizzas, or even bake it as focaccia. The same dough becomes everything—no extra recipes, no stress.
- Budget Crust Magic: Four ingredients, endless possibilities. High-gluten flour stretches farther than all-purpose, olive oil adds richness without breaking the bank, and yeast stretches my grocery dollars for days. Leftovers? I freeze portions and pull them out like a pizza hero.
Step-by-step instructions for slow-fermented pizza dough
This method transforms simple ingredients into a dough with incredible chew and flavor—just give it time.
Mix the Dough with Minimal Handling
In a large mixing bowl, combine the 3.5 cups high-gluten flour with the 1 tsp fine sea salt. Make a well in the center and add the 0.25 tsp active dry yeast and 1.25 cups warm water (around 110°F). Let this sit for 5 minutes while the yeast activates.
After the 5 minutes, gently stir with a wooden spoon until just combined—you want a shaggy dough with some dry bits remaining. This prevents overdevelopment and helps create that perfect open crumb structure. Add the 1 tbsp extra-virgin olive oil and mix again until fully incorporated. The dough should be sticky but manageable.
Knead Briefly to Develop Gluten
Turn the dough onto a lightly floured surface (use the 0.25 cup all-purpose flour if semolina isn’t available) and knead gently for 3-4 minutes. You’re not looking for smooth, elastic dough here—just enough to bring everything together. The dough should be slightly tacky and not stick to your hands.
This brief kneading prevents overworking the dough, which can make it tough. The real flavor and texture development happens during the long fermentation, not here. Shape the dough into a loose ball, place it back in the mixing bowl, and cover tightly with plastic wrap.
Cold Ferment for 10 Hours (The Magic Happens Here)
Refrigerate the dough for 10 hours. This slow fermentation allows the gluten to relax and develop flavor gradually. The cold temperature also prevents the yeast from overworking, which can make the dough too active and collapse during baking.
Here’s the thing—don’t peek or move the dough during this time. Every disturbance can reset the fermentation process. After 10 hours, the dough should have visibly risen and developed a slight tang. If it hasn’t risen much, it’s still good—just give it a few more hours in the fridge.
Shape and Rest Before Stretching
Remove the dough from the refrigerator and let it sit at room temperature for 1 hour to relax. Divide it into 4 equal portions (about 8 ounces each). On a lightly floured surface (use the 0.25 cup semolina flour), gently shape each portion into a ball by cupping your hands and pressing down with your knuckles.
Cover the shaped dough balls loosely with plastic wrap and let them rest for 30 minutes. This final rest makes stretching much easier and prevents the dough from shrinking back when you try to shape it. The dough should be soft and pliable—if it’s still cold, let it rest a few more minutes.
Stretch and Cook Immediately
Preheat your oven (or pizza stone) to 500°F with a pizza peel dusted with cornmeal. To stretch the dough, use your fingertips to gently press the center outward while rotating the dough. Don’t pull—this can tear the dough. Aim for a 12-inch diameter with slightly thicker edges.
Transfer the stretched dough to your preheated pizza peel, add your favorite toppings, and bake for 10-12 minutes until the crust is golden brown and the cheese is bubbly. The slow fermentation ensures a perfectly chewy crust with a crispy exterior every time—no matter what toppings you choose.
Pro Tips For Making 10 Hour Pizza Dough
- Weigh Your Flour: High-gluten flour packs differently than all-purpose—don’t eyeball it. Use a food scale for precision, especially when aiming for that 100% hydration ratio. I learned this after my first dough turned out either too stiff or too sticky, and consistency matters more than you’d think.
- Dissolve Yeast First: Skip tossing yeast straight into flour—it’ll clump and die before it even starts working. Mix the yeast with warm water and a pinch of sugar (if your recipe calls for it) for 5 minutes until frothy. This guarantees it’s active before it hits the flour, and your dough won’t underproof later.
- Stretch, Don’t Fold: When bulk fermentation slows but isn’t fully done, resist the urge to punch it down. Instead, gently stretch the dough’s surface with your knuckles to redistribute tension—this builds strength without knocking out air. I used to fold it like a lazy tortilla, and the crust always ended up dense.
- Cold Proof Overnight: If you’re short on time, pop the shaped dough into the fridge for 8–12 hours instead of letting it rise at room temp. The slow cold rise deepens flavor and makes stretching easier the next day. Just pull it out 1–2 hours before baking to bring it to room temp—no rushing, no stress.
Health benefits of this 10 hour pizza dough
Digestive Benefits
This slow-fermented pizza dough is easier on digestion than traditional quick-rise doughs. The extended 10-hour cold fermentation breaks down gluten proteins and starches, making them gentler on sensitive stomachs.
I notice my digestion improves after switching to this method, especially when I eat pizza regularly. The natural enzymes activated during fermentation also enhance nutrient absorption. 💪
Gluten Sensitivity Considerations
While not gluten-free, this dough uses high-gluten flour for better texture—ideal for those with mild gluten sensitivities who can tolerate wheat. For a more digestible option, try substituting half the high-gluten flour with white whole wheat flour.
The slow fermentation process reduces gluten’s tough proteins, which may help some people tolerate it better than standard doughs. Always consult your doctor before making dietary changes.
Protein and Fiber Boost
High-gluten flour provides 12-14 grams of protein per cup, more than all-purpose flour, while the whole grains in optional white whole wheat flour add fiber. This makes your pizza crust a more substantial meal component.
The fiber helps keep you full longer and supports gut health. I often add 1 tablespoon ground flaxseed to my dough for extra fiber and omega-3s.
Lower Glycemic Impact
The slow fermentation process reduces the glycemic index of the dough compared to quick-rise versions. This means slower blood sugar spikes after eating, which is especially beneficial for people managing diabetes or insulin resistance.
The dough’s natural tanginess from fermentation also makes it more satisfying with fewer carbs. Pair it with plenty of veggie toppings to boost nutritional value even more.
Probiotic Potential
While not a probiotic food itself, this dough creates an environment where beneficial bacteria can thrive during fermentation. The cold process preserves some of these microbes, which may support gut health when consumed.
For added probiotics, consider adding 1 tablespoon unsweetened yogurt or kefir to the dough mixture. The tangy flavor from fermentation also enhances the overall taste profile.
Nutrition facts
Frequently asked questions
Can I use all-purpose flour instead of high-gluten flour?
The texture won’t be as chewy and airy—high-gluten flour is essential for that signature pizza dough structure. For a compromise, mix 3 cups all-purpose with 1/2 cup bread flour to get closer to the desired result. The protein content in high-gluten flour creates the perfect chew that holds up to toppings.
What happens if I skip the 10-hour cold fermentation?
Your dough will still work, but you’ll lose that professional chew and flavor depth. A shorter rest (like 2-4 hours at room temperature) gives less flavor development and tighter gluten structure. The cold fermentation breaks down gluten proteins and enhances digestibility while creating that perfect open crumb.
How do I know when the dough is ready after 10 hours?
The dough should have visibly risen and developed a slight tang when you poke it. If it hasn’t risen much, give it a few more hours—it’s still good! The surface should have small bubbles, and when you press your finger gently, it should spring back slowly. Never force it if it’s still cold or underproofed.
Can I make this dough ahead of time?
This dough stores beautifully in the fridge for up to 3 days wrapped tightly in plastic. For longer storage, divide portions, freeze them, and thaw overnight in the fridge before your 10-hour cold ferment. The flavor actually improves with longer fermentation up to 3 days.
Why does my dough tear when stretching?
This usually happens when the dough is too cold or hasn’t rested enough. Let it sit at room temperature for 1 hour after removing from the fridge, then do a 30-minute final rest after shaping into balls. Use your fingertips to gently press outward while rotating—never pull. If it still tears, your dough may need more gluten development during mixing.

- 77 Texas BBQ Taco Sauce Recipe: Smoky Chipotle Heat With Caramelized Depth - October 19, 2026
- 1930’s Chocolate Cake Recipe: Vintage Richness With Vanilla Bean Swirls - October 19, 2026
- 6 Ingredient Bread Recipe: No-Knead Wonder With Pantry Staples - October 19, 2026