
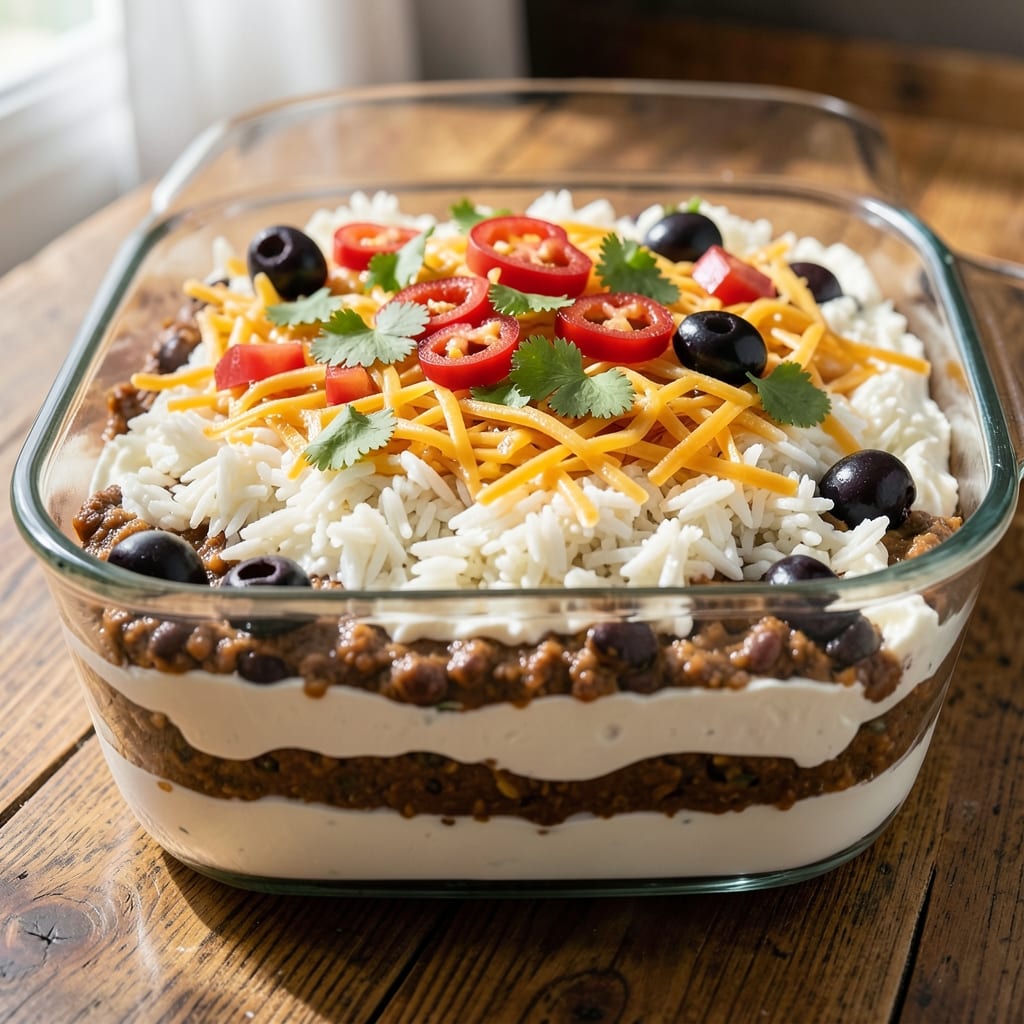
This 7-layer Mexican dip recipe with cream cheese transforms a simple appetizer into a showstopping centerpiece that disappears faster than you can say “taco Tuesday.” 🌟 The secret lies in layering textures—creamy, crunchy, and zesty—each component building on the last to create a dip that’s as impressive to look at as it is to eat.
I’ve perfected this version over years of game nights and parties, where it’s become the star of every spread without requiring hours in the kitchen.
The foundation starts with a smooth cream cheese base, blended until velvety to prevent any graininess that can ruin the experience.
From there, we build layers of refried beans, seasoned rice, diced jalapeños, black olives, shredded cheddar, and finally, a topping of crushed tortilla chips for that perfect crunch.
Each layer has a purpose—whether it’s adding protein, heat, or texture—and the assembly is methodical enough to ensure every bite delivers balanced flavors without overwhelming one another.
What you’ll end up with is a vibrant, layered masterpiece that looks as good as it tastes—golden cheddar peeking through crispy chip topping, bright green jalapeños adding a pop of color, and creamy layers that melt into every chip.
The beauty of this recipe is its versatility: serve it at parties, game day, or even as a hearty snack with tortilla chips or veggies. It’s the kind of dish that makes you look like a pro, even if you’re just starting out.
Ready to assemble? We’ll walk through each layer step-by-step, including tips for keeping the dip firm enough to slice (no soggy bottoms here!) and how to customize it with your favorite ingredients. Let’s get started—your guests won’t know what hit them.
Ingredients for 7 layer mexican dip recipe with cream cheese
Six layers of bold flavors and textures—creamy, crunchy, and zesty—ready to impress.
| Ingredient | Amount | Notes |
|---|---|---|
| Cream Cheese (Full-Fat) 🧀 | 16 oz | Room temperature, blended smooth |
| Refried Beans (Canned or Homemade) 🥫 | 1 can | Smooth texture preferred |
| Cooked White Rice 🍚 | 1 ½ cups | Day-old, cooled completely |
| Diced Jalapeños (Pickled) 🌶️ | ½ cup | With juice for moisture |
| Black Olives (Sliced) 🫒 | ½ cup | Pitted, drained |
| Sharp Cheddar Cheese (Shredded) 🧀 | 2 cups | Freshly shredded, not pre-shredded |
| Tortilla Chips (Crushed) 🍟 | 2 cups | Blue corn or regular |
| Sour Cream 🥛 | ½ cup | Full-fat for creaminess |
| Taco Seasoning 🌿 | 1 tbsp | Homemade or store-bought |
| Taco Sauce (or Salsa) 🍅 | ¼ cup | For drizzling on top |
| Lime Juice 🍋 | 1 tbsp | Freshly squeezed |
| Salt 🧂 | ½ tsp | Diamond Crystal preferred |
| Black Pepper 🌶️ | ¼ tsp | Freshly ground |
| Cilantro (Fresh, Chopped) 🌿 | ¼ cup | Optional garnish |
The cream cheese is non-negotiable here—full-fat, room-temperature is key for that velvety texture. I grab Philadelphia brand from the store because it’s consistently smooth, but any good-quality cream cheese works. The refried beans should be smooth, not chunky—if yours are thick, add a splash of water to loosen them up. For the rice, day-old works best—it’s drier and holds its shape better. Season it with taco seasoning and lime juice before mixing in, so every bite gets that zesty kick. And if you’re feeling fancy, Trader Joe’s has the best pre-seasoned rice mixes—just add water and lime.
No pickled jalapeños? Fresh jalapeños work too—just dice them small and toss with lime juice to mimic the tang. Black olives can be swapped for green olives or roasted red peppers if you prefer a different flavor profile. The cheddar? Freshly shredded is a game-changer—pre-shredded gets clumpy and melty. For the chips, crush them by hand for that perfect mix of fine and coarse textures. If you’re short on time, store-bought taco seasoning is fine, but I always make my own blend of cumin, paprika, and garlic powder for extra depth.
This dip keeps beautifully in the fridge for 3-4 days, but the flavors actually meld better after the first night—trust me on that. For serving, I like to press it into a springform pan so it holds its shape when sliced. Garnish with fresh cilantro right before serving—it wilts fast, so don’t do it too early. Leftovers? Portion into small containers for easy grab-and-go snacks. And if you’re prepping ahead, assemble it the night before—it just needs 30 minutes in the fridge to firm up before slicing.
Why You’ll Love This Recipe
- No Fuss Assembly: I swear by this dip because it’s basically layering Jenga blocks—just stack and chill. The refried beans spread like butter, the cream cheese melts into that perfect creamy blanket, and even my picky teenager won’t complain about the texture.
- Creamy-Spicy Magic: That first bite? Full-fat cream cheese swirled into refried beans with pickled jalapeños—it’s like a hug for your taste buds. The olives add a briny punch, and the rice soaks up all the flavors like a flavor sponge.
- Party in a Bowl: Game days, tailgates, or just because—this dip always disappears fast. I’ve served it at potlucks where people ask for the recipe, and it’s the one thing my in-laws actually finish (yes, really).
- Leftovers? More Like Leftovers: Make it once, eat it twice. The layers hold up for days in the fridge, and honestly? The flavors get even better after a night of mingling. Plus, it’s cheap enough that I don’t feel guilty when I make double batches.
Step-by-step instructions for 7 layer Mexican dip
Here’s how to build this crowd-pleasing masterpiece layer by layer.
👨🍳 Step 1: Prepare the Cream Cheese Base
In a large mixing bowl, combine the 16 oz cream cheese (full-fat) with the 1 tbsp taco seasoning, 0.5 tsp salt, and 0.25 tsp black pepper. Use a hand mixer or stand mixer to beat on medium-high speed for 2-3 minutes until completely smooth and fluffy. You’re looking for a light, airy consistency that will spread evenly.
This step is crucial—don’t skip it. The cream cheese should be completely homogenous with no lumps. If it’s too thick, add 1-2 teaspoons of warm water to help it blend smoothly. Spread this mixture evenly in the bottom of your 8×8-inch baking dish and smooth the top with a rubber spatula. This will be your flavor foundation for every layer above.
🥘 Step 2: Layer the Refried Beans and Rice
Spread the 1 can refried beans evenly over the cream cheese layer, using the back of a spoon to create an even surface. The beans should be smooth and well-distributed—no clumps. Next, sprinkle the 1.5 cups cooked white rice (day-old works best) evenly over the beans, pressing down gently to help it adhere.
Here’s the thing—using day-old rice prevents a soggy bottom layer. If your rice is fresh, spread it out on a baking sheet first and let it cool completely before layering. Press each layer gently with the back of a spoon to create a solid base for the next ingredients. This prevents everything from sliding around when you serve it.
🍳 Step 3: Add the Cheese and Vegetables
Now for the flavorful layers. First, sprinkle the 2 cups sharp cheddar cheese (shredded) evenly over the rice. Then add the 0.5 cup diced jalapeños (pickled) and 0.5 cup black olives (sliced) in an even distribution. The pickled jalapeños will add a tangy kick while the olives bring briny depth—both essential for that authentic Mexican flavor profile.
Don’t worry if the cheese looks like too much—it will melt and compress beautifully. Press down very lightly with your fingers or a spoon to help everything stick together. This is where the magic happens—each layer builds on the previous one, creating that perfect balance of textures and flavors when you take your first dip.
🥘 Step 4: Top with Crunch and Finish
Spread the 2 cups tortilla chips (crushed) evenly over the cheese layer, pressing down gently to create a sturdy top layer. This will be your crunchy barrier that keeps everything intact when serving. In a small bowl, mix together the 0.5 cup sour cream and 1 tbsp lime juice, then spread this mixture evenly over the chips.
Finally, drizzle the 0.25 cup taco sauce (or salsa) evenly over the entire surface. The lime juice brightens all the flavors while the taco sauce adds that final layer of tangy heat. Let the dip chill in the refrigerator for at least 1 hour before serving—this allows all the flavors to meld together perfectly and gives you that clean, creamy texture we all love.
🍽️ Step 5: Serve with Confidence
When ready to serve, sprinkle the 0.25 cup cilantro (fresh, chopped) evenly over the top for a pop of freshness. Serve with tortilla chips or veggies for scooping. The dip should be cool but not cold—let it sit at room temperature for 15-20 minutes before serving if it’s been refrigerated.
Each bite should deliver that perfect combination of creamy, crunchy, cheesy, and tangy—with every layer contributing to the experience. The cream cheese base ensures richness, the beans add heartiness, the rice provides texture, and the toppings bring the bold flavors together. This dip is a game-changer for any gathering!
Pro Tips For Making 7 Layer Mexican Dip Recipe With Cream Cheese
- CHILL THE CREAM CHEESE: Take it straight from the fridge—no thawing needed. Spread that block of cream cheese on parchment paper and let it sit at room temp for 10-15 minutes while you prep everything else. Cold cream cheese won’t mix smoothly with the sour cream or blend evenly into your layers, and you’ll end up with a dip that looks like it was assembled by a toddler with a butter knife.
- PRESS THE BEANS DRY: Drain your canned refried beans, then spread them on a paper towel and press with another towel to squeeze out every last drop of liquid. Wet beans turn your layers into a soggy mess, and nobody wants a dip that’s basically a refried bean soup. Do this right after opening the can—it takes 30 seconds and saves you from disaster.
- LAYER RICE WHILE WARM: Use rice that’s just off the heat—still steaming, but cool enough to handle. Cold rice gets gummy and sticks together like glue, while room-temp rice dries out before you even get to the tortilla chips. Spread it in an even layer while it’s warm, then let it cool slightly before adding the next layer. Your dip will stay crisp and clean, not a mushy disaster.
- DICE OLIVES SMALLER THAN YOU THINK: Cut those black olives into ⅛-inch pieces, not chunks. Big olives poke through the cheese layer like landmines, and nobody wants to dig for their snack. Tiny, even slices blend into the texture without overpowering—just like your abuela’s version, not the sad cafeteria dip you remember. A sharp knife and a steady hand make this easy.
Creative variations of these flavors
Spicy Kick Boost
For those who love heat, swap the pickled jalapeños for diced habanero peppers (about ¼ cup) mixed with 1 tbsp lime juice to mellow the intensity. Add 1 tsp smoked paprika to the cream cheese layer for a smoky depth.
I’ve tested this variation at my Super Bowl parties, and it disappears faster than the regular version. 🌶️
Vegetarian Protein Swap
Replace the refried beans with mashed avocado (about 1 cup) mixed with 1 tbsp lime juice and ½ tsp cumin for a creamy, plant-based layer. Top with crumbled cotija cheese instead of cheddar for a tangy finish. This version works perfectly for veggie-lovers but still delivers that satisfying texture.
Breakfast Twist
Turn this dip into a breakfast star by mixing ½ cup sour cream with 1 tbsp hot sauce and spreading it over the cheese layer. Top with crumbled bacon bits (about ½ cup) and chopped green onions instead of cilantro.
Serve with toasted baguette slices or hard-boiled eggs for dipping. It’s my go-to for brunch gatherings!
Seafood Fusion
For a coastal-inspired twist, replace the black olives with chopped kalamata olives and add ½ cup diced mango to the jalapeño layer. Top with crumbled feta cheese and a drizzle of chipotle mayo (mix ½ cup mayo with 1 tbsp chipotle peppers in adobo).
This version pairs beautifully with toasted pita chips or cucumber slices.
Sweet Heat Fusion
Add a sweet element by mixing 2 tbsp honey with the taco sauce before drizzling. Top with diced pineapple (about ½ cup) and crushed peanuts (about ¼ cup) for crunch.
This fusion is inspired by Mexican street food and works surprisingly well with sweet potato chips for dipping. The contrast of sweet and savory is pure magic.
Low-Carb Adaptation
Skip the rice layer entirely and replace it with cauliflower rice (about 1.5 cups) sautéed with 1 tsp taco seasoning and 1 tbsp lime juice. Use shredded Monterey Jack cheese instead of cheddar, and top with crushed pork rinds for a crispy, low-carb crunch.
This version keeps all the flavor without the carbs!
Nutrition facts
Frequently asked questions
Why does the cream cheese need to be room temperature?
Room temperature cream cheese blends much smoother without lumps, creating that perfect velvety texture in your dip. Cold cream cheese won’t incorporate evenly with the seasonings, leading to a grainy consistency that ruins the creamy base. Take it out of the fridge 30 minutes before starting for best results.
Can I make this dip ahead of time?
Assemble the entire dip in an 8×8-inch baking dish and refrigerate for 3-4 days. The flavors actually meld better after the first night. For serving, let it sit at room temperature for 15-20 minutes before slicing to restore that perfect creamy texture.
How do I prevent the layers from sliding when slicing?
Press each layer gently with the back of a spoon as you build, and chill for at least 1 hour before slicing. For extra stability, place the assembled dish on a parchment-lined tray before refrigerating. This prevents the bottom layer from spreading when you cut into it.
What’s the best way to serve this dip?
Serve with tortilla chips or veggie sticks like carrots, celery, and bell peppers. For an elegant touch, slice the dip into squares using a sharp knife dipped in hot water. Garnish with fresh cilantro right before serving to keep it vibrant.
Can I use low-fat cream cheese?
While it’s possible, low-fat cream cheese won’t give you that rich, creamy texture we all love. The fat content helps create that smooth, velvety base that holds up to all the other layers. Stick with full-fat for the best results!

- 7 Layer Mexican Dip Recipe With Cream Cheese: Bold Flavors Stacked for Crowd-Pleasing Crunch - September 26, 2026
- 3-Ingredient Peanut Butter Rice Krispie Treats Recipe: No-Bake Magic in 10 Minutes - September 26, 2026
- 2 Layer Carrot Cake Recipe with Pineapple: Tropical Swirl That Stays Moist for Days - September 26, 2026