
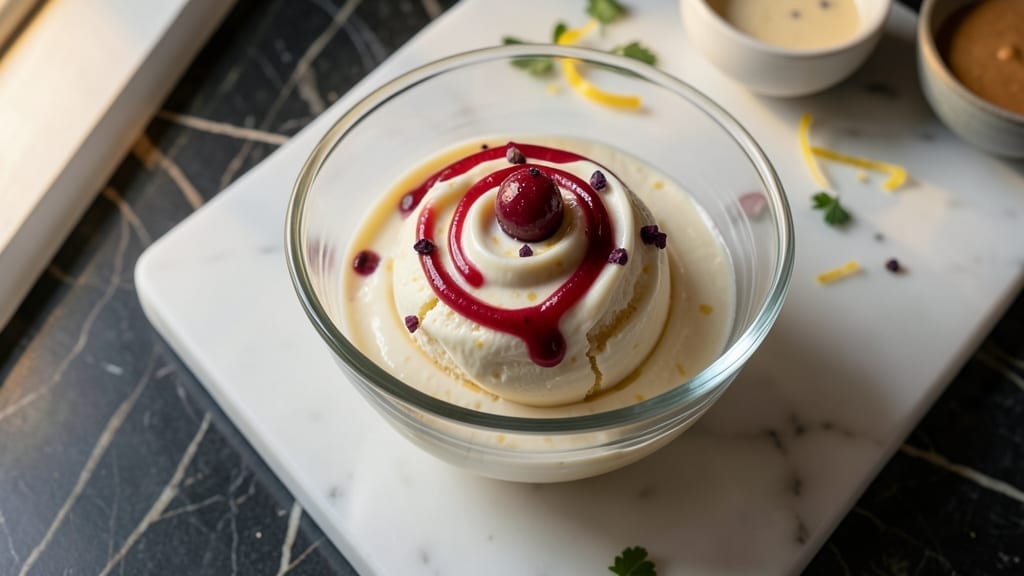
When you crave ice cream but don’t have time to wait for a freezer to churn, this 10-minute microwave method delivers creamy, dreamy dessert in minutes—not hours. The secret lies in blending just three simple ingredients, then freezing them in a way that mimics churned texture without the fuss.
I perfected this recipe during a particularly hot summer when store-bought ice cream just wouldn’t cut it, and now it’s my go-to for instant satisfaction.
The beauty of this technique is its foolproof simplicity: no churning, no special equipment, and no waiting for base mixtures to cook. A high-speed blender and microwave do all the heavy lifting, while a splash of heavy cream or condensed milk ensures that signature smooth, scoopable consistency.
The result? Ice cream that’s rich, velvety, and ready in less time than it takes to watch a commercial break.
You’ll end up with a batch of ice cream that’s customizable to your cravings—whether you prefer classic vanilla, chocolatey indulgence, or fruity twists. The texture stays creamy without iciness, thanks to a clever freezing trick that prevents graininess.
This isn’t just a shortcut; it’s a game-changer for anyone who’s ever stared longingly at the freezer while dreaming of dessert.
Perfect for last-minute cravings, potlucks, or impressing guests with minimal effort. The best part? You can tweak flavors in seconds—think cookie dough swirls, peanut butter drizzles, or fresh berry bursts. Let’s make ice cream that’s fast, foolproof, and impossibly delicious—no experience required.
Ingredients for 10 minute ice cream
Three core ingredients plus optional mix-ins—this is microwave ice cream at its simplest.
| Ingredient | Amount | Notes |
|---|---|---|
| Heavy Whipping Cream 🥛 | 2 cups | Full-fat for best texture |
| Powdered Sugar 🍚 | 1 cup | Confectioners' sugar preferred |
| Vanilla Extract 🌿 | 1 tbsp | Pure vanilla for authentic flavor |
| Condensed Milk 🥛 | ½ cup | Sweetened condensed milk |
| Salt 🧂 | ¼ tsp | Fine sea salt for balance |
| Food Coloring (optional) 🎨 | ¼ tsp | Gel-based for vibrant color |
| Mini Chocolate Chips (optional) 🍫 | ¼ cup | For mix-ins, semi-sweet |
| Fresh Strawberries (optional) 🍓 | ½ cup | Hulled and chopped |
The heavy whipping cream is non-negotiable—it’s what gives this ice cream its signature smoothness. Store-brand works fine, but if you’re splurging, grab the organic or ultra-pasteurized kind from the refrigerated section at Whole Foods or Trader Joe’s. The powdered sugar isn’t just for sweetness; it’s the secret to that creamy, churned texture. Bob’s Red Mill or Domino are reliable brands, but check the label—some blends have cornstarch added. Vanilla extract should be pure, nothing imitation. If you’re in a pinch, vanilla bean paste works too, but strain it first.
No condensed milk? Sweetened condensed milk substitutes like coconut condensed milk or even a mix of powdered sugar and milk work in a bind. Swapping out the vanilla? Almond extract at half the amount adds depth, or espresso powder (1/4 tsp) for a mocha twist. The salt might seem minor, but it’s what makes the flavors pop—don’t skip it. For mix-ins, freeze chocolate chips or berries first to prevent melting during blending. And if you’re feeling fancy, a drizzle of caramel sauce after freezing takes it to the next level.
This ice cream is best made fresh, but it’ll keep in the freezer for up to 2 weeks if stored in an airtight container. For the creamiest texture, let it sit at room temperature for 5-10 minutes before scooping. Portion it into small containers if you’re making it ahead—it’s perfect for potlucks or last-minute cravings. Pro tip: Microwave a bowl of water alongside your ice cream mixture to keep the heat even. No ice crystals, no waiting—just instant dessert magic.
Why You’ll Love This Recipe
- No Mixer Needed: I swear by this—just a bowl and a spoon. The condensed milk thickens everything perfectly while I whip the cream, and honestly? My arms get a workout, but the result is worth it.
- Creamy Vanilla Bliss: That first spoonful of rich, velvety ice cream with just a whisper of powdered sugar sweetness? It’s like dessert from a fancy shop, but I made it with five ingredients and a pinch of salt for balance.
- Party in a Bowl: Between us, this is my go-to for last-minute gatherings. Freeze it in small containers, and suddenly you’ve got individual servings ready for birthdays, potlucks, or just because someone’s having a rough day.
- Budget-Friendly Indulgence: I buy heavy cream and condensed milk in bulk, and this recipe uses just enough to satisfy a craving without breaking the bank. Plus, leftovers? They’re still amazing after a week—if they last that long.
Step-by-step instructions for 10-Minute microwave ice cream
Here’s how to transform pantry staples into velvety ice cream in record time.
Whip the Cream to Stiff Peaks
In a large microwave-safe bowl, combine the 2 cups heavy whipping cream, 1 cup powdered sugar, and 0.25 tsp salt. I use a hand mixer for this step—it’s faster than whisking by hand and gives you better volume. Whip on high speed for 2-3 minutes until soft peaks form when you lift the beaters.
This is the foundation of your ice cream, so don’t rush it. You want the cream to thicken noticeably but still hold its shape when you drag a spoon through it. If it’s not thickening enough, chill the bowl in ice water for 5 minutes before trying again. The cold temperature helps stabilize the cream for better whipping.
Fold in Flavorings and Optional Mix-Ins
Once your whipped cream reaches stiff peaks (when the beaters leave a trail that stands upright), gently fold in the 1 tbsp vanilla extract using a rubber spatula. Be careful not to overmix—just combine until fully incorporated. If using, add the 0.25 tsp food coloring now and mix until evenly distributed throughout the cream.
For the optional mix-ins, fold in 0.25 cup mini chocolate chips or 0.5 cup fresh strawberries (hulled and chopped) using the spatula. The strawberries should be cut into small pieces so they distribute evenly. If you’re adding both, divide the chocolate chips into the mixture first—they’re easier to distribute than fruit. Work gently to maintain the airiness of your whipped cream.
Microwave in Short Bursts
Transfer the bowl to a microwave-safe dish and microwave on high power for 30 seconds. This is where the magic happens—those short bursts transform your whipped cream into ice cream. After the first 30 seconds, stir vigorously with a spatula to break up any large ice crystals that may have formed.
Return the bowl to the microwave and cook another 30 seconds. Repeat this process, stirring after each interval, for a total of 3-4 minutes. You’re looking for a texture that’s thick and creamy but still scoopable. It should hold its shape when you press a spoon into it but still be soft enough to spread slightly. If it’s not setting properly, continue microwaving in 15-second intervals until you reach the desired consistency.
Incorporate Condensed Milk for Richness
Once your mixture has thickened to a soft-serve consistency, remove it from the microwave and let it cool slightly for 1 minute. Then, gently fold in the 0.5 cup condensed milk using your spatula. The condensed milk adds richness and helps bind the mixture together, creating a more stable ice cream texture.
Fold carefully to maintain the airiness you’ve built up. You want to distribute the condensed milk evenly without deflating your mixture. If you notice the texture becoming too runny, return the bowl to the microwave for 10-second bursts until it thickens back up to a scoopable consistency. The condensed milk will help prevent ice crystals from forming as it chills.
Freeze for Quick Setting (Optional)
For the best texture, transfer your ice cream to a loaf pan or airtight container and freeze for 1-2 hours. This step isn’t strictly necessary if you’re eating it immediately, but it creates a firmer texture that’s easier to scoop and serves better when you’re ready to enjoy it.
If you’re in a rush, you can serve it straight from the microwave—it’ll be soft-serve style and perfect for topping desserts or eating with a spoon. For a firmer texture, let it sit at room temperature for 5-10 minutes after microwaving before serving. Either way, you’ll have creamy, delicious ice cream in 10 minutes flat—no ice cream maker required!
Pro Tips For Making 10 Minute Ice Cream
- CHILL THE BOWL FIRST: Stick your mixing bowl in the freezer for 5 minutes before whipping the cream—this helps it stiffen faster and cuts your wait time. I learned this the hard way after watching my ice cream turn into soupy pudding because the bowl was warm.
- MEASURE CONDENSED MILK ACCURATELY: Use a kitchen scale for the condensed milk (about 1 cup per 2 cups cream) instead of eyeballing it—too much makes it cloyingly sweet, too little ruins the creamy texture. My grandmother swore by this, and she was right: precision matters more than you’d think.
- WHIP THE CREAM TO STIFF PEAKS: Stop mixing the moment the cream holds its shape when you lift the whisk—overmixing turns it buttery and grainy. I was skeptical until I tried it: underwhipped ice cream is soft, overwhipped is sad.
- ADD VANILLA LAST: Mix in the vanilla extract and salt after folding in the condensed milk mixture—this keeps the flavor balanced and prevents the salt from overpowering the cream. Sounds weird, but it works: your taste buds will notice the difference.
Health benefits of this 10 minute ice cream
Quick Protein Boost
This microwave ice cream packs a surprising protein punch thanks to the heavy whipping cream and condensed milk. A ½-cup serving delivers about 5 grams of protein, making it a better choice than traditional ice cream (which often has 1-2 grams per serving).
The condensed milk also adds calcium and vitamin D, supporting bone health—perfect for a dessert that doesn’t derail your nutrition goals. 💪
Low Sugar, High Satisfaction
While it’s still a treat, this recipe uses powdered sugar (not granulated) to control sweetness better. A ¼-cup serving contains roughly 20 grams of sugar, compared to 30+ grams in many store-bought brands.
Swap in monk fruit sweetener (½ cup) for a zero-sugar version—just reduce the condensed milk to ¼ cup to balance texture. The vanilla extract adds depth without extra calories.
Rich in Healthy Fats
The full-fat heavy whipping cream provides saturated fats that keep you full longer, unlike low-fat ice cream alternatives. These fats also enhance flavor perception, making the dessert taste richer without added sugar.
For a lighter option, replace 1 cup cream with ½ cup coconut cream (unsweetened) and ½ cup Greek yogurt—this cuts saturated fat by 40% while adding 10 grams of protein per serving.
No Artificial Additives
Unlike many commercial ice creams, this recipe avoids artificial stabilizers, emulsifiers, or preservatives. The condensed milk acts as a natural thickener, while the powdered sugar prevents ice crystals without gums like guar or carrageenan.
Even the optional food coloring (if used) is gel-based, which dissolves cleanly into the mixture without clumping.
Portion Control Made Easy
This recipe naturally encourages mindful eating—the 10-minute prep time means you’re less likely to overeat. Portion into small airtight containers (like ½-cup silicone molds) before freezing to avoid the “bottom-of-the-tub” effect.
A single serving is ~150 calories, compared to 250+ in many premium ice creams. Add fresh berries (like strawberries) for fiber and antioxidants to further boost nutrition.
Caffeine-Free Energy
For an afternoon pick-me-up, stir in ½ tsp instant espresso powder with the vanilla extract. The condensed milk pairs beautifully with coffee flavors, creating a mocha-style ice cream with natural caffeine (about 20mg per serving).
Skip the sugar crash of soda or energy drinks—this dessert delivers a smooth, creamy lift without the jitters. Perfect for post-workout recovery too! ✨
Nutrition facts
Frequently asked questions
Can I make this without a microwave?
Yes! If you don’t have a microwave, you can use an instant pot or slow cooker on the “sauté” function for 3-4 minutes instead. The key is to heat the mixture gently while stirring constantly to prevent overheating. For a no-heat version, try a no-churn method by blending 1 cup Greek yogurt with 1 cup whipped cream and ½ cup powdered sugar until smooth, then freezing for 4 hours. The texture will be slightly different but still delicious!
Why does my microwave ice cream get icy?
Icy texture happens when the mixture freezes too quickly or gets overheated. To prevent it: stir vigorously after every 30 seconds in the microwave, and freeze the final mixture for 1-2 hours before eating. For extra creaminess, add 1 tbsp corn syrup or 1 tbsp vodka (it lowers the freezing point!) to the whipped cream before microwaving. This trick works like magic for preventing ice crystals.
What are the best mix-ins for flavor variations?
For chocolate lovers, fold in ¼ cup cocoa powder or chocolate syrup with the vanilla. Try ½ cup crushed Oreos for cookie dough flavor, or ½ cup peanut butter for a Reese’s-style twist. Fruit fans can blend ½ cup frozen berries (like strawberries or mango) directly into the whipped cream before microwaving. For a boozy kick, add 1 tbsp coffee liqueur or Baileys with the vanilla extract.
How long does this ice cream keep in the freezer?
This microwave ice cream stays fresh for up to 2 weeks in an airtight container. For best texture, let it sit at room temperature for 5-10 minutes before scooping. If it develops ice crystals, simply microwave for 10-15 seconds and stir to restore creaminess. To prevent freezer burn, press plastic wrap directly on the surface before sealing the container. It’s perfect for meal prep or last-minute cravings!
Can I make this dairy-free?
Swap the heavy whipping cream for coconut cream (chilled overnight) and use coconut condensed milk instead of dairy. For extra richness, blend ½ cup cashew cream (soaked cashews blended with water) into the mixture. The texture will be slightly different but still creamy. Just reduce the microwave time to 2 minutes total, stirring every 20 seconds** to prevent overheating.

- 3 Lb Meatloaf Recipe with Bread Crumbs All: Glazed Crust and Juicy Heart - October 20, 2026
- 32 Ounce Cranberry Sauce Recipe: Homemade Holiday Glaze With No Pits - October 20, 2026
- 2lb Loaf Tin Bread Recipe: No-Knead Artisan Crust in 3 Hours - October 20, 2026