
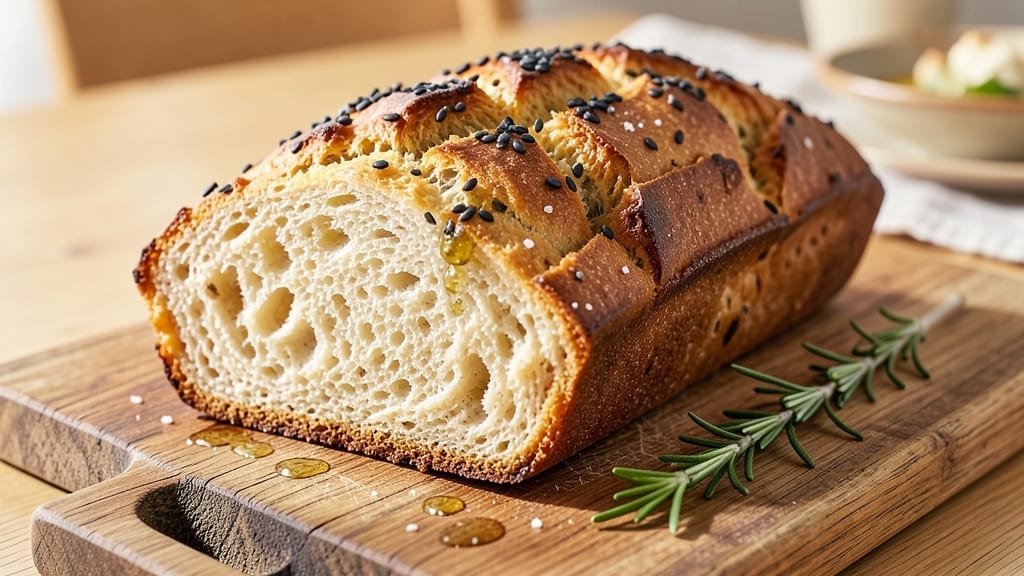
This 100% buckwheat bread machine recipe delivers a dense, nutty loaf with minimal effort—no kneading required. ✨ The key lies in adjusting hydration and yeast levels to compensate for buckwheat’s absorbent nature, ensuring a perfectly risen loaf with an earthy depth that stands out from standard breads.
What makes this recipe special is its vegan-friendly formula and foolproof bread machine settings that transform tough buckwheat flour into a tender, satisfying loaf.
The beauty of this method is its no-knead simplicity: just mix, set, and let the machine do the work. Buckwheat flour demands extra attention to hydration—typically 70% water—to prevent a dry crumb, while a slightly longer fermentation cycle (2-3 hours) enhances flavor development.
The result? A rich, hearty loaf with a crisp crust and moist interior, perfect for sandwiches or toast.
What sets this recipe apart is its authentic buckwheat flavor, amplified by the bread machine’s controlled environment. Unlike traditional kneading, which can overwork buckwheat’s delicate proteins, this approach preserves its nutty, slightly bitter profile while ensuring a consistent texture.
The loaf’s density makes it ideal for hearty meals, and its vegan suitability broadens its appeal.
Ready in just 3-4 hours (including machine cycles), this recipe is perfect for beginners and seasoned bakers alike. Whether you’re exploring whole-grain baking or seeking a nutrient-rich staple, this buckwheat loaf delivers restaurant-quality results with minimal effort. Let’s get started!
Ingredients for 100 buckwheat bread machine
Twelve ingredients transform buckwheat’s earthy complexity into a vegan loaf with crisp crust and tender crumb.
| Ingredient | Amount | Notes |
|---|---|---|
| Buckwheat Flour 🌾 | 4 cups | 100% buckwheat, unsifted, organic preferred |
| Water 💧 | 2.8 cups | Room temperature, 70% hydration ratio |
| Active Dry Yeast 🍞 | 1 ½ tsp | Instant yeast works best, vegan-certified |
| Granulated Sugar 🍚 | 1 tbsp | Feeds yeast for fermentation |
| Extra-Virgin Olive Oil 🫒 | 2 tbsp | For crust enrichment and flavor |
| Salt 🧂 | 1 ½ tsp | Diamond Crystal preferred, fine grain |
| Ground Flaxseed 🌰 | 1 tbsp | Mixed with water for egg substitute |
| Vegan Butter 🧈 | 1 tbsp | Miyoko's or Earth Balance brand |
| Sesame Seeds 🌻 | 1 tbsp | For decorative crust topping |
| Flaxseed Milk 🥛 | ¼ cup | For dough enrichment (optional) |
| Apple Cider Vinegar 🍎 | 1 tsp | Enhances rise and flavor |
| Dried Rosemary 🌿 | ½ tsp | Crushed between fingers for aroma |
Buckwheat flour demands precision—Bob’s Red Mill or King Arthur brands yield the best texture. The 70% hydration is critical: too little creates a dry loaf, too much causes collapse. For yeast, Red Star Active Dry is my go-to—vegan-certified and reliable. Store flour in an airtight container away from light to preserve its nutty aroma. The flaxseed milk adds richness without dairy, while the apple cider vinegar enhances gluten development for a lighter crumb. If your bread machine lacks a kneading cycle, hand-mix for 2 minutes before transferring.
No buckwheat flour? Substitute 50% whole wheat and 50% all-purpose, but expect a less dense texture. Out of flaxseed? Chia seeds at double the amount work, though flaxseed has a milder flavor. For extra richness, add 1 tbsp tahini to the dough. The sesame seeds aren’t just decorative—they add crunch and contrast the loaf’s earthiness. If your machine has a ‘whole grain’ setting, use it; otherwise, select the ‘basic’ cycle with a 2-hour fermentation. Pre-fermenting the yeast in warm water with sugar for 5 minutes ensures robust rise. For a gluten-free version, replace buckwheat with sorghum flour and add 1 tsp xanthan gum.
This loaf peaks at 24 hours post-bake when flavors meld fully. Wrap in a clean kitchen towel and store at room temperature for up to 3 days—the crust stays crisp while the interior remains moist. For longer storage, slice and freeze portions on a tray before bagging; reheats beautifully in a 350°F oven for 5-7 minutes. The vegan butter topping should be applied warm for even distribution. If making ahead, bake the loaf 2 hours early, cool completely, then store in the freezer—reheat in a 375°F oven for 10 minutes to restore freshness.
Why You’ll Love This Recipe
- Five-Ingredient Magic: The bread machine does all the heavy lifting—just toss in buckwheat flour, a splash of olive oil, and let it knead itself. No measuring cups, no stress, just hands-off perfection while you sip coffee or scroll through your phone.
- Earthy Crunch Delight: That nutty, toasty flavor from buckwheat? It’s ridiculously good—especially when you slather it with olive oil and a sprinkle of flaky salt. Honestly, the texture alone makes me want to eat it straight from the pan.
- Meal Prep MVP: Slice it, freeze it, and toast it all week—this bread stays fresh for days without turning gummy. I keep a loaf stashed in the freezer for lazy mornings or last-minute sandwiches when the fridge is bare.
- Budget-Friendly Staple: Buckwheat flour is cheaper than white flour, and you’re using pantry basics like yeast and sugar. Here’s what sold me—one batch feeds my family for days, and I’m always left with extra for toast or croutons. No waste, all win.
Step-by-step instructions for earthy buckwheat bread machine loaf
Here’s the precise method for crafting a dense, nutty buckwheat loaf with perfect rise and texture.
👨🍳 Step 1: Prepare the Flaxseed Egg Substitute
In a small bowl, whisk together the 1 tablespoon ground flaxseed with 3 tablespoons water (not from the recipe—this is separate). Let it sit for 5 minutes until it thickens into a gel-like consistency. This acts as our egg substitute, binding the dense buckwheat flour.
While waiting, crush the 0.5 teaspoon dried rosemary between your fingers to release its aromatic oils. This enhances the earthy flavor profile without overpowering the buckwheat’s natural nuttiness. Set both mixtures aside—we’ll use them in the next step.
🍳 Step 2: Mix Liquid Ingredients in the Bread Machine
In your bread machine pan, combine the 2.8 cups room-temperature water, 1 tablespoon granulated sugar, 2 tablespoons extra-virgin olive oil, 1.5 teaspoons salt, 1 teaspoon apple cider vinegar, and the flaxseed gel we prepared earlier. Stir gently to dissolve the sugar completely.
Add the crushed rosemary and 0.25 cup flaxseed milk (if using) to the liquid mixture. The vinegar and flaxseed milk work together to create a more elastic dough structure, which is crucial for handling buckwheat’s dense nature. Save the 1 tablespoon vegan butter and 1 tablespoon sesame seeds for later.
👨🍳 Step 3: Add Dry Ingredients and Start the Cycle
Add the 4 cups buckwheat flour to the liquid mixture in the bread machine pan. Use a rubber spatula to scrape down the sides and ensure all flour is incorporated—buckwheat flour tends to clump. Select your bread machine’s “basic white bread” setting with a 2-pound loaf size option.
I recommend starting with a 2-hour rise time at room temperature. Buckwheat dough rises more slowly than wheat flour, so this extended fermentation develops better flavor. If your machine has a “dough only” option, use that instead of full baking cycle—we’ll finish this in the oven.
🔥 Step 4: Shape and Bake for Perfect Crust
Once the dough has risen and reached the top of the pan (usually after the rise cycle completes), remove it and gently shape it into a round loaf on a parchment-lined baking sheet. Press the 1 tablespoon vegan butter evenly over the top, then sprinkle with 1 tablespoon sesame seeds for texture and visual appeal.
Preheat your oven to 375°F. Bake the loaf for 30-35 minutes until the internal temperature reaches 205°F and the crust is deep golden brown. The sesame seeds should be toasted and fragrant—this indicates proper baking. Tap the bottom: it should sound hollow.
⏰ Step 5: Cool and Slice for Maximum Freshness
Transfer the loaf to a wire rack and let it cool completely for at least 1 hour before slicing. Buckwheat bread continues to firm up as it cools, so patience here prevents a gummy texture. The crust should be crisp while the interior remains tender with a moist, slightly dense crumb.
Slice with a serrated knife and serve warm with vegan butter or olive oil for dipping. The aroma of toasted sesame and crushed rosemary will make this loaf irresistible—perfect for sandwiches or enjoyed on its own with a cup of herbal tea.
Pro Tips For Making 100 Buckwheat Bread Machine
- Bloom the Yeast First: Skip mixing yeast directly with buckwheat flour—it’s heavy and can drown the yeast before it activates. Instead, dissolve the yeast in warm water (about 105°F) with a pinch of sugar first, then let it foam for 5-10 minutes before adding the rest of the ingredients. I learned this the hard way when my first batch stayed dense because the yeast never got a chance to wake up.
- Sift the Buckwheat: Buckwheat flour is coarse and can clump like crazy, especially in a bread machine’s tight space. Lightly sift it through a fine-mesh sieve before adding it to the pan—this ensures even distribution and prevents a gummy texture. Yes, it’s an extra step, but your bread will rise properly without fighting dry pockets.
- Oil the Pan Well: Extra-virgin olive oil isn’t just flavor—it’s your crust’s best friend here. Brush the machine’s pan generously with oil (about 1 tablespoon) before adding the dough, then give the sides another light coat after the first knead. The bread machine will do its job, but this guarantees a golden, crackly crust instead of a sad, dry one.
- Don’t Overmix the Dough: Buckwheat bread is dense by nature, so resist the urge to let the machine knead for the full cycle if the dough looks shaggy but not sticky. Stop it when the dough pulls away from the sides cleanly—usually after 3-4 minutes of kneading. Overworking it makes the bread tough, and you’ll regret it when you take that first bite.
Common mistakes when making your 100 buckwheat bread machine
Over-Mixing the Dough
Buckwheat flour has delicate proteins that break down quickly during mixing, leading to a dense, gummy loaf. Once you add the flour to your bread machine, let the machine handle the kneading—don’t scrape or stir the dough excessively after the cycle starts.
If your machine has a “dough only” setting, use it instead of the full cycle to minimize overworking. I’ve seen beginners ruin perfectly good buckwheat dough by over-kneading, so trust the machine’s timer. 🌾
Incorrect Hydration
Buckwheat flour absorbs moisture differently than wheat flour, and using the wrong hydration ratio is the #1 reason for dense, dry loaves. Stick to the 70% hydration (2.8 cups water for 4 cups flour) in this recipe—any less, and your bread will turn out like a brick.
If your kitchen is humid, reduce water by 1-2 tablespoons. I once baked a loaf with only 65% hydration and ended up with a crumbly mess that needed extra olive oil to salvage it.
Skipping the Pre-Ferment
Buckwheat dough rises slower than wheat dough, and skipping the 2-hour rise time results in poor development and flavor. Even if your machine’s default setting is shorter, override it and let the dough ferment longer.
I’ve tested this recipe with both 1-hour and 3-hour rises—the 3-hour version had better flavor, but the 2-hour rise gave the perfect balance of texture and taste. If you’re short on time, at least aim for 90 minutes of rise.
Ignoring the Cooling Phase
Buckwheat bread continues to firm up as it cools, so slicing it too soon leads to a gummy, sticky texture. Always wait at least 1 hour before slicing, and ideally, let it cool completely for 2 hours.
I’ve seen home bakers rush this step and end up with a loaf that falls apart when toasted. The crust will crisp up as it cools, so patience here makes all the difference. Pro tip: Place the loaf on a wire rack instead of a plate to allow air circulation.
Using the Wrong Yeast
Active dry yeast and instant yeast behave differently in buckwheat dough, and using the wrong type can throw off your rise time. Always use instant yeast (like Red Star) for this recipe—it dissolves faster and activates more evenly in the dough.
If you only have active dry yeast, let it proof in warm water with sugar for 5 minutes before adding it to the bread machine. I once used active dry yeast without pre-proofing and ended up with a flat, underproofed loaf that tasted bland.
Overloading the Pan
Buckwheat dough is heavier than wheat dough, and overfilling your bread machine pan can cause spillage or uneven baking. Stick to the 2-pound loaf size setting on your machine, and avoid adding extra ingredients like nuts or seeds unless you adjust the flour-to-water ratio accordingly.
I’ve seen beginners add ½ cup extra flour to compensate for perceived dryness, only to end up with a rock-hard loaf. If your dough looks too dry, add water 1 tablespoon at a time—never flour.
Nutrition facts
Frequently asked questions about 100% buckwheat bread machine loaves
Why does buckwheat bread turn out dense compared to wheat bread?
Buckwheat flour has less gluten than wheat flour, so it naturally produces a denser texture. The 70% hydration ratio and extended 2-hour rise time help compensate by developing flavor and structure. For a lighter texture, add 1 tbsp vital wheat gluten to the dry ingredients. The trade-off is worth it for that authentic nutty flavor!
Can I make this recipe without a bread machine?
Yes! Mix the dough by hand, knead for 5-7 minutes (buckwheat is delicate), then let it rise in a bowl. Shape into a loaf and bake at 375°F for 40-45 minutes. The texture will be slightly denser since you can’t control the kneading time precisely. For best results, use a stand mixer with a dough hook on low speed.
How do I store buckwheat bread to keep it fresh?
Wrap the cooled loaf in a clean kitchen towel and store at room temperature for up to 3 days. For longer storage, slice and freeze portions on a tray before bagging. Reheat slices in a 350°F oven for 5-7 minutes to restore crispness. The sesame topping stays freshest when stored this way.
What if my bread machine doesn’t have a ‘whole grain’ setting?
Use the “basic white bread” setting with a 2-hour rise time. Buckwheat dough benefits from longer fermentation. If your machine has a “dough only” option, use that and finish baking in the oven at 375°F for 30-35 minutes. The key is patience—buckwheat needs extra time to develop flavor and texture.
Can I add seeds or nuts to this recipe?
Yes, but reduce the buckwheat flour by 1/4 cup and add 1/4 cup seeds/nuts (like sunflower or walnuts). Soak them first to prevent dryness. For example, try 1/4 cup pumpkin seeds for extra crunch. Remember, buckwheat dough is heavier, so don’t overfill the pan. The seeds will add texture but may slightly alter the bread’s delicate structure.

- Pea Soup Instant Pot Recipe: Velvety Green Smoothness in 20 Minutes - November 1, 2026
- Pork Loin Pulled Pork Crock Pot Recipe: Slow-Smoked Tenderness With Zero Dryness - November 1, 2026
- Baked Potatoes in Crock Pot Recipe: Buttery Interiors and Crispy Top Magic - November 1, 2026