
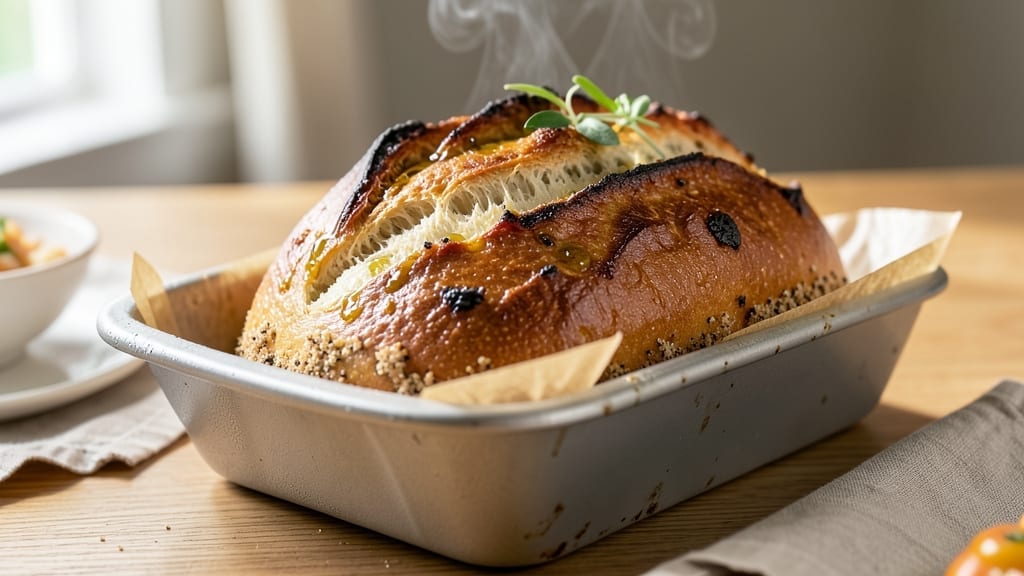
Making a 2-pound loaf bread machine recipe with a crisp artisan crust has never been easier—just load the ingredients, set the machine, and walk away. This method delivers bakery-style results without the fuss of kneading or shaping, perfect for busy home bakers who crave that satisfying crust.
The secret lies in precise ingredient ratios and the right machine settings, which transform simple flour and yeast into a loaf with a golden, crackling exterior and tender interior.
This recipe uses basic pantry staples—all-purpose flour, active dry yeast, and water—plus a touch of sugar and salt for flavor development. The bread machine handles the heavy lifting, including kneading, rising, and baking, in one seamless cycle.
For extra texture, you can add seeds or herbs during the kneading phase, though the classic version focuses on that perfect crust-to-crumb ratio. It’s a foolproof process that yields a loaf weighing exactly 2 pounds, ideal for sandwiches or serving as a side.
The result is a loaf with a crisp, caramelized crust that shatters when you tap it, paired with a soft, airy interior that’s light yet sturdy enough to hold thick slices. Unlike store-bought bread, this version stays fresh for days, with a flavor that deepens as it cools.
Whether you’re feeding a family or prepping for meal prep, this recipe delivers restaurant-quality bread with minimal effort.
For those with dietary preferences, you can easily swap all-purpose flour for whole wheat or gluten-free blends, though the texture may vary slightly. The bread machine’s even heat ensures consistent results every time, making it a reliable go-to for homemade bread.
Ready to bake? Here’s everything you need to get started.
Ingredients for 2 lb loaf bread machine
Basic pantry staples transform into a bakery-style loaf with minimal effort.
| Ingredient | Amount | Notes |
|---|---|---|
| All-Purpose Flour 🌾 | 3 ½ cups | Spooned and leveled, not scooped |
| Active Dry Yeast 🍞 | ¼ tsp | Ensure expiration date is fresh |
| Granulated Sugar 🍚 | ½ tsp | For yeast activation |
| Salt 🧂 | 1 tsp | Diamond Crystal preferred |
| Water 💧 | 1 ¼ cups | Room temperature, 75°F |
| Olive Oil 🫒 | 1 tbsp | Extra-virgin for richness |
| Honey 🍯 | 1 tbsp | Optional for crust color |
| Milk 🥛 | 1 tbsp | Optional for softness |
| Cornmeal 🌽 | 2 tbsp | For dusting bread pan |
The flour is the foundation—King Arthur or Gold Medal brands yield the best texture for bread machine baking. Check the expiration date on your yeast (Fleischmann’s is reliable) and store it in the fridge to extend freshness. Room-temperature water is critical; cold water slows yeast activation, while hot water kills it. For the crust, honey or extra olive oil enhances browning—skip these if you prefer a simpler flavor. The cornmeal isn’t just for dusting; it adds subtle sweetness and prevents sticking in the pan.
No all-purpose flour? King Arthur white whole wheat or Bob’s Red Mill 1:1 gluten-free blend work well, though texture may vary slightly. Short on yeast? Instant yeast can be used at the same ratio, but active dry requires proofing in warm water first. The milk addition is optional but creates a softer crumb—any milk works, even plant-based. For a sweeter loaf, add 1 extra tablespoon of honey or swap the sugar for maple syrup. If you forget olive oil, melted butter works too, though it adds richness.
Store the loaf in a bread bag or airtight container at room temperature for 2-3 days—it’ll stay fresh longer than store-bought. For extended storage, slice and freeze portions for up to 3 months. The crust hardens as it cools, so reheat slices in a toaster or oven for crispiness. Leftovers? Toast them—the second day’s crust is even better after the bread has rested. Avoid refrigerating whole loaves; it dries out the crumb faster.
Why You’ll Love This Recipe
- Five-Ingredient Magic: I swear by this combo—flour, yeast, sugar, salt, and water. That’s it. No fancy mix-ins or last-minute grocery runs. The bread machine does all the heavy lifting while I sip coffee and scroll.
- Crusty-Center Perfection: The crust gets that golden, crackly finish you’d pay extra for at a bakery, but the inside stays soft and pillowy—like a hug from your favorite oven. Honestly, it’s the kind of bread that makes you pause mid-slice just to admire it.
- Weeknight Wonder: Need dinner rolls for spaghetti? A side for soup? This loaf fits perfectly in my meal prep routine. I make two batches on Sunday—one for sandwiches, one for toasting—and they last until Thursday. Zero waste, zero stress.
- Budget-Friendly Staple: A 2-pound loaf costs me about $1.50 to make, and it feeds my family for days. Freeze half for emergencies (yes, even my picky teenager eats it straight from the freezer). That’s real savings, folks.
Step-by-step instructions for hands-off artisan bread in a bread machine
Let’s create a perfectly textured loaf with a crisp crust and tender crumb—your bread machine will do most of the work.
Prepare the Bread Machine Pan and Ingredients
First, lightly grease a 2-pound loaf pan with olive oil or line it with parchment paper for easy removal. Dust the bottom with 2 tablespoons cornmeal—this prevents sticking and creates a golden crust. Measure all ingredients precisely: 3.5 cups all-purpose flour, 0.25 teaspoon active dry yeast, 0.5 teaspoon granulated sugar, 1 teaspoon salt, 1.25 cups room-temperature water, 1 tablespoon olive oil, 1 tablespoon honey, and 1 tablespoon milk. The honey and milk are optional but enhance flavor and texture.
I always check the yeast expiration date—old yeast won’t activate properly, and you’ll end up with a dense loaf. Place the yeast in a small bowl with 1 teaspoon of the flour and 1 tablespoon of the water from your measurements. Let it sit for 5 minutes until foamy. This pre-activation ensures even rising in the bread machine.
Combine Wet and Dry Ingredients in the Bread Machine
In the bread machine pan, combine the 1.25 cups water, 1 tablespoon olive oil, 1 tablespoon honey, and 1 tablespoon milk. Stir gently to blend. Add the 3.5 cups flour, 1 teaspoon salt, and the pre-activated yeast mixture. Use a silicone spatula to scrape down the sides and ensure everything is evenly distributed—this prevents dry pockets in the final loaf.
The honey adds subtle sweetness and a deeper crust color, while the milk contributes softness. If you skip these, your bread will still be delicious but slightly less rich. Close the bread machine lid and select the “Basic” or “White Bread“ setting for a 2-pound loaf. Most machines take 3 to 3.5 hours for the full cycle, including kneading, rising, baking, and cooling.
Monitor the Kneading and Rising Phases
During the first 20 minutes of the cycle, your bread machine will knead the dough. You’ll hear it mix vigorously—this is normal. After kneading, the machine will switch to rising mode. The dough should double in size within 1 to 1.5 hours. If it doesn’t rise significantly, check that your yeast is fresh and your water is room temperature (75°F)—cold water slows fermentation.
Here’s the thing—bread machines vary in performance. If your dough isn’t smooth after kneading, manually press it down with a wet spatula and let the machine restart the kneading phase. This ensures a uniform texture. The rising phase is critical; if the dough overproofs (takes too long to rise), your loaf will be dense and flat.
Bake Until Golden and Hollow-Sounding
Once rising is complete, the bread machine will automatically switch to baking mode. The dough will bake for 45 to 60 minutes until the internal temperature reaches 190°F. You’ll know it’s done when the crust turns a deep golden brown and tapping the bottom produces a hollow, crisp sound. If the crust darkens too quickly, tent the pan with foil to prevent over-browning.
I always check the crust color and sound test—this guarantees doneness. Overbaking dries out the bread, while underbaking leaves it gummy. If you’re unsure, use an instant-read thermometer to confirm the internal temperature. Let the bread cool in the pan for 10 minutes before removing it to a wire rack to prevent collapsing.
Serve and Store for Maximum Freshness
Slice the loaf while still warm for the best texture. The crumb should be soft and evenly textured, with a crisp, crackly crust. Store any leftovers in an airtight container or bread bag at room temperature for 2 to 3 days. For longer storage, wrap the cooled loaf in plastic and freeze it for up to 3 months. Thaw at room temperature before serving.
This recipe yields 2 servings per loaf, but you can easily double it for a 4-pound loaf by scaling all ingredients accordingly. The hands-off approach ensures consistent results every time—no guesswork, just perfect bread with minimal effort.
Pro Tips For Making 2 Lb Loaf Bread Machine
- Weigh Your Flour: I learned this the hard way—scooping flour from the bag packs it too loosely. Use a kitchen scale for the 2 lbs of all-purpose flour; 1 cup packed is about 160g, but scooping leaves gaps. Your bread will be lighter and more consistent if you measure by weight.
- Bloom the Yeast First: Skip the “just toss it in” approach. Mix the yeast with the water and 1 teaspoon of sugar in a separate bowl, let it sit for 5 minutes until foamy. This guarantees your yeast is active before it hits the flour—no more dough that takes forever to rise or flops in the machine.
- Don’t Overload the Pan: Your bread machine’s loaf pan has a limit. If the dough rises above the rim during kneading, it’ll spill and stick like glue. After the first knead cycle, press the dough down firmly into the pan before the rise phase—even if it looks messy, it’ll bake evenly.
- Use Warm Water, Not Hot: I was skeptical until I tried it: 110°F (43°C) water works best for this recipe. Too hot and you kill the yeast; too cold and the dough drags. Fill a measuring cup with hot water, let it cool for 2 minutes, then add the yeast and sugar. Your dough will rise faster and taste fresher.
Make-ahead tips for this dish
Prep Ahead Strategy
Measure and mix all dry ingredients—flour, yeast, sugar, salt—the night before in an airtight container. Store them in the fridge until ready to use. I keep the wet ingredients (water, olive oil, honey) in separate small jars in the fridge too.
This saves 10 minutes of prep time the next morning and keeps everything fresh. 💡
Dough Prep Shortcut
Combine all ingredients except the yeast in the bread machine pan the evening before. When you’re ready to bake, simply add the yeast (pre-activated in warm water) and start the cycle.
This method works best if you store the pan in the fridge overnight—just let it sit at room temperature for 30 minutes before adding yeast to activate properly.
Freezer-Friendly Dough
For maximum convenience, prepare the dough completely (including kneading) and let it rise until just before it peaks. Shape it into a loaf, place it in a greased loaf pan with cornmeal, cover tightly with plastic wrap, and freeze for up to 3 months.
When ready to bake, thaw in the fridge overnight, then complete the rising and baking cycle in your bread machine. The texture stays just as fresh! ❄️
Batch Baking Tips
Make two 2-pound loaves at once by doubling all ingredients and using a large bread machine pan or two standard pans. This is perfect for meal prep—slice and freeze individual portions. I like to label each loaf with the date so I can track freshness.
For variety, alternate between this recipe and a whole wheat version to keep things interesting in your freezer stash.
Crust Perfection Hack
Brush the fully baked loaf with melted butter while still warm for an extra-crisp crust. For a sweeter finish, drizzle with honey-glaze (mix 1 tbsp honey with 1 tsp water, heat until warm).
Store these treated loaves in a paper bag at room temperature—they’ll stay fresh longer and taste even better the next day. 🌟
Storage Timeline
Label your stored loaves clearly: “Room Temp – 2 Days”, “Fridge – 5 Days”, or “Freezer – 3 Months”. I use masking tape and a Sharpie for quick notes.
When reheating frozen slices, wrap them in a damp paper towel and microwave for 20 seconds—this restores moisture without making them soggy. For oven reheating, bake at 350°F for 5-7 minutes until crispy again.
Nutrition facts
Frequently asked questions
Why does my bread machine loaf come out dense instead of light and airy?
Dense bread usually means the dough didn’t rise properly. Check your yeast—it must be fresh (test by dissolving in warm water with sugar; it should foam in 5 minutes). Cold water (below 75°F) or old yeast slows fermentation. Also ensure your bread machine pan isn’t overfilled—this recipe’s 2-pound yield should leave 1 inch headspace for rising. If your machine has a “dough only” setting, try that first.
Can I use whole wheat flour instead of all-purpose for this 2-pound loaf?
Yes, but adjust the ratio to 2 cups all-purpose + 1.5 cups whole wheat flour for better texture. Whole wheat absorbs more liquid, so reduce water by 1 tablespoon. For a 100% whole wheat version, add 1 extra tablespoon of oil to prevent dryness. The crust will be darker but still crisp—just bake 10 minutes longer if needed.
How do I know when the bread is fully baked in the machine?
Look for three signs: golden brown crust, a hollow sound when tapped on the bottom, and an internal temp of 190°F. The machine should automatically stop, but some models need manual confirmation. If the crust darkens too quickly, tent with foil during the last 15 minutes of baking. Never rely on time alone—always check these visual cues!
What can I add to this basic recipe for flavor variations?
Try these easy upgrades during the kneading phase: 1 tablespoon garlic powder for savory loaves, 1/2 cup dried cranberries with 1 teaspoon cinnamon for sweet bread, or 2 tablespoons sesame seeds for nutty crunch. For herbs, add 1 tablespoon chopped rosemary or thyme. Just reduce flour by 1/4 cup to accommodate add-ins. The bread machine will distribute everything evenly!
Can I make this recipe in a smaller bread machine pan?
Not recommended for this specific 2-pound recipe—smaller pans (under 1.5 pounds) will overfill and prevent proper rising. If you must, reduce flour to 3 cups and water to 1 cup, but expect a denser texture. For best results, use the pan size specified in your machine’s manual. The 2-pound yield creates that perfect crust-to-crumb ratio that makes this recipe special.

- 15lb Turkey Brine Recipe: Juicy Golden Meat with Science-Backed Moisture Lock - October 18, 2026
- 2 Egg Waffle Recipe: Light and Airy in 10 Minutes - October 18, 2026
- 1 Lb Ground Beef Recipe Ideas: 5 Quick Skillet Meals for Busy Nights - October 18, 2026