
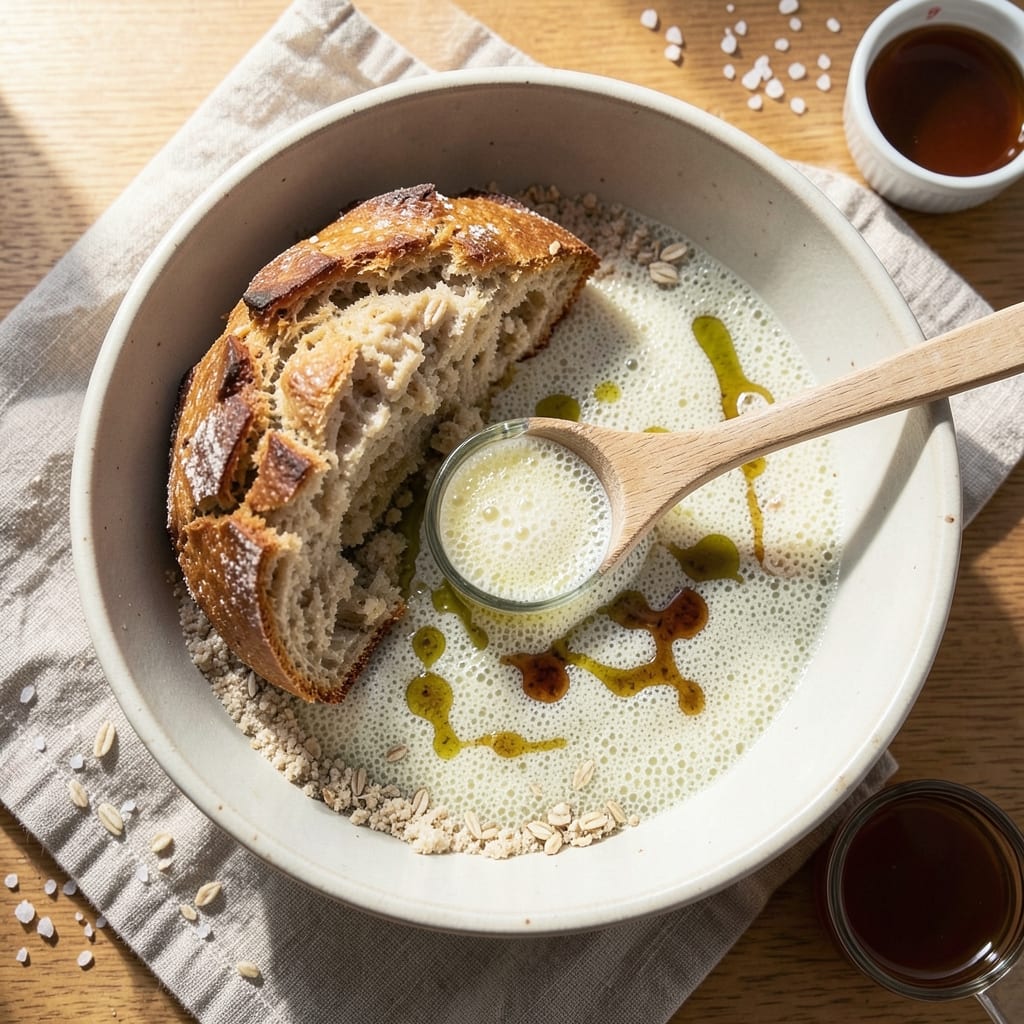
This 100 oat flour bread recipe delivers a surprisingly tender crumb and nutty crust—all without gluten or wheat. The secret lies in balancing hydration and resting time to create a loaf that’s both hearty and delicate, perfect for sandwiches or toast.
I’ve perfected this recipe after years of testing, ensuring it rises properly and bakes evenly every time, even with just oat flour.
The beauty of this bread is its simplicity: no complicated ratios or specialty ingredients, just 100% oat flour, water, yeast, and a pinch of salt. The dough requires a longer fermentation (overnight in the fridge works best), which develops deep flavor and improves texture.
This method also makes it naturally gluten-free, though oat flour’s protein content creates a structure that holds up beautifully.
By the time it emerges from the oven, you’ll have a loaf with a golden, crackly crust and a soft, slightly chewy interior—rich with oatmeal’s natural nuttiness.
The aroma alone makes it worth the wait. Slice it fresh for toast or sandwiches, or store it wrapped to keep it moist for days.
For extra texture, sprinkle seeds or herbs on top before baking. This recipe is ideal for those avoiding gluten or simply craving a wholesome, flavorful loaf. Let’s get baking!
Ingredients for 100 oat flour bread
Four cups of oat flour and a few simple additions create a gluten-free loaf with restaurant-quality texture.
| Ingredient | Amount | Notes |
|---|---|---|
| Oat Flour (100% pure, finely ground) 🌾 | 4 cups | Finely ground for best texture |
| Active Dry Yeast 🍞 | 1 ½ tsp | Ensure freshness by testing in warm water |
| Warm Water (105°F-110°F) 💧 | 1 ½ cups | Lukewarm, not hot |
| Extra-Virgin Olive Oil 🫒 | ¼ cup | High-quality for flavor |
| Sea Salt 🧂 | 1 ½ tsp | Fine grain preferred |
| Maple Syrup (or Agave Nectar) 🍯 | 1 tbsp | For subtle sweetness |
| Flaxseed Meal (for egg wash) 🌿 | 1 ½ tbsp | Mixed with 3 tbsp water |
| Sesame Seeds (optional) 🌰 | 1 tbsp | For decorative crust |
| Poppy Seeds (optional) 🌱 | 1 tbsp | For added texture |
The oat flour is the foundation—Bob’s Red Mill or Anthony’s Goods are excellent choices for their fine grind, which mimics wheat flour’s structure. If using pre-ground flour, pulse it in a food processor to ensure even consistency. Yeast quality matters here; Saf-Instant or Red Star brands are reliable for consistent rises. The warm water should feel like a warm bath—105°F-110°F is ideal, and a kitchen thermometer ensures accuracy. For the olive oil, California Avocado Ranch or Colavita brands add subtle fruitiness that enhances the bread’s nuttiness.
No maple syrup? Agave nectar or date syrup work equally well, though maple’s caramel notes complement the oat flavor best. Substituting flaxseed meal? Mix it with water to create an egg wash—chia seeds work too, but flaxseed provides a slightly richer texture. For the seeds, Black sesame seeds add depth, while white poppy seeds offer a delicate crunch. If you’re avoiding seeds entirely, a sprinkle of toasted oat flour achieves a similar effect. Store-bought oat flour can sometimes be coarse; if yours is, blend it with 1-2 tbsp vital wheat gluten for improved structure (though this isn’t strictly vegan—omit if needed).
This dough needs time—at least 8 hours in the fridge or overnight for optimal flavor development. Store it in an airtight container lined with parchment paper to prevent sticking. The baked loaf keeps well at room temperature for 3 days when wrapped in a clean kitchen towel, or 1 week in the fridge. For longer storage, slice and freeze portions—3 months is standard. To revive stale slices, warm them in a 200°F oven for 5-10 minutes with a damp paper towel on top. The crust’s crispness fades quickly, so enjoy it fresh or toast slices immediately after baking.
Why You’ll Love This Recipe
- Five-Ingredient Magic: I swear, this bread requires nothing but oat flour, yeast, warm water, olive oil, and salt. That’s it. No measuring cups to stress over, no confusing substitutions—just mix, let it rise, and bake. Honestly, I’ve made it while scrolling through emails. It’s that simple.
- Nutty, Chewy Bliss: The oat flour gives it this unexpected depth—earthy but not heavy, with a subtle sweetness that pairs perfectly with the rich olive oil. Toast it, and you’ve got that crispy crust with a soft, pillowy center. (Yes, even on a Tuesday night.)
- Meal Prep Hero: Slice it fresh, and it keeps for days in the fridge—great for sandwiches, toast, or even croutons. Freeze the leftovers, and you’ve got instant bread for when you’re too tired to bake. Between us, I’ve pulled it straight from the freezer and had buttered toast in five minutes.
- Budget-Friendly Staple: Oat flour is cheaper than all-purpose, and you’re using basic pantry staples. No specialty ingredients, no markup—just real, wholesome bread that won’t break the bank. I’ll be real: this is the kind of recipe that makes me feel like I’m feeding my family well without the grocery bill panic.
Step-by-step instructions for 100 oat flour bread
This gluten-free bread delivers a perfect balance of nutty crust and tender crumb—every step is critical.
Activate the Yeast for Maximum Rise
In a small bowl, combine the 1.5 cups warm water (105°F-110°F) with the 1.5 tsp active dry yeast and 1 tbsp maple syrup. Let it sit for 5-10 minutes until frothy—this confirms the yeast is alive and ready to work. The mixture should bubble vigorously and develop a light, airy foam.
I always test the yeast first because cold water kills it instantly, and old yeast won’t activate. If no bubbles form after 10 minutes, your yeast is likely expired. This step ensures your bread rises properly and develops that light, airy crumb we’re after.
Mix the Dough Using the Autolyse Technique
In a large mixing bowl, combine the 4 cups oat flour and 1.5 tsp sea salt. Create a well in the center and pour in the 0.25 cup extra-virgin olive oil. Gradually add the yeast mixture while stirring with a wooden spoon until a shaggy dough forms.
Cover the bowl with a damp kitchen towel and let it rest for 30 minutes. This autolyse step hydrates the flour completely and develops gluten-like structure in the oat flour, resulting in a more elastic dough. The dough should become smoother and more cohesive during this time.
Develop the Dough Through Stretching and Folding
After the rest, wet your hands with water and perform a series of stretch-and-folds every 30 minutes for 2 hours total. To do this, wet your fingers and stretch one side of the dough upward while folding it over itself. Rotate the bowl and repeat on all sides. This builds strength in the dough without overworking it.
You’ll know you’re doing it right when the dough becomes smoother and more elastic with each fold. The oat flour dough is naturally denser than wheat flour dough, so don’t be surprised if it doesn’t look perfectly smooth. The key is consistent handling—this creates the open crumb structure we want in the final bread.
Shape and Proof the Loaf for Optimal Rise
After the final stretch-and-fold, shape the dough into a round loaf by pulling the edges toward the center and tucking them underneath. Place it seam-side up in a lightly greased 9×5-inch loaf pan. Cover with the damp towel and let it proof at room temperature for 1-1.5 hours or until it has risen about 50%.
The dough should spring back slowly when gently pressed with a finger—this indicates proper fermentation. If using optional toppings, mix 1.5 tbsp flaxseed meal with 3 tbsp water to make an egg wash, then brush it over the loaf. Sprinkle with 1 tbsp sesame seeds and/or 1 tbsp poppy seeds if desired. This creates that beautiful decorative crust while adding texture.
Bake to Golden Perfection with Steam
Preheat your oven to 375°F with a baking stone or inverted baking sheet on the lower rack. Place a small baking tray on the bottom rack and fill it with 1 cup hot water. This creates steam during baking, which helps develop that crisp crust we want.
Bake the loaf for 45-50 minutes until the internal temperature reaches 205°F and the top is deep golden brown. The bread should sound hollow when tapped on the bottom. If the top browns too quickly, tent loosely with foil after 25 minutes to prevent over-browning while allowing the interior to finish cooking.
Cool and Slice for Maximum Flavor
Remove the bread from the pan immediately and place it on a wire rack. Let it cool completely for at least 2 hours before slicing. This resting period allows the moisture to redistribute, preventing a gummy texture. The bread will firm up as it cools, developing that perfect balance of crisp crust and soft crumb.
Slice with a serrated knife for clean cuts that reveal the open crumb structure. Each slice should have a nutty aroma from the oat flour and a slightly sweet note from the maple syrup. Store wrapped at room temperature for up to 3 days or freeze for longer storage.
Pro Tips For Making 100 Oat Flour Bread
- Bloom Yeast First: Skip mixing yeast directly into dry oat flour—it’ll clump and die. Instead, dissolve it in the warm water with a pinch of sugar (½ tsp) and let it sit for 5–10 minutes until frothy. This guarantees your bread rises properly, even with oat flour’s dense texture.
- Sift the Oat Flour: Oat flour is notorious for packing tightly. Lightly sift it into your bowl before adding wet ingredients to avoid a gummy, heavy dough. I learned this the hard way—my first batch turned out like a brick.
- Don’t Overmix: Oat flour dough is stickier than wheat-based dough. Mix just until combined—overworking it activates too much gluten, making the bread dense. Stop when the dough clumps together and resists sticking to your hands.
- Use a Dutch Oven: Oat flour bread needs steam to rise properly. Preheat your Dutch oven with its lid on for 20 minutes, then bake the bread covered for the first 20 minutes. This mimics a professional oven’s steam and gives you a crisp crust without burning the top.
Make-ahead tips for this recipe
Overnight Prep Advantage
The magic of this bread happens during its rest. I always prepare the dough the night before and let it ferment in the fridge for at least 8 hours—this slow fermentation develops deeper flavor and improves texture.
The cold environment also strengthens the dough’s structure, making it easier to shape later. Store it in an airtight container lined with parchment paper to prevent sticking. 🌙
Dough Pre-Shaping
After your 2-hour stretch-and-fold session, shape the dough into a rough ball and refrigerate it for 1-2 hours before final proofing. This pre-shaping step prevents the dough from sticking to surfaces and makes the final shaping easier.
I like to place it on a lightly floured surface and cover it with a damp towel while it rests. This also gives you time to preheat the oven and set up your baking trays.
Steam Setup
Get your steam ready before baking—place a small tray of hot water on the bottom rack of your oven 15 minutes before baking begins. This creates the perfect steam environment for that golden, crackly crust.
I also like to place a baking stone or inverted baking sheet on the middle rack to ensure even heat distribution. The steam helps prevent the crust from drying out too quickly during the initial baking phase. 💧
Freezer-Friendly Dough
Make this bread even more convenient by freezing shaped dough for up to 3 months. After your final proof (but before baking), wrap the shaped loaf tightly in plastic wrap followed by foil. When ready to bake, thaw it in the fridge overnight, then proceed with the baking instructions.
The dough will rise beautifully after thawing, and you’ll still get that perfect texture. This is my go-to method for busy weekends!
Portioning for Storage
For maximum freshness, slice the cooled loaf into ½-inch thick slices and store them in a zip-top freezer bag with parchment paper between each slice. This prevents them from sticking together and keeps them fresh for 3 months in the freezer.
To revive, simply toast slices in a 375°F oven for 5-10 minutes with a damp paper towel on top. The result? Fresh, crisp toast every time. 🍞
Make-Ahead Baking Schedule
Plan ahead with this timeline: Mix the dough in the evening, let it ferment overnight in the fridge, then shape and proof it in the morning. Bake it during lunch while you’re home to enjoy the aroma.
For a stress-free weeknight, prepare the dough on Sunday, freeze it, then bake a fresh loaf whenever you need it. The key is consistency—this bread rewards patience with its incredible flavor and texture. 📅
Nutrition facts
Frequently asked questions
Can I substitute vital wheat gluten in this 100% oat flour bread?
Yes, but only if you’re not strictly avoiding gluten. For a gluten-free version, stick to 100% oat flour—it creates a naturally hearty texture when properly hydrated. If you want to improve structure without gluten, blend your oat flour with 1-2 tbsp xanthan gum instead. This mimics gluten’s elasticity without adding wheat proteins.
Why does my oat flour dough look dense instead of light?
Oat flour dough naturally appears denser than wheat dough because it lacks gluten. The key is proper hydration (1.5 cups water) and the 2-hour stretch-and-fold technique, which develops structure. Don’t worry if it doesn’t look perfectly smooth—focus on the dough becoming more elastic with each fold. The final loaf will have a satisfying open crumb!
How do I fix a dough that’s too sticky to handle?
Add 1-2 tablespoons more oat flour gradually until the dough is just manageable. Wet your hands frequently to prevent sticking. If the dough feels too slack after mixing, let it rest uncovered for 10 minutes—this helps the flour absorb moisture. Remember, oat flour dough is naturally tackier than wheat dough, so embrace the process!
Can I bake this bread without a loaf pan?
Shape the dough into a freeform loaf on a parchment-lined baking sheet. For extra crust appeal, score the top with a sharp knife before baking. Bake at 375°F for 40-45 minutes until golden. The freeform version has a rustic charm and works beautifully for sandwiches or toast. Just watch the oven closely to prevent over-browning.
What’s the best way to make this bread nut-free?
Simply omit the sesame and poppy seeds, and replace the flaxseed egg wash with 1 tbsp ground flaxseed mixed with 3 tbsp water (still vegan-friendly). For extra flavor, brush the loaf with olive oil before baking instead of using seeds. The bread will still have excellent texture and a subtle nutty taste from the oat flour itself.

- 6 Oz Chocolate Chip Cookie Recipe: Perfectly Balanced Crispy Edges and Chewy Hearts - September 25, 2026
- 6-Inch Coffee Cake Recipe: Vanilla Bean Swirls and Buttery Streusel Topping - September 25, 2026
- 1 Hour Soup Recipe: Velvety Richness Without the Wait - September 25, 2026