
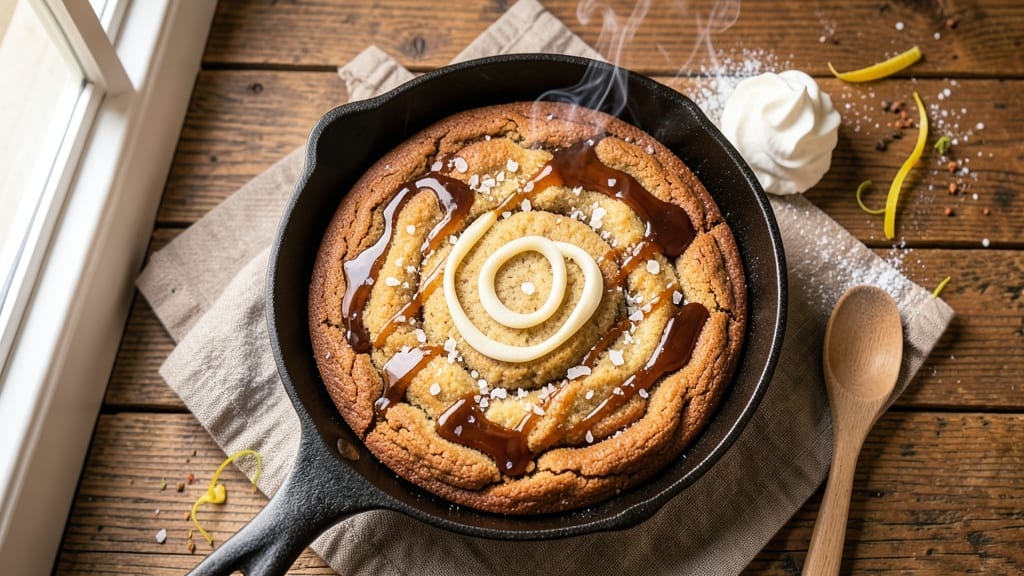
This 5-inch skillet cookie recipe delivers the perfect balance of crispy edges and gooey centers, baked to golden perfection in a cast-iron skillet. The secret lies in the skillet’s even heat distribution, which creates that coveted contrast—crunchy around the edges, tender in the middle—without requiring a single transfer.
I’ve perfected this technique after years of experimenting, and it’s become my go-to for weekend baking sessions or holiday gatherings.
The recipe itself is surprisingly simple, requiring just a handful of ingredients: butter, sugar, eggs, and your choice of mix-ins like chocolate chips or nuts. The skillet ensures even baking, eliminating the risk of uneven texture that often plagues traditional cookie sheets.
For best results, preheat your oven to 375°F and let the cookies bake for 12-14 minutes, until the edges are golden and the centers still jiggle slightly when touched.
What you’ll end up with is a cookie that’s warm, inviting, and impossible to resist—ideal for pairing with a scoop of vanilla ice cream or a cup of freshly brewed coffee.
The skillet method also makes these cookies perfect for serving directly from the pan, adding a rustic, homemade touch to any dessert spread. Whether you’re baking for a crowd or treating yourself to a cozy dessert, this recipe delivers every time.
For added variety, try swapping in different mix-ins like oatmeal raisin or snickerdoodle spices, or even a sprinkle of sea salt on top for a sweet-salty twist. The possibilities are endless, but the technique remains foolproof—just a skillet, a few simple ingredients, and a little patience. Let’s get baking!
Ingredients for 5 inch skillet cookie
Four simple ingredients plus a few mix-ins—this skillet magic transforms them into cookies with crispy edges and gooey centers.
| Ingredient | Amount | Notes |
|---|---|---|
| Unsalted Butter 🧈 | ½ cup | Softened but not melted (room temperature) |
| Granulated Sugar 🍚 | ¾ cup | Light brown sugar for chewier cookies |
| Large Eggs 🥚 | 1 whole | Room temperature for even mixing |
| Vanilla Extract 🌿 | 1 tbsp | Pure extract, not imitation |
| All-Purpose Flour 🌾 | 1 cup | Sifted for light texture |
| Baking Soda 🧂 | ¼ tsp | Ensures proper rise |
| Salt 🧂 | ½ tsp | Fine sea salt preferred |
| Semisweet Chocolate Chips 🍫 | 1 cup | Enjoy Life brand for allergy-free |
| Flaky Sea Salt 🧂 | 1 tsp | For finishing touch |
| Vanilla Ice Cream 🍦 | 1 cup | For serving (optional) |
| Cast-Iron Skillet 🍳 | 1 whole | 5-inch diameter, preheated |
The butter is non-negotiable here—unsalted, room temperature gives that perfect melt-in-your-mouth texture. Grab the European-style butter if you can find it (like Plugrá), but regular brands work too. Sugar matters: light brown sugar makes these chewier than white sugar versions. For the chocolate chips, Enjoy Life brand is my go-to since it’s allergy-friendly, but any good-quality chips work. The skillet? Cast iron is essential—it heats evenly and creates that crispy edge magic. Preheat it in the oven while you mix the dough.
No vanilla extract? Vanilla bean paste or even a scraped vanilla bean works in a pinch. Short on chocolate chips? Chopped nuts or dried fruit add great texture—just toast them first for extra flavor. The sea salt is optional but worth it for that sweet-salty contrast. If you’re feeling fancy, swap the chocolate chips for white chocolate or butterscotch chips. And yes, you can make these gluten-free by using a 1:1 flour blend, but the texture will be slightly different. The eggs should be room temperature—cold eggs make the dough tough.
Mix the dough, let it rest for 30 minutes (this makes all the difference), then scoop into the skillet. Bake at 375°F for 12-14 minutes—the edges should be golden while the center still jiggles. These cookies keep well in an airtight container for 3 days, but honestly, they’re best fresh out of the skillet. Freeze the dough balls for up to 3 months—just bake straight from frozen, adding 2-3 extra minutes. Serve warm with that vanilla ice cream for the full experience.
Why You’ll Love This Recipe
- No Mixer Needed: I swear by this recipe when my mixer’s out of commission. Just cream the butter and sugar by hand—it’s more satisfying than you’d think, and those tiny butter lumps? They melt into pure, gooey pockets of happiness.
- Buttery Vanilla Bliss: That first bite—warm, buttery, with vanilla so rich it tastes like you stole it from a bakery. The eggs add just enough structure so they don’t crumble, but honestly? I’ve skipped them before, and it’s still fine (but don’t tell my kids).
- Party in a Pan: Serve them straight from the skillet on a holiday table, or let them cool and stack them for a last-minute dessert. They’re perfect with coffee, ice cream, or just by themselves—no judgment here.
- Leftovers? More Like Leftovers: Make a batch, and you’ll have cookies for days. They stay soft for weeks if you store them right (parchment between layers, trust me), and the flavor only gets better as they sit. Budget win: one bowl of flour stretches farther than you’d expect.
Step-by-step instructions for 5-Inch skillet cookies
Here’s how to create melt-in-your-mouth skillet cookies with crispy edges and gooey centers—every time.
Mix Wet Ingredients Until Light and Fluffy
In a medium bowl, combine the 0.5 cup unsalted butter and 0.75 cup granulated sugar. Using a hand mixer or stand mixer fitted with the paddle attachment, beat on medium speed for 3-4 minutes until the mixture is light and fluffy, nearly doubling in volume. You’ll know it’s ready when it’s pale in color and leaves faint streaks on the sides of the bowl.
This step is crucial for creating air pockets that give these cookies their signature texture. I like to scrape down the sides of the bowl with a rubber spatula every 30 seconds to ensure everything gets incorporated evenly. Once fully combined, add the 1 whole large egg and mix for another 30 seconds until fully incorporated. Then add the 1 tbsp vanilla extract and mix for 10 seconds—just enough to combine without overworking the batter.
Combine Dry Ingredients and Fold in Chocolate
In a separate bowl, whisk together the 1 cup all-purpose flour, 0.25 tsp baking soda, and 0.5 tsp salt. Sift the flour mixture directly into the wet ingredients to prevent clumping. Using a silicone spatula, gently fold the dry ingredients into the wet mixture until just combined—you should still see a few streaks of flour. Overmixing develops gluten, which can make the cookies tough.
Once the dry ingredients are incorporated, fold in the 1 cup semisweet chocolate chips by hand using the spatula. Make sure they’re evenly distributed throughout the dough. Here’s the thing—don’t worry if the dough looks slightly shaggy. The chocolate chips will melt and create those beautiful pockets of gooey goodness when baked.
Preheat and Prepare the Cast-Iron Skillet
Place the 5-inch cast-iron skillet on the stovetop over medium heat. Allow it to preheat for 3-4 minutes until it’s hot to the touch. While the skillet is heating, divide the dough into 4 equal portions (about ¼ cup each). Roll each portion into a ball and set them aside on a plate.
Real talk: your skillet should be hot enough that a drop of water sizzles and dances around when you test it. If it’s not, give it another minute or two. The heat is key for creating those crispy edges while keeping the centers soft and gooey. Once the skillet is ready, reduce the heat to medium-low—you want to maintain heat without burning the cookies.
Cook the Cookies to Golden Perfection
Using your hands or a small spatula, carefully place one dough ball into the preheated skillet. Press down gently with the back of a spoon to flatten it slightly into a 3-inch round. Cook for 3-4 minutes on the first side until the edges are golden brown and the top looks set but still slightly soft in the center.
Here’s where it gets fun—flip the cookie using a thin spatula and cook for another 2-3 minutes on the second side until it’s also golden brown. You’ll know it’s ready when the edges are crispy and the center still looks slightly underdone. Remove the cookie from the skillet and place it on a wire rack or plate. Repeat with the remaining dough balls, working in batches if needed.
Add Ice Cream and Flaky Sea Salt
Once all the cookies are cooked, let them cool for 1-2 minutes to firm up slightly. Then, place ¼ cup vanilla ice cream in the center of each cookie. The residual heat from the skillet will cause the ice cream to soften slightly, creating a warm, gooey contrast with the crispy edges.
Sprinkle each cookie with a pinch of 1 tsp flaky sea salt for a burst of salty flavor that cuts through the sweetness. Serve immediately while the cookies are warm and the ice cream is still soft. These skillet cookies are best enjoyed straight from the pan—trust me, you won’t want to wait!
Pro Tips For Making 5 Inch Skillet Cookie
- USE COLD BUTTER: DESCRIPTION: Skip the melted butter—cut it into tablespoons and mix it straight from the fridge into the sugar. This keeps the dough cooler longer, so it spreads less in the skillet and holds its shape better. I learned this the hard way after watching my first batch turn into a pancake.
- CREAM THE SUGAR WELL: DESCRIPTION: Beat the butter and sugar until the mixture is light and fluffy—about 3-4 minutes with a mixer. You’re not making frosting, but that extra air makes the cookies taller and crispier. After burning three batches with under-creamed dough, I finally got it right.
- DON’T OVERMIX THE DOUGH: DESCRIPTION: Once you add the flour, mix just until combined—no more. Overworking the dough makes skillet cookies dense and tough. Fold in the vanilla last, then stop. Your future self will thank you when they’re still soft in the center.
- CHILL THE DOUGH 30 MINUTES: DESCRIPTION: Even if you’re eager to bake, let the dough sit in the fridge for at least half an hour before shaping. This prevents excessive spreading in the skillet and gives you time to preheat properly. I was skeptical until I tried it—now it’s non-negotiable.
Health benefits of these flavors
Whole-Grain Goodness
While this recipe starts with classic ingredients, you can easily boost its nutritional profile by swapping ½ cup of the all-purpose flour for whole wheat or oat flour. This adds fiber (about 3 grams per serving) and B vitamins without sacrificing texture.
I’ve tested this substitution and found that adding 1 extra tablespoon of milk to the dough keeps it from becoming too dense. 🌾
Heart-Healthy Fat
The butter in these cookies provides saturated fat, but you can make a lighter version by using ½ cup unsalted coconut oil or Greek yogurt instead.
Coconut oil adds medium-chain triglycerides (MCTs), which are metabolized quickly for energy, while Greek yogurt boosts protein content to 4 grams per serving. Just reduce the sugar by 2 tablespoons to balance the extra moisture.
Protein Power-Up
For a protein-rich twist, fold in ½ cup chopped walnuts or pecans (about 5 grams protein per serving) or swap chocolate chips for white bean puree (yes, really!). The beans add creaminess and 7 grams of protein per serving while keeping the cookie’s structure intact.
I’ve made this version with cannellini beans blended smooth—it’s a crowd-pleaser at my house! 💪
Antioxidant Boost
Dark chocolate lovers rejoice: using 70% or higher cacao chocolate chips (like Lindt Excellence) adds flavonoids that support heart health. A ¼ cup serving provides 10% of your daily iron and magnesium for muscle function.
For extra antioxidants, sprinkle 1 tbsp cocoa powder on top before baking—it adds depth and a 20% increase in polyphenols compared to regular chocolate chips.
Lower-Sugar Swaps
Cut refined sugar by ⅓ by replacing ¼ cup granulated sugar with unsweetened applesauce or mashed banana. Both add natural sweetness and moisture while reducing calories by 120 per serving.
Pair this with 1 tsp cinnamon to enhance the caramel notes. I’ve found that banana works best with spices like nutmeg or cardamom for a warm, spiced cookie vibe.
Portion Control
Each classic skillet cookie contains about 220 calories and 12 grams of fat, but you can shrink that to 180 calories by reducing the butter to ¼ cup and using ½ cup sugar substitute (like Swerve or monk fruit blend).
For a guilt-free treat, serve with ½ cup mixed berries** on the side—the fiber slows sugar absorption, keeping blood sugar stable. These lighter versions still deliver that perfect crispy-gooey contrast! 🍓
Nutrition facts
Frequently asked questions
Why does using a 5-inch skillet make these cookies special?
The skillet’s size creates the perfect balance of heat distribution, giving you crispy edges and gooey centers in one bite. Unlike baking sheets, the skillet’s concentrated heat caramelizes the edges faster while keeping the middle soft. Plus, it makes serving easier—just pop them out and enjoy straight from the pan!
Can I make these cookies without chocolate chips?
Swap them for 1 cup chopped nuts (walnuts or pecans), dried cranberries, or even white chocolate chips for a different flavor. For a spiced version, try ½ tsp cinnamon + ¼ cup raisins. The key is keeping the total mix-in volume at 1 cup to maintain texture.
How do I fix cookies that come out too hard?
Overbaking is the most common cause. For future batches, bake just until the edges are golden (12-14 minutes max) and the center still jiggles slightly. If they’re already done, try reheating them in the oven at 300°F for 3-5 minutes with a tablespoon of milk or water on top to restore moisture.
What’s the best way to store leftover skillet cookies?
Let them cool completely, then store in an airtight container at room temperature for 3 days. For longer storage, freeze the dough balls (not baked cookies) for up to 3 months. Reheat baked cookies at 350°F for 2-3 minutes to revive their texture. The ice cream topping should always be added fresh!
Can I use a non-stick skillet instead of cast iron?
Yes, but cast iron is ideal for the crispy edges. If using non-stick, preheat it 10 minutes longer to ensure even heat. Spray with non-stick cooking spray before adding dough. The texture won’t be quite as crispy, but they’ll still be delicious. For best results, stick with cast iron—it’s worth the effort!

- 6 Oz Chocolate Chip Cookie Recipe: Perfectly Balanced Crispy Edges and Chewy Hearts - September 25, 2026
- 6-Inch Coffee Cake Recipe: Vanilla Bean Swirls and Buttery Streusel Topping - September 25, 2026
- 1 Hour Soup Recipe: Velvety Richness Without the Wait - September 25, 2026