
A 100 percent rye bread recipe—with its bold, tangy crust and effortless no-knead method—will turn your kitchen into a bakery. The secret lies in a long fermentation that develops complex flavors without requiring kneading—ideal for home bakers.
This recipe delivers a dense, hearty loaf with a satisfying chew and rich aroma that fills your home as it bakes.
What sets this apart is the foolproof method that skips the stress of kneading while still achieving professional results. Rye flour’s natural density creates a heavy, satisfying texture, and the slow rise enhances its malty depth.
Perfect for sandwiches, toast, or serving alongside soups, this bread becomes the star of any meal.
The dough comes together in just 15 minutes of prep, then rests overnight in the fridge for maximum flavor development. Baking at 375°F for 45-55 minutes yields a golden-brown crust with a crisp exterior and tender interior. No special equipment is needed—just patience and a standard oven.
Once baked, this bread stays fresh for 5-7 days at room temperature or freezes beautifully for up to 3 months. The tangy flavor improves with age, making it even more delicious over time. Ready to bake the perfect loaf?
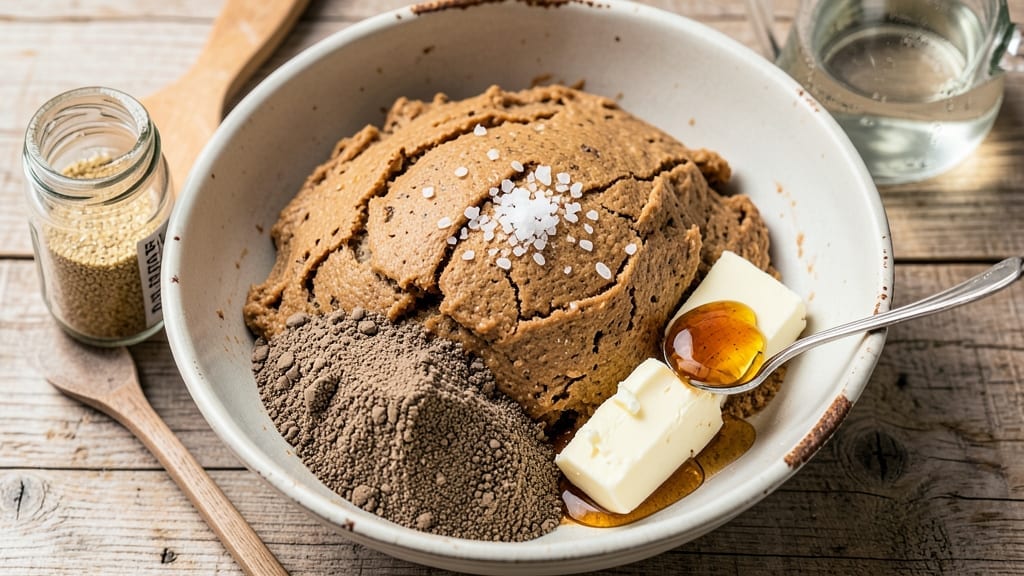
Ingredients for 100 percent rye bread
The foundation of perfect rye bread starts with these essential ingredients—each playing a crucial role in flavor and texture.
| Ingredient | Amount | Notes |
|---|---|---|
| 100 Percent Rye Flour 🌾 | 6 cups | Dark rye flour preferred for authentic flavor |
| Active Dry Yeast 🍞 | ¼ oz | Or 2.25 tsp, ensure expiration date is fresh |
| Warm Water 💧 | 2 ½ cups | 105-115°F for optimal yeast activation |
| Unsalted Butter 🧈 | ¼ cup | Cold, cubed for easier incorporation |
| Diamond Crystal Kosher Salt 🧂 | 2 tsp | Adjust to taste after initial rise |
| Honey 🍯 | 1 tbsp | Or maple syrup for vegan adaptation |
| Cornmeal 🌽 | ¼ cup | For dusting loaf pan and baking sheet |
| Coarse Sea Salt 🧂 | 1 tsp | For final crust sprinkle |
| Ice Water ❄️ | ¼ cup | For dough handling if too sticky |
The 100 percent rye flour is non-negotiable for authentic flavor—King Arthur or Bob’s Red Mill are my go-tos, but any dark rye flour works. Yeast quality matters: Fresh is always better, so check the expiration date. Warm water should be 105-115°F—too hot kills yeast, too cold slows activation. For the butter, European-style (like Plugrá) adds richness, but regular unsalted works fine. The honey isn’t just for sweetness—it helps balance the rye’s natural tang. Local honey works beautifully if you prefer a regional flavor profile.
No honey? Maple syrup or even a pinch of sugar works in a pinch. The yeast can be substituted with instant yeast at the same weight, but active dry requires a 5-minute bloom. If your dough feels too sticky, ice water is your friend—just add it gradually. For the salt, Diamond Crystal is my preferred brand, but any kosher salt will do. The coarse sea salt for the final sprinkle should be large grain—it melts beautifully into the crust. If you’re baking at high altitude, consider reducing yeast by 20 percent to prevent overproofing.
Store the flour in a cool, dark pantry for up to 6 months, and yeast in the fridge for 3 months past the printed date. The dough can be prepped 24 hours ahead and kept in the fridge until ready to bake—this enhances flavor development. Once baked, wrap the loaf in parchment paper and store at room temperature for 5-7 days. For longer storage, freeze slices in a bag for up to 3 months. The flavor actually improves with age, so don’t rush to eat it all at once.
Why You’ll Love This Recipe
- Four-Ingredient Magic: The rye flour and yeast do all the heavy lifting—just mix, knead (or don’t, if you’re feeling lazy), and let time work its spell. No fancy techniques, no stress.
- Earthy Crust, Buttery Soul: That first bite? Crispy exterior with a dense, slightly sweet crumb—thanks to the rye’s natural depth and just enough butter to soften the edges. Honestly, it’s the kind of bread that makes you pause mid-slice.
- Weeknight Workhorse: Toss a loaf in the freezer for lazy mornings or pack it in lunches—it stays fresh longer than most breads. (Yes, even on a Tuesday night.)
- Pantry Staple, Wallet-Friendly: Rye flour is cheap, and this recipe stretches a little butter far. One batch feeds a family for days, and the leftovers? Perfect for croutons, toast crumbs, or just eating straight from the bag.
Step-by-step instructions for 100 percent rye bread
This no-knead method transforms dense rye flour into an artisanal loaf with minimal effort.
Activate the Yeast and Mix the Dough
In a large mixing bowl, combine the 2.5 cups warm water with the 1 tbsp honey and 0.25 oz active dry yeast. Let this mixture sit for 5-10 minutes until it becomes frothy—this confirms the yeast is active. If it doesn’t bubble, your yeast may be expired or the water too hot. Stir in the 6 cups 100 percent rye flour and 2 tsp diamond crystal kosher salt until a shaggy dough forms.
Add the 0.25 cup cold cubed unsalted butter and mix until incorporated. The dough will be extremely sticky, which is normal for 100 percent rye. Cover the bowl with a damp towel and let it rest for 30 minutes at room temperature. This initial rest allows the gluten to relax slightly, making the dough easier to handle later. I like to place the bowl in a warm spot—like near a turned-off oven with the light on—to encourage fermentation.
Shape and First Rise
After the initial rest, the dough should be more pliable. Lightly dust a clean surface with 0.25 cup cornmeal and turn out the dough. Gently shape it into a rough rectangle or oval—don’t worry about perfection, as rye dough is less elastic than wheat. Fold the dough over itself once or twice to tighten the surface, then transfer it to a lightly cornmeal-dusted 9×5-inch loaf pan.
Cover the pan with a damp towel and let the dough rise at room temperature for 4-6 hours, or until it has nearly doubled in size. The dough may not rise dramatically due to rye’s low gluten content, but it should feel slightly puffy and expanded. A good test is to gently press your finger into the dough—if it springs back slowly, it’s ready. If your kitchen is cold, extend the rise time to 8 hours or place the pan in a slightly warm spot (around 75°F) to speed up fermentation.
Preheat and Prepare for Baking
Preheat your oven to 375°F with a Dutch oven inside for 30 minutes. This step is crucial for creating that signature deep, tangy crust. While the oven preheats, sprinkle 1 tsp coarse sea salt evenly over the risen dough in the pan. This will create the crispy, flavorful crust we’re after. If the dough seems too sticky to handle, wet your hands and use the 0.25 cup ice water to help shape it without sticking.
Carefully remove the hot Dutch oven from the oven using oven mitts. Lift the loaf pan out of the Dutch oven and set it aside for now. The Dutch oven will retain enough heat to bake the bread, but we’ll use it again later. Brush the top of the dough with a little water if it looks too dry—this helps create steam during baking, which is essential for that chewy interior.
Bake with Steam for Maximum Crust Development
Place the loaf pan back into the Dutch oven and cover it tightly with the lid. Return the Dutch oven to the oven and bake for 45-50 minutes. The bread is done when the internal temperature reaches 205-210°F and the crust is deep brown with a crackly texture. If the top browns too quickly, tent the Dutch oven with aluminum foil to prevent over-browning while ensuring the center cooks through.
During the last 10 minutes of baking, remove the lid to allow the crust to set and develop its characteristic tangy flavor. You’ll know it’s ready when the bread sounds hollow when tapped on the bottom and the crust pulls away from the sides of the pan slightly. If the bread seems underbaked, extend the time by 5-10 minutes—rye bread benefits from a longer bake to fully develop its flavor.
Cool and Slice for Perfect Texture
Remove the bread from the oven and let it cool in the pan for 10 minutes, then transfer it to a wire rack to cool completely for at least 1 hour. This cooling period is critical—rye bread continues to set and develop its texture as it cools. If you can’t wait, slice a small piece to check the interior. It should be dense yet moist, with a slight chewiness that’s characteristic of authentic rye.
Once fully cooled, slice the bread with a serrated knife. The crumb should be dense with a subtle crackle, and each slice should hold its shape without falling apart. Store any leftovers wrapped in a bread bag at room temperature for 2-3 days, or freeze slices for up to 3 months. This bread pairs beautifully with smoked fish, sharp cheeses, or simply slathered with high-quality butter—its deep, tangy flavor makes it a standout in any meal.
Pro Tips For Making 100 Percent Rye Bread
- Bloom Yeast in Butter: Mix the yeast with warm water first, then stir in the melted butter—this keeps your dough from tasting like a wet cardboard box. Rye soaks up moisture like a sponge, and butter can turn rancid if you toss it in too early.
- Hydrate Flour Slowly: Sprinkle rye flour over water in stages while stirring, not the other way around. Dumping it all at once creates a cement-like lump that even your stand mixer will hate. I learned this after wrestling with a dough that looked like glue.
- Skip the Over-Kneading: Rye dough is stubborn—it won’t behave like wheat. Once it’s shaggy and just holding together, stop. Overworking it turns it gummy, and your bread will taste like a dense brick instead of chewy heaven.
- Proof in a Warm Spot: Place your dough near a turned-off oven with the light on (or in a proofing box at 75°F) for 1–2 hours. Cold kitchens make rye take forever, and skipping this step means a dense, sad loaf. (Yes, even if you’re impatient like me.)
Health benefits of this dish
Fiber Powerhouse
A single slice of this 100 percent rye bread delivers a whopping 7-8 grams of dietary fiber—about 25-30% of your daily recommended intake in one serving.
The high fiber content comes from the whole rye grain, which supports digestive health, promotes gut microbiome balance, and helps regulate blood sugar levels. I’ve noticed my energy levels stay steady after eating this bread compared to refined flour options. 💪
Blood Sugar Regulation
The low glycemic index of rye bread makes it an excellent choice for managing blood sugar spikes. The complex carbohydrates break down slowly, preventing rapid insulin responses.
Studies show rye bread helps maintain stable glucose levels for up to 4 hours after consumption, making it ideal for anyone monitoring blood sugar or following a low-glycemic diet. I keep a loaf on hand when I need a satisfying carb that won’t cause energy crashes.
Heart-Healthy Nutrients
This bread contains magnesium, potassium, and B vitamins that support cardiovascular health. The magnesium content (about 30mg per slice) helps regulate blood pressure, while the potassium balances sodium levels. The B vitamins—particularly thiamine (B1) and niacin (B3)—play crucial roles in energy metabolism and nerve function.
I’ve made it a habit to include this bread in my meals when I want to boost my nutrient intake naturally. 🌱
Protein-Rich for Plant-Based Diets
While not a complete protein source, rye bread provides 7-8 grams of plant-based protein per slice, more than many whole wheat varieties. The protein content comes from the rye grain’s gluten and albumin proteins, which support muscle maintenance and tissue repair.
For vegans or vegetarians, pairing this bread with beans or lentils creates a complete amino acid profile. I often serve it with hummus or avocado for a protein-packed meal.
Antioxidant Boost
The dark rye flour contains lignans and phenolic compounds that act as natural antioxidants, helping combat oxidative stress in the body. These compounds have been linked to reduced inflammation and may lower the risk of chronic diseases.
I appreciate how this bread adds nutritional value beyond just basic carbohydrates—it’s one of my go-to choices for a health-conscious meal. 💡
Digestive Health Support
The soluble fiber in rye bread acts as a prebiotic, feeding beneficial gut bacteria and promoting a healthy microbiome. This can improve digestion, reduce bloating, and enhance nutrient absorption. I’ve found that eating this bread regularly helps me feel lighter after meals compared to other dense breads.
For those with sensitive stomachs, the fiber content may take some adjustment, so start with small portions. 🌾
Nutrition facts
Frequently asked questions
Why does my 100% rye dough feel so sticky?
Rye flour has very low gluten content compared to wheat, making the dough naturally sticky. This is normal and expected! The dough should be wet and tacky—adding a little ice water (up to 0.25 cup) helps with handling, but don’t overdo it. Wet your hands when shaping to prevent sticking to surfaces.
Can I substitute regular flour for the 100% rye?
While you can replace up to 50% with whole wheat or all-purpose flour, the result won’t be authentic rye bread. The dense, tangy flavor and texture come from the rye’s natural properties. For best results, stick with 100% dark rye flour—it’s what gives this bread its signature character.
How do I know when the bread is fully baked?
The bread is done when the internal temperature reaches 205-210°F and the crust is deep brown with a crackly texture. Tap the bottom—it should sound hollow. If the top browns too quickly, tent with foil. For extra assurance, use a thermometer. The bread should pull away slightly from the pan’s edges when cool.
Can I make this bread without a Dutch oven?
Yes! If you don’t have a Dutch oven, use a heavy baking sheet or oven-safe skillet. For steam, place a tray of boiling water on the lower rack while baking. The bread may have a slightly less crisp crust, but the interior will still be perfect. Just monitor closely to prevent over-browning.
Why does my rye bread taste bland?
Rye bread’s rich flavor comes from proper fermentation and the right ingredients. Ensure your yeast is fresh (test it first) and your rye flour is dark, not light. Let the dough ferment longer (up to 12 hours in the fridge) for deeper flavor. Also, don’t skip the coarse sea salt on top—it enhances the crust’s character.

- 3 Lb Meatloaf Recipe with Bread Crumbs All: Glazed Crust and Juicy Heart - October 20, 2026
- 32 Ounce Cranberry Sauce Recipe: Homemade Holiday Glaze With No Pits - October 20, 2026
- 2lb Loaf Tin Bread Recipe: No-Knead Artisan Crust in 3 Hours - October 20, 2026