
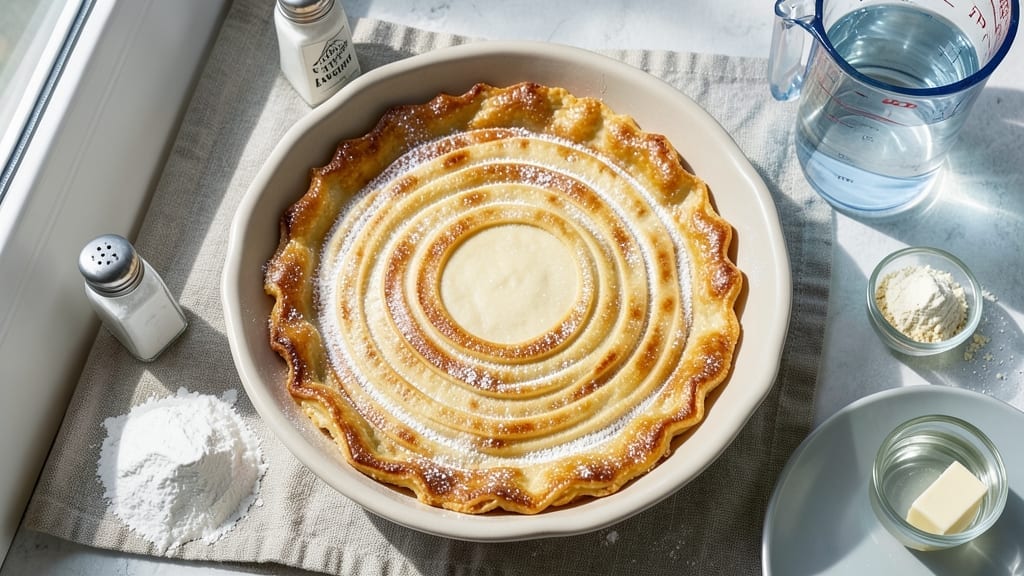
Perfecting a 9-inch pie dough that delivers on that signature shatter-and-flake promise starts with cold butter and precise technique—no shortcuts. This recipe builds layers so delicate they dissolve at the slightest touch, creating the foundation for pies that taste like they came from a bakery.
The secret lies in keeping everything cold and working quickly to preserve that crisp, buttery texture through every step.
What sets this dough apart is the 1:2 butter-to-flour ratio, which creates those signature flakes while maintaining structure. You’ll work with cold ingredients the entire time, ensuring the butter stays in thin sheets rather than melting into the flour.
This method delivers a crust that’s sturdy enough to hold fillings but tender enough to melt in your mouth with the first bite.
The result is a golden, crisp-edged crust that stays flaky even after baking, whether you’re making a classic apple pie or a savory quiche. The dough handles well when rolled and fitted, with minimal shrinking, so you’ll get that perfect 9-inch fit every time.
Pre-baking instructions ensure your crust holds up to wet fillings without becoming soggy.
For best results, let the dough rest before rolling to relax the gluten, and avoid overworking it—this is where most home bakers go wrong. The technique is straightforward, but the attention to detail makes all the difference between a good crust and a great one.
Let’s get started on creating that perfect foundation.
Ingredients for 9 inch pie dough
Cold butter, precise ratios, and a few simple pantry staples create the perfect 9-inch crust.
| Ingredient | Amount | Notes |
|---|---|---|
| All-Purpose Flour 🌾 | 2 ½ cups | Sifted for even texture |
| Unsalted Butter 🧈 | 1 cup | Cold, cubed (1/2 lb total) |
| Ice Water 💧 | ½ cup | Chilled in freezer |
| Diamond Crystal Kosher Salt 🧂 | ½ tsp | Fine grain preferred |
| Granulated Sugar 🍚 | 1 tbsp | For subtle sweetness |
| White Vinegar 🍶 | 1 tsp | Enhances flakiness |
| Yellow Cornmeal 🌽 | 2 tbsp | For dusting work surface |
| Large Egg Yolk 🥚 | 1 whole | Optional for extra binding |
| Butterflake Pastry Flour 🌾 | ¼ cup | Optional for extra flakiness |
The butter is non-negotiable here—European-style unsalted butter with at least 80% fat delivers the best flakes. Plugrá or Kerrygold are my go-tos, but any good brand works if it’s cold. Keep it in the freezer until ready to use, then cut into cubes the size of small grapes. The flour? King Arthur or Gold Medal are reliable, but any all-purpose will do. Sift it first—this prevents lumps and ensures even distribution. Pro tip: if your kitchen gets warm, chill the flour mixture between steps to prevent the butter from melting.
No cold water? Ice cubes work perfectly—just let them melt slowly as you mix. Short on butterflake flour? Add 1 tbsp cornstarch to the flour for a similar effect. The egg yolk is optional but worth it for that extra tender bite—save the white for another recipe. For a gluten-free version, swap the flour for a 1:1 gluten-free blend (like Bob’s Red Mill), but expect slightly less flakiness. The vinegar might seem odd, but it boosts the gluten structure just enough to prevent cracking when rolling. And if you’re making a savory pie, skip the sugar entirely—your filling will thank you.
This dough keeps best when wrapped tightly in plastic and stored in the fridge for up to 3 days. For longer storage, freeze shaped discs between parchment paper for up to 3 months. Thaw in the fridge overnight before using. The key to rolling it out? Cornmeal on your surface prevents sticking, and a light dusting of flour on the rolling pin keeps it from tearing. Work quickly—this dough warms up fast, and warm dough = tough crust. If it starts to stick, chill it for 10 minutes before continuing.
Why You’ll Love This Recipe
- Foolproof in Minutes: I swear by this dough—just toss cold butter into flour, pulse a few times, then add ice water. No rolling pin required, no fuss, no stress. Honestly, I’ve made it while chatting on the phone.
- Buttery Perfection: That cold butter cutting into the flour? It’s magic. The final crust has layers so delicate yet sturdy—flaky enough to make you pause mid-bite. (Yes, even on a Tuesday night.)
- Crowd-Pleasing Base: Apple pie? Savory galette? This dough handles it all. I’ve used it for holiday dinners, potlucks, and lazy Sundays. It’s my secret weapon for impressing without extra effort.
- Dollar-Smart Staple: Five ingredients, all pantry basics. A stick of butter and a bag of flour stretch across multiple pies—no wasted dough, no wasted money. Budget-friendly doesn’t mean boring, trust me.
Step-by-step instructions for 9-Inch pie dough
Here’s how to make the most flaky, buttery pie crust that’ll make everyone ask for seconds.
Mix Dry Ingredients for Perfect Texture
In a large bowl, whisk together the 2.5 cups All-Purpose Flour, 0.5 tsp Diamond Crystal Kosher Salt, 1 tbsp Granulated Sugar, and 0.25 cup Butterflake Pastry Flour (if using). The sugar adds subtle sweetness while the butterflakes promise extra flakiness. Sift the flour mixture once to ensure even distribution and break up any lumps.
This step creates the foundation for your crust’s texture. The sugar helps tenderize the flour while the salt enhances flavor. Don’t skip sifting—it prevents dense spots in your final crust. I like to use a fine-mesh sieve for the best results.
Cut in Cold Butter Until Pea-Sized Pieces Remain
Add the 1 cup Unsalted Butter, cut into ½-inch cubes, to the flour mixture. Using a pastry cutter or your fingers, work the butter into the flour until you have pea-sized pieces with some flour still clinging to them. This process is called “cutting in” and is crucial for creating flaky layers.
Keep the butter cold throughout this process—if it starts to melt, chill the mixture for 10 minutes in the refrigerator. You want just enough fat to coat the flour without melting completely. When you press a piece of butter between your fingers, it should hold its shape but still feel slightly soft.
Combine Wet Ingredients for Binding
In a separate small bowl, whisk together the 0.5 cup Ice Water, 1 tsp White Vinegar, and the 1 whole Large Egg Yolk (if using). The vinegar helps develop gluten slightly for better binding, while the egg yolk adds richness and extra binding power. The ice water keeps the mixture cold and prevents the butter from melting too quickly.
Gradually add the wet mixture to the flour-butter combination, mixing gently with a fork or dough scraper. Only add enough liquid to bring the dough together—you should have just enough to hold when pressed. The dough will be shaggy at this point, but that’s normal. Stop mixing as soon as the dough comes together when pressed.
Chill the Dough for Maximum Flakiness
Shape the dough into a disk, wrap it tightly in plastic wrap, and refrigerate for at least 2 hours or up to 48 hours. This chilling step is absolutely critical—it allows the gluten to relax and the butter to solidify, which prevents the crust from shrinking and ensures those beautiful flaky layers when baked.
For best results, I recommend chilling overnight. The longer it rests, the better the texture will be. During chilling, the dough will firm up significantly. When you’re ready to roll it out, it should be cold but still pliable enough to handle without cracking.
Roll and Transfer to Pie Pan
Lightly dust your work surface with 2 tbsp Yellow Cornmeal to prevent sticking. Roll the chilled dough between two sheets of parchment paper (this prevents sticking) to about ⅛-inch thickness. The cornmeal helps create that perfect golden-brown color on the bottom crust.
Carefully transfer the rolled dough to a 9-inch pie pan, trimming any excess that hangs over the edge. Gently press the dough into the pan, making sure it drapes evenly over the sides. The dough should be cold enough to hold its shape when lifted. If it starts to soften too much, return it to the refrigerator for 15-20 minutes before proceeding.
Pro Tips For Making 9 Inch Pie Dough
- Cut Butter in Small Batches: I used to dump all the butter at once, and it just turned into a greasy mess. Instead, pulse the butter in your food processor or cut it with a pastry cutter in 2-3 additions—just enough to form pea-sized pieces each time. This keeps the dough from getting too warm or losing its structure before the flour even gets a chance to work.
- Use Ice Water, Not Cold: Cold water? Nah. Grab actual ice cubes or frozen water and let them melt just slightly in your measuring cup—you want the water to be closer to 35°F than 50°F. The shock of real ice keeps the butter firm longer, which means your dough won’t get gummy when you roll it out later. (Yes, even if you’re impatient like me.)
- Skip the Over-Kneading: The moment your dough holds together when pressed, stop. I learned this the hard way—after kneading one batch into submission, it turned out tough as a boot. For a 9-inch pie, you only need about 10-12 gentle presses with your fingers. Overworking it = flaky crust? Nope. Just a sad, dense disk.
- Chill Between Rolls: If your dough starts sticking or resisting the rolling pin, slap it back in the fridge for 10-15 minutes. I skip this when I’m lazy, but the dough is noticeably easier to handle—and less likely to shrink when it bakes. Pro move: Wrap it loosely in plastic so it doesn’t sweat. (Your future self will thank you.)
Common mistakes when making great 9 inch pie dough
Overworking the Dough
This is the #1 mistake I see—once the dough comes together, many people start kneading it like bread dough. Resist the urge! Pie dough develops gluten when handled too much, resulting in a tough, chewy crust instead of flaky layers.
Once the dough holds when pressed, stop mixing immediately. If it feels too dry, add just 1 tsp ice water at a time until it comes together with minimal handling.
Skipping the Chill
Rushing the 2-hour chill is a recipe for disaster. Cold butter is what creates those signature flakes, and warm dough shrinks dramatically when baked. I’ve seen home bakers skip chilling and end up with a dense, sad crust.
If you’re in a hurry, shape the dough and freeze it for 30 minutes—it won’t be ideal, but it’ll save you from a complete fail.
Using Warm Butter
Soft or melted butter is the fastest way to kill your crust’s flakiness. The butter must stay cold and firm throughout the process. If your kitchen runs warm, keep the butter in the freezer until ready to use, then cut it into cubes just before mixing.
A quick test: press a piece of butter between your fingers—if it smears, it’s too soft. If it holds its shape but feels slightly soft, you’re golden. 🧈
Not Pre-Baking for Wet Fillings
For pies with juicy fillings (like berries or custards), many bakers forget to pre-bake the crust. Without this step, your crust will turn soggy. Pre-bake at 375°F for 10-12 minutes with pie weights or dried beans, then chill before adding filling.
This creates a sturdy base that holds up to even the wettest fillings. Trust me, your apple pie will thank you.
Rolling Too Thin
A crust that’s too thin (less than ⅛-inch thick) burns quickly and loses that beautiful flaky texture. Aim for ⅛-inch thickness—any thinner, and you risk a crispy but dense result.
Use a ruler or measuring tape to check thickness while rolling. If you’re struggling, dust your rolling pin with flour and roll from the center outward to keep the dough even.
Ignoring the Egg Yolk
While optional, the egg yolk adds richness and binding power that makes a noticeable difference. Skipping it can leave your crust slightly dry or crumbly. If you’re making a savory pie (like quiche), the yolk’s richness pairs beautifully with cheese and eggs.
For sweet pies, it helps create that melt-in-your-mouth texture we all love. Don’t overlook this simple upgrade!
Nutrition facts
Frequently asked questions
Can I make this 9-inch pie dough without a food processor?
This recipe works perfectly by hand using just a pastry cutter or your fingers. Simply cut the cold butter into the flour mixture until you achieve pea-sized pieces with some flour still clinging to them. The key is to keep everything cold and work quickly to maintain that signature flakiness.
How do I prevent my crust from shrinking when baking?
Proper chilling is your best defense! Always refrigerate the dough for at least 2 hours before rolling. The cold butter prevents shrinking, and working with cold dough maintains the shape. If your kitchen is warm, chill the dough between steps or even freeze it for 15 minutes before rolling.
Can I use this dough for a top crust instead of a bottom crust?
Yes, but with one important adjustment. For a top crust, add a 1 egg wash (1 egg yolk + 1 tbsp water) before baking to create that beautiful golden finish. This helps prevent browning too quickly and gives it that bakery-style appearance. Just brush it on right before going into the oven.
What’s the best way to store leftover pie dough?
Wrap the shaped dough tightly in plastic wrap and refrigerate for up to 3 days. For longer storage, freeze it between parchment paper for up to 3 months. Thaw overnight in the fridge before using. The key is to keep it airtight to prevent drying out.
Can I substitute butter with shortening for a flakier crust?
Shortening will give you a slightly different texture—more tender but less flavorful. While it works in a pinch, butter creates those signature flakes and adds rich flavor. If you must substitute, use ¾ cup shortening instead of butter, but expect a slightly different mouthfeel.

- 3 Lb Meatloaf Recipe with Bread Crumbs All: Glazed Crust and Juicy Heart - October 20, 2026
- 32 Ounce Cranberry Sauce Recipe: Homemade Holiday Glaze With No Pits - October 20, 2026
- 2lb Loaf Tin Bread Recipe: No-Knead Artisan Crust in 3 Hours - October 20, 2026