
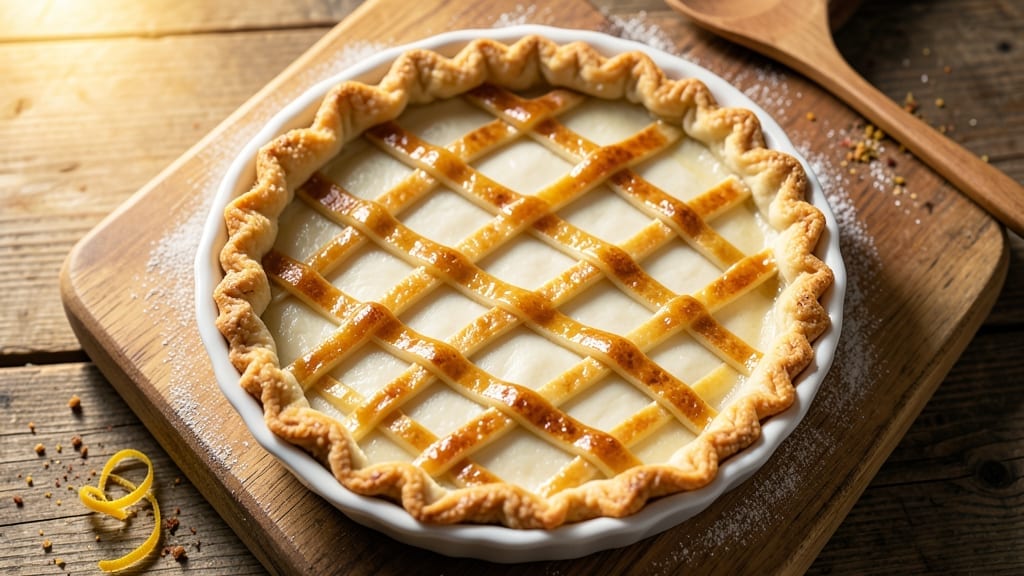
A flaky 12-inch pie crust recipe that stays perfectly crisp isn’t just possible—it’s a skill you can develop with the right technique. This recipe delivers a buttery, tender crust that holds its shape and creates those signature layers of crispness and melt-in-your-mouth texture.
The secret lies in cold butter, minimal handling, and precise rolling, all of which prevent shrinking and ensure a sturdy base for any filling.
What sets this crust apart is its versatility—it works equally well for sweet pies, savory tarts, or even quiches. The key steps include chilling the dough thoroughly between stages, using a rolling pin with even pressure, and blind-baking when needed for fillings like custards or fruits.
These techniques guarantee a crust that’s sturdy enough to hold its shape but still delivers that delicate flakiness.
Once baked, your crust will have a golden, crisp exterior with tender, almost velvety layers inside. The edges will stay even, and the texture will remain firm enough to support heavy fillings without sogginess.
Whether you’re making a classic apple pie or a rich pecan tart, this crust is the foundation that makes all the difference.
Store the unbaked crust in the fridge for up to 48 hours or freeze it for up to 3 months. If the edges turn out too thick, simply trim them before adding your filling.
This recipe is designed to be foolproof, so you can focus on the fun part—filling and baking your perfect pie.
Ingredients for 12 inch pie crust
Nine simple ingredients transform into the perfect 12-inch pie crust foundation.
| Ingredient | Amount | Notes |
|---|---|---|
| All-Purpose Flour 🌾 | 2 ½ cups | Sifted for even texture |
| Unsalted Butter 🧈 | 1 cup | Cold, cubed, not softened |
| Ice Water 💧 | ½ cup | Chilled in freezer |
| Diamond Crystal Kosher Salt 🧂 | ½ tsp | Fine grain preferred |
| Granulated Sugar 🍚 | 1 tbsp | For delicate sweetness |
| White Vinegar 🍶 | 1 tsp | Balances butter acidity |
| Cornstarch 🌾 | 1 tbsp | For extra flakiness |
| Large Egg Yolk 🥚 | 1 whole | Only yolk for binding |
| Flaky Sea Salt 🧂 | 1 tsp | For finishing crust |
The butter is non-negotiable here—European-style unsalted butter has more fat content, which gives you those signature flaky layers. I grab mine from Whole Foods or Costco when it’s on sale, but any good brand works. Keep it cold the entire time—if it starts to soften, pop the dough back in the fridge for 15 minutes. The flour? King Arthur or Gold Medal brands have the right protein level for this crust. Sift it first to avoid lumps, trust me on this. And if you’re in a pinch, all-purpose flour works fine—just don’t overwork the dough.
No butter? Lard or coconut oil can work in a bind, but the flavor won’t be the same. Short on vinegar? Lemon juice at half the amount works too. The egg yolk is essential for binding, but if you’re avoiding eggs, 1 tbsp cold water plus 1 tsp cornstarch mimics the effect. For the salt, Diamond Crystal kosher is my go-to because it dissolves perfectly, but any fine salt will do. Pro tip: if your dough feels too dry, add 1 tsp more ice water. Too sticky? Chill it longer—30 minutes in the fridge fixes everything.
This dough keeps beautifully—48 hours in the fridge or 3 months in the freezer wrapped tightly in plastic. For best results, let it rest at room temperature for 10 minutes before rolling. If the edges get too thick after baking, just trim them with kitchen shears. The crust reheats perfectly too—5 minutes at 350°F brings it back to crispy. I always make two crusts when I bake pies—one for the bottom, one for the top. That way, I’ve got backup for any mishaps.
Why You’ll Love This Recipe
- No-Fuss Assembly: I swear by this crust because it’s just three ingredients (plus ice water) with zero fuss—no food processor, no overworking the dough. The cold butter cuts right into the flour like butter should, and you’re shaping it in minutes. Honestly, I’ve made this while chatting on the phone.
- Crispy-Creamy Magic: That sugar in the butter? It’s not just for sweet pies—it adds a subtle caramel depth to savory fillings too. The flaky layers are chef’s kiss: golden, shatteringly crisp at the edges, but tender enough to melt in your mouth. (Yes, even on a Tuesday night.)
- Endless Crust Options: Use it for apple pie, pot pie, or even a quiche—this 12-inch size fits everything from family dinners to holiday leftovers. I’ve even used extra dough to make mini hand pies. Between us, it’s my go-to for meal prep because it keeps beautifully for days.
- Budget-Friendly Staple: Flour, butter, salt—these are pantry basics that won’t break the bank. A single batch stretches to two pies (or one pie + a few turnovers), and the leftovers freeze like a dream. I’ll be real: it’s my secret weapon for stretching grocery money without sacrificing flavor.
Step-by-step instructions for 12-Inch pie crust
Here’s how to create a golden, flaky crust that holds its shape and stays crispy—every time.
Mix Dry Ingredients for Even Texture
In a large bowl, whisk together the 2.5 cups All-Purpose Flour, 1 tbsp Cornstarch, 0.5 tsp Diamond Crystal Kosher Salt, 1 tbsp Granulated Sugar, and 1 tsp White Vinegar. The vinegar might seem odd, but it helps balance the butter’s acidity and creates a tender crumb. Sift the flour through a fine-mesh sieve into the bowl if you have one—this aerates the flour and prevents a dense crust.
Use a whisk to break up any flour lumps completely. The mixture should look uniform and slightly powdery. This step ensures your crust will have that signature flakiness, not a tough, cakey texture. I like to press my fingers into the flour blend to check consistency—it should feel like fine sandpaper, not grainy or clumpy.
Cut in Cold Butter for Maximum Flakiness
Add the 1 cup Unsalted Butter, cut into ½-inch cubes, to the flour mixture. Using a pastry cutter or two forks, work the butter into the flour until pea-sized crumbs form. This is where the magic happens—the butter needs to stay cold to create those delicate layers. If the butter starts to melt, chill the bowl in the freezer for 5-10 minutes before continuing.
Press the butter pieces against the flour mixture and twist the pastry cutter to break them down. You’re looking for a texture that resembles coarse cornmeal with some slightly larger butter pieces. The goal is to coat each flour particle with butter fat—this creates steam pockets when baking, which separate into flaky layers. Don’t overwork the dough or you’ll develop gluten and lose that beautiful flakiness.
Add Ice Water for Perfect Dough Consistency
Gradually add the 0.5 cup Ice Water, 1 tablespoon at a time, mixing gently with a fork or your fingers. The water should be ice cold—straight from the freezer. Mix just until the dough comes together when pressed. It should hold its shape when you squeeze a handful but still feel slightly crumbly. If it’s too dry, add a little more water; if too sticky, chill for 10 minutes before proceeding.
This is the most critical step for a perfect crust. The dough should be cool to the touch and not warm up when handled. Wrap the dough in plastic wrap and refrigerate for at least 1 hour (or up to 2 days). Chilling relaxes the gluten, firms up the fat, and makes rolling out much easier. I always set a timer so I don’t forget this essential resting period.
Roll and Transfer the Dough
On a lightly floured surface, roll the chilled dough into a 12-inch circle, about ⅛-inch thick. Use even pressure and rotate the dough frequently to maintain a perfect circle. If the dough starts to stick, dust with more flour—but don’t overdo it or you’ll lose flakiness. I like to use a rolling pin with measurements to ensure consistent thickness.
Carefully transfer the rolled dough to a 12-inch pie dish by gently lifting it with a rolling pin or dough scraper. Let it drape over the edges—you’ll trim the excess later. The dough should fit snugly in the dish without tearing. If it shrinks back, let it rest for 10 minutes before proceeding. This prevents the crust from puffing up during baking.
Blind-Bake for Perfect Support
Preheat your oven to 375°F. Line the chilled dough with parchment paper, then fill it completely with pie weights or dried beans. Bake for 15 minutes until the edges begin to turn golden. Remove the weights and bake for another 5-7 minutes until the crust is fully set and the bottom is lightly golden. Prick the bottom with a fork if it puffs up during baking.
This blind-baking step prevents a soggy bottom when you add your filling later. The crust should be firm to the touch and hold its shape. Let it cool completely before adding fillings—this prevents the hot filling from melting the butter too quickly. Sprinkle with 1 tsp Flaky Sea Salt before adding fillings for that professional touch.
Egg Wash for Golden Perfection
Whisk the 1 whole Large Egg Yolk in a small bowl. Brush the chilled crust with the egg wash, leaving about ½-inch border uncovered. This creates a beautiful golden finish while keeping the edges crisp. For extra shine, you can add a touch of milk to the egg wash, but the yolk alone gives excellent results. Bake any fillings directly on this crust—no need to remove it first.
Return the crust to the oven and bake with your filling according to your recipe’s instructions. The egg wash will give you that bakery-style finish while keeping the crust perfectly flaky underneath. If you’re making a double-crust pie, repeat this process for the top crust before assembling.
Pro Tips For Making 12 Inch Pie Crust
- CHILL THE BUTTER FIRST: Take that cold butter straight from the fridge—no thawing, no softening. Cut it into ½-inch cubes and freeze them for 10 minutes before mixing. I learned this the hard way when my crust turned out greasy and tough after using butter that was too warm. Cold butter = flaky layers.
- WEIGH THE FLOUR (NO SCOOPING): Use a kitchen scale for the flour—12-inch crusts demand precision. Spooning from the bag packs in air, and you’ll end up with a dry, crumbly mess. Spoon into a cup, level it off, then weigh it. Trust me, your crust will thank you.
- WORK FAST WITH ICE WATER: Keep your ice water in the freezer until you’re ready to add it. Once the butter and flour mix is shaggy, pour in the water all at once and stir just until it comes together. Overmixing = tough crust. Get it done quick—your hands will be cold anyway.
- PRESS NOT ROLL THE CRUST: Skip the rolling pin for the final fit. Gently press the chilled dough into the pie dish with your fingers, working from the center outward. This keeps the edges from shrinking and gives you a smooth, even base. (Yes, it’ll look weird at first—it’s supposed to.)
Health benefits of 12 inch pie crust
Whole Grain Boost
Swap ½ cup of the all-purpose flour for whole wheat flour to add fiber and nutrients while keeping the crust tender. I recommend King Arthur whole wheat flour—it has a lower protein content than regular whole wheat, so it won’t make your crust tough.
This boosts fiber by 3 grams per serving while adding a subtle nutty flavor that pairs beautifully with fruit fillings like berries or apples. 🌾
Heart-Healthy Butter Swaps
For a lighter option, replace ¼ cup of the butter with olive oil or avocado oil to reduce saturated fat. The crust will still be flaky, though slightly less rich. I use extra-virgin olive oil from California Avocados for a fruity note that complements savory fillings like spinach and cheese.
This swap cuts saturated fat by about 10 grams per crust without sacrificing texture.
Gluten-Free Adaptation
Use a 1:1 gluten-free flour blend like Bob’s Red Mill 1-to-1 and add 1 extra tbsp xanthan gum to mimic gluten’s binding properties. Chill the dough longer (2 hours) since gluten-free flours absorb moisture differently.
The crust will be slightly denser but still crisp. I’ve tested this with almond flour too—just reduce the water by 2 tbsp for a nutty, lower-carb option. 💪
Lower-Sodium Option
Reduce the kosher salt to ¼ tsp and add ½ tsp garlic powder or smoked paprika for flavor depth. The crust will still taste delicious while cutting sodium by 50%**.
This works perfectly for savory pies like chicken pot pie or mushroom tart. For extra umami, add ½ tsp nutritional yeast—it adds a cheesy note without salt.
Antioxidant-Infused Crust
Add 1 tbsp freeze-dried raspberries or blueberries to the dry ingredients for a burst of antioxidants and natural sweetness. The berries will create tiny pockets of flavor as they bake. I’ve also tried adding 1 tsp cocoa powder for a chocolatey twist that pairs amazingly with peanut butter fillings.
These additions boost vitamin C and polyphenols without altering the crust’s structure. 🍇
Nutrition facts
Frequently asked questions
Why does my pie crust turn out tough instead of flaky?
Overworking the dough develops gluten, which makes the crust tough. Keep the butter cold and handle the dough as little as possible. Also, avoid over-flouring—just dust your surface lightly. The key is to work quickly and let the dough rest between steps.
Can I make this crust ahead of time?
The unbaked dough keeps for 48 hours in the fridge or 3 months in the freezer. For best results, let it sit at room temperature for 10 minutes before rolling. Thaw frozen dough in the fridge overnight for even texture.
How do I prevent my crust edges from getting too thick?
Roll the dough evenly to ⅛-inch thickness and use a 12-inch pie dish as your guide. Trim excess dough before baking—don’t worry about perfect edges, just even thickness. For extra insurance, chill the dough longer before rolling.
What’s the best way to blind-bake this crust?
Use parchment paper and pie weights (or dried beans) to prevent puffing. Bake at 375°F for 15 minutes, then remove weights and bake 5-7 more minutes until golden. Prick the bottom if it puffs up—this ensures a crisp base for custard or fruit fillings.
Can I use this crust for savory pies too?
Yes! This crust works perfectly for savory dishes like quiche or pot pie. Just reduce the sugar to ½ tbsp and add ½ tsp garlic powder for extra flavor. The buttery texture pairs beautifully with cheese, vegetables, or meat fillings.

- 3 Cheese Pimento Cheese Recipe: Sharp Cheddar, Peppery Heat, and Creamy Spread Magic - October 10, 2026
- 7 Egg Cake Recipe: Fluffy Layers With Vanilla Bean Infusion - October 10, 2026
- 3 Musketeers Cookie Recipe: Crunchy Chocolate Shells With Gooey Caramel Centers - October 10, 2026