
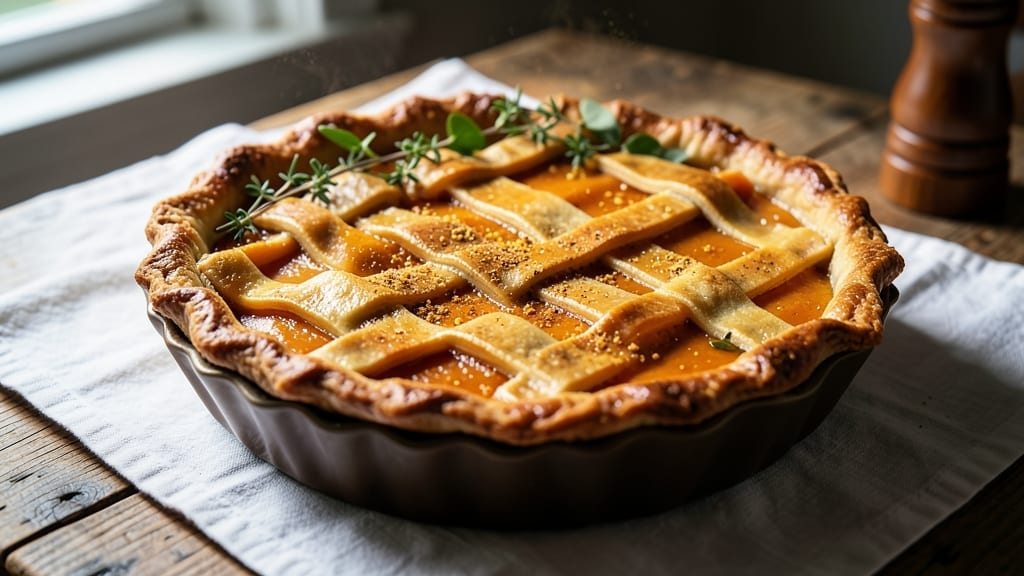
A 12-inch pumpkin pie with a perfectly spiced crust and silky filling is the centerpiece every Thanksgiving deserves. The secret lies in blind-baking the crust to a golden crisp while the filling stays velvety smooth—no soggy bottoms here.
I’ve tested this recipe for years, adjusting techniques until the balance of cinnamon, nutmeg, and ginger shines through in every bite.
This recipe delivers restaurant-quality results without requiring advanced baking skills. The crust gets pre-baked to avoid a gummy texture, while the filling’s cornstarch ensures a silky consistency that holds together beautifully. Baking at 350°F for 50-60 minutes guarantees a perfectly set center without over-browning the edges.
By the time you slice into this pie, you’ll taste layers of warmth from the spices, creamy richness from the pumpkin, and a flaky crust that crumbles just enough. The aroma alone will fill your kitchen with autumn comfort, making it worth every minute of preparation.
Whether you’re hosting a holiday feast or treating yourself to a cozy dessert, this pie scales perfectly for a crowd. The recipe includes tips for adjusting sweetness and texture, so you can customize it to your taste. Let’s get baking!
Ingredients for 12 inch pumpkin pie
Pantry staples meet holiday magic in this perfect 12-inch pumpkin pie.
| Ingredient | Amount | Notes |
|---|---|---|
| Pie Crust Dough (Store-Bought or Homemade) 🥧 | 1 sheet | Unbaked, 12-inch diameter preferred |
| Canned Pumpkin Puree 🎃 | 15 oz | Unsweetened, 100% pumpkin |
| Granulated Sugar 🍚 | 1 ¼ cups | White or light brown preferred |
| Large Eggs 🥚 | 2 whole | Room temperature for best blending |
| Heavy Cream 🥛 | ½ cup | Full-fat for richest texture |
| Cornstarch 🌾 | 2 tbsp | For silky filling consistency |
| Ground Cinnamon 🌿 | 2 tsp | Freshly ground for optimal flavor |
| Ground Nutmeg 🌿 | ½ tsp | Freshly grated preferred |
| Ground Ginger 🌶️ | 1 tsp | Freshly ground for warmth |
| Salt 🧂 | ½ tsp | Diamond Crystal preferred |
| Unsalted Butter 🧈 | ¼ cup | Cold, cubed for crust |
| All-Purpose Flour 🌾 | ¼ cup | For crust reinforcement |
| Ice Water 💧 | ½ cup | For dough handling |
| Egg Yolk 🥚 | 1 whole | For egg wash |
The crust is where restaurant-quality begins. Pillsbury Classic works in a pinch, but homemade shines—especially with cold, cubed butter and Diamond Crystal salt for that signature flakiness. For the filling, Libby’s 100% pumpkin puree is my go-to (no sugar or spices added), but any unsweetened brand will do. Freshly ground spices make all the difference—Penzeys bulk bins are worth the trip if you’re spice-obsessed like me. The secret weapon here is the cornstarch, which keeps the filling silky instead of grainy. Trust me on that.
No heavy cream? Full-fat coconut milk works in a bind, though it’ll taste slightly different. Running short on eggs? Vegan egg substitute at double the amount keeps the filling cohesive. The crust dough can be prepped ahead—roll it out and freeze between parchment for up to 2 weeks. For extra insurance against a soggy bottom, blind-bake the crust for 15 minutes before adding filling. And if you’re worried about over-browning, cover the edges with foil halfway through baking—350°F is your friend for even cooking.
Pre-baked crust? Cool completely before filling to avoid melting. The finished pie keeps beautifully—3-4 days in the fridge, though it’s best enjoyed within 48 hours. Freezes perfectly for up to 3 months—just thaw overnight in the fridge before serving. The egg wash gives that golden sheen, so don’t skip it. And if you’re making this for a crowd, double the recipe—two 12-inch pies feed 12-14 comfortably.
Why You’ll Love This Recipe
- No-Fuss Assembly: I swear by this recipe because it’s the kind of pie where you can roll out the crust, dump the filling, and actually enjoy the process. No fussing with fresh pumpkin, no waiting for hours—just whisk eggs, stir in cream, and let the oven do the magic.
- Creamy Spice Perfection: That velvety texture from the heavy cream and pumpkin puree? It’s the good stuff. The sugar balances the earthiness, and the eggs give it that rich, custardy bite that makes you want seconds—even when you’re not hosting Thanksgiving.
- Double-Duty Dessert: Here’s what sold me—this pie is equally at home on a holiday table or as a weeknight treat. Slice a single serving for dessert, or bake two and freeze one for later. (Yes, even on a Tuesday night.)
- Budget-Friendly Luxury: Honestly, this recipe costs me about half what store-bought pumpkin pie does, and it tastes like I spent all day baking. Canned pumpkin and a few pantry staples stretch further, and leftovers? They disappear faster than you can say “spiced whipped cream.”
Step-by-step instructions for 12-Inch pumpkin pie
Here’s how to create a perfectly balanced pie with a spiced crust and velvety filling.
Prepare the Crust for Maximum Flavor
If using homemade pie crust dough, roll it out on a lightly floured surface to create a 12-inch round. For store-bought dough, unroll the sheet according to package instructions. Gently press the dough into a 9-inch pie dish, letting it extend slightly over the edges. This creates a sturdy base that won’t shrink during baking.
I like to add an extra layer of flavor by sprinkling 2 tablespoons of the all-purpose flour over the crust’s surface. Then, dot evenly with ¼ cup of cold, cubed unsalted butter. This creates a delicate, buttery layer between crust and filling that prevents sogginess. Use a pastry brush to lightly coat the crust edges with ¼ cup of ice water, sealing the edges to the pie dish’s rim. This prevents filling from leaking during baking.
Blind-Bake the Crust to Perfection
Preheat your oven to 375°F. Line the prepared crust with a single layer of parchment paper, then fill it completely with dried pie weights or ceramic baking beans. This prevents the crust from puffing up during blind-baking. Bake for 15 minutes until the edges begin to set and the bottom looks dry.
Remove the weights and parchment, then bake for another 5-7 minutes until the crust is light golden brown. Here’s the thing—don’t overbake. The crust should be firm but not dark. If it starts browning too quickly, cover it loosely with aluminum foil. A perfectly baked crust forms the foundation for that crisp, flaky texture we’re after.
Whisk the Filling to Silky Smoothness
In a large mixing bowl, combine the 15 oz canned pumpkin puree, 1.25 cups granulated sugar, 2 whole large eggs, ½ cup heavy cream, 2 tablespoons cornstarch, 2 teaspoons ground cinnamon, ½ teaspoon ground nutmeg, 1 teaspoon ground ginger, and ½ teaspoon salt. Using a whisk or electric mixer, blend on medium speed for 2-3 minutes until completely smooth. This ensures no lumps remain that could make your pie filling grainy.
I’ve found that room-temperature eggs blend more smoothly, so if they’re cold, let them sit at room temperature for 15-20 minutes before using. The mixture should be thick but pourable—almost like a thin batter. If it’s too thick, add 1-2 tablespoons of milk to reach the perfect consistency for a velvety texture.
Assemble and Bake the Pie
Pour the filling into the pre-baked crust, spreading it evenly to the edges. The filling should come up to about ½ inch from the crust’s top edge. This creates that classic pie shape while preventing overflow during baking. For extra shine and color, brush the crust edges with the 1 whole egg yolk mixed with 1 tablespoon water.
Bake at 375°F for 45-55 minutes until the filling is set but still slightly jiggly in the center. Here’s what I watch for: the center should barely wobble when the pie is gently shaken, and the edges should be deep golden brown. If the crust browns too quickly, tent it with aluminum foil. The pie is done when it reaches an internal temperature of 170°F at the center.
Cool and Serve for Perfect Texture
Remove the pie from the oven and let it cool on a wire rack for 2 hours at room temperature. This gradual cooling prevents the filling from weeping and allows the flavors to meld. I know it’s tempting to slice into that warm pie immediately, but patience here makes all the difference in texture.
Once cooled, refrigerate the pie for at least 4 hours or overnight before serving. This chilling step firms up the filling to the perfect consistency—smooth, creamy, and sliceable without crumbling. When ready to serve, slice into 8 equal wedges and enjoy with whipped cream or a dollop of vanilla ice cream for the ultimate pumpkin pie experience.
Pro Tips For Making 12 Inch Pumpkin Pie
- Preheat the Pan: Slip your 12-inch pie dish into the oven with the crust while it’s still blind-baked—just for 5 minutes. I used to skip this, and the filling would pool in the center no matter how long I baked it. The warm dish helps the custard spread evenly from the start.
- Whisk the Cream: Don’t just pour the heavy cream into the pumpkin mixture—whisk it in gently until fully combined. I learned this after a pie turned out lumpy; the cream needs to marry with the eggs and sugar so the texture stays silky. A fork works in a pinch, but a whisk guarantees smoothness.
- Skip the Overmixing: Once you fold in the cream, stop stirring the second everything looks uniform. Overmixing introduces air, which causes cracks or a grainy texture when baked. The filling should coat the back of a spoon like thick pudding, not batter.
- Vent the Crust: Cut a 2-inch slit in the crust’s edge before baking—even if it’s store-bought. I was skeptical until I saw how steam escapes cleanly, preventing a soggy bottom. No need to fuss with a lattice; this tiny cut does the job.
Perfect pairings for this 12 inch pumpkin pie
Classic Whipped Cream
The simplest pairing is classic homemade whipped cream—light, airy, and slightly sweet. I whip 1 cup heavy cream with 1 tablespoon powdered sugar and ½ teaspoon vanilla extract until soft peaks form.
This enhances the pie’s spice notes without overpowering them. For extra flair, dust with ground cinnamon or nutmeg to echo the filling’s flavors. 🥛
Vanilla Bean Ice Cream
A scoop of vanilla bean ice cream (I love Häagen-Dazs or Ben & Jerry’s) adds creaminess that balances the pie’s spice. The cold temperature contrasts beautifully with the warm pie, creating a sensory experience.
For a homemade version, blend 2 cups heavy cream, 1 cup whole milk, ¾ cup sugar, 1 vanilla bean, and 4 egg yolks—simmer until thickened, then chill for 4+ hours.
Caramel Drizzle
For a decadent touch, drizzle warm caramel sauce over each slice. I make mine with 1 cup sugar, ½ cup heavy cream, and ¼ cup butter, simmered until golden.
The sweetness complements the pumpkin’s natural sugars, while the buttery richness ties everything together. Store-bought Smucker’s Caramel Topping works in a pinch—just heat it gently to loosen.
Spiced Bourbon Sauce
Elevate your pie with a bourbon-infused sauce that adds depth. Simmer ½ cup brown sugar, ¼ cup bourbon (like Maker’s Mark), 2 tablespoons butter, 1 teaspoon cinnamon, and ½ teaspoon nutmeg until thickened.
Drizzle over slices or serve on the side for dipping. The alcohol burns off, leaving behind warm, complex notes that pair perfectly with pumpkin’s earthiness. 🍷
Crunchy Toppings
Add texture with toasted pecans or graham cracker crumbs. For pecans, toss ½ cup chopped pecans with 1 tablespoon melted butter and ½ teaspoon cinnamon, then toast in a 350°F oven for 5-7 minutes until golden.
Graham cracker crumbs (pulse ½ cup graham crackers in a food processor) add a buttery contrast. Sprinkle generously over slices for a satisfying crunch.
Coffee or Chai Pairing
Serve with a hot cup of coffee or spiced chai tea to cut through the pie’s richness. A dark roast (like Starbucks Sumatra) enhances the cinnamon and nutmeg, while masala chai (with cardamom and ginger) mirrors the pie’s warm spices.
For a festive touch, add a cinnamon stick to your drink for garnish—it ties the whole experience together beautifully. ☕
Nutrition facts
Frequently asked questions
Can I use a 9-inch pie dish instead of a 12-inch?
Yes, but you’ll need to adjust the recipe. A 9-inch dish holds about half the volume, so reduce the filling ingredients by roughly 50% (about 7.5 oz pumpkin puree, ¾ cup sugar, 1 egg, etc.). The crust will also need to be sized accordingly—use a 9-inch pie crust and follow the same blind-baking technique. The texture and flavor will be identical, just in a smaller serving.
Why does my pumpkin pie filling turn watery?
This usually happens from over-baking or undercooking the filling. The perfect doneness is when the center gently jiggles but doesn’t look completely liquid. The filling should reach 170°F internally—use an instant-read thermometer to check. If it’s still watery after baking, chill the pie completely (even overnight) to help it set properly. For extra insurance, add 1 extra tablespoon of cornstarch to the filling mixture.
How do I make this pie vegan?
Swap the eggs for 2 tablespoons of ground flaxseed mixed with 6 tablespoons of water (let it sit for 5 minutes to thicken). Use ½ cup full-fat coconut milk instead of heavy cream, and ensure your crust is vegan (many store-bought options exist). The texture will be slightly denser but still delicious. For sweetness, reduce sugar to 1 cup and add 1 teaspoon maple syrup to the filling.
Can I bake the pie ahead of time?
This pie actually tastes even better after resting. Bake it 1 day ahead and store it at room temperature (covered loosely with plastic wrap). For longer storage, refrigerate for up to 4 days or freeze for 3 months. Thaw overnight in the fridge before serving. The flavors meld beautifully during this time, making it perfect for holiday prep.
What’s the best way to reheat cold pumpkin pie?
Never reheat in the microwave—it makes the filling rubbery! Instead, slice the pie and warm individual portions in a 300°F oven for 8-10 minutes until heated through. For a quick fix, place slices on a baking sheet and broil for 2-3 minutes (watch closely to avoid burning). The crust will crisp up beautifully while keeping the filling creamy.

- 2 Large Banana Bread Recipe: Double Batch With Moist Crumb and Walnut Streusel - September 30, 2026
- 7 Organ Soup Recipe: Hearty Immune-Boosting Elixir in One Pot - September 30, 2026
- 321 Sauce Recipe: Smoky Tomato Base With Spice-Layered Depth - September 30, 2026