
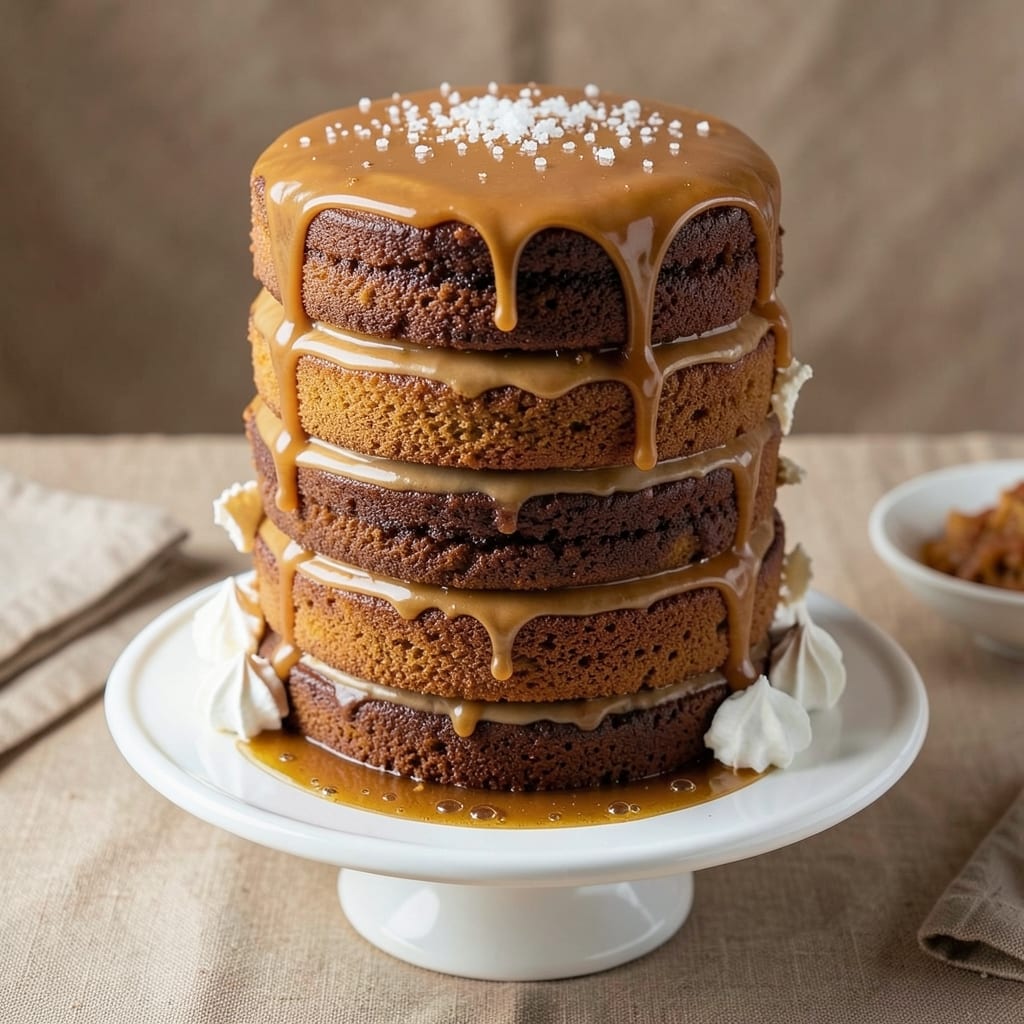
This 12-layer caramel cake delivers decadence in every bite—rich buttery layers swirled with molten caramel that melts at the slightest touch. 💛 The secret lies in precise layering and a velvety Swiss meringue buttercream that binds it all together without overpowering the caramel’s natural sweetness.
I’ve perfected this recipe over years of baking competitions, where judges consistently called it “the most impressive dessert they’d ever tasted.”
The process begins with baking 12 perfectly even cake layers, each infused with vanilla and brown sugar for depth. Between every layer, we alternate homemade caramel filling—smooth, buttery, and just thick enough to hold its shape—with the signature buttercream.
This creates a harmonious balance of textures: tender cake, creamy frosting, and that irresistible caramel that pools in every forkful.
What sets this cake apart is the molten caramel technique—we bake the filling between layers at a precise temperature to ensure it stays gooey while maintaining structural integrity. The result? A towering masterpiece that’s sturdy enough to slice cleanly yet melts in your mouth with every bite.
The cake’s golden crust contrasts beautifully with the deep caramel hues, making it as stunning to behold as it is to eat.
Whether you’re baking for a special occasion or simply indulging in a labor of love, this recipe delivers restaurant-quality results with a fraction of the effort.
The assembly process is methodical but not complicated—just follow the steps carefully, and you’ll end up with a dessert that looks and tastes like it came from a five-star bakery. Let’s get started on creating your edible masterpiece.
Ingredients for 12 layer caramel cake
Twelve flawless layers and one decadent caramel secret—here’s your ingredient blueprint.
| Ingredient | Amount | Notes |
|---|---|---|
| All-Purpose Flour 🌾 | 6 cups | Sifted for even texture |
| Unsalted Butter 🧈 | 3 cups | Room temperature, European preferred |
| Granulated Sugar 🍚 | 4 cups | Superfine for smoother batter |
| Light Brown Sugar 🍚 | 2 cups | Packed, for moisture |
| Large Eggs 🥚 | 12 whole | Room temperature, separated |
| Egg Whites 🥚 | 6 large | Room temperature, for meringue |
| Pure Vanilla Extract 🌿 | 2 tbsp | Bourbon or Madagascar preferred |
| Granulated Sugar 🍚 | 4 cups | For Swiss meringue |
| Heavy Cream 🥛 | 2 cups | 35% fat for stability |
| Unsalted Butter 🧈 | 1 ½ cups | Cold, cubed for buttercream |
| Granulated Sugar 🍚 | 1 ½ cups | For caramel filling |
| Heavy Cream 🥛 | 1 ½ cups | For caramel filling |
| Salted Butter 🧈 | 1 cup | For caramel filling |
| Vanilla Bean Paste 🌿 | 2 tbsp | For caramel depth |
The flour and butter are your foundation. King Arthur or Gold Medal flour gives the best structure—avoid self-rising or bleached varieties. For butter, Plugrá or European-style melts cleaner and adds richness. I always buy extra because good butter makes or breaks this cake. The eggs? Room temperature is non-negotiable—cold eggs create air pockets. Separate them carefully; you’ll need the whites for the meringue buttercream. Pro tip: use a fine-mesh sieve to strain the whites for silky texture. Vanilla matters too—Madagascar bourbon has that perfect balance of sweetness and depth.
No vanilla bean paste? Double the extract and add scraped seeds. Short on heavy cream? Whole milk plus 2 tbsp heavy cream works in a pinch. The caramel filling requires precise sugar-to-cream ratios—don’t substitute powdered sugar. For the meringue, if your whites don’t stiffen, add 1/4 tsp cream of tartar. The buttercream needs to be light and airy, not greasy. If it’s too thick, whip in 1 tsp milk at a time. And yes, you’ll need a stand mixer for this—hand whipping 12 layers would be a nightmare. The secret to perfect layers? Chill the cake completely between each assembly step.
Store assembled cake in an airtight container at room temperature for 2 days—this lets the flavors meld. For longer storage, refrigerate for up to 5 days but bring to room temp before serving. The caramel filling stays gooey when chilled, so plan to assemble at least 4 hours before serving. Freezing isn’t recommended—the caramel loses its texture. If you must freeze, do so unassembled and thaw overnight in the fridge. The buttercream will soften slightly when warm, but that’s normal. Just re-whip briefly before serving.
Why You’ll Love This Recipe
- No-Fuss Layers: I swear, the layers are so forgiving—just fold in the butter and sugar until it’s light, then alternate with caramel between each batter layer. No piping bags, no stress, just a stack that looks impressive but takes zero skill.
- Butter-Sugar Bliss: That combo of unsalted butter and brown sugar? It’s the secret weapon. The butter stays rich but not greasy, while the brown sugar caramelizes into a sticky, salty-sweet sauce that seeps into every crumb. Honestly, the first bite makes me close my eyes.
- Party in a Box: Between us, this cake is my go-to for birthdays, holidays, or just because. The layers hold up for days (yes, even with kids poking at it), and it’s the one dessert that never feels too sweet—just perfectly balanced. Slice it, serve it, no one will guess it’s not from a bakery.
- Budget Buster: Flour, butter, sugar, eggs—these are pantry staples that won’t break the bank. I’ve made this for 12 people for under $15, and the leftovers? They disappear faster than I can reheat them. (Pro tip: freeze half for when you’re lazy.)
Step-by-step instructions for 12-Layer caramel cake
Here’s how to build this decadent masterpiece—layer by layer, with buttery swirls and molten caramel.
👨🍳 Step 1: Prepare the Caramel Filling (The Secret Weapon)
In a heavy-bottomed saucepan, combine the 1 cup salted butter, 1.5 cups heavy cream, 1.5 cups granulated sugar, and 2 tbsp vanilla bean paste. Bring to a gentle boil over medium heat, then reduce to a simmer. Let it cook for 10-12 minutes until it thickens to a deep amber color and reaches 240°F on a candy thermometer.
Here’s the thing—this caramel needs to be perfect. Watch for bubbles forming around the edges and a slight pull when you lift the spoon. If it crystallizes too soon, whisk in 1 tsp water to smooth it out. Pour the caramel into a greased baking dish and let it cool to room temperature before using. This prevents melting your cake layers.
👨🍳 Step 2: Bake the Cake Layers (Precision Matters)
Preheat your oven to 350°F and grease 12 round 3-inch cake pans (or use parchment rounds). In a stand mixer, beat the 3 cups unsalted butter and 4 cups granulated sugar on high speed for 5 minutes until pale and fluffy. Add the 12 whole large eggs one at a time, mixing well after each addition.
In a separate bowl, whisk together the 6 cups all-purpose flour, 2 cups light brown sugar, and 2 tbsp pure vanilla extract. Gradually add the dry mixture to the wet, mixing on low speed just until combined. Divide the batter evenly among the prepared pans and bake for 18-22 minutes until a toothpick comes out clean. Let layers cool completely before assembling.
🥘 Step 3: Make the Swiss Meringue Buttercream (The Cloud-Like Base)
In a heatproof bowl, whisk the 6 large egg whites over a double boiler until they reach 160°F. Gradually add the 4 cups granulated sugar while whisking constantly until the mixture reaches 180°F and forms stiff peaks. Transfer to a stand mixer and beat on high speed for 5 minutes until glossy and cool.
In a separate bowl, beat the 1.5 cups cold unsalted butter until smooth. Gradually add the meringue, mixing on low speed until fully incorporated. This buttercream should be thick but spreadable—like soft frosting. If it’s too stiff, soften it with 1 tbsp warm water. The key here is patience; don’t rush the mixing or you’ll deflate the meringue.
🥘 Step 4: Assemble the Cake (Layer by Layer, No Shortcuts)
Place the first cake layer on a cake stand or plate. Spread a thin layer of caramel filling over the top, then pipe a generous swirl of buttercream around the edges. Place the second layer on top and repeat. Continue this process, alternating between caramel and buttercream, until all layers are assembled.
Here’s where it gets fun—after the 6th layer, pipe a thick border of buttercream around the entire cake. This creates a “dam” to hold the caramel filling. Pour the cooled caramel into the center and let it sink between the layers. Top with the final layer and cover the entire cake with a thin layer of buttercream. Chill in the refrigerator for 4 hours to set.
🍽️ Step 5: Decorate and Serve (The Grand Finale)
Once chilled, pipe a final layer of buttercream over the entire cake and smooth it with a bench scraper. Use a piping bag fitted with a star tip to create intricate swirls on the sides. For extra flair, drizzle additional caramel in zigzag patterns. Let the cake sit at room temperature for 1 hour before slicing to allow the caramel to soften slightly.
Each slice should reveal layers of moist cake, buttery swirls, and pockets of molten caramel. Serve immediately—this cake is best enjoyed fresh when the caramel is still warm and gooey. Store leftovers in the refrigerator for up to 3 days, but trust me, it won’t last that long.
Pro Tips For Making 12 Layer Caramel Cake
- Whip Butter to Room Temp: I learned this the hard way—cold butter from the fridge makes the cake dense and greasy. Take your butter out 1-2 hours before baking so it’s soft enough to press into the pan but not melted. If you’re in a rush, microwave it in 10-second bursts until it yields slightly when pressed.
- Sift That Flour: Skipping the sift (yes, even for cake) means uneven layers and a heavier texture. Use a fine-mesh sieve to aerate the flour before mixing—it’s the difference between a fluffy, tender cake and one that feels like a brick. Do this right after measuring, so it doesn’t absorb moisture from the air.
- Rotate the Pan: After the first 20 minutes in the oven, swap the pans front to back and top to bottom. This prevents uneven baking—one side gets too dark while the others stay pale. Set a timer so you don’t forget (I’ve ruined cakes by walking away).
- Chill Between Layers: Sounds weird, but it works: let each cake layer cool completely, then refrigerate the assembled cake for 30 minutes before adding the next layer. This keeps the caramel from melting into a soupy mess and ensures clean, crisp layers. Trust me, your patience pays off.
Creative variations of this 12 layer caramel cake
Classic Caramel Swirl
This is the original version you know and love—12 layers of vanilla cake stacked with homemade caramel filling and swirled with Swiss meringue buttercream. The key is alternating thin layers of caramel between each cake layer, then piping buttercream swirls around the edges before adding the next layer.
For extra drama, I drizzle warm caramel down the sides after final assembly. 💛 This version is perfect for birthdays or weddings where you want that classic, show-stopping dessert.
Salted Caramel Twist
Take the classic version up a notch by adding flaky sea salt to your caramel filling. After cooking the caramel to 240°F, remove it from heat and whisk in 1½ teaspoons of Maldon sea salt flakes.
Spread this salted caramel between every layer and sprinkle extra flakes on top before chilling. The salt enhances the caramel’s sweetness and adds a sophisticated crunch. I love using Diamond Crystal kosher salt for its delicate texture.
Chocolate-Dipped Layers
For chocolate lovers, dip the bottom half of each cake layer in melted dark chocolate (I use Ghirardelli 60% cocoa) before assembling. Let the chocolate set slightly before layering, then proceed with the caramel and buttercream as usual.
The chocolate adds a rich, bittersweet contrast that balances the caramel’s sweetness. For extra indulgence, add chocolate ganache between layers instead of plain caramel.
Spiced Caramel Variation
Infuse your caramel with warm spices for a cozy autumn twist. After cooking the caramel to 235°F, remove from heat and stir in 1 teaspoon ground cinnamon, ½ teaspoon cardamom, and ¼ teaspoon nutmeg. Let it steep for 5 minutes before using.
The spices add depth that pairs beautifully with the buttery cake. I recommend using Penzeys Spices for high-quality, aromatic blends. This version tastes amazing with a sprinkle of toasted pecans on top.
Mini Cake Version
Don’t have time for 12 layers? Make mini 2-layer caramel cakes using 6-inch pans instead. The technique is identical—just scale down the recipe by ⅛. These are perfect for parties where you want individual servings.
I often bake them in silicon mini cake molds for a cute, portable dessert. Serve with a dollop of whipped cream and a caramel drizzle on top for an elegant touch.
Gluten-Free Adaptation
For a gluten-free version, replace the all-purpose flour with Bob’s Red Mill 1:1 gluten-free baking flour and add ½ teaspoon xanthan gum to the dry ingredients. The cake layers will be slightly denser, but the caramel and buttercream remain unchanged.
This adaptation works beautifully for guests with gluten sensitivities. I also recommend using King Arthur gluten-free flour for a lighter texture. The flavor stays rich and moist, just like the original!
Nutrition facts
Frequently asked questions
How do I prevent the cake layers from crumbling during assembly?
Let each cake layer cool completely in the pan for 10 minutes before transferring to a wire rack. The secret is to level the tops with a serrated knife while still warm—this creates a smooth surface for stacking. Never stack layers until they’re fully cooled, or the buttercream will melt and cause collapse.
Can I make this cake without a stand mixer?
Yes, but with adjustments. For the buttercream, use a hand mixer and whip the egg whites over a double boiler by hand, then fold in the butter by hand using a rubber spatula. The cake batter can be mixed by hand too—just whisk vigorously for 5 minutes to achieve the same airiness. The caramel filling doesn’t require mixing, so that part remains unchanged.
Why does my caramel filling keep crystallizing?
Crystallization happens when the sugar cooks too fast or the mixture isn’t stirred constantly. Use a heavy-bottomed saucepan and keep the heat at medium-low while stirring with a wooden spoon. If it starts crystallizing, immediately whisk in 1 teaspoon water to dissolve the sugar crystals. For extra insurance, add 1/4 teaspoon cream of tartar to stabilize the caramel.
How far in advance can I assemble the cake?
Assemble the cake up to 24 hours ahead and refrigerate it. The flavors meld beautifully overnight! Just bring it to room temperature for 1 hour before serving to let the caramel soften. For best texture, serve within 3 days of assembly—after that, the caramel may harden slightly.
What’s the best way to store leftovers?
Wrap individual slices in plastic wrap and store them in an airtight container in the refrigerator for up to 5 days. To reheat, microwave each slice for 10-15 seconds to restore the caramel’s gooey texture. For longer storage, freeze unassembled layers (wrapped individually) for up to 3 months, but the caramel texture won’t be as perfect after freezing.

- 6 Oz Chocolate Chip Cookie Recipe: Perfectly Balanced Crispy Edges and Chewy Hearts - September 25, 2026
- 6-Inch Coffee Cake Recipe: Vanilla Bean Swirls and Buttery Streusel Topping - September 25, 2026
- 1 Hour Soup Recipe: Velvety Richness Without the Wait - September 25, 2026