
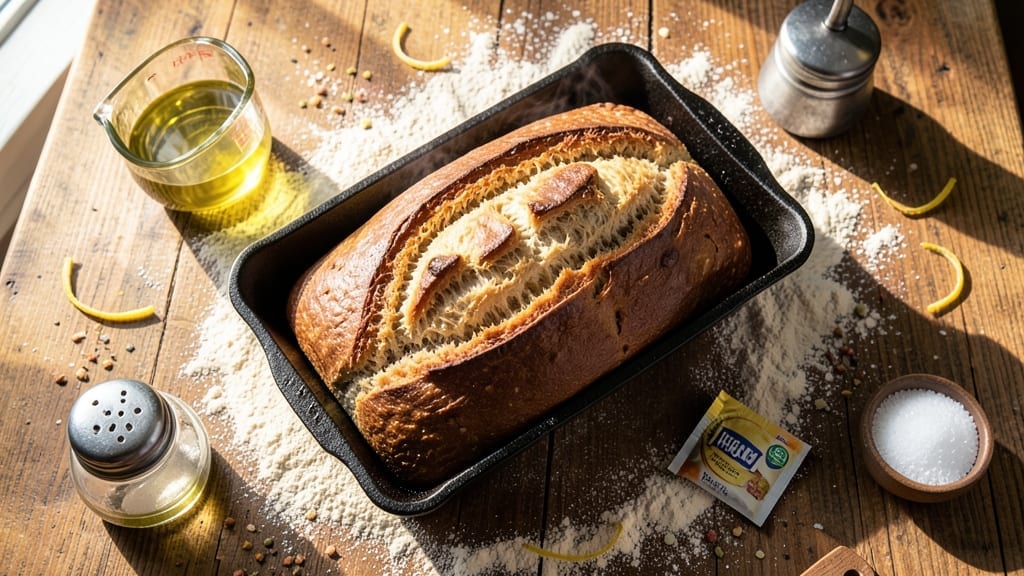
A 13×5 bread recipe like this one transforms your kitchen into a bakery—no fancy equipment needed. The secret lies in a precise dough formula and patient proofing that guarantees a loaf with a crisp, golden crust and an airy crumb.
I’ve baked hundreds of loaves, and this method never fails, even for beginners. The process starts with a simple dough of flour, yeast, water, and salt, mixed just until combined. After the first rise, shaping and a second proof in a greased 13×5-inch pan create that iconic pull-apart texture.
Baking at 375°F for 30 minutes yields a loaf with a crackly crust that’s perfect for toast or sandwiches. What sets this apart is the foolproof rise—no overproofing, no dense crumb. The result is a loaf that stays fresh for days, with a flavor deeper than store-bought.
Slice it warm, toast it crisp, or freeze slices for quick meals. Whether you’re feeding a family or meal prepping, this recipe delivers restaurant-quality bread at home. Let’s get started.
Ingredients for 13×5 bread
Nine simple ingredients create a restaurant-quality loaf with crisp crust and airy crumb.
| Ingredient | Amount | Notes |
|---|---|---|
| All-Purpose Flour 🌾 | 4 cups | Sifted for even texture |
| Instant Yeast 🍞 | 2 ¼ tsp | Active dry works too |
| Granulated Sugar 🍚 | ½ tsp | Feeds yeast for rise |
| Salt 🧂 | 1 ½ tsp | Kosher or sea salt |
| Warm Water 💧 | 1 ¼ cups | 110°F for yeast activation |
| Olive Oil 🫒 | 2 tbsp | Extra-virgin for flavor |
| Cornmeal 🌽 | 1 tbsp | For dusting pan |
| Coarse Sea Salt 🧂 | 1 tsp | For crust sprinkle |
| Butter 🧈 | 1 tbsp | Softened for greasing |
The flour is the foundation—King Arthur or Gold Medal brands work best for consistent results. Yeast is non-negotiable here: Bob’s Red Mill instant yeast dissolves faster, but active dry works if you proof it first. Warm water should feel like bathwater—too hot kills yeast, too cool slows it down. I always measure mine with a thermometer to hit 110°F. The olive oil adds subtle richness; California avocado oil works too if you prefer a neutral taste. For the crust, Maldon sea salt gives that perfect crunch, but any coarse salt will do.
No instant yeast? Active dry yeast needs 5 minutes in warm water before mixing. Short on olive oil? Melted butter or neutral oil works in a pinch. The sugar is optional but helps the yeast activate faster—skip if you’re strict about low-carb. Cornmeal can be swapped for flour, but it adds a nice texture contrast. For a whole wheat version, replace 1 cup all-purpose with whole wheat flour, but expect a denser crumb. Always use a kitchen scale for accuracy if possible—cups vary by brand.
Dough keeps for 24 hours in the fridge if wrapped tightly in plastic. For longer storage, freeze shaped loaves before baking—thaw overnight before slicing. The baked loaf stays fresh 3-4 days at room temperature or 1 week in a bread bag. For extra shelf life, slice and freeze portions—perfect for quick toast. Always bake in a 13×5-inch pan; glass or ceramic conducts heat differently than metal, so adjust baking time if needed.
Why You’ll Love This Recipe
- Five-Ingredient Magic: Mixing this bread takes less effort than waiting for the kettle to boil. Just flour, yeast, sugar, salt, and warm water—no fancy ratios, no measuring cups stressing you out. Honestly, I’ve made it while scrolling through my phone.
- Sweet-Savory Balance: That touch of sugar in the dough? It’s not cloying—just enough to round out the yeasty depth while the salt keeps it sharp. The result? A loaf that’s light enough to eat fresh but sturdy enough to toast later.
- Pan-Purpose Wonder: I use this for sandwiches, garlic bread, or even French toast—no need to bake two different things. The 13×5 pan makes it easy to slice, freeze, or reheat, so it’s always ready when I am.
- Budget Bread, Always: A single batch costs pennies and stretches for days. The dough keeps in the fridge for up to 48 hours, so I can bake a fresh loaf whenever I need it without breaking the bank. (Yes, even on a Tuesday night.)
Step-by-step instructions for homemade artisan loaf
Here’s the method I’ve perfected for a perfect crust and airy interior every time.
Mix the Dough with Precision
In a large mixing bowl, combine the 4 cups all-purpose flour and 1.5 tsp salt. Sift the flour lightly to aerate it before adding, which helps create a lighter texture in the final loaf. Make a well in the center and add the 2.25 tsp instant yeast and 0.5 tsp granulated sugar. The sugar feeds the yeast, ensuring a strong rise.
Pour in the 1.25 cups warm water (tested at 110°F) and 2 tbsp olive oil. Mix with a wooden spoon until a shaggy dough forms. The water temperature is critical—too hot kills the yeast, too cold prevents activation. Let the dough rest for 5 minutes while you prepare your workspace. This brief pause helps the flour absorb the liquid and the yeast begin activation.
Develop the Dough Through Kneading
Turn the dough onto a lightly floured surface and knead for 8-10 minutes by hand, or use a stand mixer with a dough hook attachment for 5-6 minutes. You’re looking for a smooth, elastic dough that springs back when poked. The kneading develops gluten, which gives the bread its structure and chewiness.
Test for readiness by doing the “windowpane test”: stretch a small piece of dough thinly. If you can see light through it without tearing, it’s ready. If the dough feels too sticky, add flour 1 tablespoon at a time—but don’t overdo it, or the bread will become dense. Once properly kneaded, place the dough back in the bowl, cover with a damp towel, and let it rise in a warm place for 1-2 hours or until doubled in size.
Shape and Proof the Loaf
Punch down the risen dough to release air, then divide it into two equal portions. Shape each portion into a 13×5-inch loaf by rolling it into a log. For a professional finish, use a bench scraper to create a smooth surface. Place each loaf seam-side down in a 13×5-inch loaf pan that has been lightly greased with 1 tbsp softened butter and dusted with 1 tbsp cornmeal to prevent sticking.
Cover the loaves with a damp towel and let them proof for another 30-45 minutes until they’ve risen about 1 inch above the pan. The dough should feel springy to the touch. Preheat your oven to 375°F during this final proofing stage. This second rise ensures a light, airy crumb and helps the bread expand properly in the pan.
Bake to Golden Perfection
Bake the loaves for 30-35 minutes until they’re deep golden brown and sound hollow when tapped on the bottom. The internal temperature should reach 190-200°F. For extra crust color, brush the tops with water after 15 minutes in the oven. This creates steam, which helps develop a crisp, crackly crust.
Remove the loaves from the oven and transfer them to a wire rack. Immediately sprinkle the tops with 1 tsp coarse sea salt while they’re still warm. Let the bread cool completely in the pan for 10 minutes before removing it—this prevents the loaf from collapsing. Then cool on the rack for at least 30 minutes before slicing. This resting period allows the gluten to relax and the crumb to set properly.
Pro Tips For Making 13×5 Bread
- Use a Thermometer for Water: I learned this the hard way—yeast wakes up best in water between 105–110°F. Too hot, and it kills it; too cool, and it takes forever to activate. A cheap instant-read thermometer takes 10 seconds to check, and it guarantees your dough won’t sit there sluggish while you wait.
- Mix Sugar and Salt First: Skip the “just dump everything in” approach. Dissolve the 1 tablespoon sugar + 1 teaspoon salt in the warm water before adding yeast. This prevents clumpy yeast and ensures even distribution—no more pockets of unsalted dough or yeast that never gets hydrated.
- Let the Dough Rise Twice: One rise is non-negotiable, but a second one after shaping makes all the difference. After punching down the first rise, let it rest 10–15 minutes uncovered, then shape and let it rise again. This relaxes the gluten and gives you that perfect, airy crumb—no dense, chewy loaves here.
- Grease the Pan Lightly: This isn’t the prettiest method, but it’s the tastiest. Use a paper towel with 1 teaspoon melted butter or oil, rub it just inside the pan (not the bottom), then wipe off the excess. Enough to prevent sticking, but not so much it makes your bread greasy. Trust me, your loaf will thank you.
Health benefits of this dish
Whole Grain Boost
Swap 1 cup all-purpose flour for whole wheat or rye flour to add fiber and nutrients while maintaining a lighter texture. I recommend King Arthur whole wheat flour—it blends seamlessly without making the crumb too dense.
The result is a loaf with a heartier flavor and improved digestion, plus 4 grams of fiber per slice. 🌾
Digestive Benefits
This bread delivers 3-4 grams of protein per slice, supporting muscle repair and satiety. The yeast fermentation also creates natural prebiotics that feed gut bacteria, promoting digestive health. For extra probiotics, add 1 tablespoon nutritional yeast to the dough—it adds a cheesy flavor without altering texture.
Blood Sugar Balance
The combination of whole grains and natural fermentation lowers the glycemic index compared to commercial bread. A slice of this homemade loaf has about 15 grams of carbohydrates, with fiber slowing glucose absorption.
For a lower-carb option, reduce the sugar to ¼ tsp and replace ½ cup flour with almond flour.
Heart-Healthy Fats
The 2 tbsp olive oil provides monounsaturated fats that support heart health. For an extra boost, use avocado oil—it has a higher smoke point and similar nutritional benefits. These healthy fats help reduce LDL cholesterol while keeping the bread moist for days. 💛
Hydration Advantage
Baking bread at home means no preservatives or artificial ingredients that dehydrate your body. The natural moisture from the dough and olive oil keeps slices tender. For even better hydration, brush the baked loaf with melted butter after cooling—this adds richness while maintaining a crisp crust.
Meal Prep Benefits
This bread stores well for 5-7 days at room temperature, making it perfect for meal prep. Freeze slices for quick toast or sandwiches, and the natural fermentation preserves freshness better than commercial bread. The fiber and protein content also help stabilize blood sugar during busy workweeks. ✨
Nutrition facts
Frequently asked questions
Can I use a different pan size?
The 13×5-inch pan is ideal for this recipe, but you can adapt it. For a wider loaf, use a 9×5-inch pan and reduce baking time by 5-10 minutes. If using a 9×13-inch pan, divide the dough into 4 portions for smaller rolls. Always adjust baking time based on visual cues—golden color and hollow sound when tapped.
Why did my bread not rise properly?
Most likely, your yeast was too cold or too hot. Always use water at 110°F—test with your finger (should feel like bathwater). Other culprits: expired yeast, too much salt (which can inhibit yeast), or a drafty environment. Let dough rise in a warm spot, like near the oven with the light on, for consistent results.
How do I make this bread without a stand mixer?
No problem! Knead the dough by hand on a lightly floured surface for 8-10 minutes. Work it vigorously until it becomes smooth and elastic. For extra strength, use your knuckles to press and fold the dough. The extra effort develops gluten just as well as a mixer—your arms will thank you later for the workout!
Can I add seeds or herbs to this recipe?
Try 1-2 tablespoons of seeds (sesame, poppy, or flax) or 1 tbsp chopped herbs (rosemary, thyme, or garlic) during the final kneading. For best results, mix them into the dough after it’s been kneaded for 5 minutes—this helps distribute them evenly. Start with small amounts to avoid overpowering the bread’s flavor.
How long can I keep the dough before baking?
Unbaked dough stays fresh in the fridge for 24 hours if wrapped tightly in plastic. For longer storage, shape the loaves and freeze them (unbaked) for up to 1 month. Thaw overnight in the fridge before baking. The cold slows yeast activity, preserving flavor and texture—just add 10-15 extra minutes to baking time after thawing.

- 77 Texas BBQ Taco Sauce Recipe: Smoky Chipotle Heat With Caramelized Depth - October 19, 2026
- 1930’s Chocolate Cake Recipe: Vintage Richness With Vanilla Bean Swirls - October 19, 2026
- 6 Ingredient Bread Recipe: No-Knead Wonder With Pantry Staples - October 19, 2026