
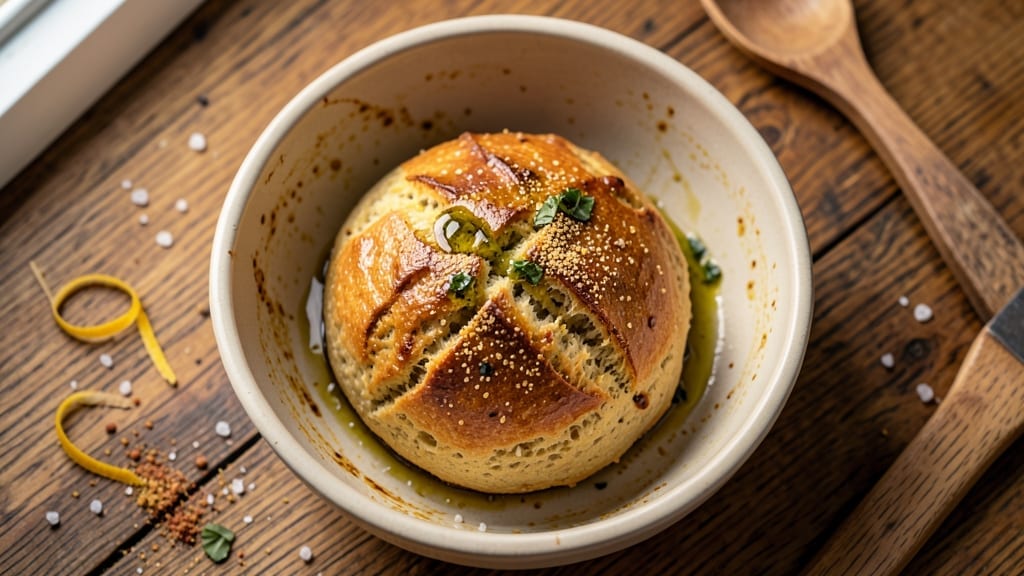
This 4-ingredient sourdough discard bread recipe transforms leftover starter into a rustic, flavorful loaf with zero waste. The magic lies in its simplicity—just flour, water, salt, and that tangy discard, yet the results taste like a bakery classic.
I developed this method after realizing how much starter I was tossing, and now it’s my go-to for quick, satisfying bread with minimal effort.
The process is beginner-friendly, with just a 2-hour rise and 45 minutes in a 425°F oven, yielding a crispy crust and airy crumb. No kneading, no fancy tools—just mix, shape, and bake.
The discard adds natural sweetness and depth, while the dough’s slow fermentation creates that signature sourdough tang without requiring a starter from scratch.
What you’ll end up with is a loaf that’s perfect for toast, sandwiches, or dipping in olive oil. The crust develops a golden-brown crust with a satisfying crunch, while the interior stays soft and slightly chewy.
Best of all? It uses up discard that would otherwise go to waste, making it both practical and sustainable.
For extra flavor, brush the baked loaf with melted butter or a sprinkle of coarse salt. Store wrapped at room temperature for up to 3 days, or freeze for longer shelf life. Ready to bake? Here’s how to do it right.
Ingredients for 4-ingredient sourdough discard bread
Four simple ingredients transform discard into bakery-quality sourdough with zero waste.
| Ingredient | Amount | Notes |
|---|---|---|
| Unbleached All-Purpose Flour 🌾 | 3 ½ cups | Plus 1 tbsp for dusting |
| Sourdough Discard 🍞 | 1 cup | Active, bubbly starter |
| Warm Water 💧 | 1 ¼ cups | 105°F-110°F preferred |
| Kosher Salt 🧂 | 1 ½ tsp | Diamond Crystal preferred |
| Olive Oil 🫒 | ½ tbsp | For shaping and brushing |
| Cornmeal or Semolina 🌽 | 2 tbsp | For dusting baking sheet |
The flour is the foundation—King Arthur or Bob’s Red Mill work best for that light, airy crumb. If your discard is weak (no bubbles), feed it 24 hours ahead with equal parts flour and water. Whole wheat flour can replace up to 20% of the all-purpose for extra flavor, but expect a denser texture. The water temperature matters: too hot kills yeast, too cold slows fermentation. 105°F-110°F is ideal—microwave a cup of water for 40 seconds if you’re unsure.
No active discard? Revive old starter by feeding it 1:1:1 flour/water/starter for 24 hours. Short on olive oil? Melted coconut oil or avocado oil works too. The salt is non-negotiable—Diamond Crystal dissolves faster than table salt, so use exactly 1.5 tsp. For a crispier crust, brush the baked loaf with an extra 0.5 tbsp olive oil after 20 minutes. Cornmeal is just for dusting; rice flour or semolina both work if that’s what you’ve got.
This dough ferments best at 75°F-78°F—warmer kitchens speed it up, cooler slow it down. Shape the loaf 1 hour before baking to let gluten relax. Store wrapped at room temperature for 3 days, or freeze the whole loaf for up to 3 months. To revive frozen bread, warm at 300°F for 10 minutes—no toaster needed. The discard keeps indefinitely in the fridge, so this recipe is perfect for weekly baking with zero waste.
Why You’ll Love This Recipe
- No-Fuss Starter: Mixing takes five minutes—just flour, discard, water, and salt. I swear by the 10-minute autolyse (yes, really) where the dough practically folds itself.
- Tangy Crust Edge: That olive oil brush? Magic. The crust gets this golden, crackly crunch while the inside stays soft—like a cross between artisanal and “I didn’t even try.” Honestly, my sourdough discard’s funk shines here without overpowering.
- Weeknight Crutch: Freeze half the dough for lazy mornings or toss a loaf in the fridge to toast for breakfast. Between us, I’ve fed a houseful with two batches—no one questions the simplicity.
- Pantry Goldmine: Uses up discard without extra yeast or sugar. The salt and olive oil stretch every dollar, and a single loaf lasts me four days (or until my kid “accidentally” eats it all). Budget win.
Step-by-step instructions for 4-Ingredient sourdough discard bread
Here’s how to transform simple ingredients into a rustic, tangy loaf with minimal effort.
Mix the Dough with Just Your Hands
In a large mixing bowl, combine the 3.5 cups unbleached all-purpose flour and 1.5 tsp kosher salt. Make a well in the center and pour in the 1 cup sourdough discard and 1.25 cups warm water. The dough will look shaggy at first—that’s normal.
Using your hands, mix and knead the dough for 5-7 minutes until it comes together into a smooth, slightly sticky ball. You’ll know it’s ready when it passes the “windowpane test”—stretch a small piece between your fingers and it should thin out without tearing. The active sourdough discard will make this dough more elastic than traditional bread dough, so don’t overwork it.
Let the Dough Rest and Develop Flavor
Lightly oil a clean bowl with 0.5 tbsp olive oil, place the dough inside, and cover with a damp kitchen towel. Let it rest at room temperature for 1 hour. This initial rest allows the gluten to relax and the sourdough discard to develop its signature tang.
After 30 minutes, you’ll notice small bubbles forming on the surface and along the sides of the bowl. These bubbles indicate fermentation is active. If your kitchen is cool (below 70°F), extend this rest to 1.5 hours—the cooler temperature slows fermentation, giving you more control over the final flavor profile.
Shape and Proof the Dough
Generously dust a work surface with 2 tbsp cornmeal or semolina and turn out the dough. Gently shape it into a round boule by pulling the edges toward the center and tucking them underneath. The dough should feel slightly tacky but not sticky—if it sticks, dust with more cornmeal.
Place the shaped dough, seam-side up, on a parchment-lined baking sheet. Cover loosely with the damp towel and let it proof for 1-2 hours until it has nearly doubled in size. You’re looking for a 25-30% increase in volume—the dough should feel light and airy when pressed gently. Overproofing is less forgiving with sourdough discard, so keep an eye on it during the final hour.
Create Steam and Bake to Golden Perfection
Preheat your oven to 425°F with a Dutch oven inside for 30 minutes. This step ensures a crispy crust and even baking. Carefully transfer the dough (still on its parchment) into the hot Dutch oven. Immediately pour 1 cup hot water into the bottom of the Dutch oven to create steam.
Bake covered for 30 minutes, then remove the lid and bake for another 10-15 minutes until the bread reaches an internal temperature of 205-210°F and the crust turns a deep golden brown. The top should sound hollow when tapped. For extra crust development, broil for 1-2 minutes at the end if needed.
Cool and Enjoy Your Homemade Loaf
Remove the bread from the Dutch oven and let it cool on a wire rack for at least 1 hour. Resist the urge to slice immediately—the internal temperature will continue rising as it cools, and the crumb will firm up for cleaner slices. The crust should be crisp, the crumb open and airy, and the flavor a perfect balance of tangy sourdough and mild sweetness.
Store any leftovers wrapped in a clean kitchen towel at room temperature for 2-3 days, or freeze slices for up to 3 months. This bread shines when served warm with butter or used for toast—its open crumb structure makes it ideal for French toast or bread pudding.
Pro Tips For Making 4-Ingredient Sourdough Discard Bread
- WEIGH YOUR FLOUR: I learned this the hard way—volume measuring with flour is a disaster for this recipe. Sourdough discard bread relies on precise hydration, and scooping flour from the bag packs in too much air, making your dough dry and dense. Use a kitchen scale and measure by weight (100g increments work well) for consistent, airy results every time.
- STIR, DON’T HOOK: Yes, I know—mixing dough by hand feels tedious. But for this simple recipe, a wooden spoon or spatula works better than a stand mixer. Hooking the dough too early develops gluten aggressively, turning your bread into a chewy brick instead of a tender loaf. Stir until shaggy, then let the autolyse (rest) do its magic—no need to rush.
- SALT THE WATER: Skip the step of adding salt directly to the flour, and your flavor will suffer. Dissolve the kosher salt in the warm water first—this ensures even distribution and prevents clumpy, salty pockets in your bread. Trust me, your first bite will taste noticeably better when the salt is fully integrated.
- LET IT RISE UNTIL DOUBLED: I used to pull my dough out of the oven too soon, thinking “almost doubled” meant “ready.” Wrong. Wait until the dough has visibly puffed to at least double its original size—this guarantees a light, airy crumb. If you’re in a hurry, place it in a warm spot (like a turned-off oven with the light on) to speed things up, but don’t skip the full rise.
Dietary considerations for 4-ingredient sourdough discard bread
Gluten-Free Adaptation
Swap the all-purpose flour for a 1:1 gluten-free baking flour blend like King Arthur Measure for Measure or Bob’s Red Mill 1-to-1. Add 1 tsp xanthan gum to help bind the dough, as gluten-free flours lack natural elasticity.
The dough will be stickier, so use more cornmeal when shaping. Expect a denser texture but still delicious—gluten-free sourdough discard bread is absolutely possible! 🌾
Vegan-Friendly Options
This recipe is already vegan! The 4 ingredients (flour, water, salt, discard) contain no animal products. For extra richness, brush the baked loaf with olive oil instead of butter. The sourdough discard adds natural tang, replacing dairy or egg substitutes entirely. Perfect for plant-based diets while keeping it simple. 💚
Low-Sodium Considerations
Reduce the 1.5 tsp kosher salt to 0.5 tsp for a lower-sodium version. The sourdough discard already provides subtle flavor, so you won’t miss much. If you need extra flavor, add 1 tsp dried herbs (like rosemary or thyme) to the dough.
Always taste before baking—discard can vary in saltiness. 🧂
Allergen-Free Notes
Check your sourdough discard for hidden allergens—some starters contain dairy or honey. If using a store-bought starter, verify the label. For nut-free kitchens, avoid cross-contamination by using separate utensils and surfaces.
Cornmeal can be substituted with rice flour if corn allergies are a concern. Always prioritize clean tools when accommodating allergies. ✨
Nut-Free Substitutions
If your recipe calls for nut-based flours (like almond flour), stick to certified gluten-free blends instead. The 4-ingredient base remains nut-free, but avoid adding toppings like chopped nuts.
For extra crunch, sprinkle pumpkin seeds on top before baking—these are nut-free and add texture without allergens. Always double-check labels on all ingredients. 🌰
Nutrition facts
Frequently asked questions
Can I use this recipe with inactive sourdough discard?
No, the recipe requires active discard with visible bubbles. If yours is flat, revive it by mixing 1 cup discard with 1 cup flour and 1 cup water, then let it sit at room temperature for 12-24 hours until bubbly. The discard needs active fermentation to develop proper flavor and texture in your bread.
What if my dough doesn’t rise enough?
Check your discard first—it must be active with bubbles. If the dough rises slowly, try these fixes: place the bowl in a 75°F-80°F environment (like near your oven with light on), or extend the proofing time to 2-3 hours. Cold kitchens slow fermentation, while warm ones speed it up. Also ensure your discard is fed regularly before using.
Do I need a Dutch oven for this recipe?
A Dutch oven creates the perfect steam for a crispy crust, but you can substitute with a heavy oven-safe pot with a lid. If you don’t have one, bake on a regular sheet pan and spray with water every 5 minutes during the first 20 minutes to mimic steam. The crust will be slightly less crispy but still delicious.
Can I make this bread without olive oil?
Yes! Replace the 0.5 tbsp olive oil with 0.5 tbsp melted coconut oil or avocado oil for shaping. For extra flavor, use 1 tbsp melted butter (if not vegan) instead. The oil helps create a soft crumb and prevents sticking during shaping—just don’t skip it entirely or the dough may tear.
How do I know when the bread is fully baked?
Your bread is done when the internal temperature reaches 205-210°F and the crust turns a deep golden brown. Tap the bottom—it should sound hollow. For extra confirmation, check the center with an instant-read thermometer. If it’s under 200°F, return to the oven for 5-10 more minutes. Overbaking dries out the crumb, so aim for perfection!

- 77 Texas BBQ Taco Sauce Recipe: Smoky Chipotle Heat With Caramelized Depth - October 19, 2026
- 1930’s Chocolate Cake Recipe: Vintage Richness With Vanilla Bean Swirls - October 19, 2026
- 6 Ingredient Bread Recipe: No-Knead Wonder With Pantry Staples - October 19, 2026