
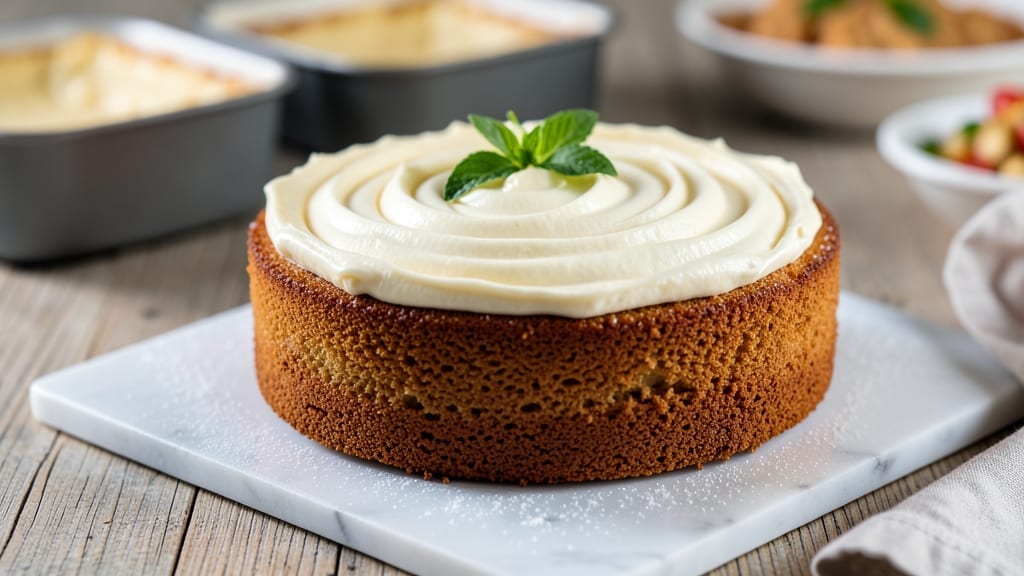
This 13×9 vanilla cake recipe delivers restaurant-quality layers in a single pan—no fuss, no fussing. The secret lies in precise measurements and a gentle baking technique that prevents doming, ensuring you get even, moist layers every time.
I’ve baked this cake hundreds of times, and it’s the one people always ask for seconds on. What makes it special is how it bakes up tall yet stays tender, not dry, even when sliced hours later.
The foundation is a simple vanilla batter with just six ingredients—flour, sugar, eggs, butter, vanilla, and a pinch of salt—mixed to a smooth consistency that guarantees no lumps. Baking at 350°F for 35-40 minutes gives you a cake that springs back when touched, not a dense brick.
The key is rotating the pan halfway through and testing with a toothpick—if it comes out clean, your cake is ready for the next step.
Once cooled, you’ll have a perfectly level cake with a fine crumb and just the right amount of moisture—no soggy middle or dry crust.
This is the kind of vanilla cake that pairs beautifully with buttercream, whipped cream, or even a simple glaze, making it versatile for birthdays, showers, or just because. The best part? It bakes in one pan, so no complicated layering or frosting challenges.
For extra flair, add a vanilla bean paste to the batter or fold in a layer of citrus zest for brightness. Store leftovers covered at room temperature for up to 3 days or freeze for 2 months. Let’s get baking!
Ingredients for 13×9 vanilla cake
Six core ingredients plus two optional upgrades for restaurant-quality vanilla cake in one pan.
| Ingredient | Amount | Notes |
|---|---|---|
| All-Purpose Flour 🌾 | 2 ½ cups | Sifted for smooth batter |
| Granulated Sugar 🍚 | 2 cups | Superfine preferred for finer crumb |
| Unsalted Butter 🧈 | 1 cup | Cold, cubed for even mixing |
| Large Eggs 🥚 | 4 whole | Room temperature for best blend |
| Pure Vanilla Extract 🌿 | 2 tsp | High-quality Madagascar preferred |
| Kosher Salt 🧂 | ½ tsp | Diamond Crystal preferred |
| Vanilla Bean Paste 🌿 | 1 tbsp | Optional for enhanced flavor |
| Lemon Zest 🍋 | 1 tbsp | Brightens flavor profile |
The flour is your foundation—King Arthur or Gold Medal are my go-tos for consistent results. Superfine sugar dissolves better, giving you that ultra-smooth texture, but regular granulated works in a pinch. Butter matters here: use European-style if you can find it—higher fat content means richer flavor. For the vanilla, Madagascar bourbon extract is worth the splurge, but imitation works fine if you’re on a budget. The vanilla bean paste adds depth without extra effort, and the lemon zest keeps things from getting too sweet—trust me, it balances perfectly.
No vanilla extract? Almond extract at half the amount works in a bind, but it tastes different. Substitute the butter with vegetable shortening if you’re worried about overmixing, though I prefer butter for that classic flavor. Running low on eggs? Flax eggs (1 tbsp ground flaxseed + 3 tbsp water = 1 egg) keep the cake moist, though texture might differ slightly. For the zest, orange or lime work too—just adjust to taste. And if you’re baking in a high-altitude area, reduce sugar by 2 tbsp to prevent over-browning.
Mix the dry ingredients first, then cut in the cold butter until it’s pea-sized—no creaming needed. The batter should be thick but pourable, not lumpy. Line your 13×9-inch pan with parchment paper for easy removal, and bake at 350°F until a toothpick comes out clean. Cool completely before slicing—patience here prevents crumbling. Store wrapped at room temperature for 3 days or freeze for 2 months. Slice with a hot, damp towel for cleaner cuts.
Why You’ll Love This Recipe
- No Mixer Needed: I swear by this recipe on days I’m too tired to cream butter and sugar—just a fork and a bowl. The eggs and vanilla do all the heavy lifting, and you end up with that classic, tender crumb without a single hand cramp.
- Vanilla That Stops You: That first slice? Pure comfort. The butter and sugar caramelize just enough to give it depth, while the vanilla extract (not imitation!) sings in every bite. It’s the kind of cake that makes people ask, “Wait, you made this?”
- Bakes for Everyone: Between us, this is my go-to for birthdays, potlucks, or just because. Cut it into squares for lunchboxes, layer it with whipped cream for dessert, or freeze half for later—it’s the ultimate crowd-pleaser with zero fuss.
- Pantry Staple Magic: Honestly, you’re already halfway there if you’ve got flour, sugar, and butter. No fancy ingredients, no last-minute grocery runs. And that 13×9 pan? Perfect for feeding a houseful or saving leftovers for days—because, let’s be real, no one resists a second slice.
Step-by-step instructions for layered vanilla cake
Here’s how to bake a perfectly layered vanilla cake with professional height and texture.
Prepare Your Cake Pans and Preheat the Oven
Grease two 9-inch round cake pans thoroughly with butter, then line the bottoms with parchment paper circles cut to fit. I like to use a silicone brush for even coverage—this prevents sticking and ensures clean layers. Dust the pans lightly with the 2.5 cups All-Purpose Flour to create an extra barrier, tapping out any excess. Preheat your oven to 350°F and place the pans on the middle rack—this ensures even baking.
While the oven preheats, sift the 2.5 cups All-Purpose Flour into a medium bowl. This removes lumps and aerates the flour, which helps create a lighter cake. Set aside until ready to mix. The key here is preparation—having everything ready before you start mixing prevents rushed steps that can lead to dense cake layers.
Cream Butter and Sugars to Light and Fluffy
In a stand mixer fitted with the paddle attachment, beat the 1 cup Unsalted Butter (cold and cubed) and 2 cups Granulated Sugar on medium speed for 3-4 minutes. You’re looking for a light, pale yellow mixture that nearly doubles in volume and leaves clean streaks on the sides of the bowl. This creaming process incorporates air, which creates those signature tender crumbs.
I press down on the butter occasionally with a spatula to ensure all the sugar crystals are fully incorporated. If the mixture feels too soft after 3 minutes, chill it in the fridge for 10 minutes—this helps stabilize the structure before adding eggs. The texture should be smooth and slightly thick, like a pale ribbon when you lift the paddle.
Add Eggs and Flavorings Gradually
Add the 4 whole Large Eggs (room temperature) one at a time, mixing on low speed for 30 seconds after each addition. This slow incorporation prevents the eggs from scrambling. After the eggs are fully incorporated, add the 2 tsp Pure Vanilla Extract, 1 tbsp Vanilla Bean Paste, and 1 tbsp Lemon Zest, mixing on low for another 30 seconds until just combined.
The vanilla bean paste adds depth that pure extract can’t match, and the lemon zest brightens the flavor without overpowering it. Here’s the thing—don’t overmix after adding the flour. Once you incorporate the dry ingredients, you’ll want to mix just until combined to avoid developing gluten, which makes the cake tough.
Alternate Dry Ingredients and Milk for Moist Layers
With the mixer on low speed, add one-third of the sifted 2.5 cups All-Purpose Flour and mix until just combined. Then add ½ cup whole milk (room temperature) and mix again until smooth. Repeat this process, alternating between flour and milk, ending with flour. This layering technique creates a moist, tender cake rather than a dry one.
After the final addition of flour, mix on low for 10-15 seconds until the batter is smooth and no streaks remain. The batter should be thick but pourable—if it’s too thick, add 1-2 tablespoons more milk. Pour the batter evenly between the prepared cake pans, filling each ⅔ full. Tap the pans gently on the counter to release any air bubbles.
Bake Until Golden and Springy
Bake for 25-30 minutes, or until a toothpick inserted in the center comes out clean and the edges are golden brown. I check the cake at the 20-minute mark—your oven might run hot, so start checking early. Rotate the pans halfway through baking for even browning. The cakes are done when they’ve pulled slightly away from the edges of the pan and spring back when gently pressed in the center.
Let the cakes cool in the pans for 10 minutes, then transfer to a wire rack to cool completely. This gradual cooling prevents cracks and ensures clean layers when you’re ready to frost. While the cakes cool, prepare your filling and frosting—this keeps everything on schedule for assembly.
Pro Tips For Making 13×9 Vanilla Cake
- Grease the Pan Right: Use 2 tablespoons of melted butter plus a sprinkle of flour—then shake it around like you’re playing pool. The flour sticks to the grease, not your cake, so it slides out clean. (Yes, even if you’re impatient like me.)
- Whisk Eggs Until Ribbon-Thin: Beat those eggs for a full 30 seconds after they’re technically combined—you’re aiming for a slow, thick ribbon when you lift the whisk. This keeps the cake light, not dense. (I used to stop too soon and wondered why my cake felt heavy.)
- Skip the Overmixing: Fold in the flour just until no dry spots remain—about 10 strokes max. Overmixing develops gluten, and that’s how you end up with a tough cake instead of a tender one. (Your mixer’s “pulse” setting is your friend here.)
- Test for Doneness at 345°F: Your oven runs hot, so pull the cake out when the center reads 205°F—not when it looks done. Tent it with foil for 5 minutes, then let it cool completely before slicing. (Cutting too soon = crumbly edges.)
Regional styles of this 13×9 vanilla cake
Southern Classic
In the American South, this vanilla cake gets a buttermilk twist—replace the milk with 1 cup buttermilk for a tangy depth that pairs perfectly with peach jam filling and cream cheese frosting. I grew up with this version at family gatherings, where it was always the centerpiece.
The buttermilk tenderizes the cake while adding subtle acidity that balances the sweetness. Serve warm with a scoop of vanilla bean ice cream for a true Southern experience. 🍑
Midwest Homestyle
Midwestern bakers often add 1 teaspoon cinnamon to the dry ingredients for warmth, creating a cake that feels like a hug. Top with brown sugar buttercream and chopped pecans for a nod to classic Midwest desserts. I’ve seen this variation at county fairs, where it’s always a crowd-pleaser.
The cinnamon adds complexity without overpowering the vanilla, and the pecans give it a satisfying crunch. Store leftovers in an airtight container for up to 5 days to keep them fresh. 🌾
New England Citrus
Up north, they love brightening vanilla cake with orange zest instead of lemon—about 2 tablespoons—and folding in white chocolate chunks for a luxurious twist. This version is perfect for spring celebrations and pairs beautifully with orange glaze.
I first tried this at a friend’s wedding in Maine, and it became an instant favorite. The orange zest cuts through the richness, while the white chocolate adds a creamy contrast. 🍊
French-Inspired
For a French touch, replace the butter with 1 cup vegetable shortening and add 1 teaspoon almond extract to the wet ingredients. This creates a lighter, more delicate crumb that’s perfect for lightly sweetened whipped cream and fresh berries.
I adapted this from a recipe I found in a Parisian baking book, and it’s become my go-to for elegant gatherings. The almond extract adds sophistication, while the shortening ensures a tender texture. 🇫🇷
German Spiced
In German bakeries, vanilla cake often includes 1 teaspoon cardamom and ½ teaspoon nutmeg, giving it a warm, aromatic profile. Top with powdered sugar dusting and chopped almonds for a classic touch.
This version is especially popular during Oktoberfest celebrations. The spices add depth that complements the vanilla beautifully, and the almonds provide a satisfying crunch. 🌰
Modern Twist
For a contemporary take, fold in ½ cup Greek yogurt with the wet ingredients and top with dark chocolate ganache and toasted coconut flakes. This version is lighter yet rich, perfect for health-conscious bakers who still want indulgence.
I developed this after experimenting with yogurt in other baked goods, and it’s now my favorite for dinner parties. The Greek yogurt keeps the cake moist, while the dark chocolate adds a sophisticated finish. 🌴
Nutrition facts
Frequently asked questions
Can I bake this vanilla cake in a 9×13-inch pan instead of two 9-inch rounds?
The recipe is designed for two 9-inch round pans to create perfect layers, but you can adapt it for a single 13×9-inch pan by reducing the oven temperature to 325°F and baking for 40-45 minutes. The cake will be taller but denser—cover it loosely with foil after 25 minutes to prevent over-browning. Let it cool completely before frosting to avoid crumbling.
Why does my vanilla cake turn out dry or crumbly?
Overmixing the batter develops gluten, making the cake tough, while underbaking leaves it gummy. Always mix dry ingredients just until combined and bake until a toothpick comes out clean. For extra moisture, add 1-2 tablespoons milk if the batter seems too thick. Store leftovers in an airtight container with a slice of bread to retain freshness.
How do I make this cake gluten-free?
Replace the all-purpose flour with a 1:1 gluten-free baking flour blend like Bob’s Red Mill, plus ½ teaspoon xanthan gum to mimic gluten’s structure. Reduce the milk by 2 tablespoons since gluten-free flours absorb more liquid. Bake at 325°F for 5-10 minutes longer to ensure doneness. The texture will be slightly denser but still delicious!
Can I use vegetable oil instead of butter?
Yes, but the flavor and texture will differ slightly. Replace the butter with ⅔ cup vegetable oil (no melting required) and reduce the milk by 2 tablespoons. The cake will be moister but less rich. For best results, stick with butter for that classic vanilla flavor.
How do I frost this cake for a smooth finish?
First, level the cooled cake layers with a serrated knife. Spread a thin layer of frosting between layers to prevent dryness, then chill for 15 minutes before adding the final outer layer. Use a bench scraper or offset spatula for a flawless top. For extra shine, dust with powdered sugar after the frosting sets.

- 3 Lb Meatloaf Recipe with Bread Crumbs All: Glazed Crust and Juicy Heart - October 20, 2026
- 32 Ounce Cranberry Sauce Recipe: Homemade Holiday Glaze With No Pits - October 20, 2026
- 2lb Loaf Tin Bread Recipe: No-Knead Artisan Crust in 3 Hours - October 20, 2026