
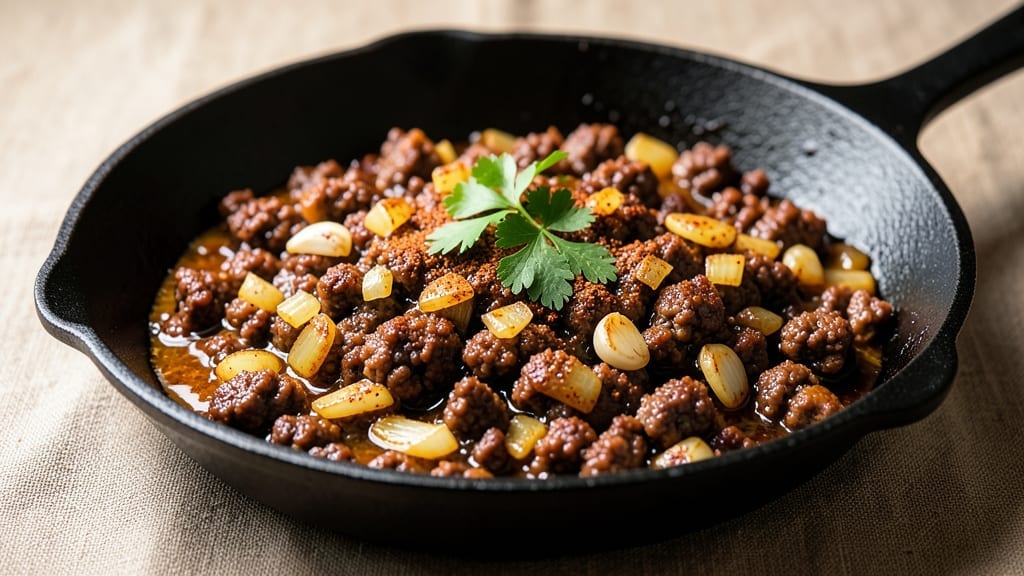
Transforming 1.5 lbs of ground beef into a one-pan cheesy skillet with crispy edges is the perfect solution for a weeknight dinner that feels like a restaurant meal.
The secret lies in browning the beef thoroughly before adding the cheese, which creates that coveted texture contrast—crispy on the bottom, creamy on top.
I developed this recipe after realizing how often ground beef dishes either turned into a mushy pile or dried out completely, and this method solves both problems elegantly.
This dish delivers restaurant-quality results in under 45 minutes, making it ideal for busy weeknights when you still want a satisfying meal.
The combination of garlic powder, onion powder, and smoked paprika infuses the beef with deep, savory flavors, while the cheddar and mozzarella blend creates a stretchy, gooey topping that melts into perfect pockets.
The crispy edges come from a simple technique: cooking the beef and onions until deeply browned before adding the cheese, which ensures that crispy texture stays intact even after the cheese melts.
What you’ll end up with is a hearty, cheesy skillet that’s packed with flavor and texture—crispy edges on the bottom, tender beef throughout, and a blanket of melted cheese on top.
The dish is substantial enough to serve as a main course but flexible enough to pair with a simple salad or crusty bread. The best part? It all comes together in one pan, meaning minimal cleanup and maximum satisfaction.
This recipe is designed to maximize every ounce of that 1.5 lbs of ground beef, ensuring no leftovers go to waste. Whether you’re feeding a family of four or looking for a hearty solo meal, this cheesy skillet delivers comfort food perfection without the fuss.
Let’s get started on creating this foolproof, flavorful dish that will become a staple in your meal rotation.
Ingredients for 1.5 lbs ground beef
Here’s what transforms 1.5 lbs ground beef into restaurant-quality crispy-edged cheesy skillet magic.
| Ingredient | Amount | Notes |
|---|---|---|
| Ground Beef 🥩 | 1 ½ lb | 80/20 fat ratio preferred |
| Yellow Onion 🧅 | 1 whole | Diced, medium size |
| Garlic Powder 🧄 | 1 tbsp | Freshly ground preferred |
| Onion Powder 🧅 | 1 tbsp | For depth of flavor |
| Smoked Paprika 🌶️ | 1 tbsp | For smoky richness |
| Salt 🧂 | 1 tsp | Kosher or sea salt |
| Black Pepper 🌶️ | ½ tsp | Freshly ground preferred |
| Shredded Cheddar Cheese 🧀 | 1 cup | Sharp cheddar preferred |
| Shredded Mozzarella Cheese 🧀 | 1 cup | Low-moisture preferred |
| All-Purpose Flour 🌾 | ¼ cup | For thickening sauce |
| Beef Broth 💧 | ½ cup | Low-sodium preferred |
| Olive Oil 🫒 | 1 tbsp | For browning beef |
The beef is everything—80/20 fat ratio keeps it juicy while browning beautifully. Costco or Walmart usually have it pre-ground, but if you’re buying a block, pat it dry before measuring. That extra fat is what gives you crispy edges later. The onions? Yellow works best here—red gets too bitter when cooked down. Dice them small so they caramelize quickly. For the spices, Penzeys or local spice shops carry the best smoked paprika, but the grocery store stuff is fine if it’s fresh. Smell your spices—if they don’t smell strong, toss them.
No smoked paprika? Regular paprika plus a pinch of liquid smoke works in a pinch. Short on beef broth? Chicken broth with an extra splash of Worcestershire gets you close. The cheeses are non-negotiable—sharp cheddar for bite, low-moisture mozzarella for stretch. Pre-shredded gets clumpy, so grab blocks and shred yourself. Flour is just for thickening—all-purpose works fine. The olive oil matters here too—use something with a high smoke point like avocado or light olive oil if you’re worried about burning.
This reheats beautifully—honestly tastes better the next day once everything melds. Keeps 4-5 days in the fridge, freezes for 3 months. I always make a double batch because it’s that good. Store in a shallow container so it reheats evenly. The cheese gets stringy when cold, so take it out 5 minutes before serving. Leftovers? Perfect for breakfast hash the next morning.
Why You’ll Love This Recipe
- No-Fuss Pantry Magic: I swear by this when I’ve got nothing but basics—just brown the beef with diced onion until it’s tender, then hit it with those powders. The smoked paprika gives it this just-right depth without needing fancy spices.
- Smoky Depth in Minutes: That onion powder and garlic powder combo? It’s like a flavor bomb. The beef soaks it up perfectly, and the smoked paprika adds a warmth that makes it taste like it simmered for hours—even though it’s ready in 20.
- Lunchbox Hero: Between us, this is my secret for packing lunches. Cool it down, portion it into containers, and boom—crunchy, savory meat that’s still exciting by day three. My kid’s favorite, honestly.
- Budget Stretch: A pound and a half of beef goes a long way here, especially when you’re stretching it with onions. I’ve made this feed four people for under $10, and it’s still the star of the meal. No waste, no guilt.
Step-by-step instructions for one-pan cheesy skillet with crispy edges
Here’s how to transform simple ingredients into a restaurant-worthy skillet with golden, crispy edges and melty cheese.
Brown the Ground Beef Perfectly
Heat a large oven-safe skillet over medium-high heat and add the 1 tablespoon olive oil. Once shimmering, add the 1.5 lb ground beef, breaking it up with a wooden spoon as it cooks. Let it brown undisturbed for 3-4 minutes until the edges start to crisp—that’s when you’ll know it’s ready to stir.
Cook for another 5-6 minutes, breaking the beef into small, even crumbles. You’re aiming for deep brown color throughout, not just pink centers. The fat ratio matters here—80/20 gives you enough fat to create that crispy texture we want. Once fully browned, use a slotted spoon to transfer the beef to a plate, leaving all that delicious rendered fat in the skillet.
Sauté the Onions and Seasonings
In the same skillet (don’t wipe it clean—those browned bits are flavor gold), add the 1 whole yellow onion that you’ve already diced. Cook for 5-6 minutes until softened and starting to caramelize at the edges. This is where the onion powder and garlic powder come into play—add them now along with the 1 tablespoon smoked paprika, 1 teaspoon salt, and ½ teaspoon black pepper.
Stir everything together for 1 minute until the spices are evenly distributed and the onions are sweet and translucent. The paprika will add that smoky depth while the onion powder enhances the natural sweetness of the onions. This step builds the flavor foundation for your entire dish, so don’t rush it.
Create the Thick, Rich Sauce
Sprinkle the ¼ cup all-purpose flour evenly over the onion mixture and stir vigorously for 1-2 minutes until the flour is completely incorporated and the mixture turns slightly darker. This creates a roux that will thicken your sauce beautifully. Immediately pour in the ½ cup beef broth and stir constantly for 2-3 minutes until the sauce thickens to a gravy-like consistency.
Here’s where the magic happens: the flour and broth combination creates a velvety sauce that clings perfectly to the beef. If the sauce looks too thick, add 1-2 tablespoons of water to reach your desired consistency. The sauce should coat the back of a spoon but still be pourable—not gluey. Keep the heat at medium-low to prevent burning.
Layer and Melt the Cheeses
Return the browned ground beef to the skillet and stir to combine with the sauce. Spread the mixture evenly in the pan, then sprinkle ½ cup of the shredded cheddar cheese and ½ cup of the shredded mozzarella cheese evenly over the top. The high-moisture mozzarella will melt beautifully while the sharp cheddar adds that tangy kick we love.
Cover the skillet with a lid or foil and let it cook for 5-7 minutes on the stovetop. This steaming process melts the cheese completely and lets all the flavors meld together. You’ll know it’s ready when the cheese is fully melted and the top looks smooth and bubbly—not stringy or dry.
Achieve Crispy Edges and Serve
Transfer the skillet to a 375°F preheated oven. Bake uncovered for 8-10 minutes until the edges are golden brown and crispy. This is where the one-pan magic happens—the residual heat in the skillet creates that perfect texture contrast between crispy edges and creamy centers.
Watch closely in the last 2 minutes to prevent over-browning. Once the edges are beautifully crispy and the cheese is bubbling, remove from the oven. Let it rest for 2-3 minutes before serving—this helps the cheese set slightly and makes it easier to portion. Garnish with the remaining ½ cup cheddar and ½ cup mozzarella if desired, then serve immediately with crusty bread or over rice.
Pro Tips For Making 1.5 Lbs Ground Beef
- CRANK THE HEAT FIRST: Dump that ground beef into your pan over medium-high heat—no, higher—and let it sizzle hard for the first 2 minutes. I used to cook it low and slow, and the onions would turn to mush before the beef browned. High heat gets you crispy edges and deeper flavor fast.
- CHOP ONIONS SMALLER THAN YOU THINK: Quarter that onion, then slice it paper-thin—almost like you’re making coleslaw. Big chunks take forever to soften, and you’ll end up with uneven texture. If you’re lazy, pulse it in the food processor for 3 seconds, but don’t overdo it or you’ll get paste.
- DON’T SKIP THE SALT BUT DO IT RIGHT: Season the beef before cooking with at least 1 teaspoon of salt—it draws out moisture so you get better browning. Then, after cooking, add another pinch to the onions while they’re still raw. I learned this the hard way when my dish tasted bland no matter how much paprika I threw in.
- UPGRADE WITH A SPLASH OF WATER: When the onions start sticking after 5 minutes, add 2 tablespoons of water and scrape the bottom with a wooden spoon. It deglazes the pan, lifts up all the browned bits, and makes your sauce richer. Sounds weird, but it works—my grandmother swore by it.
Creative variations of this recipe
Spicy Southwest Skillet
Swap the smoked paprika for 1 tbsp chili powder and ½ tsp cumin, then add 1 diced jalapeño with the onions. Stir in ½ cup black beans (drained and rinsed) after the flour step.
Top with ½ cup corn kernels and ½ cup cotija cheese instead of mozzarella. This version brings bold, smoky heat that pairs perfectly with lime wedges and avocado slices. 🌶️
Breakfast Hash Twist
Add 2 diced potatoes (gold or Yukon) to the skillet with the onions, cooking them until tender. Stir in 2 fried eggs at the end, then top with sour cream and green onions.
Serve with toasted sourdough—this turns your cheesy skillet into a hearty breakfast. The potatoes add satisfying texture while the eggs keep it protein-packed. 🍳
Italian-Inspired Meat Sauce
Skip the cheese entirely and deglaze with ½ cup dry red wine instead of broth. Stir in 1 can (14 oz) crushed tomatoes and 2 tbsp tomato paste after the flour step. Simmer for 15 minutes to develop deeper flavors.
Serve over fettuccine or polenta for a satisfying Italian-inspired meal. This version works well as a freezer meal—just reheat with a splash of water. 🍝
BBQ Pulled Beef Hack
Cook the beef slightly longer until it’s more shreddable, then stir in ½ cup BBQ sauce (I love Sweet Baby Ray’s) with the broth. Top with pickled red onions and crumbled bacon before serving.
This version works great on buns or over mashed potatoes. The smoky-sweet contrast makes it a crowd-pleaser. 🥓
Buffalo Chicken Cheesy Skillet
Cook the beef with 1 tbsp hot sauce (like Frank’s RedHot) mixed into the spices. After adding the cheese, stir in ½ cup ranch dressing and top with crumbled blue cheese and chopped celery.
The tangy heat balances the creamy cheese perfectly. Serve with carrot sticks for dipping. 🔥
Vegetarian Swap Option
Replace the beef with 1.5 lbs crumbled firm tofu or 1 package vegan ground “meat”. Use 1 tbsp soy sauce instead of smoked paprika for umami depth.
The same cheese and sauce technique works beautifully—just ensure your meat substitute is well-drained. This version proves the skillet concept works for plant-based diets too! 🌱
Nutrition facts
Frequently asked questions
Can I use lean ground beef instead of 80/20?
While you can use leaner ground beef, the crispy edges won’t be as dramatic. The 80/20 fat ratio is ideal because the fat renders out during cooking, creating that perfect crispy texture while keeping the meat juicy. If you must use leaner beef, try adding 1 tablespoon of butter to the skillet after browning to help with crispiness. The flavor will still be great, just with slightly less texture contrast.
How do I prevent the cheese from getting stringy?
Stringy cheese happens when the moisture content is too high. Always use low-moisture mozzarella and avoid pre-shredded cheeses (they contain anti-caking agents that make them stringy). For extra insurance, sprinkle the cheese in two layers, letting the first layer melt slightly before adding the second. Also, don’t overcook in the oven—remove it when the edges are just golden brown, not dark brown. The cheese will continue melting while resting.
Can I make this recipe in a non-stick skillet?
Yes, but with a few adjustments. Non-stick skillets won’t develop the same crispy edges because they don’t get as hot. To compensate, cook the beef on medium-high heat for 1-2 extra minutes before transferring to the oven. You may also need to increase the oven temperature to 400°F for the final crisping step. The flavor will still be fantastic—just the texture will be slightly different.
What if I don’t have beef broth?
No problem! Use ½ cup water plus 1 teaspoon soy sauce or Worcestershire sauce for depth of flavor. For a richer option, substitute with ½ cup chicken broth or even ½ cup tomato juice for a slightly tangy twist. The sauce will still thicken properly, though the flavor profile will change slightly. The key is maintaining the same liquid-to-flour ratio.
How do I reheat leftovers without drying them out?
Reheat in the microwave by covering with a damp paper towel and heating in 30-second intervals, stirring between each interval. For best results, transfer to an oven-safe dish and warm at 350°F for 10-15 minutes until heated through. Add a splash of beef broth or water to the pan to help restore moisture. The dish reheats beautifully and often tastes even better the second time around!
