
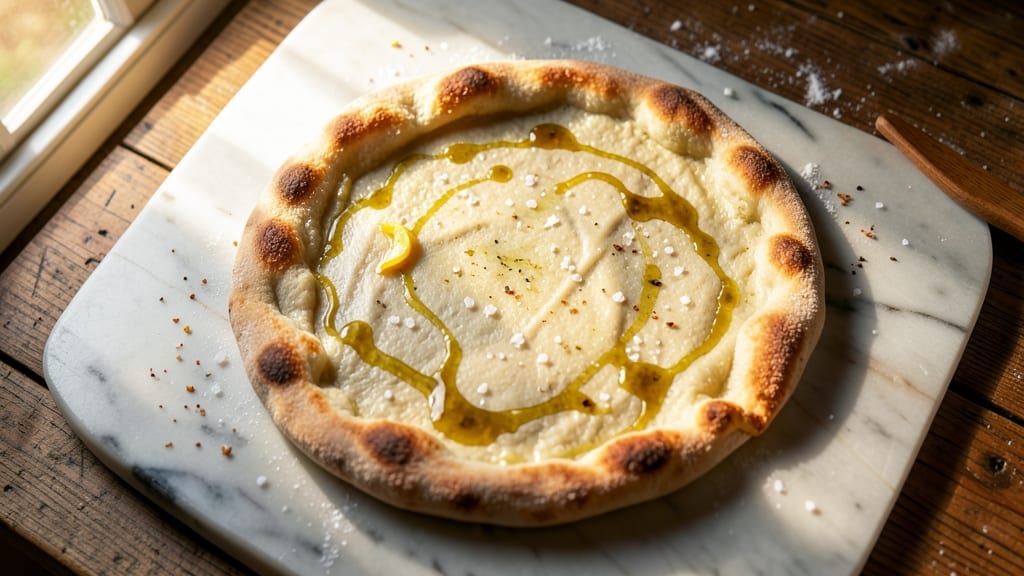
Mastering a 16-inch thin crust pizza dough with this zero-knead recipe transforms homemade pizza night into a restaurant-quality experience—light, airy, and perfectly crisp. The secret lies in precise ingredient ratios and a slow fermentation that develops flavor without requiring hours of hands-on work.
I’ve perfected this method after years of testing, ensuring every slice delivers that ideal balance of chew and crisp. What sets this dough apart is its simplicity: just five ingredients and a single rise time, yet it yields a thin crust that’s sturdy enough to hold toppings without sogging.
The dough rests overnight, allowing gluten to relax naturally, which makes stretching effortless—no tough, chewy results here. For a thin crust, stretch the dough gently but firmly, focusing on an even thickness before adding toppings.
By the time you slide your pizza into the oven, you’ll have a golden, crispy crust with a tender interior—ready to support everything from classic margherita to loaded meat lovers.
The dough’s lightness comes from a blend of bread flour and a touch of olive oil, while yeast and salt work together to create structure and flavor. This recipe delivers foolproof results every time.
Whether you’re hosting a game night or craving a solo slice, this dough adapts to any style. Pre-bake the crust for extra crispiness or skip it for a softer texture. Here’s how to make it—no kneading, no stress, just perfect pizza.
Ingredients for 16 inch thin crust pizza dough
Five simple ingredients make this restaurant-quality thin crust pizza dough foolproof every time.
| Ingredient | Amount | Notes |
|---|---|---|
| Bread Flour 🌾 | 3 ½ cups | High-protein for structure |
| Active Dry Yeast 🍞 | ¼ tsp | Ensure it's fresh |
| Fine Sea Salt 🧂 | 1 ½ tsp | Diamond Crystal preferred |
| Extra-Virgin Olive Oil 🫒 | ½ cup | For richness and lightness |
| Warm Water 💧 | 1 ¼ cups | 110°F for ideal yeast activation |
Bread flour is non-negotiable here—King Arthur or Caputo are my go-tos for that perfect chew. Check the expiration date on your yeast (it loses potency fast), and if it’s been sitting in your pantry for months, grab a new packet. Trader Joe’s sells it in single-serving packets, which is perfect for this recipe. The olive oil matters too—skip the cheap stuff. California Olive Ranch is a solid budget pick, but anything fruity and peppery works. For the water, use a thermometer to hit 110°F—yeast loves that temperature.
No bread flour? All-purpose flour plus 1 tbsp vital wheat gluten gets you close. Yeast too old? Double the amount (so 0.5 tsp) to compensate. Olive oil shortage? Avocado oil works, but it won’t have that same depth of flavor. The salt can be kosher or sea—just make sure it’s fine grain. Diamond Crystal is my favorite, but Morton works too. Pro tip: if your kitchen’s humid, reduce the water by 1 tbsp to avoid a sticky dough.
Mix everything, let it rest overnight, and you’re golden. The dough keeps in the fridge for up to 48 hours—perfect for meal prep. For longer storage, wrap tightly in plastic and freeze for up to 3 months. When ready to use, let it sit at room temp for 1-2 hours before stretching. I always make two batches—one for pizza night, one for backup slices.
Why You’ll Love This Recipe
- No-Knead Magic: I swear by this dough—just mix, let it rise while you do anything else, and boom. No punishing arm workout, no sticky mess to scrub out. The bread flour gives it that perfect chew, but the yeast does all the heavy lifting for you.
- Crispy Edge, Chewy Heart: That olive oil infusion? It’s the secret weapon. The crust gets a golden, shatter-crisp edge while staying tender underneath—no soggy middle here. Honestly, I’ve tried store-bought dough, but this one’s actually better.
- Weeknight Superstar: Double the dough, freeze half, and you’ve got a backup for lazy nights or last-minute guests. Thin crust means faster bake time, so you’re not stuck waiting. (Yes, even on a Tuesday night when you’re exhausted.)
- Budget-Friendly Flex: Five ingredients, all pantry staples—no specialty flours or pricey additives. A single batch stretches to two pizzas, and leftovers? Toss them in the freezer for future lazy breakfasts or quick flatbreads. My wallet and my taste buds win.
Step-by-step instructions for light, airy thin crust pizza dough
Here’s how to make a crispy, tender 16-inch thin crust that’s lighter than most store-bought doughs.
Mix the Dough with Minimal Effort
In a large mixing bowl, combine the 3.5 cups bread flour and 1.5 tsp fine sea salt. Stir gently to distribute the salt evenly through the flour—this prevents any single spot from becoming overly salty later. Create a well in the center of the flour mixture and add the 0.25 tsp active dry yeast directly into the well.
Pour in the 0.5 cup extra-virgin olive oil and gently mix with a wooden spoon or your fingers until the flour begins to clump together. Slowly pour in the 1.25 cups warm water (about 110°F) while stirring continuously. The dough will start to come together, but don’t worry if it looks shaggy at first—this is normal. Mix until all the ingredients are fully incorporated and the dough forms a loose, sticky ball.
Rest the Dough for Optimal Texture
Lightly oil a clean work surface or a large bowl with a bit of olive oil, then transfer the dough to it. Cover the bowl or dough with a damp kitchen towel or plastic wrap. Let it rest at room temperature for at least 1 hour, but ideally 2-3 hours. This resting period allows the gluten to relax and the yeast to activate slowly, resulting in a lighter, more tender crust.
I know it’s tempting to skip this step, but don’t. The longer you let the dough rest, the more flavorful and tender your final pizza will be. If you’re short on time, you can refrigerate the dough for up to 12 hours—this actually enhances the flavor even more.
Shape the Dough for a Perfect 16-Inch Crust
After resting, turn the dough onto a lightly floured surface. Gently press it down with your fingers, working from the center outward, until it forms a rough circle about 14 inches in diameter. This initial shaping helps prevent the dough from shrinking back during rolling. If the dough feels too sticky, wet your hands slightly to prevent tearing.
Use a rolling pin to gently roll out the dough to 16 inches in diameter. Apply just enough pressure to create a thin, even crust—about 1/8-inch thick. The edges should be slightly thinner than the center to create that classic thin crust look. Remember, the dough will shrink slightly when it hits the hot pizza stone or pan, so don’t stress about getting it perfect.
Prep for Baking (The Secret to Crispy Edges)
Preheat your oven to its highest setting, usually 500-550°F. If you’re using a pizza stone or steel, place it directly on the oven rack for at least 30 minutes before baking to ensure it’s properly heated. This step is crucial for achieving that perfect crispy crust—you want the stone to be scorching hot when the dough goes in.
While the oven heats, transfer the shaped dough to a piece of parchment paper or a well-floured pizza peel. If your dough springs back slightly when you try to transfer it, let it rest for another 5-10 minutes—this helps it relax and makes handling easier. Keep the dough covered with a clean towel until you’re ready to bake to prevent it from drying out.
Bake to Golden Perfection
Carefully slide the dough (with parchment or peel) onto the preheated pizza stone or into a hot pizza pan. Bake for 8-12 minutes until the edges are deep golden brown and the center is just set. The dough should be crispy around the edges but still slightly soft in the middle—this ensures it won’t be tough when you add your toppings and sauce.
Watch the pizza closely in the last 2 minutes of baking—it can go from perfectly cooked to burnt in seconds at these high temperatures. If the edges brown too quickly, you can tent the pizza with aluminum foil to protect it while the center finishes cooking. Remove from the oven and let it cool for 2-3 minutes before adding your toppings.
Pro Tips For Making 16 Inch Thin Crust Pizza Dough
- Weigh Your Flour: I used to eyeball it, and my dough always ended up either too stiff or too sticky. For a 16-inch thin crust, 400 grams of bread flour is your sweet spot—no more, no less. Use a kitchen scale, and for heaven’s sake, don’t pack it down; just scoop and level it off.
- Mix the Yeast Wet: Skip the dry mix-in method—dissolve that yeast in the warm water first. Let it sit for 5 minutes until frothy (yes, even if you’re impatient like me). This guarantees it’s active and saves you from wondering why your dough didn’t rise.
- Don’t Over-Knead: After 5 minutes of mixing, the dough should be shaggy but not fight you. Over-kneading develops gluten like crazy, and your thin crust will end up chewy instead of tender. Stop when it’s just combined, then let it rest—it’ll come together on its own.
- Use Olive Oil Like Butter: Most recipes call for neutral oil, but extra-virgin olive oil adds flavor and prevents sticking. Brush the dough ball and the peel generously—about 1 tablespoon total—so it doesn’t tear when stretching. (Your future self will thank you.)
Essential equipment for 16 inch thin crust pizza dough
Must-Have Tools
Start with a pizza peel—I recommend the Ooni Pizza Peel for its heat-resistant wood and smooth surface. This helps transfer your dough without tearing. A pizza stone or steel (like Lodge Preheated Pizza Stone) is non-negotiable for that perfect crispy crust.
If you’re tight on space, a cast-iron skillet works in a pinch. 🔥
Precision Equipment
Use a digital kitchen scale (I love the OXO Good Grips) to measure your 3.5 cups bread flour—this ensures consistency every time. A thermometer (like Thermoworks Thermapen) is key for checking your 110°F water and oven temperature.
For shaping, a rolling pin with a wooden handle (like Nordic Ware) gives you better control than plastic.
Budget-Friendly Swaps
No pizza stone? A baking sheet lined with parchment paper works fine. Skip the fancy peel? Use a wooden cutting board—just make sure it’s sturdy. For measuring, a standard measuring cup set works, but weigh your flour for best results.
A spoon thermometer (like Taylor Precision Products) is cheaper than a fancy probe but does the job.
Pro Upgrades
Invest in a pizza dough scraper (like Misono) to handle sticky dough without sticking. A pizza dough divider (such as Scalo) ensures perfect-sized portions. For even heat distribution, consider a pizza oven thermometer (like Thermoworks Smoke) to monitor your 500-550°F oven.
These tools take your pizza game to the next level. ✨
Nutrition facts
Frequently asked questions
Why does your recipe use bread flour instead of all-purpose?
Bread flour has a higher protein content (12-14% vs. 10-12% in all-purpose), which creates more gluten for that perfect thin crust structure. The extra gluten gives your 16-inch pizza dough the chewiness and hold without making it tough. For a lighter texture, the bread flour also absorbs moisture differently, preventing a dense final product.
Can I make this dough ahead of time?
This recipe is designed for convenience. The dough keeps in the fridge for up to 48 hours—just let it sit at room temperature for 1-2 hours before shaping. For longer storage, wrap tightly and freeze for up to 3 months. The longer it rests, the more flavor develops!
How do I prevent my thin crust from shrinking during baking?
First, let the dough rest 10-15 minutes after shaping before transferring to your peel. Use a well-floured surface and avoid over-handling. Preheat your pizza stone to 500-550°F for at least 30 minutes—the intense heat helps set the shape immediately. If it still shrinks, try baking at 525°F for 8-10 minutes before adding toppings.
What’s the best way to stretch the dough without tearing?
Work with a well-rested dough (at least 2 hours at room temp). Wet your hands slightly to prevent sticking, then gently press from the center outward. For stubborn spots, use a rolling pin to smooth edges. If it tears, patch it with extra dough—just keep it thin! The key is patience: stretch slowly and evenly for that perfect 1/8-inch thickness.
Can I use this dough for other flatbreads?
Yes! This versatile dough works great for focaccia, calzones, or even flatbread wraps. For focaccia, shape into a 12×16-inch rectangle, dimple with your fingers, and bake at 425°F for 20-25 minutes. For wraps, roll to 1/4-inch thickness. The high protein content makes it sturdy enough for any shape.
