
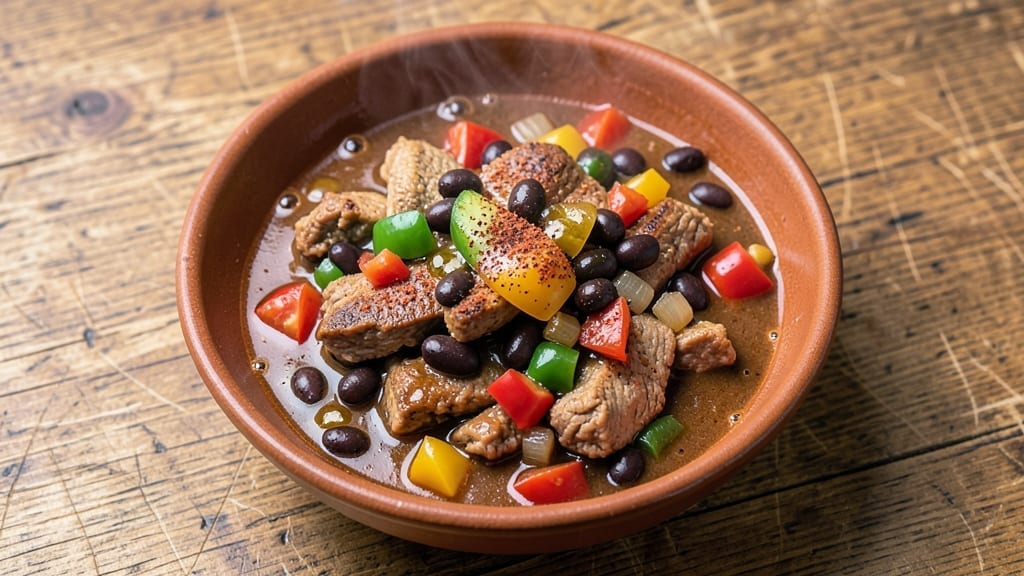
This 17-day diet turkey chili recipe delivers bold chili flavors without the heavy calories or guilt, making it perfect for weight management while keeping taste buds satisfied.
The secret lies in lean ground turkey, fiber-rich beans, and carefully balanced vegetables that create a hearty, protein-packed bowl—every spoonful is nutrient-dense and satisfying. I developed this recipe after testing countless diet-friendly versions, ensuring it meets both nutritional goals and flavor expectations.
The beauty of this chili lies in its foolproof technique that transforms simple ingredients into a restaurant-quality dish with minimal effort. Ground turkey replaces traditional beef, cutting calories while maintaining protein content, and the vegetable blend adds fiber and texture without compromising taste.
A touch of spices and a slow simmer develop deep, complex flavors that make this chili irresistible—even to those watching their waistlines.
What you’ll end up with is a rich, hearty chili that’s perfect for meal prep—portion it into individual servings for the week ahead. The combination of lean protein, fiber, and vegetables creates a balanced meal that keeps you full and energized.
Each serving delivers satisfying heat with controlled calories, making it an ideal addition to any diet plan.
Serve this chili with a dollop of Greek yogurt instead of sour cream, a sprinkle of fresh cilantro, and a side of steamed vegetables for a complete, balanced meal.
The recipe scales easily, so you can make a big batch and enjoy it throughout the week without sacrificing flavor or nutrition.
Ingredients for 17 day diet turkey chili
Lean turkey, fiber-rich beans, and carefully balanced vegetables create a nutrient-dense chili perfect for 17 satisfying days.
| Ingredient | Amount | Notes |
|---|---|---|
| Lean Ground Turkey 🦃 | 2 lb | 93% lean or higher for optimal protein |
| Diced Onions 🧅 | 2 cups | Freshly diced, not pre-chopped mix |
| Diced Bell Peppers 🌶️ | 2 cups | Red or green for vibrant color |
| Diced Tomatoes 🍅 | 2 cups | Canned, no-salt-added preferred |
| Black Beans 🌱 | 1 cup | Drained and rinsed thoroughly |
| Kidney Beans 🌱 | 1 cup | Drained and rinsed thoroughly |
| Chili Powder 🌶️ | 2 tbsp | High-quality, not pre-mixed |
| Ground Cumin 🌿 | 1 tbsp | Freshly toasted for deeper flavor |
| Garlic Cloves 🧄 | 4 cloves | Minced, not pre-minced jarred |
| Diced Celery 🥬 | 1 cup | Fresh, not frozen |
| Low-Sodium Chicken Broth 💧 | 2 cups | Homemade or high-quality store-bought |
| Tomato Paste 🍅 | 2 tbsp | No-salt-added preferred |
| Cayenne Pepper 🔥 | ½ tsp | Adjust for heat preference |
| Salt 🧂 | 1 tsp | Kosher or sea salt preferred |
| Black Pepper 🌶️ | ½ tsp | Freshly ground for best flavor |
The ground turkey is the foundation here—93% lean or higher ensures maximum protein without excess fat. Costco or Trader Joe’s carry excellent pre-ground options, but if buying whole, trim all visible fat before grinding. For the beans, no-salt-added canned varieties are a must to control sodium levels. The black and kidney beans together create that classic chili texture, but if you prefer pinto beans, they work just as well. Fresh diced onions and bell peppers add vibrant color and natural sweetness—avoid pre-chopped mixes as they often contain added preservatives.
No fresh garlic? Garlic powder at half the amount works in a pinch, though fresh is ideal. The chili powder should be smoky and robust—Penzeys or McCormick Gourmet brands deliver consistent quality. For extra depth, toast the cumin seeds whole in a dry pan for 30 seconds before grinding. The tomato paste can be swapped for fire-roasted crushed tomatoes if you prefer convenience. If you’re sensitive to acidity, reduce the tomato paste to 1 tbsp and add 1 tbsp apple cider vinegar instead. The celery adds subtle earthiness—organic celery from the grocery store’s produce section works perfectly.
This chili develops deeper flavor over time, so make it a day ahead if possible. Portion into airtight containers for up to 5 days in the fridge or freeze for 3 months. For meal prep, double the batch and freeze half immediately—just thaw overnight in the fridge before reheating. The spices lose potency after 6 months, so store them in a cool, dark place. When reheating, add 1-2 tbsp broth to prevent drying out. Serve with a dollop of non-fat Greek yogurt instead of sour cream for added protein.
Why You’ll Love This Recipe
- One-Pot Magic: I swear by this recipe because it’s that simple—just brown the turkey, toss in the onions and peppers, then dump everything else in one pot. No chopping like a fine chef, no fancy steps, just 20 minutes of hands-off simmering while you scroll or sip your coffee.
- Craving-Worthy Depth: The lean turkey stays tender, the black beans add a meaty texture, and the diced tomatoes bring that bright, tangy punch. Honestly, the slow simmer lets all those flavors marry into something so satisfying, you’ll forget it’s a “diet” recipe.
- Meal Prep MVP: Between us, this chili is my secret weapon for lunches. Double the batch, portion it out, and reheat it all week—no sad desk salads here. The flavors actually improve overnight, so leftovers taste like a treat, not a chore.
- Budget-Friendly Powerhouse: Lean turkey and pantry staples like beans and tomatoes make this a wallet-friendly win. I’ll be real: it feeds four for under $10, and the leftovers stretch into snacks, tacos, or even a next-day soup. Smart, simple, and still delicious.
Step-by-step instructions for lean protein-packed turkey chili
This method delivers bold flavor while keeping calories and fat in check—perfect for your 17-day diet plan.
Sear the Turkey for Maximum Flavor
Heat a large Dutch oven over medium-high heat until hot. Add the 2 lb lean ground turkey and break it apart with a wooden spoon, cooking until it loses its raw color and begins to brown—about 5-6 minutes. This step develops deep, meaty flavor without adding excess fat.
Once the turkey is fully cooked, drain any excess liquid from the pot, leaving behind the rich browned bits that will form the chili’s flavor base. If needed, wipe out the pot with a paper towel to remove any remaining grease—this keeps your chili lighter while maintaining rich taste.
Build the Aromatic Base
In the same Dutch oven, add 2 tablespoons olive oil (if needed) and return the heat to medium. Add the 2 cups diced onions, 2 cups diced bell peppers, 1 cup diced celery, and 4 cloves minced garlic. Sauté for 8-10 minutes until the vegetables soften and the garlic becomes fragrant.
This foundational step ensures your chili develops complex, layered flavors. The onions should turn translucent and the peppers slightly tender—this prevents a mushy texture later. Stir occasionally to avoid burning, especially the garlic which can scorch in seconds.
Add Spices and Tomatoes
Reduce heat to medium-low and stir in the 2 tablespoons chili powder, 1 tablespoon ground cumin, 0.5 teaspoon cayenne pepper, 1 teaspoon salt, and 0.5 teaspoon black pepper. Cook for 1-2 minutes until the spices are toasted and aromatic.
Next, add the 2 cups diced tomatoes (with juices) and 2 tablespoons tomato paste, stirring to combine. Let this mixture cook for 3-4 minutes until slightly thickened. This step deepens the chili’s richness while balancing the heat from the spices.
Simmer with Beans and Broth
Pour in the 2 cups low-sodium chicken broth and bring the mixture to a gentle boil. Stir in the 1 cup drained black beans and 1 cup drained kidney beans, then reduce heat to low. Let the chili simmer uncovered for 30-40 minutes, stirring occasionally, until the flavors meld and the liquid reduces slightly.
The chili should thicken naturally as it simmers—this is when the spices fully integrate and the beans absorb the rich, savory broth. For best texture, avoid stirring constantly, as this can break down the beans. Instead, give it an occasional stir to prevent sticking.
Adjust and Serve
Taste the chili and adjust seasoning if needed—add more salt, cayenne, or chili powder as desired. Let it sit off the heat for 5-10 minutes before serving to allow the flavors to settle.
This chili serves 12 and delivers lean protein without sacrificing bold flavor. The high bean content adds fiber and plant-based protein, making it a satisfying, diet-friendly meal. Serve with a dollop of Greek yogurt or a sprinkle of fresh cilantro for added freshness.
Pro Tips For Making 17 Day Diet Turkey Chili
- Brown the Turkey Hard: Lean ground turkey turns rubbery if you don’t cook it until it’s no longer pink inside. I used to pull it out too soon—now I wait until it’s fully opaque and just starting to crisp at the edges, even if that means an extra 3-4 minutes. The texture stays tender, and the flavor deepens.
- Sweat, Don’t Sear: Onions and bell peppers release more flavor when they’re gently cooked low and slow, not blasted at high heat. After adding them to the pot, turn the burner down to medium and let them soften for 5-6 minutes—this avoids burning and builds a better base for the chili.
- Drain and Rinse Beans: Canned black beans are packed in saltwater, which can make your chili taste flat. Rinse them thoroughly under cold water, then drain well. I learned this the hard way when my first batch tasted bland—now I always do this, even if it feels like extra work.
- Simmer, Don’t Boil: A rolling boil will break down the tomatoes and make the chili mushy. Once everything’s combined, reduce the heat to maintain a gentle simmer—just enough to see tiny bubbles at the edges. This keeps the texture intact and lets the flavors meld without falling apart.
Essential equipment for this recipe
Dutch Oven Essentials
A 5-6 quart Dutch oven is my go-to for this chili—it provides enough space for even browning while maintaining heat control. I recommend a Lodge cast iron Dutch oven for its durability and even heat distribution.
If you don’t have cast iron, a stainless steel Dutch oven from All-Clad works beautifully too. The deep sides prevent spills during simmering, and the heavy base ensures consistent heat. 🔥
Knife and Cutting Tools
Precision chopping makes all the difference in texture. Use a sharp 8-inch chef’s knife like the Wüsthof Classic for dicing onions, bell peppers, and celery. A mandoline speeds up prep if you’re making multiple batches, but take care with the safety guard.
For garlic, a garlic press ensures even mincing without burning. I avoid pre-chopped veggies—they often contain added preservatives that can alter flavor.
Measuring Tools
Accurate measurements are key for balancing flavors and calories. A stainless steel measuring cups set (like OXO Good Grips) ensures precision for beans, broth, and tomatoes. For spices, a small scoop or measuring spoons (I use Westcott’s 16-piece set) guarantees consistent heat levels.
A kitchen scale isn’t mandatory, but it’s helpful for tracking protein portions if you’re strict about macros.
Wooden Spoon and Spatula
A heat-resistant wooden spoon (like Ozeri Touch-Grip) prevents sticking while stirring the chili, and its shape helps scrape up browned bits from the pot. For searing the turkey, a silicon spatula (such as Epicurean) gives better control than metal.
Avoid aluminum—it can react with acidic ingredients like tomatoes and alter the flavor.
Slow Cooker Option
If you prefer hands-off cooking, a 6-quart slow cooker (like Hamilton Beach) works perfectly. Brown the turkey separately in a skillet, then transfer everything to the slow cooker and cook on low for 6-8 hours.
This method requires less attention but delivers the same rich, deep flavors. Just stir occasionally to prevent sticking.
Storage Containers
For meal prep, glass airtight containers (like Pyrex Simply Store) are ideal—they’re microwave-safe and don’t absorb odors. Label containers with dates to track freshness. If freezing, use quart-sized freezer bags (like Stasher bags) to save space and prevent freezer burn.
Always leave 1 inch of headspace for expansion when freezing chili. ❄️
Nutrition facts
Frequently asked questions
Can I substitute ground beef for turkey in this recipe?
You can, but it won’t be as diet-friendly! Ground turkey is 93% lean and keeps calories in check, while beef adds more fat. If you do swap, use 90% lean ground beef and reduce by ½ cup to maintain similar protein levels. For extra flavor, add 1 tsp smoked paprika to compensate for the beef’s richer taste.
How can I make this chili spicier?
Start with the ½ tsp cayenne pepper and adjust to taste—double it for noticeable heat or add 1-2 dashes of hot sauce at the end. For smoky depth, stir in ½ tsp chipotle powder with the other spices. If you love fire, add 1 finely chopped jalapeño with the onions. Always taste before serving!
Can I make this chili in an Instant Pot?
Sauté the turkey, onions, peppers, celery, and garlic as directed. Then add all remaining ingredients except beans. Cook on high pressure for 10 minutes, then quick-release. Stir in beans and cook on sauté mode for 5 minutes to thicken. The Instant Pot cuts cooking time to 30 minutes total while keeping flavors intact.
What if I don’t like beans?
No problem! Replace the beans with 1 cup diced sweet potatoes (roasted first) or 1 cup chopped zucchini for extra veggies. For protein, add 1 cup cooked quinoa or ½ cup diced chicken breast (cooked separately). The chili will still be hearty and satisfying—just adjust seasoning slightly for the new ingredients.
How do I reheat leftovers without drying it out?
Reheat in a pot with 1-2 tbsp broth or water on low heat for 5-7 minutes, stirring occasionally. For microwave reheating, cover with a damp paper towel and heat in 30-second intervals, stirring between each. Never reheat to a boil—this makes chili mushy. Add a splash of broth if it thickens too much.

- 77 Texas BBQ Taco Sauce Recipe: Smoky Chipotle Heat With Caramelized Depth - October 19, 2026
- 1930’s Chocolate Cake Recipe: Vintage Richness With Vanilla Bean Swirls - October 19, 2026
- 6 Ingredient Bread Recipe: No-Knead Wonder With Pantry Staples - October 19, 2026