
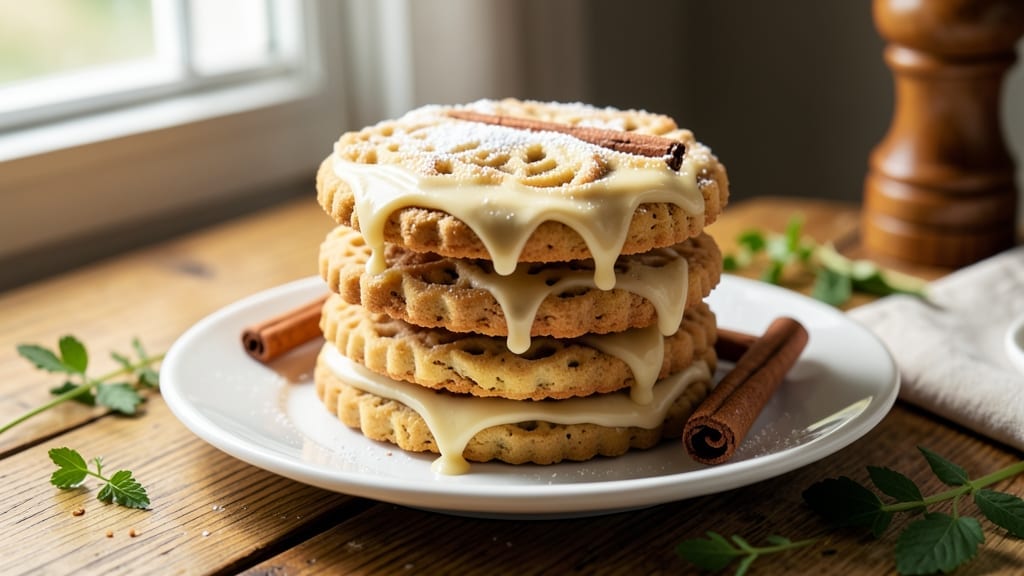
This 1950s sugar cookie recipe brings back the magic of homemade treats that taste like childhood memories—vanilla swirls, tender crumb, and just the right amount of spice. The secret lies in a precise balance of butter, sugar, and a touch of cinnamon that gives them that nostalgic warmth.
Unlike modern recipes, these cookies rely on old-school techniques that deliver a melt-in-your-mouth texture with crisp edges.
The dough is rolled to an even thickness and cut into classic shapes—think stars, wreaths, or simple rounds—before baking to a golden brown. What sets these apart is the vanilla swirl, created by folding vanilla extract into the dough before rolling.
This method ensures every bite carries that signature flavor without overpowering the delicate sugar cookie base.
Once baked, these cookies stay soft for days, thanks to a simple trick: wrapping them in plastic wrap while still warm. The result? A batch of cookies that’s perfect for holiday gatherings, gift-giving, or simply enjoying with a glass of milk.
The spice blend—cinnamon, nutmeg, and a hint of cloves—adds depth without overpowering the sweetness.
Whether you’re recreating a family tradition or trying a vintage recipe for the first time, this method guarantees cookies that taste like they came straight from a 1950s kitchen. The instructions are straightforward, and the results are always impressive. Let’s get started!
Ingredients for 1950 sugar cookie
Butter, sugar, and vanilla create the nostalgic base for these classic 1950s sugar cookies.
| Ingredient | Amount | Notes |
|---|---|---|
| Unsalted Butter 🧈 | 1 cup | Cold, cubed for even texture |
| Granulated Sugar 🍚 | 2 ½ cups | Superfine preferred for smooth crumb |
| Pure Vanilla Extract 🌿 | 2 tsp | Imitation-free for authentic flavor |
| Large Eggs 🥚 | 1 whole | Room temperature for even mixing |
| All-Purpose Flour 🌾 | 3 ½ cups | Sifted, spooned lightly |
| Ground Cinnamon 🌶️ | 1 tsp | True cinnamon, not cassia |
| Ground Nutmeg 🌿 | ¼ tsp | Freshly grated for depth |
| Ground Cloves 🌶️ | ¼ tsp | Lightly toasted for warmth |
| Salt 🧂 | ½ tsp | Fine sea salt preferred |
| Powdered Sugar 🍚 | 1 cup | For rolling and dusting |
| Vanilla Bean Paste 🌿 | 1 tbsp | Optional, for extra vanilla depth |
| Cornstarch 🌾 | 1 tbsp | For tender crumb texture |
The butter is everything here—European-style unsalted like Plugrá or Land O’Lakes makes all the difference. Look for blocks, not tubs, for higher fat content. The sugar? Superfine dissolves faster, but if you only have granulated, pulse it in a food processor for 30 seconds. Vanilla extract should be pure, no alcohol fillers—I always double-check the bottle. For the spice blend, Penzeys or bulk bins at Whole Foods give you the freshest cinnamon and nutmeg. Toasting the whole spices before grinding? Worth the extra minute for deeper flavor.
No vanilla bean paste? Extra vanilla extract works—just add an extra teaspoon. Substituting butter? Coconut oil gives a similar texture, but it lacks the richness. Running low on powdered sugar? Granulated sugar processed in a blender is a fine swap. For the dough, if it feels too sticky, chill it 15 minutes before rolling. Too dry? Add 1 teaspoon of milk. The cornstarch isn’t just for texture—it keeps those cookies soft for days. And if you’re cutting shapes? A cookie cutter set from a vintage store adds that authentic touch.
Wrapped in plastic while warm, these cookies stay soft for 5-7 days at room temperature. For longer storage, freeze shaped cookies on a tray first—then transfer to a bag. Reheat in the oven at 300°F for 3-5 minutes to restore that melt-in-your-mouth feel. The vanilla swirl? That’s the secret—fold it into the dough before rolling, not after. And if you’re gifting? Dust with powdered sugar right after baking—it sets as they cool, giving that classic 1950s look.
Why You’ll Love This Recipe
- Butter-Soft Shortcut: I swear by this dough—just cream butter and sugar until fluffy, then fold in vanilla and eggs. No food processor, no fuss, and that melt-in-your-mouth texture happens every time. (Honestly, my mixer’s been collecting dust since I tried this.)
- Vanilla Hug in Every Bite: That pure vanilla extract isn’t just flavor—it’s the star. The cookies caramelize just enough to get that buttery crunch, but the center stays tender. My husband licks the bowl before baking. (Yes, even on a Tuesday night.)
- Holiday or Snack Attack: Roll these out for gingerbread houses in December or cut into stars for a kid’s birthday. Or—here’s the real win—bake a batch, freeze the dough, and pull them out whenever you need a treat. No last-minute stress.
- Dollar Stretch Magic: Butter, sugar, flour—these are pantry staples that won’t break the bank. A single batch makes 30 cookies, and leftovers? Toss them in the oven for 30 seconds to revive. My secret weapon for potlucks where I’m the only one bringing sweets.
Step-by-step instructions for 1950 sugar cookie recipe
Here’s how to create these nostalgic spiced cookies with perfect texture and flavor.
Cream Butter and Sugar for Maximum Flavor
In a stand mixer fitted with the paddle attachment, beat the 1 cup unsalted butter (cold, cubed) and 2.5 cups granulated sugar on medium speed for 3-4 minutes. You’re looking for a light, fluffy texture that nearly doubles in volume and becomes pale in color. This creaming process incorporates air, which creates that classic tender crumb and helps the cookies hold their shape.
I like to scrape down the sides of the bowl with a silicone spatula every 30 seconds to ensure even mixing. The butter should be fully incorporated but still slightly grainy – this indicates it’s properly creamed but not melted. If it looks too soft, chill the bowl in the freezer for 5 minutes before proceeding.
Add Eggs and Vanilla for Rich Depth
Add the 1 whole large egg (room temperature) and mix on low speed for 30 seconds until fully incorporated. Then add the 2 tsp pure vanilla extract and 1 tbsp vanilla bean paste (if using), mixing for another 30 seconds. The mixture will look slightly curdled at first, but don’t worry – this will resolve when we add the dry ingredients.
This is where the cookies get their signature vanilla flavor. I always use both extract and paste for maximum depth. If you’re using vanilla bean paste, make sure it’s well mixed into the batter – those little specks of vanilla bean add beautiful flecks of color and intense flavor to each bite.
Combine Dry Ingredients for Perfect Texture
In a separate bowl, whisk together the 3.5 cups all-purpose flour, 1 tsp ground cinnamon, 0.25 tsp ground nutmeg, 0.25 tsp ground cloves, 0.5 tsp salt, and 1 tbsp cornstarch. The cornstarch is key here – it helps create that tender crumb that’s characteristic of 1950s sugar cookies.
With the mixer on low speed, gradually add the dry ingredients to the wet mixture, mixing just until combined. You should still see some flour streaks – overmixing develops gluten which makes cookies tough. Stop mixing as soon as the dough comes together. If it’s too crumbly, add 1-2 teaspoons of cold water to help it bind.
Chill the Dough for Ideal Shape and Flavor
Divide the dough into two equal portions and flatten each into a 1-inch thick disk. Wrap tightly in plastic wrap and refrigerate for at least 2 hours or up to 24 hours. This chilling step is crucial – it allows the flour to fully hydrate, prevents excessive spreading, and develops the flavors.
I know it’s tempting to skip this step, but don’t. The longer you chill the dough, the better the cookies will be. The cold dough also makes rolling and cutting much easier. If you’re short on time, you can freeze the dough disks for 30 minutes as a shortcut.
Roll and Cut for Classic Cookie Shape
Preheat your oven to 350°F and line two baking sheets with parchment paper. On a lightly floured surface, roll out one disk of dough to about 1/4-inch thickness. Use a 2-1/2 inch round cutter to cut out cookies, then reroll the scraps and cut more cookies until you’ve used all the dough.
Place the cut cookies on the prepared baking sheets, spacing them about 1 inch apart. For that classic 1950s look, you can make a small slit in the center of each cookie with a knife before baking. Bake for 8-10 minutes until the edges are just beginning to turn golden. The centers should still look slightly underdone – they’ll continue cooking on the hot pan.
Finish with Powdered Sugar and Vanilla Swirl
Remove the cookies from the oven and let them cool on the baking sheet for 2 minutes, then transfer to a wire rack to cool completely. Once cooled, roll each cookie in the 1 cup powdered sugar for that signature dusted look. For the vanilla swirls, use a small knife to gently drag a line of vanilla bean paste across the top of each cookie.
The powdered sugar should cling to the cookies, creating that beautiful dusted appearance. The vanilla swirl adds both visual appeal and an extra layer of vanilla flavor. Store cookies in an airtight container for up to 5 days or freeze for up to 3 months for maximum freshness.
Pro Tips For Making 1950 Sugar Cookie
- CHILL THE DOUGH: After mixing, pop the dough in the fridge for at least 2 hours—no, 30 minutes won’t cut it. I learned this the hard way when my cookies spread into sad, flat pancakes. Cold butter behaves, and your cookies will hold their shape while baking.
- USE ROOM-TEMP BUTTER: Take that butter out of the fridge 1–2 hours before mixing—yes, even in winter. Cold butter means uneven texture, and nobody wants a cookie that’s tough in spots. Soft but not melted is the goldilocks zone.
- WEIGH THE FLOUR: Scoop that flour straight from the bag? Stop. Spoon it into a measuring cup, then level it off—packing it changes the ratio, and your cookies will turn out dense. A kitchen scale makes this foolproof, but even a proper scoop works.
- BAKE ONE PAN AT A TIME: Overcrowding the oven = uneven baking. Space your cookies 2 inches apart and use the middle rack. I used to cram them in like holiday cookies, and half came out pale while others burned. Patience here = perfect batches.
Perfect pairings for 1950 sugar cookie
Classic Milk Pairings
These cookies were practically designed for a tall glass of cold milk—whole milk is my go-to for its creamy richness that balances the sweetness. For a nostalgic 1950s touch, try homogenized whole milk (the kind from glass bottles) if you can find it.
If you prefer something lighter, 2% milk works perfectly, though it won’t be as indulgent. Avoid skim milk—the cookies deserve that velvety contrast! 🥛
Spiced Tea Complements
For a sophisticated pairing, serve these cookies with Earl Grey tea—the bergamot’s citrus notes cut through the sugar while the cinnamon in the cookies echoes the tea’s warmth.
Another winner is chai tea, especially if you steep it with extra cardamom or cloves to mirror the cookie’s spice blend. Iced tea lovers can try vanilla chai iced tea for a refreshing twist that highlights the vanilla swirl.
Creamy Coffee Pairings
If you’re a coffee drinker, cinnamon-flavored coffee (like Starbucks’ Cinnamon Dolce) creates a magical pairing—the spice in the cookies and coffee harmonize beautifully. For a classic combo, try vanilla cream coffee—the vanilla in both the cookies and coffee creates a cohesive, comforting experience.
A shot of espresso with a sprinkle of powdered sugar on top also works wonderfully, especially if you serve the cookies alongside.
Seasonal Beverage Ideas
In winter, pair these cookies with hot apple cider—the tartness of the cider contrasts perfectly with the sweetness. For summer, vanilla lemonade (made with fresh lemon juice and a splash of vanilla extract) is a refreshing match.
If you’re feeling festive, mulled wine (spiced red wine) during the holidays adds a cozy, boozy touch that complements the cookies’ warmth. 🍎
Unexpected Pairings
Don’t overlook sparkling cider (like Martinelli’s) for a festive, bubbly contrast. Or try vanilla-infused hot chocolate—the cookie’s vanilla swirl and the hot chocolate’s richness create a decadent dessert-like experience.
For something truly unique, pair with ginger beer (non-alcoholic or spiced) to highlight the cookies’ spice notes while adding a fizzy kick.
Nutrition facts
Frequently asked questions
Why does this recipe use cornstarch instead of baking powder?
Cornstarch creates a tender, melt-in-your-mouth texture that’s classic for 1950s sugar cookies. Unlike baking powder, it doesn’t develop gluten, which keeps the cookies soft and delicate. The 1 tbsp cornstarch also helps maintain moisture, making these cookies stay fresh for days. For extra tenderness, don’t skip it!
Can I make these cookies without a mixer?
Use a sturdy wooden spoon or fork to cream the butter and sugar by hand—just work it vigorously for 5-7 minutes until light and fluffy. For the dough, mix dry ingredients with a fork in the bowl, then cut in the butter with a pastry cutter or your fingers. The chilling step becomes even more important when hand-mixing.
What’s the secret to getting the perfect vanilla swirl?
Fold the vanilla extract (and paste) into the dough before rolling, not after. Use a small offset spatula to gently press the vanilla into the dough in thin, even lines while rolling. For extra visual appeal, add a tiny dot of vanilla paste in the center of each cookie before baking—it’ll create a beautiful swirl as they cook.
Why do my cookies spread too much or stay doughy?
Over-creaming the butter (making it too soft) causes spreading, while underbaking leaves them doughy. Always chill the dough for at least 2 hours and bake at 350°F for 8-10 minutes—the centers should look slightly underdone. For extra insurance, chill the baking sheet for 10 minutes before adding cookies. Too much flour? Measure by weight for precision!
How can I make these cookies gluten-free?
Replace the all-purpose flour with a 1:1 gluten-free baking flour blend (like Bob’s Red Mill) plus 1 extra tsp xanthan gum. Reduce the sugar to 2 cups and add 1/4 cup almond milk to the dough. Chill the dough 3 hours and bake at 325°F for 10-12 minutes**—gluten-free dough spreads less but needs more time. Store in the fridge to prevent crumbling.

- 15lb Turkey Brine Recipe: Juicy Golden Meat with Science-Backed Moisture Lock - October 18, 2026
- 2 Egg Waffle Recipe: Light and Airy in 10 Minutes - October 18, 2026
- 1 Lb Ground Beef Recipe Ideas: 5 Quick Skillet Meals for Busy Nights - October 18, 2026