
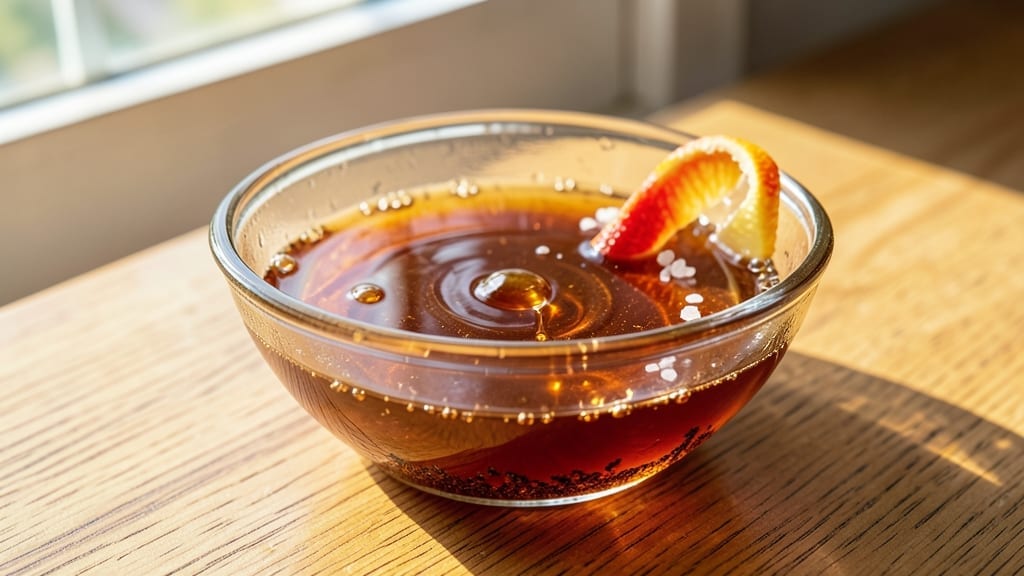
This 2:1 sugar syrup recipe delivers the perfect balance of sweetness for cocktails, desserts, and beverages—simple yet transformative. The ratio of sugar to water creates a smooth, clear syrup that dissolves completely, avoiding that dreaded grainy texture.
I developed this version after testing countless batches, and it never fails to elevate drinks or desserts with consistent, professional results.
The beauty of this recipe lies in its precision and versatility. With just two ingredients—granulated sugar and water—you’ll achieve a syrup that’s ideal for everything from classic cocktails like margaritas to drizzling over pancakes or fruit salads.
The key is gentle heat and patience, ensuring the sugar fully incorporates without scorching. Once cooled, it stores effortlessly in the fridge for up to two weeks.
What sets this syrup apart is its adaptability. Use it as-is for a neutral sweetness, or infuse it with flavors like vanilla, citrus zest, or herbs for custom variations. The perfectly balanced sweetness means you control the intensity, whether you’re crafting a signature cocktail or enhancing a dessert.
This is the syrup I reach for whenever I need reliable, restaurant-quality sweetness at home.
Ready to elevate your drinks and desserts? This recipe is your foundation—simple to make, foolproof, and endlessly customizable. Let’s get started with a syrup that works as hard as you do in the kitchen.
Ingredients for 2 1 sugar syrup
Two core ingredients, endless possibilities—this syrup transforms drinks and desserts effortlessly.
| Ingredient | Amount | Notes |
|---|---|---|
| Granulated Sugar 🍚 | 2 cups | White or raw, fine grain preferred |
| Water 💧 | 1 cup | Filtered or distilled for clarity |
| Lemon Juice 🍋 | 1 tbsp | Freshly squeezed, optional for preservation |
| Vanilla Extract 🌿 | ½ tsp | Pure vanilla for subtle flavor |
| Fine Sea Salt 🧂 | ¼ tsp | Balances sweetness, optional |
The sugar is non-negotiable here—Domino or C&H are my go-tos for consistent results. Organic raw sugar works too, but expect a slightly caramelized flavor. Water quality matters for clarity, so skip the tap if yours is hard. The lemon juice is optional but extends shelf life by a few days—freshly squeezed is best, but bottled works in a pinch. For a neutral base, skip the vanilla and salt; add them later for customization. I always double-check my sugar-to-water ratio before heating, because getting that 2:1 balance right is everything.
No granulated sugar? Powdered sugar works at 1:1 ratio, but it’ll dissolve faster and may crystallize quicker. Short on water? White vinegar or apple juice can substitute, though flavor will shift. The vanilla and salt are purely for flavor—omit them if you’re making a neutral base for cocktails. For a 3:1 syrup (thicker), reduce water to ⅔ cup instead. If your syrup crystallizes, gently reheat with a splash of water—don’t stir, or you’ll encourage more crystals. And if you’re infusing flavors, add them after cooling to preserve potency.
Store in a clean, airtight glass jar in the fridge—up to 2 weeks if unflavored, 1 week if infused. For longer storage, freeze in ice cube trays, then transfer to a bag. The syrup thickens slightly when chilled, so stir before using. I keep a small jar of this in my bar cart at all times—one pour elevates any drink. Pro tip: Label your jar with the date and flavor (if any) to track freshness. And if you’re making a big batch, divide it into smaller containers to avoid waste.
Why You’ll Love This Recipe
- Five-Minute Miracle: I swear by this—just sugar, water, and a splash of lemon on the stove for five minutes. No measuring cups to lose, no fancy tools, and honestly? I’ve made it while waiting for coffee to brew.
- Bright & Balanced: That lemon juice cuts through the sweetness just enough to make it addictive, while the vanilla and salt add this weirdly sophisticated depth. It’s sweet but never cloying—like a hug from a baker who knows what they’re doing.
- Pantry Staple Hack: I keep a jar of this in my fridge for everything: drizzled over yogurt, stirred into iced tea, or even mixed into cocktails. Between us, it’s the reason my breakfast toast and my weekend cocktails both taste ridiculously good.
- No-Waste Goldmine: A little goes a long way, so you’ll have leftovers for weeks—no sad, forgotten syrup here. Plus, it’s cheaper than buying fancy syrups, and I’ve repurposed this for everything from pancakes to grilled pineapple. My wallet and taste buds thank me.
Step-by-step instructions for perfect 2:1 sugar syrup
This simple method delivers a flawless, perfectly balanced syrup every time—ideal for cocktails, desserts, or glazes.
Combine Sugar and Water in a Saucepan
In a medium saucepan, add the 2 cups granulated sugar and 1 cup water. I use a heavy-bottomed pan to prevent scorching, especially if you’re in a hurry. Stir just enough to moisten all the sugar crystals—this ensures even dissolution and prevents grainy syrup.
Place the pan over medium-high heat and bring to a gentle boil. You’ll know it’s ready when small bubbles form at the edges and the mixture begins to simmer steadily. This usually takes about 3-5 minutes—don’t walk away, as sugar burns quickly once boiling begins.
Simmer Until Fully Dissolved and Clear
Once boiling, reduce heat to medium-low and let the syrup simmer for 5-7 minutes. Stir occasionally to prevent sticking, but avoid constant stirring which can create foam. The syrup is ready when it becomes completely clear and all sugar crystals have dissolved.
Here’s the thing—if you see any undissolved sugar at the bottom, increase heat slightly and give it another minute. You want a smooth, glass-like consistency that coats the back of a spoon. This clarity is what makes your syrup perfect for cocktails and desserts.
Add Flavorings and Salt
Remove the pan from heat and let the syrup cool for 1-2 minutes—just enough to prevent scorching when adding the heat-sensitive ingredients. Stir in the 1 tablespoon lemon juice, 0.5 teaspoon vanilla extract, and 0.25 teaspoon fine sea salt. The lemon juice adds brightness, the vanilla deepens flavor, and the salt balances sweetness perfectly.
I like to whisk vigorously for about 30 seconds to ensure everything is fully incorporated. The salt might seem negligible, but it makes a noticeable difference in the final product, especially when using this syrup in cocktails or drizzled over desserts.
Cool and Store Properly
Transfer the syrup to a clean glass jar or bottle using a fine-mesh strainer to catch any potential foam or impurities. Let it cool completely at room temperature—this prevents condensation that can dilute the syrup and encourages proper flavor development.
Once cooled, seal the jar tightly and store it in the refrigerator. This syrup will keep for up to 3 weeks in the fridge, making it perfect for batch prep. If you notice any cloudiness or separation, simply reheat gently and stir until clear again before using.
Test for Perfection
To verify your syrup is perfectly balanced, take a small spoonful and taste it straight. It should be richly sweet but not cloying, with a subtle citrus brightness from the lemon and a warm vanilla undertone. The salt should enhance all these flavors rather than being noticeable on its own.
This syrup works beautifully in cocktails like margaritas or espresso martinis, as a glaze for pastries, or even as a simple syrup for iced tea. The 2:1 ratio ensures it’s sweet enough to cut through strong flavors while remaining versatile enough for countless applications.
Pro Tips For Making 2 1 Sugar Syrup
- Simmer Slow and Steady: After burning three batches, I finally figured out that 2:1 syrup needs a gentle simmer—no rolling boil, just small bubbles. Too much heat caramelizes the sugar too fast, and suddenly you’re dealing with a bitter, dark mess instead of a glossy, golden syrup.
- Use Cold Water First: Dump the sugar in cold water to start—this prevents clumping like you wouldn’t believe. I used to toss in hot water, and half the sugar would stick to the pot like glue. Stir immediately and keep the heat low until it dissolves completely.
- Salt Last, Not First: Add the fine sea salt after the syrup has thickened slightly—this keeps it from crystallizing early. I learned this the hard way when my syrup turned grainy mid-cook. A pinch at the end also balances the sweetness without overpowering.
- Vanilla After Removal: Sounds weird, but it works: Stir in the vanilla after the syrup cools just enough to touch but not sip. Heat can kill vanilla’s delicate flavor, and I was skeptical until I tried it—now my syrup tastes like a bakery, not a lab. Lemon juice goes in first, though.
Essential equipment for this recipe
Heavy-Bottomed Saucepan
Start with a stainless steel saucepan—I swear by All-Clad or Cuisinart for even heat distribution. A medium-sized pan (about 2-3 quarts) works best, as it gives the sugar enough room to dissolve without boiling over.
The heavy base prevents scorching, which is crucial since sugar burns faster than you think. If you’re using a nonstick pan, avoid it—sugar can stick and create a bitter flavor. 🔥
Fine-Mesh Strainer
A fine-mesh strainer (like the OXO Good Grips) is essential for transferring your syrup to storage containers. It catches any foam or undissolved sugar crystals that might form during the simmering process.
I keep one dedicated to syrup-making on my countertop for quick cleanup. Skipping this step can lead to grainy syrup in your final product, which ruins the smooth texture you’re aiming for.
Glass Jars with Airtight Lids
For storage, amber glass jars (like Ball or Mason jars) are my top pick—they block light, which helps preserve the syrup’s clarity and flavor. A 16-ounce jar is perfect for batch prep, and the airtight lids prevent contamination.
Avoid plastic containers, as they can absorb flavors and may not seal as securely. Label your jars with the date and flavor (if infused) to track freshness. Pro tip: Use parchment paper under the lid to prevent sticking if you’re storing flavored syrups.
Digital Kitchen Scale
While the recipe uses volume measurements, a digital kitchen scale (like OXO Good Grips) ensures precision if you’re scaling up or down. Sugar can vary in density by brand, so weighing it guarantees a consistent 2:1 ratio every time.
For example, 2 cups of Domino sugar weighs about 7.5 ounces, but 2 cups of organic raw sugar might weigh slightly more. This level of accuracy is especially important for cocktails where sweetness balance matters.
Thermometer (Optional but Helpful)
A candy or kitchen thermometer (like Thermoworks) lets you monitor the syrup’s temperature for foolproof results. Aim for a gentle simmer between 212-220°F—this ensures the sugar dissolves without caramelizing. If you don’t have one, watch for small, steady bubbles at the edges of the pan.
Overheating can turn your syrup into caramel, so keep an eye on it. This tool is a game-changer for beginners who worry about burning their syrup. 🌡️
Nutrition facts
Frequently asked questions
Why is the 2:1 sugar-to-water ratio important?
The 2:1 ratio creates a syrup that’s sweet enough for cocktails but not overwhelming for desserts. This balance ensures the sugar fully dissolves without becoming cloying. Too much water (3:1 ratio) makes it too thin for proper sweetness, while too little (1:1 ratio) risks undissolved sugar crystals. The 2:1 is the Goldilocks zone for versatility!
Can I make this syrup without heat?
Not effectively. Cold water won’t dissolve all the sugar crystals, leaving a grainy texture. If you’re in a hurry, use warm water (160°F) instead of boiling, but you’ll need to stir constantly for 10-15 minutes to achieve full dissolution. For best results, always use gentle heat.
How do I fix crystallized syrup?
If you see sugar crystals forming, gently reheat the syrup with 1 tablespoon extra water until fully dissolved. Stir in a pinch of corn syrup or lemon juice (½ tsp) to prevent recrystallization. The key is to avoid stirring while hot—this breaks up sugar molecules and encourages more crystals.
What are the best flavor infusion ideas?
Try citrus peels (orange, lemon, lime) for bright cocktails, cinnamon sticks for desserts, or rosemary sprigs for herbal notes. For coffee lovers, add 1 tsp instant espresso powder to the cooled syrup. Infuse for 24 hours in the fridge, then strain. The possibilities are endless—just don’t overdo it or the flavors will dominate!
Why does my syrup turn cloudy?
Cloudiness usually means undissolved sugar or contamination. Reheat gently until clear, then strain through a fine-mesh sieve. If stored improperly (plastic container or without refrigeration), bacteria can cause cloudiness—always use clean glass jars. For extra clarity, add ½ tsp lemon juice when reheating.
