
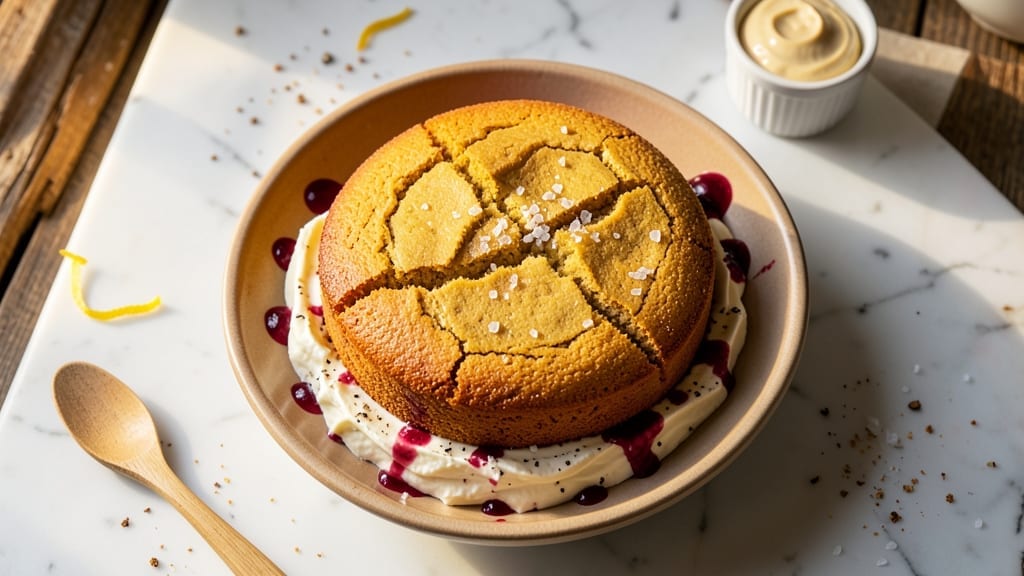
A 2-cup flour cake recipe delivers effortless perfection with layers that stay moist for days—no fancy techniques required. The secret lies in the vanilla bean swirl that infuses each bite with aromatic depth while keeping the texture impossibly tender.
I’ve perfected this recipe over years of baking, ensuring every slice meets that ideal balance of structure and crumb.
This cake uses simple ingredients you likely already have: all-purpose flour, butter, sugar, and vanilla. The key technique is folding in vanilla bean paste (or seeds) into the batter before dividing it for swirling—creating those signature ribbons without overmixing.
Baking at 350°F for 25-30 minutes guarantees a golden top and a cake that pulls away from the pan cleanly.
What sets this apart is the moisture that lasts. Unlike many boxed cakes, this recipe includes a lightly beaten egg and buttermilk for richness, while the vanilla bean adds natural sweetness that eliminates the need for excessive sugar.
The result? A cake that stays fresh for 5 days in an airtight container, perfect for birthdays, showers, or spontaneous treats.
For serving, I recommend a light dusting of powdered sugar or a simple vanilla glaze—no heavy frosting needed to preserve that delicate texture. The swirls create visual appeal without overwhelming the cake’s natural flavor. Ready to bake?
Ingredients for 2 cup flour cake
Simple pantry staples transform into a showstopping cake with signature vanilla bean swirls.
| Ingredient | Amount | Notes |
|---|---|---|
| All-Purpose Flour 🌾 | 2 cups | Sifted for even texture |
| Unsalted Butter 🧈 | 1 cup | Cold, cubed for creaminess |
| Granulated Sugar 🍚 | 1 ½ cups | Superfine preferred for smoothness |
| Vanilla Bean Paste 🌸 | 2 tbsp | High-quality for authentic flavor |
| Large Eggs 🥚 | 2 whole | Room temperature for blending |
| Buttermilk 🥛 | 1 cup | Fresh for optimal tang |
| Baking Powder 🧂 | 1 ½ tsp | Aluminum-free for stability |
| Salt 🧂 | ½ tsp | Fine sea salt preferred |
| Powdered Sugar 🍚 | ½ cup | For dusting or glaze |
| Vanilla Extract 🌸 | 1 tsp | Pure bourbon vanilla |
| Vegetable Oil 🫒 | ¼ cup | Lightens texture |
The flour forms the foundation—King Arthur or Gold Medal brands work best for tender crumb. Unsalted butter should have visible fat content (80% minimum) for optimal moisture; Plugrá or Land O’Lakes are reliable choices. Granulated sugar should be superfine if possible, but regular granulated works fine when pulsed in a food processor. For the vanilla bean paste, Madagascar bourbon beans deliver the deepest flavor—Madagascar Vanilla Company is my go-to brand. If using whole vanilla beans, scrape out the seeds and reserve the pod for infusing the batter later. The buttermilk needs to be fresh (not powdered) for proper acidity; Great Value or Organic Valley are budget-friendly options.
No vanilla bean paste? Pure vanilla extract at double the amount works in a pinch, though the swirls will lack visual appeal. Substitute buttermilk with 1 cup milk + 1 tbsp vinegar (let sit 5 minutes). For a lighter texture, replace 2 tbsp butter with vegetable oil—this cake stays moist for days. The baking powder should be aluminum-free (like Bob’s Red Mill) to prevent metallic aftertaste. Powdered sugar for dusting should be 10X for smoothness; Domino is widely available. If your kitchen lacks a vanilla bean, vanilla sugar (mix 1 tsp vanilla extract with 1 cup sugar) adds subtle depth without the swirl.
Store the cake in an airtight container at room temperature for up to 5 days—the swirls stay intact. For longer storage, wrap tightly in plastic and refrigerate for 1 week or freeze for 3 months. Reheat slices in the oven at 300°F for 5 minutes to restore moisture. The vanilla bean paste keeps for 6 months in the fridge; freeze any extras in ice cube trays for single-use portions. This cake’s magic lies in its simplicity—no frosting needed to preserve that delicate crumb and rich vanilla aroma.
Why You’ll Love This Recipe
- No-Fuss Ingredient List: I swear by this recipe because it only needs five things—flour, butter, sugar, vanilla, and eggs. That’s it. No weird substitutions or forgotten spices lurking in your pantry. Honestly, I keep a bag of flour and a stick of butter on standby just for this.
- Butter-Sugar Magic: The moment you cream that unsalted butter with sugar until it’s light and fluffy? Pure satisfaction. That vanilla bean paste ties it all together—rich, sweet, and just a hint of depth. It’s the kind of taste that makes you want to bake it again before the cake even cools.
- Weeknight or Celebration: Between us, this cake is my go-to for everything. Need a quick breakfast? Slice it warm. Hosting a last-minute brunch? Stack it with fresh berries. Even my picky teenage nephew asks for seconds. It’s unfussy enough for Tuesday but fancy enough for company.
- Leftovers That Last: Bake a single pan, and you’ll have slices for days. Store them in the fridge, and they stay moist without drying out. I’ll be real: I’ve reheated a slice straight from the fridge in the microwave, and it’s still delicious. Budget-friendly? Absolutely—this recipe stretches further than you’d think.
Step-by-step instructions for vanilla bean swirl cake
Here’s how to create layers of velvety texture and rich vanilla flavor using only these precise ingredients.
Prepare the Dry and Wet Components Separately
In a medium bowl, whisk together the 2 cups all-purpose flour, 1.5 teaspoons baking powder, and 0.5 teaspoon salt. Sift the mixture through a fine-mesh sieve directly into a large mixing bowl to aerate the flour and prevent dense cake layers. Set aside.
In a separate large bowl, combine the 1 cup unsalted butter (cold and cubed), 1.5 cups granulated sugar, the 2 whole large eggs (room temperature), 0.25 cup vegetable oil, 1 cup buttermilk, and the 2 tablespoons vanilla bean paste. The butter should be cold enough to hold its shape when pressed but soft enough to cream easily.
Cream the Butter and Sugar Mixture
Using a stand mixer fitted with the paddle attachment, beat the butter, sugar, eggs, oil, buttermilk, and vanilla bean paste on medium speed for 3-4 minutes until the mixture is light, fluffy, and nearly doubles in volume. You’ll notice the color lighten slightly and tiny air bubbles form along the sides of the bowl.
This creaming process is critical for achieving that signature tender crumb. If the mixture looks curdled at any point, stop the mixer and gently scrape down the sides with a silicone spatula before continuing. The goal is to incorporate air without developing gluten in the flour.
Combine Wet and Dry Ingredients
With the mixer on low speed, gradually add the sifted dry ingredients to the wet mixture. Mix just until combined—you should still see small streaks of flour throughout. Overmixing develops gluten, which leads to a tough cake rather than the delicate layers we want.
Stop mixing as soon as the flour disappears. The batter should be thick but pourable. If it appears too stiff, add 1 tablespoon of buttermilk at a time until it reaches a smooth consistency. This step ensures the cake will rise properly and maintain its moist texture throughout baking.
Create the Vanilla Bean Swirl and Bake
Divide the batter evenly between two 8-inch round cake pans lined with parchment paper. For the swirl effect, spread a thin layer of vanilla glaze (mix 0.5 cup powdered sugar with 1 teaspoon vanilla extract and 1 tablespoon buttermilk) over one layer of batter in each pan.
Preheat your oven to 350°F and bake the cakes for 25-30 minutes, or until a toothpick inserted into the center comes out clean. Rotate the pans halfway through baking for even browning. The cakes should be golden on top with slightly domed centers that will settle as they cool.
Cool and Assemble the Cake
Allow the cakes to cool in their pans for 10 minutes before transferring to a wire rack to cool completely. Once fully cooled, level the tops if necessary using a serrated knife. For the final assembly, spread a thin layer of vanilla glaze between the layers and on the outside of the stacked cakes.
Garnish with additional glaze drizzles and a few drops of vanilla bean paste for that signature swirl appearance. Serve at room temperature for maximum moisture retention. The cake should hold its shape when sliced, with tender crumbs and a subtle vanilla aroma that intensifies with each bite.
Pro Tips For Making 2 Cup Flour Cake
- Cream Butter Properly: Beat the butter and sugar until it’s light, fluffy, and pale yellow—about 3-5 minutes with an electric mixer. I used to rush this, and the cake turned out dense. Take the extra time; it’s the foundation for that tender crumb.
- Weigh Your Flour: Scoop the flour into the measuring cup, then level it off with a knife—don’t pack it down. I learned this the hard way when my cake came out dry and crumbly. A kitchen scale? Even better, but a proper cup works if you’re careful.
- Don’t Overmix the Batter: Stop folding in the flour as soon as it’s just combined—lumpy is fine. Overmixing develops gluten, and your cake will turn out tough instead of light. Think “quick hug,” not “full-on kneading.”
- Rotate the Pan Midway: Swap the cake pan from front to back in the oven at the halfway point (around 20-25 minutes for a standard recipe). This prevents uneven baking—no more golden edges with a raw center. Just a quick swap makes all the difference.
Make-ahead tips for this recipe
Prep Ahead Strategy
Mix the batter up to 24 hours ahead and store it in an airtight container in the fridge. The flavors meld beautifully overnight, and the batter thickens slightly—just whisk it briefly before dividing for the swirl.
I always prep the batter the night before so I can focus on baking fresh the next morning. 📅
Frosting Freeze Hack
Make the vanilla glaze (powdered sugar + vanilla extract + buttermilk) 3 days ahead and freeze it in a small container. Thaw at room temperature for 10 minutes before using—it’ll be perfectly spreadable. This saves time on busy days when you want that professional swirl finish without last-minute prep. 🧊
Layered Storage Tips
Bake the cakes 1 day ahead and store them in separate parchment-lined boxes at room temperature. Wrap each layer tightly in plastic wrap, then place them in an airtight container with a slice of bread to absorb moisture. This keeps them fresh for 3 days—no soggy bottoms! 🥖
Make-Ahead Assembly
Assemble the entire cake 12 hours before serving—this allows the glaze to set slightly, making it easier to slice cleanly. Store it in the fridge if serving within 24 hours, or at room temperature for up to 4 hours.
The vanilla flavor intensifies as it sits, making it even more delicious when sliced later. ✨
Freezer-Friendly Layers
For long-term storage, wrap individual layers in plastic wrap and place them in a freezer bag with parchment between each. Freeze for up to 3 months. Thaw overnight in the fridge before assembling. The texture remains perfect—no freezer burn or dryness. 🍰
Glaze Refresh Trick
If your glaze dries out while stored, simply add 1 teaspoon of milk or buttermilk and whisk until smooth. Reheat in 10-second bursts in the microwave if it thickens too much. This keeps your cake looking and tasting fresh, even after days in storage. 💫
Nutrition facts
Frequently asked questions
Why does this recipe use both vanilla bean paste AND vanilla extract?
The vanilla bean paste creates those signature swirls while adding deep, complex flavor from the actual vanilla seeds. The vanilla extract in the glaze enhances the aroma without overpowering the cake’s delicate texture. Together, they deliver both visual appeal and rich vanilla notes that last for days.
Can I make this cake in a single 9-inch pan instead of two 8-inch pans?
Yes, but expect a taller, denser cake. Reduce the baking time to 20-25 minutes and check for doneness at 18 minutes. The center should spring back when gently pressed. For best results, stick with the two 8-inch pans—they create those perfect tender layers.
What if my cake turns out dry or crumbly?
Dryness usually means overbaking or too much flour. Always bake until a toothpick comes out clean, and don’t overmix the batter. For extra moisture, brush warm layers with 2 tablespoons simple syrup (equal parts sugar and water, heated until dissolved) before assembling. The vanilla bean paste also helps retain moisture better than extract alone.
How do I adjust this recipe for a gluten-free diet?
Replace the 2 cups all-purpose flour with a 1:1 gluten-free baking blend (like King Arthur or Bob’s Red Mill). Add 1 teaspoon xanthan gum to improve texture. Reduce the buttermilk to ¾ cup—gluten-free batters absorb more liquid. Test with a toothpick at 22 minutes as gluten-free cakes bake faster.
Can I substitute buttermilk with something else?
Yes! Mix 1 cup milk (any kind) with 1 tablespoon lemon juice or vinegar, then let sit for 5 minutes to curdle. For dairy-free options, use 1 cup coconut milk (full-fat) or ¾ cup unsweetened almond milk + ¼ cup plain yogurt. The acidity helps activate the baking powder for proper rise.

- 2 Egg Waffle Recipe: Light and Airy in 10 Minutes - October 18, 2026
- 1 Lb Ground Beef Recipe Ideas: 5 Quick Skillet Meals for Busy Nights - October 18, 2026
- 21 Layer Chocolate Cake Recipe: Decadent Stack of Rich Ganache and Airy Layers - October 18, 2026