
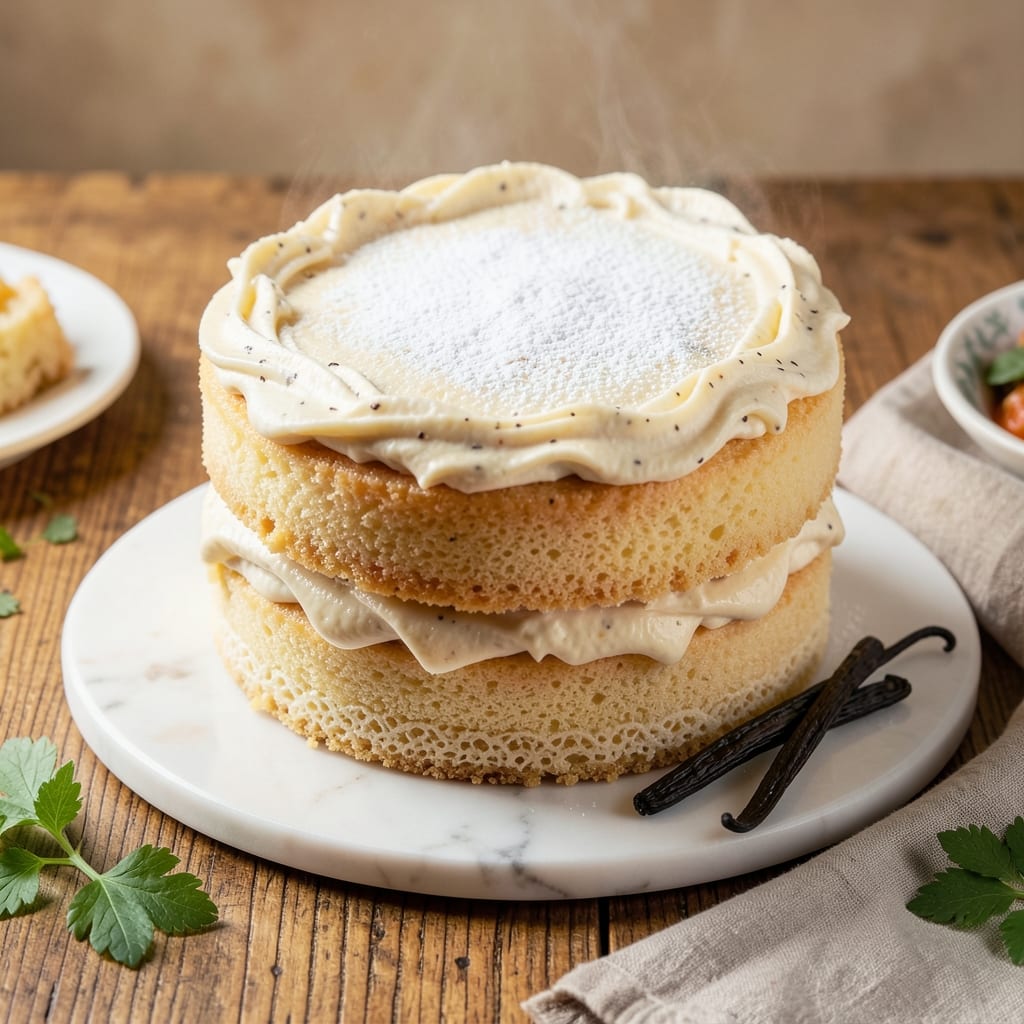
This 2-layer vanilla cake recipe from scratch delivers the perfect balance of tender crumb, rich vanilla flavor, and velvety buttercream—no shortcuts, just pure baking satisfaction. 💛 The secret lies in properly creaming butter and sugar, folding in egg yolks for moisture, and incorporating vanilla bean paste for depth that store-bought extracts can’t match.
I’ve baked this cake dozens of times, adjusting until every slice is golden, moist, and perfectly leveled for that showstopping presentation.
What sets this recipe apart is the vanilla bean swirl between layers, adding visual elegance and an extra layer of flavor without overpowering the delicate vanilla cake. The buttercream frosting is made with real butter and vanilla—not powdered sugar shortcuts—so it’s rich, smooth, and spreads like a dream.
Baking times are precise, and I’ll walk you through every step to ensure your cake rises evenly and stays moist for days.
By the time you’re done, you’ll have a professional-quality cake with crisp edges, a tender crumb, and frosting so creamy it melts in your mouth. The vanilla bean swirl adds a touch of sophistication, while the buttery frosting ties everything together.
This isn’t just dessert—it’s a centerpiece that’ll impress even the most discerning guests.
Whether you’re celebrating a birthday, anniversary, or just treating yourself, this cake delivers restaurant-quality results at home. Let’s get started—your oven is about to become the star of the show.
Ingredients for 2 layer vanilla cake recipe from scratch
Twelve ingredients, two layers of perfection—this cake delivers restaurant-quality vanilla bliss from scratch.
| Ingredient | Amount | Notes |
|---|---|---|
| All-Purpose Flour 🌾 | 3 cups | Sifted for even texture |
| Granulated Sugar 🍚 | 2 ¼ cups | Divided for cake and swirl |
| Unsalted Butter 🧈 | 1 ½ cups | Room temperature, softened |
| Large Eggs 🥚 | 6 whole | Room temperature, separated |
| Pure Vanilla Extract 🌿 | 2 tbsp | High-quality, not imitation |
| Vanilla Bean Paste 🌶️ | 2 tbsp | For authentic vanilla flavor |
| Baking Powder 🧂 | 2 ½ tsp | Diamond Crystal preferred |
| Salt 🧂 | ½ tsp | Fine sea salt |
| Whole Milk 🥛 | 1 cup | Room temperature |
| Vanilla Bean Seeds 🌿 | 1 whole | From 1 vanilla bean, scraped |
| Powdered Sugar 🍚 | 4 cups | For buttercream, sifted |
| Heavy Cream 🥛 | 1 cup | Cold, for buttercream |
The butter and sugar are non-negotiable here—European-style butter (like Plugrá or President) gives the richest flavor, but any good-quality brand works. I always grab my vanilla beans from Williams Sonoma or Sur La Table, but a high-end grocery store’s spice section will have them too. Look for plump, moist beans with seeds that pop out easily when scraped. The flour? King Arthur or Gold Medal are my go-tos—they bake up lighter than store-brand options. And for the vanilla bean paste, Madagascar bourbon beans take this cake to the next level.
No vanilla bean? Double the extract—but trust me, the real deal makes all the difference. Running low on heavy cream? Whipped topping works in a pinch, though it won’t be as stable. Diamond Crystal baking powder is my secret weapon—it’s double-acting, so the cake rises perfectly. If you only have single-acting, use half the amount but bake just until the toothpick comes out clean. For the buttercream, powdered sugar from the bulk bin stays fresher longer than pre-packaged. And if you’re feeling fancy, add a pinch of vanilla bean powder (just blend dried seeds) to the frosting for extra depth.
Store the cake layers in an airtight container with parchment between them for up to 3 days—they’ll actually taste better the next day as the flavors meld. The buttercream keeps for 5 days in the fridge, though it’ll firm up. Bring it to room temp before re-whipping. For the vanilla bean swirl, make it fresh—30 minutes before assembly—so the seeds stay vibrant. If you’re prepping ahead, freeze the unfrosted layers for up to 2 months. Just thaw overnight in the fridge before decorating.
Why You’ll Love This Recipe
- No-Fuss Layers: I swear by this method—just creaming butter and sugar until light, folding in eggs one at a time, then alternating dry ingredients. No mixer? A sturdy whisk and your arm muscles will do just fine. The secret’s in the patience of folding the batter gently so those layers stay airy.
- Vanilla Kiss: That first whiff of vanilla extract swirled into warm batter? Pure magic. The buttercream (yes, made with the same butter from the cake) melts into every bite, and the vanilla’s depth lingers like a hug from your grandma’s kitchen—no artificial shortcuts here.
- Birthday Everyday: This cake’s your go-to for any reason—birthdays, coffee dates, or just because. Frost it simply with powdered sugar glaze for a rustic look, or go all out with chocolate ganache. Honestly, I’ve even served it cold with whipped cream for a dessert that feels fancy but costs nothing extra.
- Pantry Goldmine: You’re already stocked for this—flour, sugar, butter, eggs, and vanilla? That’s it. No weird ingredients or last-minute store runs. And leftovers? They slice beautifully for days, whether you’re packing lunches or saving slices for when you “forgot” to bake. (Yes, even on a Tuesday night.)
Step-by-step instructions for 2 layer vanilla cake with swirls
Here’s how to bake a showstopping vanilla cake with professional swirls and silky buttercream.
👨🍳 Step 1: Prepare the Cake Batter and Vanilla Swirl
Preheat your oven to 350°F and grease two 8-inch round cake pans, lining the bottoms with parchment paper. In a large mixing bowl, whisk together the 3 cups all-purpose flour, 2.5 tsp baking powder, and 0.5 tsp salt. Set aside.
In a separate bowl, cream together the 1.5 cups unsalted butter and 1 cup granulated sugar (reserve the remaining 1.25 cups for later) on medium speed until light and fluffy, about 3-4 minutes. Add the 6 whole large eggs, one at a time, mixing well after each addition. Stir in the 2 tbsp pure vanilla extract and 2 tbsp vanilla bean paste, scraping down the sides as needed.
Gradually add the dry ingredients to the wet, mixing on low speed until just combined. Alternate adding the 1 cup whole milk and remaining 1.25 cups granulated sugar, beginning and ending with the milk. For the swirl, scrape the batter into a piping bag fitted with a star tip. Divide the batter evenly between the prepared pans.
🔥 Step 2: Bake the Cake Layers and Create Swirls
Bake the cake layers for 25-30 minutes, until a toothpick inserted into the center comes out clean. Here’s the pro move: while the first layer is baking, pipe a 1-inch wide swirl of batter around the edge of the second pan, then pour the remaining batter over it. Rotate the pan gently to create a marbled effect. Bake this layer for 20-25 minutes—it’ll bake faster due to the thinner batter.
Let the cakes cool in their pans for 10 minutes, then transfer to a wire rack to cool completely. This prevents them from collapsing when removed. Real talk: don’t skip the cooling step—warm cakes will turn gummy when frosting. While they cool, prepare the buttercream by beating the 1.5 cups unsalted butter (softened) and 4 cups powdered sugar on medium speed until smooth and fluffy.
🍳 Step 3: Whip the Buttercream and Assemble the Cake
Add the 1 cup cold heavy cream and 2 tbsp pure vanilla extract to the buttercream mixture, beating on high speed until light and airy, about 2-3 minutes. For extra flavor, scrape the seeds from the 1 whole vanilla bean and mix them into the buttercream. Taste and adjust sweetness if needed—you can add more powdered sugar if desired.
Place one cake layer on a cake stand or plate. Spread a thin layer of buttercream (about ¼ inch) over the top, then add the second layer. Gently press down to level the cake. Spread the remaining buttercream over the top and sides, creating a smooth finish. Here’s where it gets fun—use a spatula to create decorative swirls on the sides for a bakery-style look.
⏰ Step 4: Chill and Decorate for Perfect Results
Refrigerate the cake for at least 30 minutes before slicing to allow the frosting to set. This is especially important if your kitchen is warm. For extra shine, brush the top with a bit of whole milk or simple syrup after frosting. The cake will keep at room temperature for 2 days or in the refrigerator for up to 5 days.
Here’s the thing—this cake tastes even better the next day when the flavors have time to meld. The buttercream will firm up slightly, making it easier to slice cleanly. If you’re feeling fancy, dust the top with powdered sugar or add fresh berries before serving. Each slice should have that perfect balance of tender crumb, rich vanilla flavor, and smooth buttercream.
Pro Tips For Making 2 Layer Vanilla Cake Recipe From Scratch
- MELT THE BUTTER FULLY: I learned this the hard way—stopping at “softened” butter leaves you with greasy, dense cake. For a 2-layer vanilla cake, melt the butter completely until it’s smooth and just shy of brown (no nutty smell), then let it cool to room temp before mixing. This ensures even distribution and a tender crumb.
- WEIGH YOUR FLOUR—NO EXCUSES: Scooping flour from the bag packs it down, adding extra moisture and throwing off your cake’s structure. Use a kitchen scale for precise measurements (1 cup all-purpose flour = 125g). If you’re measuring by volume, spoon it into the cup and level it off—this keeps your layers light and fluffy.
- DON’T OVERMIX THE BATTER: The moment your batter looks like pancake batter, stop. Overmixing develops gluten, which turns your cake into a tough, chewy brick. Mix just until the flour disappears—about 20-30 seconds after adding it to the wet ingredients. Your layers will thank you with a tender, airy texture.
- CHILL THE BATTER BEFORE BAKING: This isn’t just for show—giving your batter a 30-minute rest in the fridge lets the flour absorb moisture and the eggs set slightly. It also prevents doming in the oven. Pop the pans back in the fridge for 10 minutes before baking if you’re in a rush, but don’t skip this step entirely. Your cake’s rise will be more even.
Flavor customization for these flavors
Citrus Twist
Brighten your vanilla cake with a zest infusion by adding 1 tbsp lemon or orange zest to the dry ingredients. This subtle citrus note cuts through the richness while enhancing the vanilla flavor.
I like to add 1 tsp lemon juice to the buttercream for a refreshing contrast. The acidity also helps balance the sweetness, making each bite feel lighter. 🌟
Spiced Vanilla
For a warm, cozy twist, fold 1 tsp cinnamon and ½ tsp nutmeg into the cake batter. The spices deepen the vanilla flavor while adding complexity. To keep the frosting simple, I recommend using just the vanilla bean seeds in the buttercream—no extra spices needed.
This variation works beautifully for fall or holiday celebrations. 🍂
Chocolate-Dipped Layers
Take your cake to the next level by dipping the bottom half of each layer in melted dark chocolate (I use Ghirardelli 60% cocoa) before assembling. The chocolate adds a rich contrast to the vanilla, and the swirl effect becomes even more dramatic.
For the frosting, reduce the powdered sugar to 3.5 cups and add ¼ cup cocoa powder for a chocolate-vanilla fusion. 🍫
Cream Cheese Swirl
Replace the vanilla swirl with a tangy cream cheese filling by mixing 4 oz cream cheese, 2 tbsp butter, and 1 tbsp powdered sugar until smooth. Pipe this between the layers for a creamy, slightly tangy surprise.
The contrast with the buttery frosting is pure magic. For extra flair, add ½ tsp vanilla extract to the filling. 🧀
Salted Caramel Drizzle
Top your frosted cake with a salted caramel drizzle made by heating ½ cup granulated sugar and 2 tbsp heavy cream until golden, then whisking in 2 tbsp butter and a pinch of flaky sea salt.
Let it cool slightly before drizzling over the cake. The caramel adds a luxurious finish that pairs perfectly with the vanilla. Trust me, this takes your cake from “delicious” to “showstopper.” 🍯
Berry Swirl Fusion
Infuse the vanilla swirl with ½ cup mixed berry jam (I love strawberry or raspberry) mixed with 1 tbsp lemon juice**. Pipe this into the second layer before baking for a fruity surprise in every bite.
The jam adds moisture and a bright pop of flavor that complements the vanilla beautifully. For the frosting, keep it classic but add a few fresh berries on top for garnish. 🍓
Nutrition facts
Frequently asked questions
Why does your recipe use both vanilla extract AND vanilla bean paste?
Vanilla bean paste gives you the real deal—thick, flavorful vanilla seeds suspended in extract. The extract ensures even distribution of flavor, while the paste adds depth and those little black specks that make the cake look (and taste) like it came from a bakery. Together, they create a flavor profile that’s far richer than extract alone.
Can I make this cake in a 9-inch pan instead of 8-inch?
Yes, but you’ll need to adjust baking time and reduce oven temperature to 325°F. Bake for 35-40 minutes instead of 25-30. The layers will be thinner, so you’ll need about 1.5 times the batter. The swirl technique will still work, but you may want to use a smaller piping tip for precision.
My cake cracked on top—what went wrong?
Cracking usually happens when the cake cools too quickly or the oven temperature fluctuates. Always let cakes cool in pans for 10 minutes before removing, and avoid opening the oven door during baking. For extra insurance, place a baking sheet under the pans to catch any drips that might cool the batter too fast.
How can I make this cake gluten-free?
Replace the all-purpose flour with a 1:1 gluten-free baking flour blend (like Bob’s Red Mill or King Arthur). Add ½ tsp xanthan gum to help with structure, and increase the milk to 1.25 cups since gluten-free batters tend to be drier. Bake at 325°F for 35-40 minutes—they need more time to set properly.
Can I make the buttercream ahead of time?
The buttercream keeps for 5 days in the fridge, but it will firm up. Bring it to room temperature and re-whip for 1-2 minutes before using. For best results, make it the day before assembling—it actually tastes better as the flavors meld. If it gets too hard, microwave in 10-second bursts while whipping to soften.

- 1950s Deviled Eggs Recipe: Nostalgic Creamy Yolk Magic - September 25, 2026
- 6 Qt Dutch Oven Bread Recipe: Crusty Crumb and Golden Crust in One Bake - September 25, 2026
- 8-Inch Chocolate Cake Recipe: Fudgy Crust and Decadent Ganache Swirls - September 25, 2026