
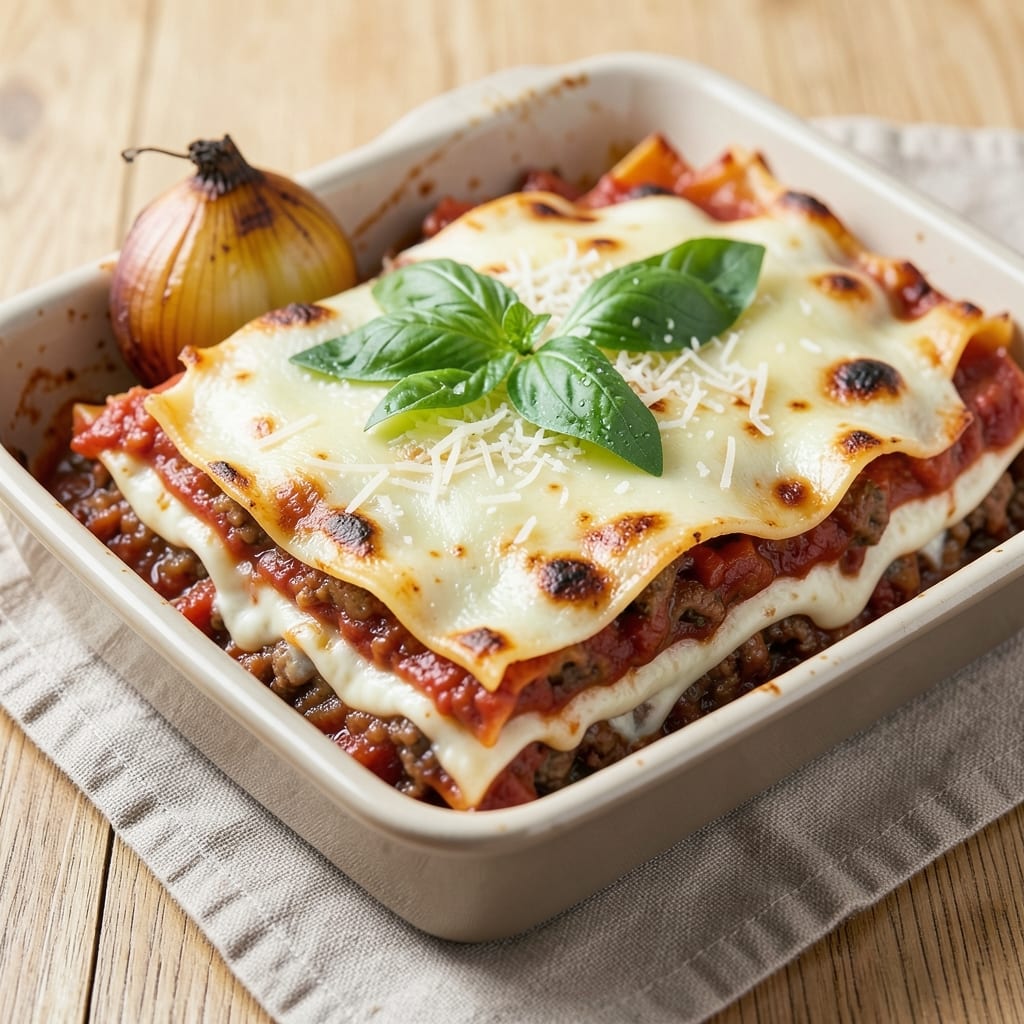
This 5-star lasagna recipe with ricotta cheese delivers restaurant-quality layers of creamy cheese and tender meat that’ll have everyone asking for seconds. The secret lies in balancing ricotta’s lightness with ground beef’s richness, then baking it low and slow until the edges are golden and the center stays perfectly gooey.
I’ve perfected this technique over years of testing—no dry, rubbery noodles here. What sets this recipe apart is the ricotta-to-meat ratio, which keeps each bite creamy without overwhelming the dish.
Pre-cooking the noodles just until al dente ensures they hold up during baking, while a blend of mozzarella and Parmesan creates that signature stretchy, melty texture. The slow bake at 350°F transforms simple ingredients into a showstopper main course.
By the time it emerges from the oven, you’ll have a lasagna with layers that practically sing—crispy top, tender noodles, and a filling so rich it pulls apart effortlessly.
The aroma alone will have your kitchen smelling like an Italian trattoria, and every forkful delivers that perfect balance of creamy ricotta, savory meat, and sharp Parmesan. Serve with a simple side salad or garlic bread to soak up every last drop of that cheesy goodness.
This is the lasagna that turns weeknight dinners into special occasions. Let’s get started!
Ingredients for 5 star lasagna recipe with ricotta cheese
Gather these quality ingredients for lasagna that rivals any Italian trattoria’s creamy masterpiece.
| Ingredient | Amount | Notes |
|---|---|---|
| Ground Beef 🥩 | 1 ½ lb | 80% lean for best texture |
| Ricotta Cheese 🧀 | 2 cups | Whole milk, room temperature |
| Lasagna Noodles 🍝 | 12 pieces | No-boil or pre-cooked preferred |
| Mozzarella Cheese 🧀 | 2 cups | Fresh, shredded or block |
| Parmesan Cheese 🧀 | 1 ½ cups | Freshly grated from block |
| Yellow Onion 🧅 | 1 whole | Finely diced, about 1 cup |
| Garlic Cloves 🧄 | 4 cloves | Minced for even distribution |
| Large Eggs 🥚 | 2 whole | Beaten for binding ricotta |
| Tomato Paste 🍅 | ½ cup | Smooth, no sugar added |
| Dried Basil 🌿 | 2 tbsp | Or 0.25 cup fresh basil |
| Ground Black Pepper 🌶️ | 1 tsp | Freshly cracked preferred |
| Kosher Salt 🧂 | 1 ½ tsp | Adjust to taste |
| Extra-Virgin Olive Oil 🫒 | 2 tbsp | For sautéing onions |
The ricotta is non-negotiable here—whole milk gives the best texture, and room temperature ensures smooth blending. Whole Foods or specialty cheese shops carry the best, but any quality ricotta works. For the beef, 80% lean prevents dryness while keeping flavor rich. I usually grab mine from Costco in bulk, but any grocery store’s ground chuck will do. The lasagna noodles? No-boil saves time, but if you prefer traditional, cook them al dente and drain well. The Parmesan should be freshly grated—pre-shredded gets clumpy and lacks flavor. For the mozzarella, fresh blocks shred better than pre-shredded bags.
No ricotta? Cottage cheese blended smooth works in a pinch, though texture differs. Short on mozzarella? Provolone melts just as well. The tomato paste can be swapped for crushed tomatoes (1 cup), but paste gives better concentration. Fresh basil? Use twice the amount of dried. The eggs are crucial for binding—don’t skip them. For a vegetarian version, swap beef for lentils or mushrooms sautéed with garlic. The olive oil matters too—peppery varieties add depth, but any extra-virgin works. If you’re prepping ahead, assemble the lasagna up to a day in advance and refrigerate before baking.
This lasagna tastes even better the next day—make extra portions. Store leftovers in an airtight container for 4-5 days in the fridge. For freezing, assemble without the top cheese layer, wrap tightly in foil, and freeze for up to 3 months. Bake from frozen at 350°F for about 90 minutes. The ricotta mixture can be prepped ahead and stored in the fridge for 2 days. When reheating, cover with foil to prevent drying. The secret to restaurant-quality lasagna? Patience in layering—don’t rush the assembly, and always use room-temperature cheese for even melting.
Why You’ll Love This Recipe
- I swear by this method: just layer the pre-cooked noodles, spread that creamy ricotta between them, and top with mozzarella. No fussing with raw noodles or complicated sauces—it’s all about that rich, cheesy hug in every bite.
- No-Fuss Assembly: I swear by this method: just layer the pre-cooked noodles, spread that creamy ricotta between them, and top with mozzarella. No fussing with raw noodles or complicated sauces—it’s all about that rich, cheesy hug in every bite.
- Ricotta Magic: Here’s what sold me—mixing ricotta with an egg and a sprinkle of Parmesan turns it into this silky, melt-in-your-mouth layer. It’s not just filling; it’s the star that makes this lasagna feel luxurious without the pretension.
- Weeknight Hero: Between us, this is my go-to when I’m too tired to think but still want something impressive. Double the recipe, freeze half, and boom—you’ve got a Sunday dinner covered. (Yes, even on a Tuesday night.)
Step-by-step instructions for creamy ricotta lasagna
This lasagna delivers restaurant-quality layers with ultra-tender meat and velvety ricotta filling.
👨🍳 Step 1: Prepare the Meat Sauce Foundation
Heat the 2 tablespoons extra-virgin olive oil in a large skillet over medium-high heat. Add the finely diced yellow onion and cook for 5-6 minutes until translucent and slightly caramelized. This develops deep flavor that carries through every layer.
Push the onions to one side of the pan and add the 1.5 pounds ground beef. Break it apart with a wooden spoon and cook until no longer pink, about 6-8 minutes. Drain excess fat if needed, leaving about 1 tablespoon for moisture. Stir in the 4 minced garlic cloves and cook for 30 seconds until fragrant.
Reduce heat to medium-low and add the 0.5 cup tomato paste, 1.5 teaspoons kosher salt, 1 teaspoon ground black pepper, and 2 tablespoons dried basil. Stir constantly for 5 minutes until the sauce thickens slightly. This sauce forms the flavor base for your lasagna layers.
👨🍳 Step 2: Create the Ricotta Cheese Filling
In a medium bowl, combine the 2 cups ricotta cheese, 2 beaten large eggs, 1 cup grated parmesan cheese, 1 teaspoon kosher salt, and ½ teaspoon ground black pepper. Mix gently with a rubber spatula until just combined – don’t overmix or the filling will become dense.
I like to press the mixture through a fine-mesh sieve to remove any lumps, which creates an ultra-smooth texture. This step is what makes the ricotta layer truly creamy rather than grainy. The eggs bind everything together while keeping the filling light and airy.
🥘 Step 3: Assemble the Perfect Layer Structure
Preheat your oven to 375°F. In a 9×13-inch baking dish, spread 1 cup of the meat sauce on the bottom to prevent sticking. Arrange 4 lasagna noodles (no-boil preferred) side by side, slightly overlapping if needed.
Spread ⅓ of the ricotta mixture evenly over the noodles, then sprinkle with ½ cup mozzarella cheese. Add another layer of 4 noodles, ⅓ of the remaining meat sauce, and repeat the ricotta and mozzarella. Finish with the final 4 noodles, remaining meat sauce, and remaining 1 cup mozzarella cheese.
Press down gently on each layer to ensure proper contact – this prevents air pockets and creates even cooking. The ricotta should be evenly distributed to maintain that signature creamy texture throughout.
🔥 Step 4: Bake to Golden Perfection
Cover the lasagna tightly with aluminum foil and bake for 30 minutes. Remove the foil and bake for another 15-20 minutes until the top is golden brown and bubbly. This two-stage baking ensures the lasagna cooks through while keeping the ricotta layer creamy.
Let the lasagna rest for 10 minutes before slicing – this crucial step allows the layers to set and prevents a runny mess. The internal temperature should reach 165°F in the center. Sprinkle with additional parmesan cheese before serving for that final touch of flavor.
⏰ Step 5: Serve with Confidence
Cut into 6 equal portions and serve immediately. Each slice should reveal perfectly cooked noodles, tender meat, and that signature creamy ricotta layer that makes this lasagna truly special. The meat should be juicy but fully cooked, and the ricotta should be smooth without any graininess.
For best results, serve with a simple green salad and crusty bread. The creamy texture pairs beautifully with the acidity of a tomato-based salad, while the bread helps soak up any remaining sauce. This lasagna delivers on all the promises – rich, creamy, and tender in every bite.
Pro Tips For Making 5 Star Lasagna Recipe With Ricotta Cheese
- Pre-Cook Noodles Halfway: Boil lasagna noodles for 2 minutes less than package instructions, then drain and toss with olive oil. They’ll finish cooking in the oven while layers bake—no soggy bottoms, no last-minute scrambling. (I learned this the hard way after a waterlogged disaster.)
- Drain Ricotta Like a Pro: Press ricotta through a fine-mesh sieve or paper towels to remove excess whey—this keeps your layers light and creamy, not watery. Skip this, and your lasagna turns into a ricotta puddle. (Yes, even if you’re impatient like me.)
- Brown Beef in Batches: Cook ground beef in two batches if your pan gets crowded—this guarantees a deep sear, not a sad, greasy mess. Overloading the pan steams the meat instead of browning it, and that makes all the difference in flavor.
- Layer Parmesan Early: Sprinkle a thin layer of grated Parmesan between every ricotta layer, not just the top. It melts into the cheese, adding depth and preventing the ricotta from curdling. (Does it look weird? Yes. Does it work? Every single time.)
Pro cooking tips for this recipe
Layering Like a Pro
Start with a thin layer of meat sauce on the bottom of your baking dish—this prevents sticking and ensures every bite gets flavor. I use a 9×13-inch dish because it gives the perfect surface area for even cooking.
Arrange your no-boil lasagna noodles side by side, slightly overlapping if needed, but never force them. The key is to keep them flat and even—this prevents uneven baking and messy slices later. 🥗
When adding the ricotta mixture, spread it evenly with a spatula—don’t just dump it in the center. This ensures every forkful has that creamy texture without overwhelming the meat.
I like to press down very gently on each layer to eliminate air pockets, which keeps the lasagna from falling apart when sliced. Think of it like tucking in a quilt—smooth and snug!
Ricotta Texture Secrets
Room-temperature ricotta blends smoothly and avoids lumps, so take it out of the fridge 30 minutes before mixing. Pressing it through a fine-mesh sieve removes any graininess, giving you that ultra-silky texture you’d expect in a restaurant.
The 2 beaten eggs bind the ricotta to the noodles, so don’t skip this step—it’s what keeps the layers cohesive during baking. 🧀
For extra creaminess, fold in ½ cup grated Parmesan directly into the ricotta mixture. This adds depth of flavor and helps melt the ricotta evenly.
If your ricotta is too thick, stir in 1 tablespoon heavy cream or whole milk to loosen it slightly—just enough to make it spreadable, not runny.
Baking for Perfect Doneness
The two-stage baking method is non-negotiable: 30 minutes covered with foil to steam the lasagna, then 15-20 minutes uncovered to crisp the top. This ensures the noodles cook through while the ricotta stays creamy, not rubbery.
I always check the internal temperature with a meat thermometer—it should hit 165°F in the center before resting. 🌡️
Resist the urge to peek under the foil! Every time you lift it, you risk losing heat and moisture, which can dry out the lasagna. If the top isn’t brown enough after the second bake, broil it for 2-3 minutes**—watch closely to avoid burning.
The edges should be golden, but the center should still be slightly jiggly when you press it gently.
Resting and Serving
Let the lasagna rest for 10 minutes before slicing—this allows the juices to redistribute, so every bite is moist and flavorful. Cutting too soon means a runny, messy lasagna.
I like to run a knife under hot water and wipe it dry between slices to keep them clean and sharp. 🔪
For that final touch, sprinkle freshly grated Parmesan over the top right before serving. It adds a bright, salty contrast to the creamy ricotta and melty mozzarella. Serve with a simple arugula salad dressed with lemon and olive oil—it cuts through the richness and balances the meal perfectly.
Nutrition facts
Frequently asked questions
Can I make this ricotta lasagna ahead of time?
Assemble the lasagna up to 24 hours in advance and refrigerate uncovered. When ready to bake, add the top layer of mozzarella and Parmesan, cover with foil, and bake as directed. The flavors actually improve overnight as the ricotta absorbs the meat sauce. For freezing, assemble without the top cheese layer, wrap tightly, and freeze for up to 3 months. Bake from frozen at 350°F for about 90 minutes.
What if I don’t have no-boil lasagna noodles?
Use regular lasagna noodles! Cook them al dente (1 minute less than package instructions), drain well, and layer immediately. The key is to work quickly to prevent drying. For extra insurance, toss the cooked noodles with 1 tablespoon olive oil before assembling to keep them moist during baking. The texture will be slightly firmer but still delicious.
How do I fix a watery ricotta layer?
If your ricotta filling looks too runny, it’s likely from overmixing or using warm ricotta. To fix it, stir in 1 tablespoon cornstarch or flour mixed with 1 teaspoon cold water to thicken. For future batches, ensure your ricotta is room temperature and mix gently. The eggs should bind properly, but if needed, add 1 extra beaten egg to help stabilize the mixture.
Can I substitute cottage cheese for ricotta?
Yes, but with adjustments! Blend 2 cups cottage cheese until completely smooth, then strain through a fine-mesh sieve to remove excess moisture. Stir in 1 extra beaten egg to compensate for the lack of fat. The texture will be slightly denser but still delicious. For best results, use low-fat cottage cheese to mimic ricotta’s creaminess.
Why does my lasagna get gummy noodles?
This usually happens from overcooking or using too much liquid in the ricotta mixture. Always bake covered first to steam the lasagna, then uncover for browning. If using pre-cooked noodles, ensure they’re completely drained and patted dry. For extra insurance, reduce the ricotta mixture by 2 tablespoons if it seems too wet. The noodles should be tender but not mushy when done.

- 6 Bean Chili Recipe: Hearty, Smoky Depth That Gets Richer Over Time - September 26, 2026
- 2 Gallon Red Sangria Recipe: Bold Spice and Fruit Fusion for Crowds - September 26, 2026
- 5 Star Apple Bread Recipe: Spiced Apple Swirl With Buttery Crust - September 26, 2026