
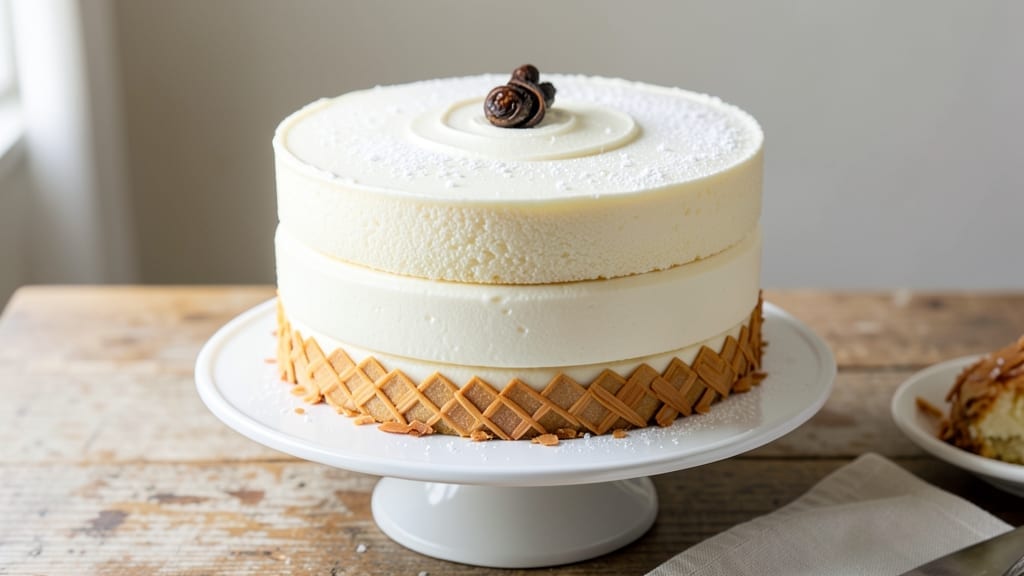
This 2-layer white cake recipe delivers the perfect balance of tender crumb and rich vanilla flavor, topped with velvety buttercream that makes every slice feel like a celebration. 💛 The secret lies in precise mixing techniques—whipping egg whites to cloud-like peaks and folding them into the batter at just the right moment—to create layers that are light yet sturdy enough to hold the frosting.
I’ve baked this cake for everything from birthdays to holiday desserts, and it never fails to impress, even with beginners in the kitchen.
The recipe starts with a classic vanilla cake batter, where butter and sugar are creamed together until pale and fluffy, ensuring a moist crumb.
A swirl of vanilla bean paste in the center of each layer adds depth without overpowering the delicate flavor, while the buttercream frosting—made with real vanilla extract and a touch of cream cheese for stability—creates that signature smooth finish.
Baking times are carefully timed to ensure even layers, and cooling is critical to prevent crumbs when frosting.
What you’ll end up with is a showstopping dessert that’s as beautiful as it is delicious—snowy white layers framed by a glossy buttercream swirl, ready for sprinkles, fresh berries, or a dusting of powdered sugar.
The texture is the star: tender yet slightly dense enough to support the frosting, with a vanilla aroma that fills the kitchen as it bakes. This cake is the kind that makes guests ask for the recipe before they even take their first bite.
For variations, swap vanilla extract for almond or lemon zest, or add a hint of citrus zest to the frosting for a brighter twist. The key to success is patience—letting the cake cool completely before frosting ensures clean layers and a professional finish. Let’s get baking!
Ingredients for 2 layer white cake
Classic ingredients transformed into elegant layers and velvety frosting for celebration-worthy cake.
| Ingredient | Amount | Notes |
|---|---|---|
| Unsalted Butter 🧈 | 1 ½ cups | Softened to room temperature |
| Granulated Sugar 🍚 | 2 ½ cups | Superfine preferred for smoother texture |
| Large Eggs 🥚 | 6 whole | Room temperature for even mixing |
| All-Purpose Flour 🌾 | 2 ½ cups | Sifted before measuring |
| Vanilla Bean Paste 🌿 | 2 tbsp | High-quality vanilla for rich flavor |
| Baking Powder 🍞 | 2 tsp | Freshly opened for best rise |
| Salt 🧂 | ½ tsp | Fine sea salt preferred |
| Pure Vanilla Extract 🍯 | 2 tsp | Bottled vanilla extract |
| Heavy Cream 🥛 | 1 ½ cups | Cold for buttercream stability |
| Powdered Sugar 🍚 | 4 cups | Sifted for smooth frosting |
| Cream Cheese 🧀 | 8 oz | Room temperature for blending |
| Vanilla Bean Seeds 🌿 | 1 tsp | From scraped vanilla bean |
| Lemon Zest 🍋 | 1 tsp | Optional for brightness |
The butter and sugar are the foundation—use high-quality unsalted butter like Land O’Lakes or Plugrá for rich flavor. Sift the flour before measuring to avoid dense layers, and don’t skimp on the vanilla bean paste (Wilton or Nielsen-Massey are reliable brands). Eggs should be room temperature for even mixing, so pull them out 30 minutes before baking. For the frosting, powdered sugar matters—Domino or C&H brands sift beautifully. The cream cheese (Philadelphia works best) needs to be room temperature to blend smoothly, so let it sit out while you bake the cake.
No vanilla bean paste? Pure vanilla extract plus 1 tsp sugar mimics the flavor, though it lacks the speckled look. Swap heavy cream for whipped topping (like Cool Whip) in a pinch, but the texture won’t be as stable. For a lighter frosting, reduce powdered sugar to 3.5 cups and add 1 tbsp lemon juice. The lemon zest is optional but adds a subtle brightness—use organic lemons for the best flavor. If your frosting is too thick, add 1 tsp milk or cream at a time until it reaches a smooth, pipeable consistency.
Store the cake layers wrapped in plastic at room temperature for up to 2 days, or in the fridge for 3 days. The frosting keeps 3 days in the fridge—just rewhip if it separates. For longer storage, freeze the unfrosted layers for up to 3 months. Let them thaw completely before frosting. The fully frosted cake? 24 hours in the fridge is ideal—it lets the flavors meld and prevents soggy layers. Serve at room temperature for the best texture.
Why You’ll Love This Recipe
- No-Fuss Mixing: I swear by the creamy butter-egg combo—just 5 minutes of whisking, no stand mixer required. The vanilla bean paste (not extract!) infuses that rich, natural depth without extra fuss.
- Buttery Vanilla Bliss: That first bite? Pure comfort—tender crumb from the sugar-leavened flour, buttery richness from the melted butter, and vanilla so bright it tastes homemade. (Yes, even my kids notice.)
- Weekend or Weeknight: Slap it together for a birthday, a potluck, or a “I just want cake” Tuesday. The layers stay moist for days, so it’s my go-to for last-minute celebrations or lazy afternoons.
- Budget-Friendly Luxury: Uses pantry staples (no fancy ingredients), but tastes like a bakery showstopper. A single cake feeds 12, so it’s cheaper than takeout—and way tastier than store-bought.
Step-by-step instructions for vanilla bean swirl cake
Precision and patience create this elegant two-layer cake with signature vanilla swirls.
👨🍳 Step 1: Prepare the Cake Batter
Preheat oven to 350°F and grease two 8-inch round cake pans, lining the bottoms with parchment paper. In a large mixing bowl, cream the 1.5 cups unsalted butter and 2.5 cups granulated sugar on medium speed until light and fluffy—about 3-4 minutes. I press the paddle against the bowl occasionally to scrape down the sides and ensure even mixing.
Add the 6 whole large eggs one at a time, mixing well after each addition. The batter should nearly double in volume and become pale yellow. Stir in the 2 tbsp vanilla bean paste and 2 tsp pure vanilla extract until fully combined. This step builds the airy texture that makes the cake light and tender.
In a separate bowl, whisk together the 2.5 cups all-purpose flour, 2 tsp baking powder, and 0.5 tsp salt. Sift the mixture directly into the wet ingredients and gently fold using a spatula until just combined—you should still see some flour streaks. Overmixing develops gluten and makes the cake tough. Divide the batter evenly between the prepared pans.
🔥 Step 2: Bake the Cake Layers
Bake for 25-30 minutes until a toothpick inserted into the center comes out clean. The cake should spring back when gently pressed in the center. I like to rotate the pans halfway through baking to ensure even browning. Let the cakes cool in their pans for 10 minutes before transferring to a wire rack to cool completely.
While the cakes cool, prepare the vanilla swirl filling. In a small bowl, mix 1.5 cups heavy cream with 1 tsp vanilla bean seeds and 1 tsp lemon zest. Whisk until smooth and set aside. This bright, citrusy cream cuts through the richness of the buttercream and adds a sophisticated flavor layer.
🥘 Step 3: Assemble the Cake with Vanilla Swirl
Once the cakes are completely cool, level the tops if needed using a serrated knife. Place the first cake layer on a cake stand or plate. Spread a thin layer of the vanilla cream mixture over the top, leaving a ½-inch border around the edges. This prevents the filling from oozing out when you add the second layer.
Pipe a border of the remaining vanilla cream around the edge of the first layer, then pipe a swirl in the center. Place the second cake layer on top and gently press down. The swirl should show through the sides of the cake, creating that signature look. Chill the assembled cake in the refrigerator for 30 minutes to firm up before frosting.
🍳 Step 4: Make the Buttery Frosting
In a stand mixer fitted with the paddle attachment, beat the 8 oz cream cheese and 1.5 cups unsalted butter on medium speed until smooth and creamy—about 2-3 minutes. Gradually add the 4 cups powdered sugar and mix until fully incorporated. Add the 2 tsp pure vanilla extract and 1 tsp vanilla bean seeds for depth of flavor.
Increase the speed to high and beat for 2-3 minutes until the frosting is light and fluffy. This step is crucial for achieving that professional, airy texture. If the frosting is too thick, add 1-2 tablespoons heavy cream to reach the perfect consistency for piping.
🎂 Step 5: Frost and Decorate
Remove the cake from the refrigerator and apply the frosting using an offset spatula or piping bag. Start with a thin crumb coat, then chill the cake for 15 minutes to set. Apply the final layer of frosting and smooth it evenly using a bench scraper or spatula. For a polished look, dip the scraper in hot water, wipe it dry, and smooth the frosting in circular motions.
Decorate with additional vanilla bean seeds or lemon zest for a pop of color. Serve immediately or store in the refrigerator for up to 3 days. This cake keeps beautifully, with the flavors developing even more as it sits. The contrast of the vanilla swirl against the buttery frosting makes every slice a showstopper.
Pro Tips For Making 2 Layer White Cake
- Cream Butter Slowly: I learned this the hard way—dumping cold butter into sugar at high speed just makes a greasy mess. Beat the butter and sugar on medium until light and fluffy (about 3-5 minutes), then increase speed. That’s when the sugar starts dissolving properly and the butter emulsifies like it should.
- Separate Egg Yolks First: This isn’t the prettiest method, but it’s the tastiest. Whip the egg whites to stiff peaks before mixing them into the batter—add them last, folding gently. If you mix yolks and whites together first, you risk deflating the structure, and nobody wants a dense white cake.
- Skip the Overmixing: Once the flour hits the wet ingredients, stop mixing the second everything’s just combined. Overmixing develops gluten, and that’s how you end up with a cake that tastes more like a sad breadstick. Use a spatula to gently fold—just until no dry spots remain.
- Room-Temp Everything: Cold eggs and butter are the enemy of even baking. Let eggs sit in warm water for 10 minutes, and take butter out of the fridge 1-2 hours before starting. Cold ingredients cause uneven baking, and you’ll end up with a cake that’s underdone in the center but dry on top.
Pro cooking tips for great 2 layer white cake
Temperature Precision
The oven must be preheated to 350°F—no higher, no lower. I’ve found that 350°F ensures even baking without over-browning the edges. Use an oven thermometer to verify accuracy, as home ovens can vary by 25°F or more.
Placing the cake pans on the middle rack guarantees consistent heat distribution, preventing domed tops or underbaked centers. 🌡️
Egg White Whipping
While the intro mentions whipping egg whites, I’ll add that separating eggs is critical—even a tiny bit of yolk ruins the stability of whipped egg whites. Beat them on high speed until they form stiff peaks, then gently fold them into the batter in 3 additions to preserve airiness.
Overmixing here collapses the structure, so fold just until combined. This step is what gives the cake its signature lightness.
Batter Consistency Check
The batter should be thick but pourable—like heavy pudding. If it’s too thin, add 1-2 tablespoons more flour; if too thick, mix in 1 tablespoon milk or cream. I test consistency by lifting the spatula: the batter should hold a slight peak but still flow gently.
This balance prevents dense layers while ensuring the cake holds its shape when sliced. A kitchen scale helps here—weighing ingredients prevents errors from volume measurements.
Vanilla Swirl Technique
For the signature swirl, use a pastry bag fitted with a star tip (Wilton 1M works well). Pipe the vanilla cream in a loose spiral starting from the center, then gently press the second layer down to create clean edges.
If the cream leaks, chill the cake longer—45 minutes instead of 30—before frosting. The contrast between the white frosting and golden swirl is what makes this cake visually stunning. 🎨
Frosting Stability
Cream cheese frosting can be finicky—always let the cream cheese and butter reach room temperature before mixing. If the frosting curdles, strain it through a fine-mesh sieve to remove lumps. For extra stability, chill the frosting for 10 minutes before piping.
I also recommend using a stand mixer (not hand mixer) for the final high-speed beating—it incorporates more air for that cloud-like texture.
Crumb Coat Secret
The crumb coat isn’t just for looks—it’s essential. Apply a thin layer of frosting (⅛-inch thick) and chill for 15 minutes to set. This prevents crumbs from mixing into the final frosting layer.
Use a bench scraper to smooth the final coat, dipping it in hot water between swipes for ultra-smooth edges. This pro trick makes even amateur bakers look like cake decorators. ✨
Nutrition facts
Frequently asked questions
Why does my white cake turn out dense instead of light?
Overmixing the batter develops gluten, making the cake tough. Fold dry ingredients just until combined—you should still see flour streaks. Also, ensure your egg whites are whipped to stiff peaks before folding them in. Underbaking can cause density too, so always check with a toothpick at 25-30 minutes.
Can I make this cake without a stand mixer?
Yes! Use a hand mixer for the buttercream, but beat it on high for 5-6 minutes to incorporate air. For the cake batter, mix by hand until just combined—don’t overdo it. The key is patience: whip egg whites separately with a hand mixer until stiff peaks form, then fold gently into the batter.
How do I fix cracked cake layers?
Cracks usually mean the cake cooled too quickly. Prevent them by letting cakes cool in pans for 10 minutes before transferring. For existing cracks, spread a thin layer of frosting over them before adding the final coat—it creates a seamless finish. Chill the cake for 30 minutes before frosting to prevent new cracks.
What’s the best way to store leftover cake?
Wrap the unfrosted layers tightly in plastic wrap and store at room temperature for 2 days, or freeze for 3 months. For frosted cake, keep it refrigerated for up to 3 days. Bring it to room temperature before serving—cold frosting can feel heavy. If the frosting separates, rewhip it briefly with a hand mixer.
Can I substitute buttercream with whipped cream frosting?
Yes! Replace the buttercream with 2 cups whipped cream sweetened with ½ cup powdered sugar and flavored with 1 tsp vanilla. For stability, add 1 tbsp cornstarch to the powdered sugar. Whip to stiff peaks and spread immediately—it softens faster than buttercream, so chill the cake for 15 minutes before serving.
