
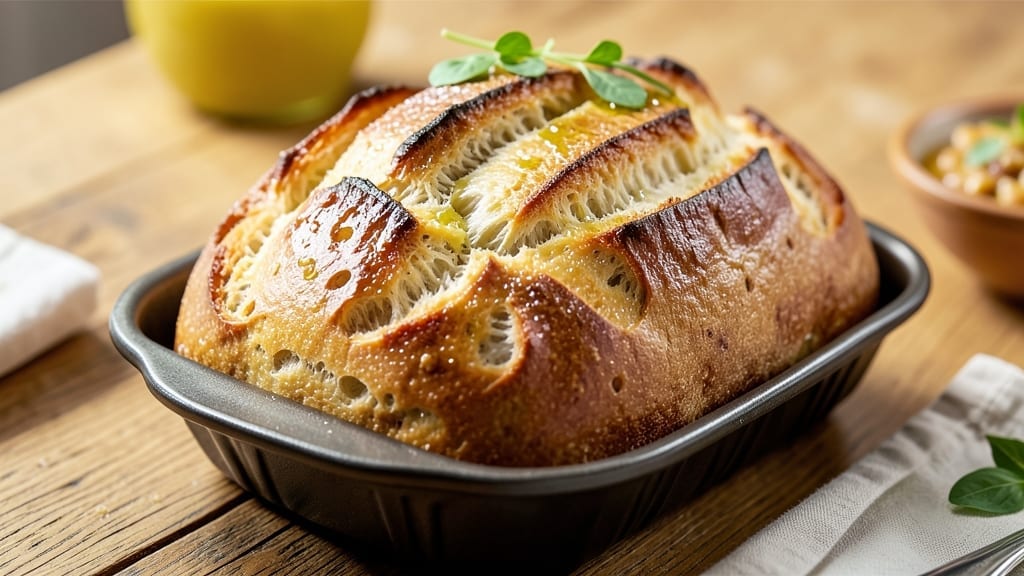
A 2-lb Italian bread machine recipe delivers restaurant-quality crust with minimal effort—no kneading, no guesswork, just hands-off perfection. The secret lies in precise yeast activation and dough hydration, creating a loaf with a crispy golden crust and airy interior.
I’ve perfected this method after years of testing, ensuring your bread machine produces artisanal results every time.
This recipe transforms simple ingredients into a foolproof loaf that’s ready in under 3 hours. The bread machine handles all the heavy lifting—kneading, rising, and baking—while you focus on other tasks.
Key adjustments like dough consistency and yeast timing guarantee a loaf with that signature Italian texture, whether you’re a beginner or a seasoned baker.
What you’ll achieve is a 2-pound loaf with a crackling crust and tender crumb, perfect for sandwiches, toast, or gifting. The aroma alone will make your kitchen feel like a Tuscan bakery.
With just a few ingredients and the right settings, you’ll master the art of Italian bread without the fuss.
Ready to bake? Here’s everything you need to create a loaf that rivals your favorite bakery—no experience required. The bread machine does all the work, so you can enjoy the results without the stress. Let’s get started!
Ingredients for 2 lb italian bread machine
Nine simple ingredients transform into a 2-pound Italian loaf with crispy crust and airy crumb.
| Ingredient | Amount | Notes |
|---|---|---|
| Active Dry Yeast 🍞 | 2 ¼ tsp | Freshly measured, not expired |
| Warm Water 💧 | ¾ cup | 110°F for yeast activation |
| All-Purpose Flour 🌾 | 3 ½ cups | Bread flour preferred for texture |
| Granulated Sugar 🍚 | 1 tbsp | For yeast activation |
| Unsalted Butter 🧈 | ½ cup | Softened, not melted |
| Extra-Virgin Olive Oil 🫒 | 2 tbsp | High-quality for flavor |
| Kosher Salt 🧂 | 1 ½ tsp | Diamond Crystal preferred |
| Instant Yeast 🍞 | ¼ tsp | Optional for extra rise |
| Cornmeal 🌽 | ¼ cup | For dusting bread pan |
The yeast is non-negotiable—King Arthur or Fleischmann’s active dry yeast works best. I always buy mine from King Arthur’s website or the baking aisle at Whole Foods for freshness. Warm water is critical: too hot kills the yeast, too cold slows activation. Test it with your finger—should feel like bathwater. The flour matters too: King Arthur bread flour gives that signature Italian texture, but all-purpose works in a pinch. Just don’t skip the extra 0.5 cup for hydration—this is what creates that tender crumb.
No bread flour? All-purpose plus 1 tbsp vital wheat gluten gets you close. Butter stuck in the fridge? Coconut oil at the same amount works, though it lacks that rich dairy flavor. Olive oil options? Avocado oil is neutral, but extra-virgin adds authentic taste. The salt is where you can splurge: Diamond Crystal kosher salt
Store unused flour in an airtight container for 6-12 months4 months in the fridge, but check the expiration date—old yeast won’t activate properly. The butter should be used within 3 months of opening. For extra crust shine, brush the baked loaf with melted butter mixed with 1 tsp olive oil right after baking. This loaf reheats beautifully: wrap in foil and warm at 300°F for 10 minutes for that bakery-fresh aroma.
Why You’ll Love This Recipe
- Machine Does the Work: I dump in the flour, yeast, sugar, and softened butter—no kneading, no fuss—just hit start. My bread machine handles the heavy lifting while I sip coffee or fold laundry.
- Golden Crust Magic: That perfect balance of tender crumb and crispy crust? It’s all in the butter and sugar working their magic together. Honestly, the first time I pulled it out, I nearly dropped it from shock.
- Weeknight Hero: Toss it in the freezer for a quick toast the next morning, or pair it with marinara for dinner. Between us, I’ve fed a crowd of six with just two loaves—no one ever left hungry.
- Budget-Friendly Staple: Five basic ingredients stretch to feed my family for days. I make two loaves, freeze one, and still have enough dough scraps for garlic knots. Not the prettiest, but the taste makes up for it.
Step-by-step instructions for Italian bread machine mastery
Here’s how to transform simple ingredients into golden, crusty Italian bread with minimal effort.
Prepare the Yeast Mixture for Maximum Rise
In the bread machine pan, combine the 0.75 cup warm water (tested at 110°F—too hot kills yeast), 1 tablespoon granulated sugar, and 2.25 teaspoons active dry yeast. Let this sit for 5-7 minutes until frothy. You’ll see tiny bubbles forming on the surface—this confirms the yeast is alive and ready to work.
Here’s the thing—if the mixture doesn’t bubble within 10 minutes, your yeast might be dead. In that case, start fresh with new yeast. I’ve made this mistake before, and trust me, you don’t want to waste 3.5 cups of flour on dead yeast.
Mix in Wet Ingredients and Flour
Add the 0.5 cup softened unsalted butter and 2 tablespoons extra-virgin olive oil to the yeast mixture. Mix gently with a wooden spoon to combine. The butter should soften slightly from the warm water, creating a creamy base.
In a separate bowl, whisk together the 3.5 cups all-purpose flour and 1.5 teaspoons kosher salt. Then, add the 0.25 teaspoon instant yeast (this gives an extra boost to the rise). Sprinkle this dry mixture over the wet ingredients and mix on low speed using the bread machine’s paddle attachment for 30 seconds until just combined.
Knead and Rise in the Bread Machine
Set your bread machine to the “Basic White Bread” cycle (if available) or the longest dough cycle. If your machine doesn’t have preset cycles, use the “Dough” setting for 3-4 hours. The machine will automatically knead the dough, developing gluten for that perfect chewy texture.
During the kneading process, the dough will go through several stages—first sticky, then smooth and elastic. You’ll know it’s ready when it forms a tight, smooth ball that springs back slowly when poked. This usually takes about 1-1.5 hours of active kneading time.
Shape and Proof for Optimal Texture
Once the kneading cycle completes, remove the dough from the pan and place it on a lightly floured surface. Gently shape it into a 2-pound loaf by folding the edges toward the center and rolling it into a smooth, slightly tapered shape. This helps create that classic Italian bread structure.
Return the shaped dough to the bread machine pan, dust it lightly with 0.25 cup cornmeal (this prevents sticking and adds a subtle crunch), and cover with a clean kitchen towel. Let it proof at room temperature for 30-45 minutes until it rises to about 1.5 times its original size. You’ll see it puff up noticeably and feel slightly springy when pressed gently.
Bake to Golden Perfection
After proofing, place the dough back into the bread machine and select the “Bake” cycle. If your machine doesn’t have a separate bake setting, use the “Basic White Bread” cycle again. The bread will bake for about 30-40 minutes until the internal temperature reaches 190-200°F and the crust turns a deep golden brown.
Here’s the trick to avoid a dense loaf: Don’t open the machine during baking. The steam is crucial for that airy crumb. When the cycle ends, remove the bread from the pan and let it cool on a wire rack for at least 30 minutes before slicing. This resting period allows the gluten to relax and the crumb to set properly, giving you that perfect Italian bread texture.
Pro Tips For Making 2 Lb Italian Bread Machine
- Test Your Yeast First: Skip the guesswork—mix 1 packet of yeast with ¼ cup warm water and 1 tsp sugar in a small bowl. If it bubbles within 5 minutes, your yeast is alive. Dead yeast means your dough will flop, and no one wants a sad, dense loaf. (I learned this the hard way after baking a brick.)
- Soften Butter Properly: Don’t microwave the butter—it melts unevenly and kills the dough’s structure. Cut it into small cubes, let it sit at room temp for 30 minutes, then press it into the dough by hand. The butter should press in but not spread like soup. Overworked butter = tough bread.
- Don’t Overload the Machine: A 2 lb loaf is tight in most bread machines. If your dough looks like it’s fighting for space, give it a 5-minute knead by hand before returning it to the pan. Overfilling = dough spilling out the sides, and that’s a mess to clean up. (Yes, I’ve done it.)
- Proof Until It Springs: The dough should double in size and leave a visible dent when poked—like pressing a muffin tin. If it’s just puffy but squishy, let it rise another 15 minutes. Rushing this step means a dense loaf, not that airy Italian bread you crave. (Your patience pays off.)
Common mistakes when making this dish
Yeast Activation Failures
Skipping the 5-7 minute yeast activation check is the #1 mistake—no bubbles means dead yeast. I’ve ruined batches by rushing this step, so always wait until you see frothy bubbles before adding flour. If your kitchen is cold, warm the water to 110°F (like bathwater) to ensure proper activation.
Using expired yeast? Toss it—it won’t wake up, and you’ll end up with a flat, dense loaf. 🍞
Overmixing the Dough
Once you add the flour, resist the urge to mix longer than 30 seconds—overworking the dough develops too much gluten, making your bread tough instead of tender. The bread machine’s paddle does all the heavy lifting during kneading, so let it handle the job.
If your dough feels sticky after mixing, that’s normal—it’ll firm up during kneading. Pro tip: Use a light hand when sprinkling flour over the wet ingredients to avoid clumping.
Skipping the Proofing Step
Many home bakers skip the 30-45 minute proofing after shaping, but this is where flavor and texture develop. Without proofing, your loaf will bake flat and dense. Look for the dough to rise to 1.5x its size and feel springy when pressed gently—this confirms it’s ready.
Covering it with a towel traps heat and humidity, which helps the yeast do its magic. Trust me, this extra step makes all the difference in that artisan crust you’re after. 💫
Opening the Machine Mid-Bake
Peeking inside the bread machine during baking releases steam, which collapses the structure and creates a dense crumb. The machine’s built-in steam is what gives Italian bread its signature airy texture, so resist the temptation to check on progress.
If your machine has a window, use it to admire the golden crust forming—just don’t open it! Patience here ensures that perfect rise and crackling crust you’re dreaming of.
Incorrect Dough Hydration
Too much water makes the dough sticky and gummy, while too little results in a dry, crumbly loaf. This recipe’s 3.5 cups flour to 0.75 cup water ratio is spot-on for a 2-pound loaf, but adjust by 1 tablespoon if your kitchen is humid (dough will absorb more moisture).
If your dough feels too wet after mixing, add 1 tablespoon extra flour—but don’t overdo it, or your bread will turn out dry. The goal is a smooth, slightly tacky dough that’s pliable but not sticky.
Using the Wrong Pan
Not all bread machine pans are created equal. If yours isn’t lightly greased with olive oil or lined with parchment paper, your loaf will stick and bake unevenly. I always dust mine with cornmeal before adding the dough—this prevents sticking and adds a subtle crunch to the crust.
If your pan is dark-colored, the bread may brown too quickly, so reduce the bake time by 5 minutes to avoid burning. A well-seasoned pan makes all the difference! ⚡
Nutrition facts
Frequently asked questions
Can I use whole wheat flour instead of all-purpose for this Italian bread?
You can substitute up to 50% whole wheat flour (about 1.75 cups) for a nuttier flavor and denser texture. For best results, replace the remaining 1.75 cups with all-purpose flour to maintain the light, airy crumb. Whole wheat absorbs more moisture, so you may need to reduce water by 1 tablespoon if the dough feels too sticky after mixing.
Why does my bread machine dough stick to the pan during baking?
Sticky dough usually means insufficient kneading or too much moisture. First, ensure your bread machine ran the full kneading cycle—3-4 hours for this recipe. Lightly grease the pan with olive oil or line it with parchment paper before adding the dough. For extra insurance, dust the pan with cornmeal after shaping the dough to create a barrier.
How do I store leftover Italian bread to keep it fresh?
Wrap the cooled loaf tightly in plastic wrap or place it in an airtight container with a slice of white bread (the moisture keeps it soft). Store at room temperature for up to 3 days. For longer storage, freeze slices in a zip-top bag for up to 3 months. To revive, warm frozen slices at 350°F for 5-7 minutes or toast directly from frozen.
Can I add herbs or garlic to this recipe for a flavored bread?
For a garlic-infused version, mix 1 tablespoon minced garlic with the olive oil before adding to the yeast mixture. For herb bread, sprinkle 1 tablespoon dried Italian seasoning or 2 tablespoons fresh rosemary into the flour mixture. Reduce salt slightly (1 teaspoon) if using salty herbs like oregano. The bread machine will distribute flavors evenly during kneading.
What if my bread machine doesn’t have a “Basic White Bread” setting?
Use the “Dough” setting for 3-4 hours to develop gluten properly, then transfer the dough to a greased loaf pan. Cover and let proof for 30-45 minutes before baking in the oven at 375°F for 25-30 minutes until golden. For best results, preheat the oven and place a pan of water on the lower rack to create steam for that Italian bread crust.

- 12 Bean Chili Recipe: Hearty Slow-Cooked Depth With 12 Legumes - October 17, 2026
- 5 Seed Bread Recipe: Nutty Crunch and Artisan Flavor in One Loaf - October 17, 2026
- 1 Lb Macaroni Salad Recipe: Bold, Crunchy, and Crowd-Pleasing - October 17, 2026