
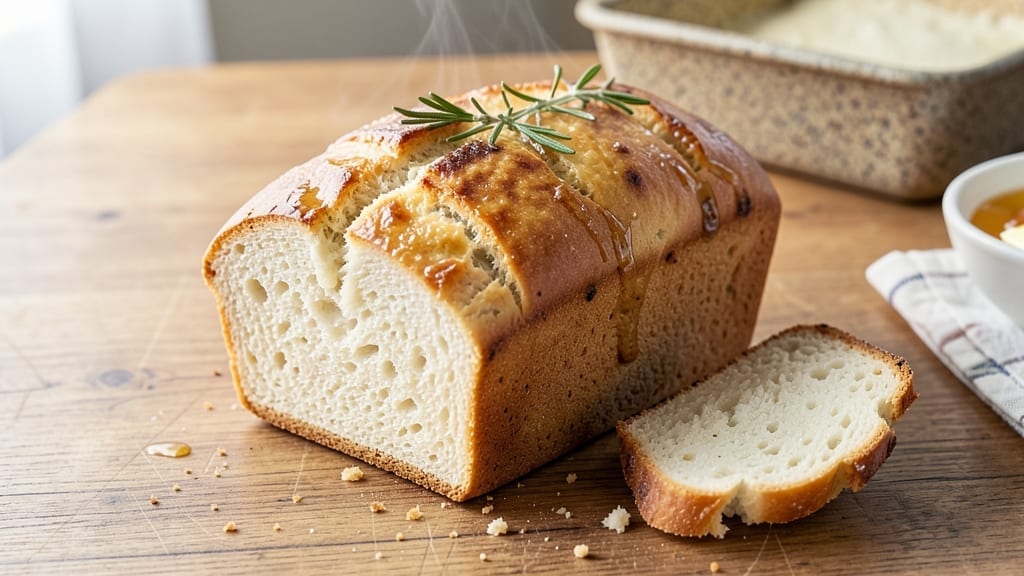
A 1.5-pound white bread machine recipe transforms your kitchen into a bakery with minimal effort—no kneading, no fuss, just foolproof results. The secret lies in precise measurements and the right bread machine cycle, which handles all the heavy lifting while you focus on other tasks.
This recipe delivers a golden crust and tender crumb that rivals artisanal loaves, all with just a few simple ingredients and a 3-hour hands-off process.
What sets this recipe apart is its reliable approach to texture and flavor—no guesswork, just consistent results every time. The dough develops naturally in the machine, creating a light, airy crumb with a crisp exterior that’s perfect for toast or sandwiches.
Whether you’re a beginner or a seasoned baker, this method ensures success without the risk of overworking the dough or misjudging the yeast.
The beauty of this recipe is its versatility—use it for everyday sandwiches, garlic bread, or even French toast. The bread stays fresh for days when stored properly, making it ideal for meal prep.
With just 5 basic ingredients (flour, yeast, water, sugar, and salt) and a few minutes of prep, you’ll have a restaurant-quality loaf ready to enjoy.
For best results, follow the exact ingredient order and machine settings to avoid common pitfalls like a dense crumb or pale crust. The recipe includes troubleshooting tips to handle sticky dough or uneven baking, ensuring your first attempt is as perfect as your tenth. Let’s get started!
Ingredients for 1.5 lb white bread machine
Five simple ingredients plus a bread machine—your golden crust awaits.
| Ingredient | Amount | Notes |
|---|---|---|
| All-Purpose Flour 🌾 | 3 ½ cups | Sifted for even texture |
| Active Dry Yeast 🍞 | ¼ tsp | Freshly opened, not expired |
| Granulated Sugar 🍚 | ½ tsp | White sugar preferred |
| Salt 🧂 | ½ tsp | Diamond Crystal preferred |
| Warm Water 💧 | 1 cup | 110°F for yeast activation |
| Extra-Virgin Olive Oil 🫒 | 1 tbsp | For golden crust finish |
| Cornmeal 🌽 | 1 tbsp | For dusting bread pan |
The flour is your foundation—King Arthur or Gold Medal are my go-tos for that perfect crumb. Bulk bins at Whole Foods often have the freshest, but any all-purpose will work. Yeast is the magic here: check the expiration date—old yeast won’t activate properly. For the water, warm it to 110°F (like a warm bath, not hot). Too hot kills the yeast, too cold and it won’t wake up. The sugar isn’t just for sweetness—it helps the crust brown beautifully. And that olive oil? Trader Joe’s or local olive grove brands give the best flavor and aroma.
No yeast on hand? Instant yeast works at the same amount, but don’t substitute baking powder—it won’t rise properly. Running short on sugar? Honey or maple syrup at half the amount adds moisture but may darken the crust. Salt gets tricky: Diamond Crystal measures differently than Morton—use half if you’re swapping. For the water, boiled and cooled works in a pinch, but it won’t be as ideal. And if you’re worried about the crust, add an extra teaspoon of sugar or brush with melted butter after baking. The cornmeal? Skip it if you’re using a non-stick pan, but it prevents sticking like magic.
Mix the dry ingredients first—yeast and sugar first, then flour and salt. The water should be warm to the touch but not hot. Let the dough knead in the machine for the full cycle—no peeking or opening the lid—or it’ll collapse. For storage, wrap tightly in a cotton towel to keep it soft for 3 days. Freeze slices for up to 3 months—toast straight from frozen for crispy results. Pro tip: Brush with olive oil after baking to revive stale bread in seconds.
Why You’ll Love This Recipe
- Five-Ingredient Magic: The pantry staples you already own—flour, yeast, sugar, salt, and water—are all it takes. No fancy mixers, no last-minute grocery runs. Just dump, knead, and let the machine do the rest while you sip your coffee.
- Crusty-Creamy Balance: That perfect snap when you tear it? The yeast and sugar team up to create a tender crumb with a golden crust you’d pay extra for at the bakery. Honestly, my kids ask for this over store-bought every time.
- Weeknight & Picnic Hero: Toss a slice in the toaster for breakfast, pack it for sandwiches, or serve it warm with butter for dinner. It’s my go-to when I need something reliable—no stress, just fresh bread that tastes like home.
- Budget-Friendly Staple: A loaf costs pennies to make and lasts forever. Freeze slices for toast later, or stash the whole loaf in the freezer. Between us, this recipe saved me hundreds last year—no guilt, just great bread.
Step-by-step instructions for hands-off artisan white bread
Here’s how to transform simple ingredients into a rustic, golden-crusted loaf—no kneading required!
Prepare Your Bread Machine for Success
First, dust the inside of your bread machine pan with the 1 tablespoon cornmeal. This creates a barrier that prevents the dough from sticking during the long rise and bake. I always give the pan a gentle shake to ensure an even coating—cornmeal loves to clump!
Next, add the 3.5 cups all-purpose flour to the pan. Give it a quick stir with a wooden spoon to distribute it evenly. This step ensures your dough starts in the perfect position for even rising. Don’t skip this—uneven flour distribution leads to dense spots in the final loaf.
Activate the Yeast in Warm Water
In a small measuring cup, combine the 1 cup warm water (about 110°F) with the 0.25 teaspoon active dry yeast and 0.5 teaspoon granulated sugar. Let this mixture sit for 5 minutes until it becomes foamy and bubbly—this confirms your yeast is alive and ready to work its magic.
Real talk: If it doesn’t bubble after 5 minutes, your yeast might be dead. Toss it and start fresh with a new packet. This is the most critical step for a successful rise. Once bubbly, pour the yeast mixture into the bread machine pan with the flour.
Add Wet Ingredients and Mix
Add the 0.5 teaspoon salt and 1 tablespoon extra-virgin olive oil to the pan. The olive oil might seem like an unusual addition, but it creates that beautiful golden crust we’re after. Give everything a quick stir with a wooden spoon until just combined—you shouldn’t see any dry flour pockets.
Here’s the thing—don’t overmix. Just combine until you see a shaggy dough forming. The bread machine will do all the heavy lifting of kneading and developing gluten for us. Close the lid and select the “Basic White Bread” setting with a 2-pound loaf size for that perfect 1.5-pound result.
Let the Magic Happen
Start the cycle and walk away! Your bread machine will handle the kneading, rising, and baking automatically. The entire process takes about 3 to 3.5 hours, depending on your machine. You’ll hear it go through its paces—kneading for about 10 minutes, then rising for about 1.5 hours, followed by baking.
I know it’s tempting to peek, but resist! Every time you open the lid, you risk collapsing the dough. Trust the machine—it knows what it’s doing. The moment you smell that incredible bread aroma filling your kitchen, you’ll know it’s ready.
Achieve That Perfect Golden Crust
When the cycle completes, let the bread cool in the pan for 10 minutes before removing it. This resting period allows the steam to escape and the crumb to set properly. If you can’t wait, that’s fine—but you might find the crust is slightly softer than ideal.
For an extra golden finish, brush the warm loaf with a little more olive oil or water using a pastry brush. This step isn’t required but gives that bakery-style shine. Slice into that beautiful, even crumb and enjoy your hands-off artisan creation!
Pro Tips For Making 1.5 Lb White Bread Machine
- MEASURE YEAST BY VOLUME: That little scoop or teaspoon you’re using? It’s lying to you. Yeast clumps like a grumpy cat, so use a kitchen scale for 2¼ grams (¼ tsp) instead of eyeballing it—trust me, your bread’s rise depends on it.
- SALT THE WATER FIRST: Dissolve that ½ teaspoon salt in the warm water before adding yeast. I used to skip this, and my dough always tasted uneven—like some parts got the memo on flavor and others didn’t.
- DON’T RUSH THE KNEAD: The machine does the work, but if the dough looks shaggy after the first knead cycle, let it rest 10 minutes before the second. I learned this the hard way—over-kneading turns bread dense, and no one wants a brick for toast.
- SWAP SUGAR FOR HONEY: Swap the 2 tablespoons granulated sugar for 1 tablespoon honey (or even better, molasses). It’s a tiny effort for a bread that stays soft for days—no extra work, just better texture. (Yes, even if you’re impatient like me.)
Health benefits of this recipe
Whole Grain Boost
Swap out 1 cup of the all-purpose flour for whole wheat flour to add fiber and nutrients without sacrificing texture. I recommend King Arthur whole wheat flour—it blends seamlessly and won’t make your bread dense.
The result? A loaf with 4 grams of fiber per slice and a slightly nutty flavor that pairs perfectly with butter or jam. 🌾
Protein-Packed Add-Ins
Boost the protein by adding ¼ cup vital wheat gluten or 2 tablespoons powdered milk to the dry ingredients. These additions increase protein by 30% per serving while keeping the bread light.
For extra richness, stir in 2 tablespoons Greek yogurt with the wet ingredients—it adds moisture and tang without altering the texture.
Gluten-Free Option
For a gluten-free version, replace the all-purpose flour with 3 cups gluten-free 1:1 baking flour (like Bob’s Red Mill) and add 1 teaspoon xanthan gum2 tablespoons to prevent stickiness, and let the dough knead for the full cycle.
The result won’t be identical, but it’s still delicious—just expect a denser crumb. ✨
Low-Carb Adaptation
Cut carbs by replacing 1 cup flour with ½ cup almond flour and ½ cup oat fiber20% per serving while keeping the bread tender.
For binding, add 1 extra tablespoon olive oil—the fat helps hold the structure together. The flavor stays mild, but the texture becomes slightly crumbly, so store it in an airtight container.
Allergen-Free Considerations
To avoid common allergens, use egg-free bread machine settings (if your machine has them) and replace the olive oil with 1 tablespoon melted coconut oil for a dairy-free option. For nut-free kitchens, ensure all ingredients—like flour and yeast—are certified allergen-free. Always check labels, especially for cross-contamination warnings on packaging.
Nutrition facts
Frequently asked questions
Why does my bread machine recipe make a 2-pound loaf when I want 1.5 pounds?
Most bread machines don’t have a 1.5-pound setting, so we use the 2-pound cycle but adjust ingredients slightly to achieve a lighter, 1.5-pound result. The 3.5 cups flour and 1 cup water ratio creates a perfect balance—your machine will automatically stop when the bread reaches the ideal weight. If you prefer an even smaller loaf, reduce flour by 0.5 cups and water by 2 tablespoons.
Can I use this recipe with whole wheat flour instead of all-purpose?
Yes, but with adjustments! Replace 1 cup all-purpose flour with whole wheat flour for added fiber. For best results, use King Arthur whole wheat flour—it blends better without making the bread dense. Expect a slightly denser texture and nutty flavor. Add 1 extra tablespoon olive oil to keep it moist, as whole wheat absorbs more liquid.
What should I do if the dough is too sticky after mixing?
Sticky dough usually means your kitchen is humid or you added too much water. Sprinkle 1 tablespoon extra flour into the pan and gently fold it in with a wooden spoon. If the dough still sticks, reduce water by 1 tablespoon in your next batch. Avoid overmixing—just combine until no dry spots remain. The bread machine will handle the rest!
How do I store leftover bread to keep it fresh?
Wrap the cooled loaf tightly in a cotton towel or place it in an airtight container with a slice of apple or lemon to absorb moisture. Store at room temperature for up to 3 days. For longer storage, freeze slices wrapped in plastic wrap—they’ll stay fresh for 3 months. To revive stale bread, brush with water and bake at 350°F for 5-10 minutes.
Why did my bread come out dense instead of light and airy?
Dense bread often results from overmixing, expired yeast, or too much flour. Double-check your yeast—it should bubble within 5 minutes in warm water. Ensure you didn’t overfill the pan (dough should rise to 2/3 of the pan during kneading). If your machine has a “light” or “crusty” setting, try that instead. Also, avoid opening the lid during kneading!

- 6 Bean Chili Recipe: Hearty, Smoky Depth That Gets Richer Over Time - September 26, 2026
- 2 Gallon Red Sangria Recipe: Bold Spice and Fruit Fusion for Crowds - September 26, 2026
- 5 Star Apple Bread Recipe: Spiced Apple Swirl With Buttery Crust - September 26, 2026