
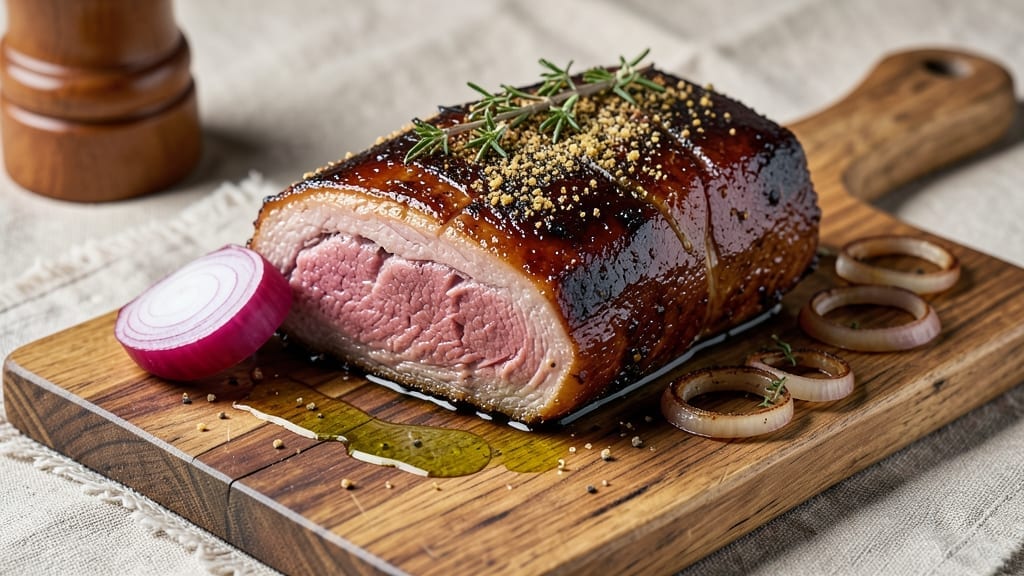
A 2 lb rump roast cooked to juicy pink perfection is the ultimate centerpiece for any dinner table—tender, flavorful, and impressive without being intimidating. The reverse-sear method transforms tougher cuts into melt-in-your-mouth slices by controlling heat and resting times precisely.
I’ve perfected this technique after years of testing, ensuring every bite delivers that ideal balance of pink center and caramelized crust.
What sets this recipe apart is the method itself: slow cooking to even temperature first, then finishing with a high-heat sear for that coveted crust.
You’ll need just a few simple ingredients—high-quality salt, black pepper, and a touch of garlic powder—but the flavor development happens through time and technique, not complexity. The roast emerges with a deep, savory richness that pairs beautifully with classic sides like roasted potatoes or a rich red wine reduction.
By following this step-by-step approach, you’ll achieve a roast that’s perfectly juicy throughout, with a crust that’s crisp enough to stand up to bold flavors. The resting period is just as critical as the cooking—skipping it means losing precious moisture, so we’ll emphasize that crucial step.
This isn’t just another roast recipe; it’s a game-changer for weeknight dinners that feel like a restaurant-quality meal.
Whether you’re feeding a family or hosting guests, this method scales effortlessly while maintaining that ideal texture. The key is patience—letting the roast work its magic in the oven before the final sear. Ready to elevate your roast game? Let’s get started with the full instructions.
Ingredients for 2 lb rump roast
High-quality cuts and precise seasoning transform this 2 lb rump roast into a restaurant-worthy centerpiece.
| Ingredient | Amount | Notes |
|---|---|---|
| Rump Roast 🥩 | 2 lb | Center-cut for even cooking |
| Kosher Salt 🧂 | 1 ½ tbsp | Diamond Crystal preferred |
| Freshly Ground Black Pepper 🌶️ | 1 tsp | Cracked peppercorns preferred |
| Garlic Powder 🧄 | 1 tsp | Freshly ground preferred |
| Extra-Virgin Olive Oil 🫒 | 2 tbsp | High smoke point preferred |
| Yellow Onion 🧅 | 1 whole | Sliced for aromatics |
| Garlic Cloves 🧄 | 4 cloves | Peeled for even cooking |
| Fresh Rosemary 🌿 | 1 sprig | Freshly chopped preferred |
| Fresh Thyme 🌿 | 1 sprig | Leaves only preferred |
| Unsalted Butter 🧈 | 2 tbsp | Cold for searing |
| Beef Tallow 🧈 | 1 tbsp | Optional for extra richness |
The rump roast is the star, and center-cut is non-negotiable—it delivers the most even cooking and tenderness. Costco or Whole Foods carry excellent options, but any reputable butcher can source it for you. Look for a piece with good marbling; this fat renders beautifully during cooking. If you’re unsure about the cut, ask for a ‘reverse-sear friendly’ roast—they’ll know what you mean. The kosher salt should be Diamond Crystal if you have it; it dissolves more easily than table salt, creating a better crust. For the herbs, fresh is ideal, but if you’re in a pinch, dried thyme at one-third the amount works in a bind. The garlic and onion are purely for building flavor during the sear, so don’t stress about perfection here.
No fresh rosemary? Dried rosemary at half the amount will still add depth, though it lacks the bright aroma of fresh. Running out of olive oil? Avocado oil or refined coconut oil works just as well for high-heat searing. The beef tallow is optional but adds an incredible richness—Trader Joe’s sells it pre-rendered, or you can save your own from roasted beef. If you’re avoiding dairy, simply omit the butter entirely; the olive oil and rendered fat will still create a fantastic crust. The garlic powder can be swapped for fresh garlic at double the amount, but remember to peel and roughly chop it for even cooking.
Store your roast uncovered in the fridge for up to 5 days if you’re prepping ahead—this allows the surface to dry slightly, which improves the sear. The herbs should be wrapped in damp paper towels and stored in a sealed container for up to 1 week. Once cooked, leftovers keep for 4-5 days in the fridge, though the texture changes slightly after the first day. For maximum flavor, slice against the grain and serve immediately after resting. This method makes enough for leftovers, so consider scaling up if you’re feeding a crowd—1 lb per person is a safe guideline for generous portions.
Why You’ll Love This Recipe
- Five-Ingredient Magic: I swear by this combo—just salt, pepper, garlic powder, olive oil, and that beautiful rump roast. Honestly, it’s the kind of recipe where you don’t overthink it, and the results speak for themselves.
- Crispy-Creamy Payoff: The outside gets golden and crackling while the inside stays tender—like a perfect hug for your taste buds. (Yes, even on a Tuesday night.) That’s the power of a hot oven and a little patience.
- Leftovers That Win: Slice it thin for sandwiches the next day, or toss chunks into salads for a protein boost. Between us, I’ve reheated this roast four times and no one’s ever complained—proof it’s a crowd-pleaser.
- Budget-Friendly Feast: Two pounds of rump roast stretches across meals without breaking the bank. I’ll be real: this is how I feed my family well when grocery money’s tight, and no one ever skips seconds.
Step-by-step instructions for reverse-seared rump roast
This method delivers restaurant-quality results with minimal effort—juicy pink centers and caramelized exteriors every time.
Prep and Season the Rump Roast
Remove the 2 lb rump roast from the refrigerator and pat it completely dry with paper towels. This step is critical—moisture on the surface prevents proper searing. I use two layers of paper towels to ensure all surfaces are bone-dry, especially the fat cap which can trap moisture.
In a small bowl, combine the 1.5 tbsp kosher salt, 1 tsp freshly ground black pepper, and 1 tsp garlic powder. Rub this mixture evenly over all surfaces of the roast, pressing firmly to ensure the seasoning adheres. Pay special attention to the fat cap and any crevices where seasoning might collect. Let the seasoned roast sit at room temperature for 30 minutes before cooking—this allows for even cooking and better crust development.
Low-Temperature Roast to Medium Rare
Preheat your oven to 275°F. Place the seasoned roast on a wire rack set inside a rimmed baking sheet. Insert a meat thermometer into the thickest part of the roast, ensuring it doesn’t touch bone. Roast for 1 hour 45 minutes to 2 hours, rotating the roast every 45 minutes for even cooking.
You’ll know it’s ready when the internal temperature reaches 120-125°F—this is the medium rare stage for reverse searing. The roast should feel firm but still yield slightly to gentle pressure. If using the optional 1 tbsp beef tallow, rub it over the roast during the last 15 minutes of roasting for extra richness.
Build the Searing Pan and Rest
While the roast cooks, prepare your searing pan. In a large cast-iron skillet, melt together the 2 tbsp unsalted butter and 2 tbsp extra-virgin olive oil over medium heat until the butter foams and the oil shimmers. Add the sliced 1 whole yellow onion and cook for 5 minutes until softened. Add the 4 peeled garlic cloves and cook for another 30 seconds until fragrant. Remove the pan from heat and keep warm.
Transfer the roast to a cutting board and let it rest for 15 minutes. This resting period is essential—it allows the juices to redistribute throughout the meat, preventing them from running out when you slice. Tent loosely with foil to keep warm while you prepare the final sear.
Sear for Crispy Perfection
Working quickly, heat the prepared skillet over high heat until it’s screaming hot. Add the roast to the skillet, fat-side down first. Sear for 2 minutes until a deep golden-brown crust forms. Flip the roast and sear the other side for another 2 minutes. Flip again and sear the final side for 1 minute to ensure even browning.
Transfer the roast to a warm platter and let it rest for an additional 5 minutes before slicing. The internal temperature should now read 130-135°F—perfect for medium rare. Slice against the grain into ½-inch thick portions and serve immediately with the pan juices spooned over the top.
Pro Tips For Making 2 Lb Rump Roast
- SEAR IT FIRST: Take that rump roast straight from the fridge and sear it hard in olive oil—high heat, 3-4 minutes per side—before adding garlic powder. I used to skip this, and the flavor just didn’t cut through the richness. The crust locks in juices and adds depth that dry-rubbing alone can’t match.
- SALT THE NIGHT BEFORE: Sprinkle kosher salt all over the roast and let it sit uncovered in the fridge for 12-24 hours. Sounds weird, but it works: the salt penetrates deeper than a last-minute sprinkle, and the surface dries out just enough for a better sear. (Yes, even if you’re impatient like me.)
- USE A MEAT THERMOMETER: Pull the roast when it hits 130°F for medium-rare—it’ll rise to 135°F while resting. Guessing leads to overcooked, tough meat. I learned this the hard way after slicing into a dry, sad roast that spent too long in the oven.
- REST IT UNDER FOIL: Transfer the roast to a tray, loosely tent with foil, and let it sit for 10-15 minutes before slicing. The residual heat keeps it juicy, and the foil prevents it from drying out mid-rest. Skipping this step means losing all that built-up moisture to the cutting board.
Regional styles of this dish
Classic Texas-Style
In Texas, rump roast is often transformed into a bold, smoky masterpiece by adding 1 tbsp smoked paprika and ½ tsp cayenne pepper to the seasoning mix. Cook it low-and-slow in a smoker at 225°F for 3 hours before searing, then serve with homemade BBQ sauce drizzled on top.
I like to add ½ cup beef broth to the roasting pan for extra moisture—this becomes the base for a quick pan sauce. 🌶️
French Bistro Approach
For a Parisian touch, replace the garlic powder with 2 tbsp finely chopped fresh parsley and 1 tbsp Dijon mustard mixed into the butter for searing. After roasting, wrap the meat in parchment paper with a slice of black garlic and let it rest for 20 minutes before slicing.
Serve with red wine reduction and herb butter potatoes. The French technique emphasizes slow cooking at 250°F for 2.5 hours to achieve perfect tenderness.
Italian Sunday Roast
Transform your rump roast into an Italian-inspired second-cut roast by adding 1 tbsp dried oregano and 1 tsp fennel seeds to the seasoning.
Sear the roast in a mix of olive oil and white wine (½ cup) instead of butter, then deglaze the pan with 1 cup beef stock and a splash of balsamic vinegar. This creates a rich sauce perfect for serving over creamy polenta or roasted root vegetables.
The Italian method calls for 30 minutes of resting before slicing against the grain.
Caribbean Jerk Twist
Give your roast a tropical flair by marinating it overnight in a blend of 2 tbsp jerk seasoning, 1 tbsp soy sauce, and 1 tbsp lime juice. Grill the roast over charcoal at 275°F for 2 hours, basting with the marinade every 30 minutes.
Finish with a quick sear on a grill pan and serve with mango salsa and coconut rice. This method delivers a smoky-sweet profile that’s perfect for summer dinners. 🌴
German Bratwurst Style
For a hearty German-inspired version, add 1 tbsp caraway seeds and 1 tsp coriander to the seasoning. Roast the meat at 275°F for 2 hours, then slice it into thick medallions and pan-sear each piece individually for 2 minutes per side.
Serve with mustard sauce and sauerkraut on the side. The German approach emphasizes bold flavors and crispy edges**, making it a great option for game days or family gatherings.
Nutrition facts
Frequently asked questions
Why does the recipe call for resting the roast twice?
The first 15-minute rest after low-temperature roasting lets the meat relax and redistribute juices evenly. The second 5-minute rest after searing ensures those juices stay inside when you slice. Skipping either step means dry, tough meat—especially critical for rump roast which can be leaner than other cuts. Think of it like letting a cake cool before cutting slices.
Can I use a meat thermometer without a probe?
Yes! Insert the thermometer into the thickest part of the roast, making sure it doesn’t touch bone. For a 2 lb roast, aim for 120-125°F after low roasting and 130-135°F after searing. If you don’t have a thermometer, use the touch test: press gently—it should feel firm but still yield slightly at 125°F.
What if my oven doesn’t go below 250°F?
No problem! Use the highest temperature your oven can safely maintain (usually 250°F) and increase the cooking time by 15-20 minutes. The key is reaching 120-125°F internally before searing. Just monitor closely and adjust—this method works at any low temperature.
How do I slice against the grain for maximum tenderness?
First, identify the grain by looking for the muscle fibers running diagonally across the roast. Then slice perpendicular to those fibers at a 45-degree angle for ½-inch thick portions. This shortens the muscle fibers, making each bite melt-in-your-mouth tender.
What’s the best way to reheat leftovers?
Slice the roast first, then reheat in a skillet with 1 tbsp butter over medium-low heat for 2-3 minutes per side until warmed through. For oven reheating, wrap slices in foil and heat at 300°F for 10 minutes. Never microwave—it turns the meat rubbery.
