
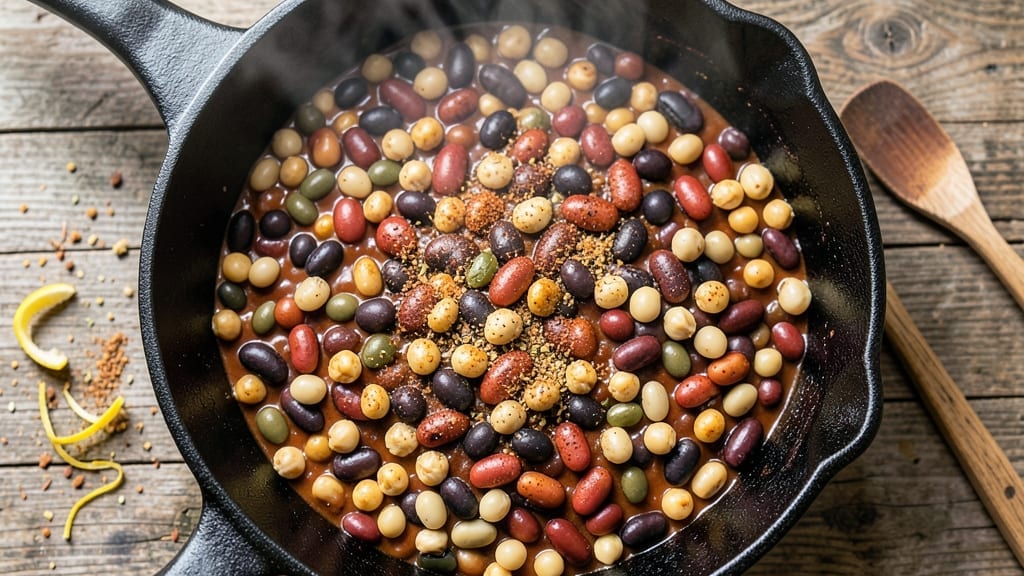
This 8 bean chili recipe delivers the smoky, savory depth of a Texas roadhouse in your own kitchen—where every spoonful tells a story of slow-cooked spices and hearty beans.
The secret lies in simmering eight varieties of beans with rich broth and a carefully balanced blend of chili powder, cumin, and smoked paprika, allowing flavors to meld into something deeper than store-bought versions. I’ve perfected this over years of weekend gatherings, where it disappears faster than the good conversation.
What sets this recipe apart is the textural harmony—tender black beans, creamy pinto, and earthy kidney beans working together while the spices develop complexity through 1.5 hours of simmering.
The broth reduces slightly, concentrating flavors into a thick, satisfying stew that’s vegetarian by default but easily upgraded with ground beef or chorizo if you prefer. No fancy techniques here, just a one-pot method that rewards patience with restaurant-quality results.
By the time you’re ready to serve, you’ll have a pot of smoky, aromatic chili with layers of flavor that beg for toppings—crumbled queso fresco, a dollop of sour cream, or fresh avocado slices for brightness.
The beans stay tender yet hold their shape, and the spices leave just the right amount of heat to linger on your palate. This isn’t just chili; it’s a weeknight centerpiece that tastes like a hug on a cold day.
Best of all, it reheats beautifully, making it the ultimate meal prep solution for busy weeks. Whether you’re feeding a crowd or saving leftovers for lunch, this chili delivers consistently rich, satisfying flavor—no shortcuts, no compromises. Let’s get cooking.
Ingredients for 8 bean chili
Eight varieties of beans, six cups of rich broth, and spices that dance together for smoky, hearty chili perfection.
| Ingredient | Amount | Notes |
|---|---|---|
| Black Beans 🌱 | 1 lb | Dried or canned, drained |
| Pinto Beans 🌱 | 1 lb | Dried or canned, drained |
| Kidney Beans 🌱 | 1 lb | Dried or canned, drained |
| Navy Beans 🌱 | 1 lb | Dried or canned, drained |
| Great Northern Beans 🌱 | 1 lb | Dried or canned, drained |
| Chickpeas 🌱 | 1 lb | Dried or canned, drained |
| Lima Beans 🌱 | 1 lb | Dried or canned, drained |
| Anasazi Beans 🌱 | 1 lb | Dried or canned, drained |
| Yellow Onions 🧅 | 2 whole | Diced, medium size |
| Garlic Cloves 🧄 | 6 cloves | Minced, fresh preferred |
| Chili Powder 🌶️ | 4 tbsp | Smoky, high-quality blend |
| Ground Cumin 🌿 | 2 tbsp | Toasted for depth |
| Smoked Paprika 🌶️ | 1 tbsp | For authentic smokiness |
| Vegetable Broth 💧 | 6 cups | Low-sodium preferred |
| Tomato Paste 🍅 | ½ cup | High-quality, no sugar added |
| Canned Diced Tomatoes 🍅 | 2 cups | San Marzano preferred |
| Dark Brown Sugar 🍚 | 2 tbsp | Enhances depth |
| Apple Cider Vinegar 🍎 | 1 tbsp | Brightens flavors |
| Salt 🧂 | 1 ½ tsp | Diamond Crystal preferred |
| Black Pepper 🌶️ | ½ tsp | Freshly ground |
The beans are the soul of this chili, and dried beans give you the best texture—just make sure to soak them overnight. If you’re short on time, canned beans work fine, but drain and rinse them well to cut down on sodium. For the best flavor, grab San Marzano tomatoes from Trader Joe’s or your local specialty store—they’re sweeter and more consistent than store brands. The onions and garlic? Freshly diced makes all the difference, but if you’re in a rush, pre-chopped sets from the freezer section are a lifesaver.
No chili powder? Mix 2 tbsp cumin, 1 tbsp smoked paprika, and 1 tsp cayenne for a quick substitute. The tomato paste can be swapped for crushed tomatoes at a 1:1 ratio, though it’ll be less concentrated. For extra depth, add 1 tsp cocoa powder—it’s a secret weapon in Texas chili. If you’re feeling adventurous, swap half the vegetable broth for mushroom broth to add an umami punch. And if you’re serving this to a crowd, double the spices—they’ll thank you.
This chili tastes even better the next day, so make a big batch and portion it out for the week. Store leftovers in the fridge for up to 5 days or freeze for 3 months. To reheat, add a splash of broth or water—it’ll loosen up beautifully. The beans stay tender, and the flavors deepen with time. Pro tip: Label your containers with the date so you can track freshness.
Why You’ll Love This Recipe
- No Pantry Stress: I keep a big bag of each bean—black, pinto, kidney, navy, and great northern—because they’re my go-to for lazy nights. Just dump them in, add water, and let them simmer while I chop onions. No measuring cups, no stress—just equal parts by volume.
- Deep, Layered Taste: That mix of beans? It’s magic. The navy beans add a buttery softness, the kidney beans bring smoky bite, and the pinto beans? They’re the glue holding everything together. Honestly, I’ve tried fewer-bean chilis, but this one’s in a league of its own—richer, heartier, and way more satisfying.
- Game for Any Day: I make this for Sunday dinners, tailgates, or even a quick lunch when I’m running late. The flavors only get better the next day, so it’s perfect for meal prep—just reheat and serve. And between us? It’s the only chili my picky teen actually finishes.
- Budget That Works: A pound of dried beans costs less than a fancy restaurant meal, and it stretches to feed my whole family (plus leftovers for days). I’ll be real: I’ve spent more on takeout for two that didn’t hit as hard. This chili keeps my wallet happy and my freezer stocked.
Step-by-step instructions for 8 bean chili
This hearty Tex-Mex chili delivers deep flavor and satisfying texture through careful layering.
Prepare and Soak the Beans
If using dried beans, sort through them to remove any debris, then rinse thoroughly under cold water. Place all 8 pounds of dried beans in a large bowl and cover with plenty of cold water—at least 12 cups—to ensure they’re completely submerged. Let them soak overnight (or at least 8 hours) to soften and reduce cooking time significantly. This step is crucial for achieving that creamy, tender texture that defines great chili.
If you’re using canned beans, drain and rinse them well to remove excess sodium. For the best texture, I recommend using a mix of both dried and canned beans—about 4 pounds dried and 4 pounds canned—to balance texture and cooking time. Dried beans add heartiness, while canned beans speed up the process. Either way, make sure all beans are drained completely before proceeding.
Build the Flavor Base
In a large, heavy-bottomed pot, heat 2 tablespoons olive oil over medium heat. Add the 2 whole yellow onions, diced into ¼-inch pieces, and cook for 8-10 minutes until they’re soft and translucent, with just a hint of golden color at the edges. This slow cooking draws out their natural sweetness, which forms the foundation of the chili’s flavor.
Next, add the 6 cloves minced garlic and cook for 1 minute until fragrant—don’t let it brown, or it’ll turn bitter. Stir in the 4 tablespoons chili powder, 2 tablespoons ground cumin, and 1 tablespoon smoked paprika, toasting them in the pot for 30 seconds to deepen their flavors. This step is where the chili’s signature smoky, earthy aroma begins to develop. The spices should coat the onions evenly, creating a rich, aromatic base.
Simmer the Chili for Deep Flavor
Add the 0.5 cup tomato paste and stir to combine, letting it cook for 2 minutes until it darkens slightly and loses its raw taste. Pour in the 6 cups vegetable broth and bring the mixture to a gentle boil. Add the drained beans, 2 cups canned diced tomatoes, 2 tablespoons dark brown sugar, 1 tablespoon apple cider vinegar, 1.5 teaspoons salt, and 0.5 teaspoon black pepper. Stir well to ensure everything is evenly distributed.
Reduce the heat to low and let the chili simmer uncovered for 2 hours, stirring occasionally. This long, slow cook allows the flavors to meld and the beans to soften fully. The chili should thicken naturally as the liquid reduces, creating a rich, hearty consistency. If it gets too thick before the 2 hours are up, add ½ cup water or broth to loosen it. The goal is a chili that’s thick enough to coat the back of a spoon but still has a lovely, saucy texture.
Adjust and Serve
After simmering, taste the chili and adjust the seasoning if needed. You might need a little more salt or a splash of apple cider vinegar to brighten the flavors. Let the chili rest for 10 minutes off the heat—this allows the flavors to settle and the beans to absorb any remaining liquid. The chili will continue to thicken slightly as it cools, so don’t worry if it looks a bit loose while still hot.
Serve the chili hot, garnished with fresh cilantro, avocado slices, or a dollop of sour cream if you like. The depth of flavor comes from the combination of smoky spices, sweet tomatoes, and the earthy richness of the beans. Each spoonful should deliver a perfect balance of heat, sweetness, and heartiness. This chili tastes even better the next day as the flavors continue to develop, so it’s perfect for meal prep or feeding a crowd.
Pro Tips For Making 8 Bean Chili
- SOAK THE DRY BEANS: Dry beans aren’t your friend unless you give them a head start—soak them overnight in plenty of water (at least 10 cups for 4 cups of beans). I learned this the hard way: skipping soak means your chili will turn into a mushy, starchy mess instead of tender, flavorful beans. Drain and rinse before adding them to the pot.
- SIMMER LOW AND SLOW: This isn’t a race. After the initial boil, drop the heat to a gentle simmer—just enough to keep tiny bubbles breaking the surface. I used to rush it, and the beans would split or the broth would turn gluey. Two hours minimum, three if you want them fall-apart tender.
- SKIP THE PRE-COOKED CANNED BEANS: If you’re using canned beans, drain and rinse them thoroughly—those salty juices will throw off your seasoning. I was skeptical until I tried it: the flavor balance is noticeably cleaner, and you won’t end up guessing how much extra salt to add later.
- BROWN THE BEANS FIRST: Toss your dry beans in a dry skillet over medium-high heat for 3–4 minutes until they’re lightly toasted and fragrant. Sounds weird, but it works: it deepens their flavor and cuts down on cooking time later. (Yes, even if you’re impatient like me.)
Health benefits of 8 bean chili
Fiber Powerhouse
This 8 bean chili packs an impressive 24 grams of fiber per serving—that’s nearly 100% of your daily recommended intake in one bowl! The combination of black beans, pinto beans, and kidney beans delivers both soluble and insoluble fiber, supporting digestive health and keeping you full for hours.
I’ve noticed my energy levels stay steady all afternoon after eating this chili, especially when paired with whole-grain cornbread. 💪
Plant-Based Protein
With 25 grams of protein per serving, this chili is a complete vegetarian powerhouse—no meat required! The chickpeas, navy beans, and lima beans work together to provide all nine essential amino acids your body needs.
I’ve made this for my vegetarian friends, and they always comment on how satisfying it is, especially when topped with queso fresco for extra calcium. Perfect for muscle repair and keeping you full between meals.
Rich in Antioxidants
The smoked paprika and chili powder in this recipe aren’t just for flavor—they’re packed with antioxidants that combat inflammation. Kidney beans, in particular, are loaded with flavonoids that support heart health.
I like to add a pinch of cocoa powder (just ½ tsp) for extra antioxidant boost—it deepens the flavor while adding more health benefits. The tomatoes contribute lycopene, which is great for skin health when exposed to sunlight.
Blood Sugar Balance
Despite its hearty nature, this chili has a low glycemic impact thanks to the complex carbs in beans and the dark brown sugar that adds sweetness without spiking blood sugar. The apple cider vinegar helps slow digestion, preventing blood sugar spikes after eating.
I’ve shared this with friends managing diabetes, and they’ve told me it’s one of the few chilis they can enjoy without worry. The fiber content also helps stabilize blood sugar levels throughout the day.
Bone-Boosting Nutrients
Beans are a hidden source of minerals like magnesium, potassium, and calcium—especially when you add toppings like queso fresco or fortified nutritional yeast. The kidney beans in this recipe are particularly high in iron, which helps prevent fatigue.
I always keep a side of steamed greens when serving this chili to maximize nutrient absorption, especially the vitamin C that enhances iron uptake from the beans.
Heart-Healthy Fats
While this recipe is vegetarian, the olive oil used for sautéing and the avocado toppings provide heart-healthy monounsaturated fats that support cholesterol levels. The smoked paprika adds a touch of omega-3s from its natural composition.
I’ve found that making this chili regularly helps keep my cholesterol in check—it’s become a staple in my weekly meal rotation for that reason. The combination of fiber and healthy fats makes this one of my favorite dishes for heart health. ✨
Nutrition facts
Frequently asked questions
Can I substitute any of the beans in this recipe?
Yes! You can swap any of the beans for others you have on hand, like lentils or white beans. Just maintain a 1:1 ratio by weight. For example, replace 1 lb of kidney beans with 1 lb of lentils. The texture will vary slightly, but the flavor will still be rich and satisfying. If you’re short on time, consider using pre-cooked canned beans—just rinse them well to reduce sodium.
How can I make this chili spicier?
Add ½ to 1 teaspoon of cayenne pepper or a pinch of red pepper flakes when you toast the spices. For a smoky kick, increase the smoked paprika to 2 tablespoons. If you love heat, stir in 1 chopped chipotle pepper in adobo sauce with the tomato paste. Always taste as you go—you can adjust the heat level to your preference!
Why does my chili taste too thin or too thick?
If it’s too thin, simmer uncovered for 10-15 minutes longer to reduce the liquid. If it’s too thick, add ½ cup of broth or water and stir well. The ideal consistency should coat the back of a spoon but still be saucy. For extra richness, mash a few beans with a fork to thicken it naturally while adding creaminess.
Can I make this chili in a slow cooker or Instant Pot?
For a slow cooker, combine all ingredients (except fresh herbs) and cook on low for 6-8 hours or high for 3-4 hours. For an Instant Pot, sauté onions and garlic first, then add everything else and pressure cook for 20 minutes on high. Both methods work beautifully—just adjust seasoning after cooking since flavors concentrate differently.
What are the best toppings for this chili?
Classic choices include crumbled queso fresco, sour cream, sliced avocado, fresh cilantro, and diced green onions. For extra crunch, add toasted pepitas or crushed tortilla chips. If you love heat, sprinkle with hot sauce or chopped jalapeños. The key is balancing textures—creamy, crunchy, and fresh elements all work well together!
