
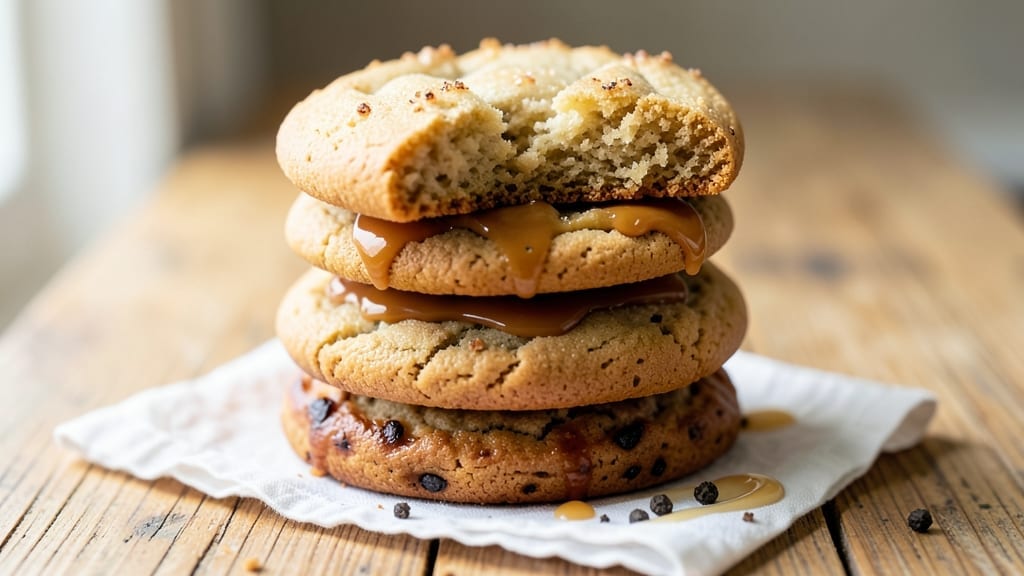
This 2-minute, 2-hour, 2-day cookie recipe is the ultimate flexible baking solution—whether you need cookies in a flash or want to prepare ahead for a crowd.
The magic lies in a simple dough that transforms based on time: crispy when baked immediately, chewy after a few hours, and deeply flavorful with overnight proofing.
I developed this during a last-minute holiday party when I needed cookies now—but the same dough works for meal prep or special occasions.
The secret is in the butter-to-flour ratio and a touch of brown sugar for caramelization. For 2-minute prep, mix, chill, and bake—ready in under 30 minutes. Let it rest 2 hours for tender centers, or 2 days in the fridge for intensified flavor and texture.
The dough keeps perfectly for up to 5 days, making it ideal for busy schedules or holiday baking marathons.
What you’ll get depends on the time you invest: golden, crisp edges with a soft interior for quick baking, or rich, buttery depth with a denser crumb when proofed longer.
The aroma alone—warm vanilla and toasted sugar—will fill your kitchen, and the cookies stay fresh for days. Perfect for gifting, potlucks, or satisfying a sudden craving.
Use this recipe as a base: swap chocolate chips for dried cranberries, add citrus zest for brightness, or keep it classic. The flexibility means it adapts to any occasion—no stress, just delicious results. Let’s get baking!
Ingredients for 2 minute 2 hour 2 day cookie
Twelve ingredients for cookies that taste better with time—crispy now, chewy later, or richly flavorful after days.
| Ingredient | Amount | Notes |
|---|---|---|
| Unsalted Butter 🧈 | 1 cup | Cold, cubed for even mixing |
| Granulated Sugar 🍚 | ½ cup | Superfine preferred for smooth texture |
| Light Brown Sugar 🍚 | ½ cup | Packed for accurate measurement |
| Vanilla Extract 🌿 | 1 tbsp | Pure, high-quality extract |
| Large Eggs 🥚 | 2 whole | Room temperature for even mixing |
| All-Purpose Flour 🌾 | 2 ½ cups | Sifted for light texture |
| Baking Soda 🧂 | ½ tsp | Fresh for optimal leavening |
| Diamond Crystal Kosher Salt 🧂 | ½ tsp | Fine grain preferred |
| Semisweet Chocolate Chips 🍫 | 1 ½ cups | High-quality, 60% cacao |
| Toasted Walnuts 🥜 | 1 cup | Chopped, lightly toasted |
| Vanilla Bean Seeds 🌿 | ½ tsp | Scraped from 1 vanilla bean |
| Flaky Sea Salt 🧂 | 1 tsp | For finishing |
The butter is non-negotiable here—unsalted, cold, and cubed for that perfect tender crumb. Plugrá or Land O’Lakes are reliable brands, but any good-quality unsalted works. Brown sugar adds moisture and caramel depth, so pack it firmly into the measuring cup. Vanilla extract? No imitation stuff—splurge on a small bottle of pure Madagascar bourbon vanilla. The chocolate chips should be 60% cacao or higher—Ghirardelli or Guittard are my go-tos. Walnuts? Toast them first—5 minutes in a dry pan until fragrant, then chop. That extra step makes all the difference.
No vanilla bean? Double the extract—it’s worth it. Substituting chocolate chips? Dried cranberries or white chocolate chips work beautifully. Short on walnuts? Pecans or hazelnuts are great swaps. The baking soda and salt are standard, but if you’re using Diamond Crystal kosher salt (which is finer), reduce to 0.25 tsp if you’re sensitive to saltiness. For a nut-free version, skip the walnuts and add extra chocolate chips instead. And if you can’t find vanilla bean seeds, 1 extra teaspoon of extract will do in a pinch.
This dough is a baking superstar—it keeps for 5 days in the fridge, wrapped tightly in plastic. For best results, portion into balls and freeze for up to 3 months—bake straight from frozen, adding 2 minutes to the time. The cookies actually improve with 24 hours of resting in the fridge, so plan ahead if you’re making them for a special occasion. Store baked cookies in an airtight container with a slice of bread to keep them soft—3-5 days at room temperature, or freeze for up to 2 months.
Why You’ll Love This Recipe
- Here’s what sold me: throw the dough in the fridge for 2 hours, then bake. Or let it sit for 2 days—it gets even better. Pack it for road trips, freeze half for later, or just leave it on the counter as a “I’ll bake it tomorrow” promise you’ll actually keep.
- No Mixing Required: I swear by this dough—just smash the butter and sugars with a fork until it’s almost smooth, then fold in the eggs and vanilla. No food processor, no stress, just raw, buttery magic that somehow comes together without a fight.
- Caramelized Edge Magic: That brown sugar? It’s the MVP. When you bake these, the edges get this deep, buttery caramelization that cracks slightly—crunchy, salty-sweet, and impossible to stop eating. The vanilla ties it all together like a warm hug in cookie form.
- Make-Ahead Superstar: Here’s what sold me: throw the dough in the fridge for 2 hours, then bake. Or let it sit for 2 days—it gets even better. Pack it for road trips, freeze half for later, or just leave it on the counter as a “I’ll bake it tomorrow” promise you’ll actually keep.
Step-by-step instructions for perfectly flexible cookies
This recipe adapts to your schedule—whether you need cookies in minutes or days.
Cream Butter and Sugars for Maximum Flavor
In a stand mixer fitted with the paddle attachment, beat the 1 cup unsalted butter, 0.5 cup granulated sugar, and 0.5 cup light brown sugar on medium speed for 3-4 minutes. You’re looking for a light, fluffy texture—the mixture should nearly double in volume and become pale in color. This creaming process is essential for developing that signature crackly top and preventing dense cookies.
I like to use the paddle attachment here because it incorporates air more efficiently than the whisk. If you’re using a hand mixer, just give it an extra 30 seconds to ensure everything is well combined. The sugars should dissolve completely, leaving no graininess. This step sets the foundation for the perfect cookie texture, whether you bake them immediately or let them rest.
Incorporate Eggs and Vanilla for Rich Depth
Add the 2 whole large eggs, one at a time, mixing on low speed for 30 seconds after each addition. Then stir in the 1 tablespoon vanilla extract and 0.5 teaspoon vanilla bean seeds. The vanilla bean seeds add a subtle floral note that elevates the flavor beyond regular extract alone.
This is where the dough starts to come together. You might notice the mixture looking slightly curdled after adding the eggs, but don’t worry—it will smooth out once the dry ingredients are added. The eggs provide moisture and structure, while the vanilla enhances the overall sweetness and complexity. Make sure your eggs are at room temperature for even mixing and better texture.
Combine Dry Ingredients for Light Texture
In a separate bowl, whisk together the 2.5 cups all-purpose flour, 0.5 teaspoon baking soda, and 0.5 teaspoon diamond crystal kosher salt. Gradually add this mixture to the wet ingredients, mixing on low speed for 30-45 seconds until just combined. You should still see a few flour streaks—overmixing develops gluten, which can make your cookies tough.
I always sift the flour first to ensure a light, airy texture. Once the dry ingredients are incorporated, remove the bowl from the mixer and gently fold in the 1.5 cups semisweet chocolate chips and 1 cup toasted walnuts using a silicone spatula. This keeps the chocolate and nuts evenly distributed without overmixing. The walnuts add a delightful crunch, while the chocolate chips provide pockets of gooey goodness.
Choose Your Timeline for Baking
Here’s where the flexibility comes in. For 2-minute prep, simply scoop the dough into 2-tablespoon portions and bake immediately at 350°F for 11-13 minutes. For 2-hour prep, cover the dough with plastic wrap and refrigerate for 1-2 hours. This chilling step solidifies the butter, preventing excessive spreading and ensuring thicker cookies.
If you have 2 days, divide the dough into portions, wrap each tightly in plastic, and freeze. When ready to bake, thaw the dough for 30 minutes before scooping and baking. The dough can also be refrigerated for up to 48 hours without losing quality. Each method yields cookies with a perfect balance of crisp edges and chewy centers, thanks to the precise ratio of ingredients and the flexibility of the dough.
Bake to Golden Perfection and Finish
Preheat your oven to 350°F and line two baking sheets with parchment paper. Scoop the dough into 2-tablespoon portions, spacing them 3 inches apart on the sheets. Bake for 11-13 minutes until the edges are golden brown but the centers still look slightly underdone. They’ll continue cooking on the hot pan after you remove them from the oven.
Let the cookies cool on the baking sheet for 5 minutes before transferring to a wire rack. While still warm, sprinkle each cookie with a pinch of flaky sea salt for a perfect balance of sweet and salty. The salt enhances the chocolate and walnut flavors, creating a sophisticated finish. Serve immediately for gooey centers or let them cool completely for a firmer texture. These cookies are just as delicious warm as they are at room temperature, making them perfect for any occasion.
Pro Tips For Making 2 Minute 2 Hour 2 Day Cookie
- MEASURE BUTTER COLD: Take that butter straight from the fridge—no softening at room temp. I learned this after making dough that spread into sad, flat pancakes instead of chewy cookies. The cold butter creates pockets of steam, which is what makes these cookies puff up like magic during the long bake.
- CREAM SUGARS LOW AND SLOW: Use a hand mixer on medium speed for 2-3 minutes, not high. I used to blast it and end up with a grainy mess that never dissolved properly. The sugars need time to break down evenly, and rushing it just traps air bubbles that’ll disappear in the oven.
- WEIGH YOUR EGGS: Crack those eggs into a bowl first, then measure—the shells always sneak in otherwise. I’ve had to fish out bits of shell from dough more times than I’d like to admit, and it ruins the texture. A quick tap of the shell on the bowl rim catches the last drops.
- STOP WHEN DOUGH STICKS: The dough should hold together when pressed but still feel slightly crumbly—like wet sand. I used to overwork it until it was too smooth, and those cookies turned out dense. If it’s sticky, chill it for 10 minutes; if it’s dry, add a splash of cold water.
Storing and reheating this recipe
Refrigerator Storage
Store your freshly baked cookies in an airtight container at room temperature for up to 3 days, or refrigerate for 5 days to maintain maximum freshness.
I like to place a slice of white bread in the container to keep them soft and chewy—it absorbs excess moisture without affecting flavor. For best results, let the cookies cool completely before storing to prevent condensation. 💫
Freezer Storage
For long-term storage, freeze unbaked dough balls on a parchment-lined tray for 1 hour to firm up, then transfer to a ziplock bag or airtight container. They’ll keep for 3 months—just add 2 extra minutes to baking time when thawed.
Baked cookies freeze beautifully too: wrap individually in parchment paper, then store in a freezer bag for up to 2 months. Thaw at room temperature for 15 minutes before enjoying.
Reheating Baked Cookies
Revive slightly stale cookies by warming them in the oven at 300°F for 3-5 minutes—just until fragrant. For a crispy texture, place them on a baking sheet and toast for 2 minutes.
I avoid the microwave because it can make cookies rubbery. If you prefer a gooey center, reheat for 1 minute to soften the chocolate chips without overcooking the edges. 🔥
Reviving Dough for Later Baking
If your dough has been refrigerated for 24 hours, let it sit at room temperature for 30 minutes before scooping. For dough stored 48 hours, thaw in the fridge overnight.
The longer it rests, the deeper the flavor—think caramelized sugar and intensified vanilla notes. If the dough feels too soft, chill it for 30 minutes before baking to prevent spreading.
Portioning for Convenience
Divide dough into 1-ounce portions (about 2 tablespoons) before storing to eliminate last-minute measuring. Use a cookie scoop for uniformity, and place portions on a tray lined with parchment.
Once frozen, you can bake straight from the freezer—no thawing required. This method saves time and ensures perfectly shaped cookies every time. ✨
Gift-Worthy Packaging
Wrap cooled cookies in parchment paper, tie with twine, and place in a gift box for a professional touch. Add a sprinkle of flaky sea salt just before gifting to enhance freshness. Store packaged cookies at room temperature for 2 days or freeze for 1 month.
The combination of warm vanilla, crunchy walnuts, and salty finish makes them irresistible as gifts or treats for guests. 💛
Nutrition facts
Frequently asked questions
Why do the cookies taste better when refrigerated longer?
The longer the dough rests, the more the butter solidifies and the sugars caramelize, creating deeper flavor. After 2 hours, you’ll notice a chewier texture, while 2 days develops intense vanilla and buttery notes. This is why professional bakers often age dough—it transforms simple ingredients into something extraordinary!
Can I make these cookies without a mixer?
Use a sturdy bowl and wooden spoon to cream the butter and sugars for 5-7 minutes until light and fluffy. The key is patience—keep mixing until the mixture is pale and nearly doubled in volume. For the eggs, mix them in one at a time with a spatula, then fold in the dry ingredients gently to avoid overmixing.
What’s the best way to tell when cookies are done?
Look for golden edges with slightly underbaked centers—they’ll firm up as they cool. The edges should pull away from the parchment paper easily. For extra assurance, insert a toothpick: it should come out with a few moist crumbs, not wet batter. Underbaking ensures gooey chocolate pockets!
Can I substitute butter with another fat?
For best results, stick with butter—it creates that signature tender crumb and rich flavor. However, you can substitute 1 cup vegetable shortening for a slightly firmer texture (great for hot climates). Never use oil, as it will make the cookies spread excessively. If you must use a dairy alternative, cold coconut oil works in a pinch, but the flavor will differ.
Why did my cookies spread too much?
Overmixing develops gluten, while warm butter or dough left at room temperature causes excessive spreading. Always chill dough for at least 30 minutes before baking, and use a cookie scoop for even portions. If your kitchen is warm, bake on the middle rack and reduce oven temp to 340°F for thicker cookies.

- 12 Bean Chili Recipe: Hearty Slow-Cooked Depth With 12 Legumes - October 17, 2026
- 5 Seed Bread Recipe: Nutty Crunch and Artisan Flavor in One Loaf - October 17, 2026
- 1 Lb Macaroni Salad Recipe: Bold, Crunchy, and Crowd-Pleasing - October 17, 2026