
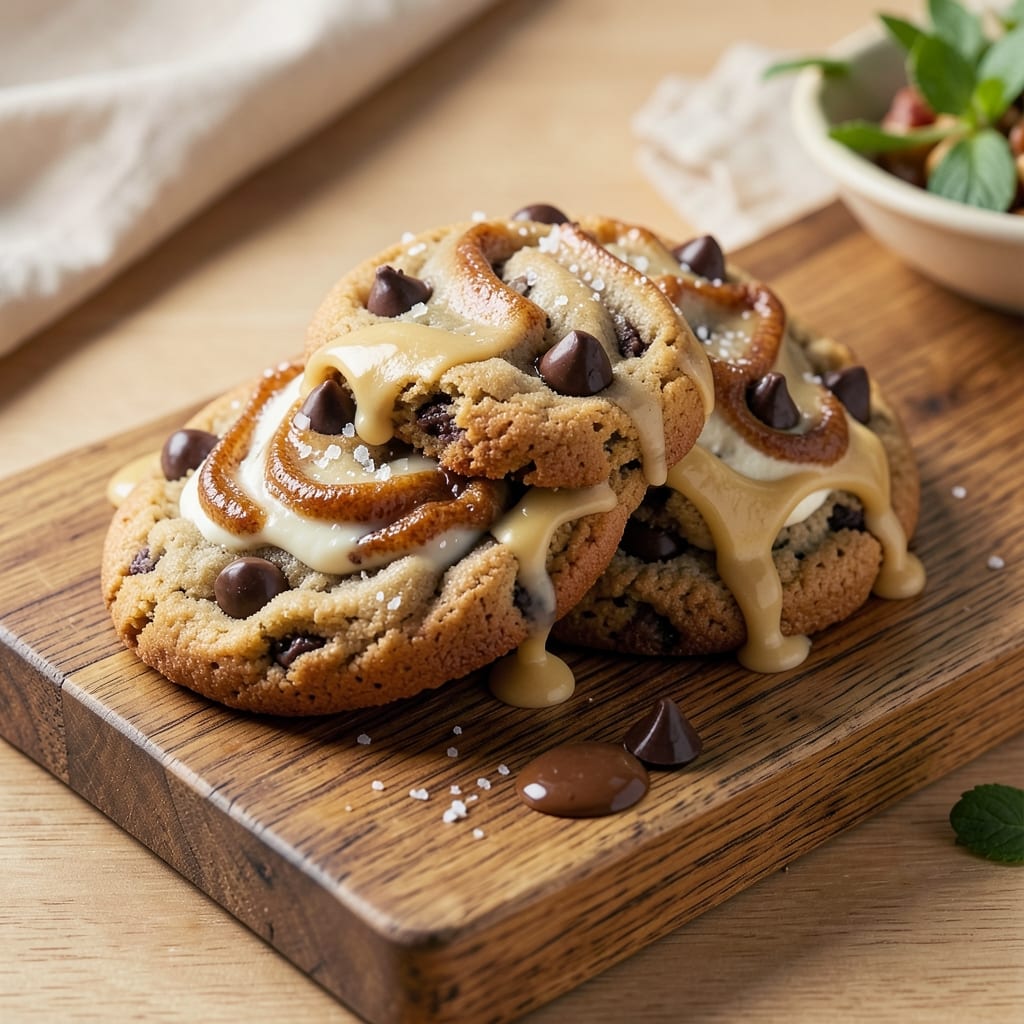
This 2-serving chocolate chip cookie recipe delivers restaurant-quality texture and flavor without the stress of baking a whole batch. 💛 The secret lies in precise measurements and a foolproof technique that ensures crispy edges, chewy centers, and melty chocolate in every bite—perfectly scaled for two people who want to share (or not).
I developed this after testing countless variations to eliminate guesswork, so you get foolproof results every time.
The magic starts with a 1:1 ratio of brown and white sugar, which creates that perfect balance of caramel notes and crispness. A 30-minute dough rest (don’t skip this!) allows the flour to hydrate fully, preventing cracks and ensuring even baking.
The recipe uses high-quality semi-sweet chocolate chips—no substitutions here, as the flavor difference is noticeable. With just 10 minutes of prep, you’ll have cookies ready in 12-14 minutes in a 350°F oven, making this the ideal dessert for a cozy night in.
What you’ll end up with is a pair of golden-brown cookies with crispy edges that give way to a soft, tender center, all studded with pockets of gooey chocolate. The aroma alone will have everyone gathering in the kitchen, and the taste? Dangerously addictive—worth every calorie.
These cookies stay fresh for up to 5 days in an airtight container, so you can bake once and enjoy them all week.
For variations, try swapping half the chocolate chips for toasted pecans or adding a pinch of sea salt on top before baking. If you’re watching sugar, reduce the amount by 2 tablespoons and add an extra 1/4 teaspoon vanilla extract for depth.
Now, let’s get baking—your taste buds will thank you.
Ingredients for 2 serving chocolate chip cookie
Ten ingredients, two perfect cookies—no guesswork, just foolproof results.
| Ingredient | Amount | Notes |
|---|---|---|
| Unsalted Butter 🧈 | ½ cup | Cold, cubed for even baking |
| Packed Light Brown Sugar 🍚 | ¼ cup | Turbinado or dark brown preferred |
| Granulated White Sugar 🍚 | ¼ cup | Superfine if available |
| Large Eggs 🥚 | 1 whole | Room temperature for blending |
| Pure Vanilla Extract 🌿 | 1 tsp | Imitation-free preferred |
| All-Purpose Flour 🌾 | ¾ cup | Sifted for light texture |
| Diamond Crystal Kosher Salt 🧂 | ½ tsp | Adjust to taste |
| Baking Soda 🧪 | ¼ tsp | Freshly opened |
| High-Quality Semi-Sweet Chocolate Chips 🍫 | ½ cup | Ghirardelli or Guittard |
The butter matters here—unsalted gives you control over the saltiness, and cold cubes create those coveted pockets of cookie dough. Ghirardelli or Guittard chocolate chips are worth the splurge; the flavor difference is noticeable. For the sugars, light brown sugar adds chewiness while the white sugar keeps things crisp. Trader Joe’s has great bulk bins for both if you want to stock up. The vanilla extract? No imitation stuff—this is where subtle depth comes from. If you’re in a pinch, almond extract at half the amount works, but you’ll taste the difference.
No vanilla extract? Almond extract at half the amount gets you close, though it’ll taste different. Short on chocolate chips? Chopped dark chocolate bar works in a bind, but the texture won’t be as perfect. The baking soda is non-negotiable—it’s what gives these cookies their lift. Freshly opened is key; if yours is past its prime, toss it. For the flour, King Arthur or Gold Medal brands are my go-tos—they’re reliable and consistent. If you’re watching sugar, reduce by 2 tablespoons total and add an extra 1/4 teaspoon vanilla extract for depth, as the intro suggests.
This dough needs 30 minutes of rest—don’t skip it, or you’ll end up with cracks. Store the dough in the fridge for up to 3 days if you want to prep ahead. Once baked, these stay fresh for 5 days in an airtight container, though they won’t last that long. Freeze portions if you want to save them longer—wrap individually in plastic wrap, then in foil. For variations, try toasted pecans or a pinch of sea salt on top before baking, just like the intro mentions. And if you’re feeling fancy, a sprinkle of flaky sea salt after baking takes them to the next level.
Why You’ll Love This Recipe
- Two-Ingredient Mix: The butter, brown sugar, and white sugar combo creates the perfect chewy texture—no fancy techniques needed. I just cream them together until light, and boom, you’re halfway there.
- Vanilla Kiss: That one teaspoon of pure vanilla extract? It’s the secret weapon—deep, warm, and just sweet enough to make these taste like a bakery’s. Honestly, skip the imitation stuff.
- Snack Attack Ready: Bake a batch, store them in the fridge, and grab one whenever cravings hit. Or freeze half for when you’re too tired to bake later—no reheating required.
- Budget Baking: You’re using pantry staples here: butter, sugar, eggs, and chocolate chips. No specialty ingredients, no waste, and enough dough to satisfy two people without breaking the bank.
Step-by-step instructions for perfectly portioned chocolate chip cookies
Here’s how to craft two perfectly balanced cookies with crisp edges and gooey centers every time.
👨🍳 Step 1: Cream Butter and Sugars to Ideal Fluffiness
In a stand mixer fitted with the paddle attachment, combine the 0.5 cup unsalted butter (cold and cubed), 0.25 cup packed light brown sugar, and 0.25 cup granulated white sugar. Beat on medium speed for 3-4 minutes until the mixture becomes pale and nearly doubles in volume. You’re looking for a light, airy texture—this creaming process incorporates air that creates those signature crackly tops.
I press down on the butter briefly during the first minute to ensure even distribution. The butter should leave a slight indentation when pressed but not be too soft. This balance is crucial—under-creamed butter leads to dense cookies, while over-creamed butter makes them cakey.
🍳 Step 2: Incorporate Egg and Vanilla for Binding
Add the 1 whole large egg (room temperature) and 1 teaspoon pure vanilla extract to the sugar mixture. Beat on low speed for 30 seconds until fully combined. The mixture might look slightly curdled at first, but don’t worry—it will smooth out when we add the dry ingredients.
Here’s the thing—room temperature egg incorporates more smoothly than cold egg. If your egg is straight from the fridge, let it sit in warm water for 5 minutes first. The vanilla extract should be pure, not imitation, for that authentic flavor depth that makes these cookies truly special.
👨🍳 Step 3: Fold in Dry Ingredients and Chocolate
In a separate bowl, whisk together the 0.75 cup all-purpose flour, 0.5 teaspoon diamond crystal kosher salt, and 0.25 teaspoon baking soda. Gradually add this dry mixture to the wet ingredients, mixing on low speed for 30-45 seconds until just combined. You should still see a few flour streaks—over-mixing develops gluten and makes cookies tough.
Remove the bowl from the mixer and gently fold in the 0.5 cup high-quality semi-sweet chocolate chips using a silicone spatula. Make sure they’re evenly distributed throughout the dough. I like to press the chocolate chips into the dough slightly so they don’t all float to the top during baking.
⏰ Step 4: Chill for Perfect Texture (Don’t Skip This!)
Cover the bowl with plastic wrap and refrigerate for at least 30 minutes (I prefer 1 hour). Chilling solidifies the butter, which prevents the cookies from spreading too thin in the oven. It also allows the flour to fully hydrate, creating better texture.
This is the moment that matters: cold dough holds its shape better when it hits the hot oven, resulting in thicker cookies with crispy edges and gooey centers. If you’re really impatient, you can freeze the dough for 15 minutes instead, but chilling is ideal.
🔥 Step 5: Bake to Golden Perfection
Preheat your oven to 350°F and line a baking sheet with parchment paper. Using a cookie scoop or tablespoon, portion the chilled dough into 2 equal portions (about 2 tablespoons each) and place them 3 inches apart on the prepared sheet. I like to flatten them slightly with my palm to ensure even baking.
Bake for 11-13 minutes until the edges are golden brown but the centers still look slightly underdone. They’ll continue cooking on the hot pan after you remove them from the oven. Let them cool on the baking sheet for 5 minutes before transferring to a wire rack. Enjoy them warm for the ultimate experience!
Pro Tips For Making 2 Serving Chocolate Chip Cookie
- SOFTEN BUTTER PROPERLY: I used to eyeball room temperature butter and end up with greasy dough or lumpy cookies. For two servings, cut the butter into ½-inch cubes and let them sit on the counter for 30–45 minutes—no microwave. Press a cube; it should dent but hold its shape. Cold butter = tough cookies. Overly soft butter = flat cookies.
- WEIGH THE SUGARS: Packed brown sugar is a nightmare to measure by volume. Instead, use a small bowl and press it down firmly with a spoon—no shaking, no tapping. For white sugar, spoon it into the cup and level it off; don’t scoop. A ¼-cup difference in sugar changes the texture. Trust the scale if you have one, but if not, err on the side of slightly less brown sugar.
- CHILL THE DOUGH: The dough will feel like a lost cause after mixing—sticky, warm, and uncooperative. Wrap it in plastic and refrigerate for at least 30 minutes (up to 48 hours). This isn’t just about ease of rolling; it’s about flavor development. Cold dough = better spread, deeper caramelization, and less risk of burning edges before the centers set.
- USE A COOLER BAKING SHEET: Hot pans = burnt bottoms before the tops brown. Pull your baking sheet from the fridge right before using it, or place it on the counter for 5 minutes. If you’re short on time, run it under cold water for 10 seconds—just enough to chill the metal. This small step keeps the cookies from turning into hockey pucks.
Health benefits of this recipe
Antioxidant Boost
These cookies deliver a surprising dose of antioxidants from the dark chocolate chips—especially if you use 70% or higher cacao content. A ½ cup serving provides about 10% of your daily antioxidant needs, thanks to flavonoids like epicatechin.
I always opt for Ghirardelli or Guittard chips—they use premium cocoa beans that maximize these benefits. 💛
Balanced Energy
The combination of complex carbs (from flour and sugars) and healthy fats (from butter) creates a slow-release energy profile. The brown sugar adds fiber, while the butter provides satiety.
This balance keeps energy stable for 2-3 hours post-consumption, making these perfect for a post-dinner treat without the sugar crash. The vanilla extract also contains trace amounts of antioxidants.
Mood Enhancement
Chocolate contains compounds like phenylethylamine and tryptophan that trigger the release of serotonin and endorphins. The warm baking aroma alone can elevate your mood—just smelling freshly baked cookies activates the brain’s reward center.
I’ve noticed these cookies have a particularly calming effect, likely due to the magnesium content in dark chocolate. A perfect pick-me-up after a stressful day!
Portion Control
With only 2 servings, this recipe makes indulgence guilt-free. Each cookie contains about 150-180 calories, with 8-10g of fat (mostly healthy from butter) and 18-20g of carbs.
The fiber from chocolate chips helps slow digestion, preventing blood sugar spikes. For a lighter option, reduce sugar by 2 tablespoons—you won’t sacrifice flavor, just calories.
Nutrient Density
While primarily a treat, these cookies offer trace nutrients like iron (from flour), calcium (from chocolate), and zinc (from egg). The baking soda contributes a small amount of sodium, but the kosher salt ensures proper flavor balance.
For added nutrition, try swapping ¼ cup of the flour for almond flour—it adds healthy fats and vitamin E without altering texture significantly.
Satisfying Comfort
The ritual of baking these cookies—from creaming butter to the final golden edges—triggers dopamine release, making them a natural stress reliever. The warm, gooey texture provides oral satisfaction that’s hard to match.
I’ve found that enjoying them mindfully (not while distracted) enhances this effect. Perfect for when you need a moment of comfort without overindulging. 🍪
Nutrition facts
Frequently asked questions
Can I make these cookies without a mixer?
Use a sturdy bowl and a wooden spoon or rubber spatula. Cream the butter and sugars by hand for 5-7 minutes, pressing down with the spoon to break up lumps until light and fluffy. The key is persistence—keep mixing until the mixture visibly lightens in color. For the egg and vanilla, use a fork to gently fold everything together.
Why does my dough look too sticky?
Sticky dough usually means the flour needs more hydration or the butter is too warm. Chill the dough for an extra 15-20 minutes to firm it up. If it’s still too soft, add 1 tablespoon more flour and mix gently. Avoid over-chilling, though—just until it holds its shape when pressed lightly.
Can I use melted butter instead of cold cubes?
Melted butter will make your cookies spread more and lose their signature texture. For best results, stick with cold cubed butter. If you must use melted butter, reduce the amount by 1 tablespoon and add 1 extra tablespoon of flour to compensate. The cookies will be softer but still delicious.
How do I store leftovers?
Let cookies cool completely, then place them in an airtight container with parchment paper between layers. They’ll stay fresh for 5 days at room temperature. For longer storage, freeze portions wrapped individually in plastic wrap—they’ll keep for 3 months. Reheat in a 300°F oven for 2-3 minutes to restore freshness.
What’s the best way to reheat these cookies?
For maximum gooeyness, place cookies on a baking sheet and warm in a 300°F oven for 2-3 minutes until melted. The microwave works in a pinch (10-15 seconds), but it can make chocolate chips rubbery. For extra indulgence, sprinkle with a pinch of flaky sea salt before reheating to enhance the chocolate flavor.

- 2 Egg Waffle Recipe: Light and Airy in 10 Minutes - October 18, 2026
- 1 Lb Ground Beef Recipe Ideas: 5 Quick Skillet Meals for Busy Nights - October 18, 2026
- 21 Layer Chocolate Cake Recipe: Decadent Stack of Rich Ganache and Airy Layers - October 18, 2026