
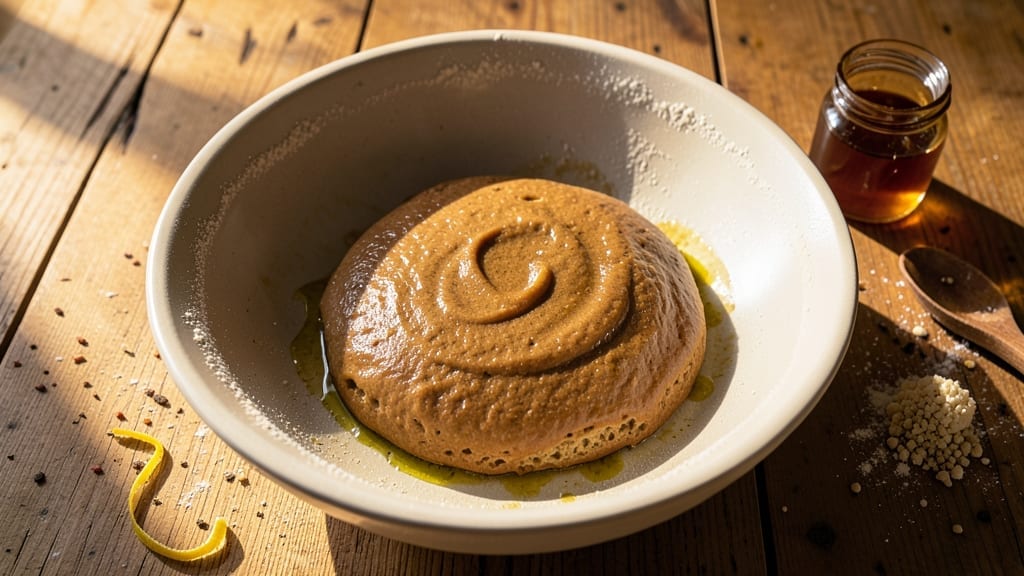
A 24-hour bread dough recipe transforms basic ingredients into artisanal loaves with just time and patience—no kneading required. The secret lies in slow fermentation, which develops deep, complex flavors while building a light, airy crumb structure that store-bought bread can’t match.
I’ve baked dozens of variations, and this method consistently delivers restaurant-quality results at home.
The process begins with a simple mix of flour, water, yeast, and salt, but the magic happens during the 24-hour fermentation. Room-temperature bulk fermentation kickstarts flavor development, while cold-proofing overnight enhances gluten structure and improves texture.
This extended proofing also makes the dough easier to handle, reducing the risk of overproofing that often frustrates home bakers.
What you’ll end up with is a golden, crusty loaf with an open crumb and nutty, tangy flavor—proof that slow fermentation delivers professional results. The dough’s improved elasticity means better oven spring, while the extended fermentation breaks down starches for a more digestible final product.
This isn’t just bread; it’s a foolproof method for achieving bakery-quality flavor in your own kitchen.
Perfect for sourdough enthusiasts or beginners alike, this recipe scales easily for multiple loaves. Once you try bread with this level of flavor development, there’s no going back to quick breads. Let’s get started on creating your first 24-hour fermented loaf—your taste buds will thank you.
Ingredients for 24 hour bread dough
Eight simple ingredients transform into restaurant-quality bread with just time and patience.
| Ingredient | Amount | Notes |
|---|---|---|
| Bread Flour 🌾 | 4 cups | High-protein for better structure |
| Warm Water 💧 | 2 ¼ cups | 105°F for optimal yeast activation |
| Active Dry Yeast 🍞 | ¼ oz | Or 2.25 tsp (1 packet) |
| Kosher Salt 🧂 | 1 ½ tsp | Diamond Crystal preferred |
| Honey 🍯 | 1 tbsp | Or maple syrup for vegan option |
| Olive Oil 🫒 | 2 tsp | Extra-virgin for richness |
| Semolina Flour 🌾 | ¼ cup | For dusting and scoring |
| Cornmeal 🌽 | ¼ cup | For baking surface |
| Ice Water ❄️ | 1 cup | For final shaping |
Bread flour is non-negotiable here—its high protein content develops that signature chewy crumb. King Arthur or Caputo are my go-tos, but any high-protein flour (12-14% protein) works. The yeast needs to be fresh: if it’s past its expiration or smells funky, toss it. Bulk bins at Whole Foods often have fresher yeast than packages. For the water, you’ll want it warm but not hot—think lukewarm bathwater. The honey isn’t just for sweetness; it helps feed the yeast during fermentation. If you’re making multiple loaves, double the batch—this dough scales perfectly.
No honey? Maple syrup or agave works in a pinch, though the flavor will differ slightly. Running short on olive oil? Melted coconut oil or avocado oil are great substitutes. The semolina and cornmeal might seem like small details, but they’re crucial: semolina creates that beautiful crust, while cornmeal prevents sticking. For scoring, I always keep a sharp lame or razor blade handy—dull blades tear the dough instead of cutting cleanly. The ice water might seem counterintuitive, but it helps tighten the gluten structure during final shaping, making those crispy crusts possible.
This dough is your friend—it’s incredibly forgiving. Store it in an airtight container in the fridge for up to 48 hours before baking, which actually enhances the flavor. The longer it ferments, the better it gets. For best results, let it sit at room temperature for 1-2 hours before baking. The dough doubles in size during fermentation, so don’t panic if your bowl looks full. Once baked, these loaves keep well wrapped at room temperature for 3 days or frozen for 3 months. I always bake two loaves—one for today, one for tomorrow.
Why You’ll Love This Recipe
- Foolproof Timing: I swear by this 24-hour schedule—mix it at night, wake up to golden perfection. No rushed mornings, no last-minute stress. That slow rise? It’s what makes the crust actually crispy without burning.
- Honeyed Depth: That little spoon of honey isn’t just for sweetness—it feeds the yeast and adds this subtle caramel note that lingers. The salt balances it just right, so every bite has this warm, almost buttery richness. (Yes, even plain toast feels fancy.)
- Weeknight Magic: I make a batch on Sundays, shape it into rolls or loaves, and stash them in the fridge. Pull out what I need for sandwiches, toast, or garlic bread—no baking required. It’s my secret to effortless meals all week.
- Budget Baking: Five ingredients, zero frills, and it stretches farther than store-bought. Freeze half the dough, and you’ve got backup for when life gets busy. Plus, bread flour and yeast are cheaper than takeout—this is the kind of deal that makes me laugh.
Step-by-step instructions for 24-Hour fermented bread dough
This slow fermentation transforms simple ingredients into bread with unmatched depth of flavor—no kneading required.
Activate the Yeast and Begin the Ferment
In a large mixing bowl, combine the 4 cups bread flour with the 1.5 tsp kosher salt and whisk to aerate. In a separate small bowl, whisk together the 2.25 cups warm water (should feel like bathwater, around 105°F) with the 0.25 oz active dry yeast and 1 tbsp honey. Let this mixture sit for 5 minutes until it becomes frothy—this confirms your yeast is active.
Pour the yeast mixture into the dry ingredients and add the 2 tsp olive oil. Using a wooden spoon, stir until just combined, being careful not to develop gluten prematurely. The dough will look shaggy and uneven, which is perfect for this method. Cover the bowl loosely with plastic wrap and let it rest at room temperature for 1 hour. You’ll notice bubbles forming and the dough expanding—this is your ferment beginning.
Let the Magic Happen Overnight
After the initial hour, give the dough a gentle stir to redistribute any settled ingredients. Then, cover the bowl again and place it in the refrigerator for the full 24 hours. This cold fermentation develops complex flavors and improves the dough’s structure without requiring your attention. The dough will rise slowly but steadily, eventually doubling in size. Poke it gently with your finger—it should spring back slowly but leave a slight indentation.
Here’s the thing—resist the urge to peek or stir during this time. Every disturbance releases gas and can disrupt the fermentation process. The cold slows yeast activity just enough to build flavor without overproofing. When you remove it from the fridge, you’ll notice a rich, tangy aroma—this is your reward for patience.
Shape and Prepare for Baking
Lightly flour a clean work surface with some of the 0.25 cup semolina flour. Turn out the dough and gently shape it into a loose round by folding the edges toward the center. Don’t worry about perfection—this isn’t a tight boule or batard. Place the shaped dough on a baking sheet dusted with 0.25 cup cornmeal, cover it with a clean kitchen towel, and let it rest at room temperature for 1 hour. This final proof allows the gluten to relax and the dough to develop its final structure.
During this resting period, preheat your oven to 425°F. The cornmeal creates a non-stick surface that prevents the dough from sticking while allowing steam to circulate during baking. If you’re making multiple loaves, shape them all at once and let them rest together—they’ll benefit from each other’s warmth.
Score and Bake to Golden Perfection
Just before baking, score the top of each dough round with a sharp razor or serrated knife. Make a simple crosshatch pattern—this allows steam to escape and prevents the loaf from bursting unevenly. Transfer the scored dough to a preheated baking stone or inverted baking sheet in your oven. Bake for 30-35 minutes until the crust is deep golden brown and sounds hollow when tapped on the bottom.
For the first 10 minutes, bake with the oven door slightly ajar to create steam. This helps develop that beautiful oven spring. After that, close the door and continue baking until the internal temperature reaches 205°F when measured with an instant-read thermometer. The bread should have a crisp crust and a soft, airy crumb with an open, irregular texture—proof of the slow fermentation process.
Pro Tips For Making 24 Hour Bread Dough
- Use a Thermometer for Water: I learned this the hard way—yeast hates extremes, and guessing “warm” leads to sluggish or overactive dough. Aim for 95°F (35°C) for the water; anything hotter kills the yeast, and cooler water makes it work too hard. A cheap instant-read thermometer solves this forever.
- Mix Salt and Honey First: Skip the “sprinkle-and-stir” approach—dissolve the kosher salt and honey in the warm water before adding yeast. This prevents salt from inhibiting yeast activity upfront (salt needs time to hydrate fully), and the honey dissolves better without flour clumping around it. Trust me, your dough will rise faster.
- Stretch and Fold at 2-Hour Intervals: The 24-hour rest is where magic happens, but neglecting folds means weak gluten. Every 2 hours for the first 8 hours, do 3-4 stretch-and-folds—grab the dough from one side, stretch it up, and fold it over itself. It’s tedious, but this builds structure that a single bulk ferment can’t. (Yes, even if you’re tired.)
- Cover with Damp Towel, Not Plastic: Plastic wrap traps condensation and turns your dough into a soggy mess. Use a lightly damp kitchen towel instead—it keeps moisture in without suffocating the dough. After 12 hours, switch to a loose plastic bag if your kitchen’s dry. Your dough’s crust will thank you.
Creative variations of this dish
Sourdough Starter Swap
Replace the commercial yeast with ¼ cup active sourdough starter (fed and bubbly) to create a hybrid loaf. Reduce the honey to ½ tbsp since the starter adds natural sweetness. This version develops even more complex flavors over the 24 hours, with a tangy depth that rivals traditional sourdough.
I’ve found that using a starter with 100% hydration works best for this adaptation. 🌱
Whole Wheat Boost
Substitute 1 cup of the bread flour with whole wheat flour for a nutty, heartier loaf. The extra fiber requires 1 extra tablespoon of water to maintain proper hydration. Whole wheat dough ferments slightly slower, so extend the cold proof to 26 hours for optimal flavor development.
The crust will be darker and the crumb denser, but the flavor is worth every bite.
Seeded Crust Enhancement
Add 2 tablespoons of mixed seeds (sunflower, sesame, or pumpkin) to the semolina flour used for dusting and scoring. Press the seeds lightly into the dough surface before baking for a beautiful, textured crust.
I like using King Arthur’s Everything Bagel Seasoning Mix instead of plain seeds for extra flavor. These seeds add crunch and visual appeal while complementing the bread’s nutty undertones.
Herb-Infused Variation
Mix 1 tablespoon chopped fresh rosemary or thyme directly into the dough during the initial mixing. The herbs infuse the dough with aromatic notes during the long fermentation, creating a fragrant loaf perfect for soups or charcuterie boards.
For a stronger flavor, use ½ teaspoon dried herbs instead. The herbs pair beautifully with the bread’s natural sweetness from the honey.
Sweet Brioche Twist
Add ¼ cup granulated sugar and 1 extra egg yolk to the dough for a richer, slightly sweet brioche-style loaf. The sugar feeds the yeast for extra rise, while the egg yolk adds moisture and tenderness.
This version has a softer crumb and a more pronounced caramelized crust. I recommend brushing the baked loaf with a simple syrup glaze (equal parts sugar and water, heated until dissolved) for extra shine.
Gluten-Free Adaptation
For a gluten-free version, replace the bread flour with 2 cups gluten-free all-purpose flour blend (like Bob’s Red Mill 1:1) and add ½ cup vital wheat gluten to improve structure. Increase the water to 2.5 cups and let the dough ferment for 26 hours in the fridge.
The texture won’t be identical, but it’s surprisingly close to the original. The gluten-free version benefits from an extra 15 minutes** in the oven for proper browning.
Nutrition facts
Frequently asked questions
Can I use all-purpose flour instead of bread flour?
The texture will be slightly less chewy and open, but it’s absolutely possible! For best results, add 1 extra tablespoon of vital wheat gluten per 4 cups of all-purpose flour to mimic bread flour’s protein content. The flavor won’t be quite as developed, but the bread will still be delicious. This works especially well for the whole wheat variation.
Why does my dough smell so strong after 24 hours?
That tangy, almost vinegary aroma is a good sign—it means fermentation is working perfectly! The cold proofing creates lactic and acetic acids that deepen the flavor. If it smells overly sour (like spoiled milk), your dough may have overproofed. In that case, bake immediately to capture the developed flavor before it becomes too acidic.
Can I make this dough in a stand mixer?
While this recipe is designed for minimal handling, you can use a stand mixer with the dough hook on low speed for 2-3 minutes after the initial 1-hour rest. This helps develop gluten slightly without overworking it. Just be gentle—overmixing will make the dough tough. The no-knead method works best with hands or a wooden spoon for the shaggy texture.
What if I forget to take the dough out of the fridge?
No problem! The dough can safely stay in the fridge for up to 48 hours—the flavor actually improves with time. When ready to bake, let it sit at room temperature for 1-2 hours before shaping. The dough may be slightly less springy but will still bake beautifully. This is why the recipe is so forgiving—it rewards patience rather than punishing mistakes.
How do I know when the bread is fully baked?
Look for three signs: 1) The crust should be deep golden brown with crisp spots, 2) The internal temperature should reach 205°F when measured with an instant-read thermometer, and 3) The bread should sound hollow when tapped on the bottom. If you don’t have a thermometer, the pull test works too—gently pull the bread apart; if it resists and springs back slightly, it’s done.

- 12 Bean Chili Recipe: Hearty Slow-Cooked Depth With 12 Legumes - October 17, 2026
- 5 Seed Bread Recipe: Nutty Crunch and Artisan Flavor in One Loaf - October 17, 2026
- 1 Lb Macaroni Salad Recipe: Bold, Crunchy, and Crowd-Pleasing - October 17, 2026