
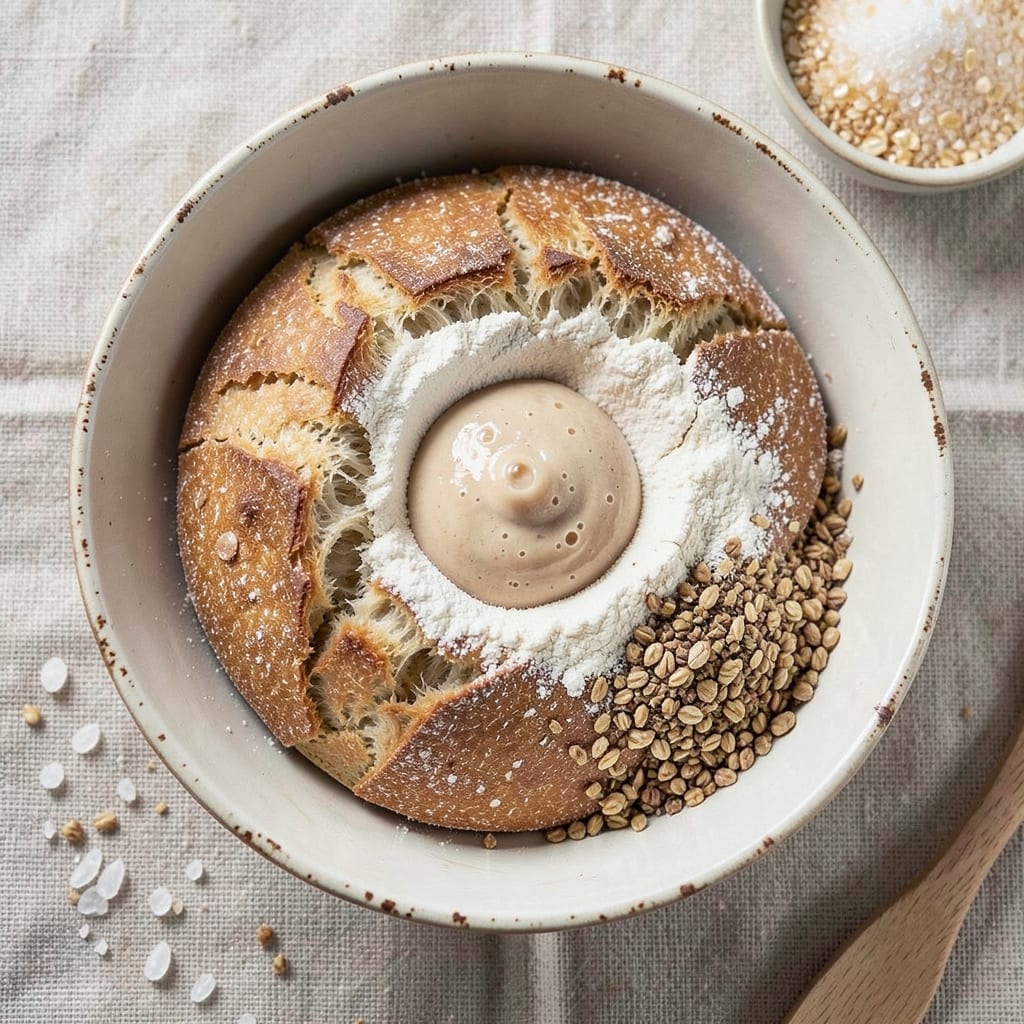
Mastering 24-hour sourdough bread transforms your kitchen into a bakery where every loaf develops tangy depth and an open crumb structure that rivals artisanal bakeries. The secret lies in the cold fermentation—letting time work its magic at refrigerator temperatures to develop flavor while strengthening gluten for that signature oven spring.
This method is perfect for beginners eager to embrace tradition without the complexity of overnight schedules.
Unlike rushed recipes, this 24-hour process builds flavor through controlled fermentation, creating a loaf with a crisp crust and airy interior. The key steps—mixing, bulk fermentation, cold proof, shaping, and baking—each play a crucial role in achieving that professional-quality texture.
No special equipment is needed beyond a mixing bowl and Dutch oven (for that iconic crust), making it accessible yet impressive.
What you’ll achieve is a loaf with a golden, crackly crust and a crumb so open it practically melts in your mouth. The tangy notes from fermentation elevate every bite, making it ideal for sandwiches, toast, or simply enjoying as-is.
The beauty of this method is its flexibility—adjust hydration levels or fermentation times to suit your kitchen’s conditions.
Whether you’re baking for a crowd or treating yourself, this recipe delivers restaurant-quality results with minimal effort. The cold proof does the heavy lifting while you sleep, ensuring you wake up to a freshly baked loaf ready to share. Let’s get started on your first perfect loaf.
Ingredients for 24 hour sourdough bread
Simple ingredients transform into a loaf with restaurant-quality tang and texture through time and patience.
| Ingredient | Amount | Notes |
|---|---|---|
| Active Sourdough Starter 🍞 | ¼ cup | 100% hydration, bubbly and active |
| All-Purpose Flour 🌾 | 3 ½ cups | King Arthur or Bob's Red Mill preferred |
| Whole Wheat Flour 🌾 | ½ cup | For added flavor and nutrition |
| Granulated Sugar 🍚 | ½ tsp | Feeds yeast for fermentation |
| Salt 🧂 | 1 ½ tsp | Diamond Crystal preferred |
| Water 💧 | 2 ¼ cups | Filtered or dechlorinated |
| Vegan Butter 🧈 | ½ tbsp | Miyoko's or Earth Balance |
| Olive Oil 🫒 | 1 tbsp | Extra-virgin for richness |
| Flaxseed Meal 🌱 | 1 tbsp | For dough strengthener |
| Vegan Milk 🥛 | ¼ cup | Almond or oat milk for softness |
The sourdough starter is your secret weapon—it should be bubbly and active (like a jiggly Jell-O) before using. King Arthur or Bob’s Red Mill flour yield the best results due to their high gluten content, but any bread flour works. For the starter, I keep mine in a glass jar on my countertop, feeding it daily with equal parts flour and water. If you’re new to sourdough, look for a starter that’s been maintained for at least 7 days—it’ll have more complex flavors. The flaxseed meal adds structure without eggs; mix it with water to form a gel before adding to the dough.
No vegan butter? Coconut oil or extra olive oil works in a pinch, though texture may vary slightly. Short on whole wheat flour? Substitute with more all-purpose, but expect a denser crumb. The olive oil should be extra-virgin and fruity—avoid the cheap stuff that tastes like soap. For hydration flexibility, adjust water by 1 tbsp up or down based on your flour’s absorption (King Arthur runs slightly drier). The vegan milk adds softness; if you’re out, aquafaba (chickpea brine) works too—just use the same amount. Always measure flour by weight if possible for consistency, but cups work fine for beginners.
Mix your starter and dough in stainless steel or glass—plastic can react with the acidity. Let the dough rest in a lightly oiled bowl covered with a damp towel for the bulk fermentation. For cold proofing, place the shaped dough in the fridge overnight (12-16 hours)—this slows fermentation for better flavor development. The loaf keeps well at room temperature for 2 days wrapped in a towel, or 5 days in the fridge. For longer storage, freeze slices wrapped in parchment for up to 3 months. To revive stale bread, sprinkle with water and toast—it’ll taste fresh again.
Why You’ll Love This Recipe
- No-Knead Magic: I’ll admit—this recipe feels like cheating. Just mix your starter with flour, a pinch of sugar, and salt, then let time do the work. The dough develops overnight, so you’re not stuck kneading for hours (or dealing with sore arms).
- Tangy Crust, Soft Core: That whole wheat flour gives it a nutty depth, while the sugar just hints at sweetness without being cloying. The crust? Crisp enough to hold up to toast, but the inside stays pillowy—like a hug from your favorite bakery.
- Weeknight Workhorse: Between us, I make this at least twice a week. It’s the base for French toast (yes, even on a Tuesday night), sandwiches for packed lunches, or just straight-up buttered slices when I’m too tired to plan dinner.
- Budget-Friendly Staple: Honestly, this recipe stretches my grocery budget. A small starter and a few cups of flour go a long way, and the bread freezes beautifully. I pull out a loaf straight from the freezer for lazy mornings—no waste, all flavor.
Step-by-step instructions for 24-Hour sourdough bread
This method delivers a perfectly fermented loaf with an open crumb and tangy depth—no kneading required.
Mix and Autolyse the Dough
In a large mixing bowl, combine the 3.5 cups all-purpose flour and 0.5 cup whole wheat flour. Create a well in the center and add the 0.25 cup active sourdough starter, 0.5 tsp granulated sugar, and 1.5 tsp salt. Gently mix with a wooden spoon until just combined, then slowly pour in the 2.25 cups water while stirring.
Once incorporated, add the 1 tbsp flaxseed meal and 1 tbsp olive oil, mixing until a shaggy dough forms. Let it rest for 10 minutes while you prepare the next step. This initial mix creates a stable gluten structure without overworking the dough.
Hydrate and Develop the Dough
After the 10-minute rest, wet your hands and perform a series of stretch-and-folds every 30 minutes for 2 hours. To do this, dip your fingers in water, grab one side of the dough, stretch it upward, and fold it over itself. Rotate the bowl and repeat, working all sides. This builds strength without kneading.
After the final fold, cover the bowl with a damp towel and let the dough rest at room temperature for 20 minutes. This autolyse stage allows the flour to fully hydrate and gluten to relax, making the dough easier to shape later. You’ll notice it becomes slightly smoother and more cohesive.
Shape and Bulk Ferment
Lightly oil your hands and divide the dough into 4 equal portions (about 12 ounces each). Shape each into a round boule by pulling the edges toward the center while rotating the dough. Place the shaped dough onto a floured surface, seam-side up, and cover with the damp towel.
Let the dough bulk ferment at room temperature for 18-20 hours. The ideal fermentation occurs when the dough has doubled in size and shows active bubbles along the surface. For best results, maintain a consistent temperature between 70-75°F—warmer environments speed fermentation, while cooler ones slow it down.
Pre-Shape and Cold Proof
After the bulk fermentation, gently deflate each boule by pressing down with your fingertips. Reshape them into tight rounds, then place them onto a floured baking sheet or proofing basket, seam-side up. Cover with the damp towel and refrigerate for 8-12 hours. This cold proofing enhances flavor development and improves oven spring.
During this time, the dough will rise slowly but steadily. When ready, it should feel springy when pressed lightly and show visible expansion. The cold environment also helps the gluten relax, making final shaping easier. Remove the dough from the fridge 1 hour before baking to allow it to come to room temperature.
Score and Bake for Maximum Crisp
Preheat your oven to 475°F with a Dutch oven inside for 45 minutes. Using a sharp lame or razor blade, score each boule ½-inch deep in a crosshatch or diagonal pattern. This prevents over-expansion and creates that iconic crust.
Carefully transfer the scored dough to the hot Dutch oven, cover, and bake for 20 minutes. Remove the lid and bake for an additional 20-25 minutes until the crust reaches a deep golden brown and sounds hollow when tapped. The internal temperature should reach 205-210°F.
Cool and Enjoy
Remove the bread from the Dutch oven and let it cool on a wire rack for at least 1 hour before slicing. This resting period allows the steam to escape, preventing a gummy crumb. The finished loaf should have a crisp exterior, an open crumb structure, and a tangy depth from the long fermentation.
Slice and serve warm with vegan butter or olive oil for the ultimate experience. Store leftovers in an airtight container at room temperature for up to 3 days or freeze for longer storage. The flavor continues to develop over time, making each slice even more delicious.
Pro Tips For Making 24 Hour Sourdough Bread
- Scale the Starter: Weigh your active sourdough starter—don’t eyeball it. A 100g starter with 100% hydration (1:1 flour-to-water ratio) gives you predictable fermentation. I used to guess, and my bread turned out either too dense or too sour. Grab a kitchen scale and stick to the numbers.
- Mix Whole Wheat Last: Add the whole wheat flour after autolyse and initial mixing. It’s grittier and absorbs water differently, so blending it in last keeps the dough smoother and easier to handle. I learned this after fighting a sticky, uneven mess—now my dough stretches like butter.
- Skip the Overproofing: Stop folding when the dough springs back slowly (not instantly) when poked. Overproofing kills the structure, and you’ll end up with a sad, dense loaf. I once left mine an extra hour, and it collapsed like a pancake. Trust your fingers—if it’s ready, bake it.
- Steam the First 10 Minutes: Use a metal bowl of boiling water in your oven for the first 10 minutes of baking. This isn’t optional—it’s what gives sourdough that crackly crust and open crumb. I skipped it once (thinking I was saving time), and the bread turned out dense and flat. Don’t be lazy here.
Perfect pairings for this recipe
Classic Pairings
Serve your freshly baked sourdough with vegan butter (like Miyoko’s) and a drizzle of extra-virgin olive oil—the tangy crust soaks up the richness beautifully. I love pairing it with avocado slices and sliced heirloom tomatoes for a simple, vibrant charcuterie board.
The open crumb structure makes it perfect for sandwiches too—try hummus and cucumber or vegan pesto with roasted veggies. 🥗
Sweet Toppings
For breakfast, slather slices with almond butter and drizzle with maple syrup for a naturally sweet treat. I also love sprinkling crushed walnuts and cinnamon on warm toast—it feels like a cozy dessert.
A dollop of vegan ricotta with honey (or agave) adds a creamy contrast to the crusty bread. The long fermentation balances the sweetness perfectly.
Savory Spreads
For lunch or dinner, try olive tapenade or vegan goat cheese with a sprinkle of flaky sea salt.
I make a quick garlic-herb spread by blending 2 tbsp vegan cream cheese, 1 minced garlic clove, 1 tbsp chopped parsley, and a pinch of red pepper flakes. The sourdough’s acidity cuts through the richness, creating a harmonious bite. 🧈
Beverage Pairings
A chilled glass of sparkling water with lemon cleanses the palate between bites, while black coffee enhances the bread’s depth. For something richer, a dry white wine like Sauvignon Blanc complements the tangy notes.
If you prefer tea, earl grey or hibiscus tea adds a floral contrast that pairs surprisingly well with the crust. Avoid heavy, oaky wines—they’ll overpower the delicate fermentation flavors.
Global Variations
In Italy, sourdough is often paired with tomato-basil bruschetta or proscuitto (use vegan prosciutto for this version). French bakers serve it with herb butter and radish slices, while Scandinavian traditions include smoked salmon and dill cream cheese.
For a modern twist, try miso caramel or spicy harissa—the heat and umami balance the bread’s tang perfectly. 🌍
Nutrition facts
Frequently asked questions
Why does this recipe use a 24-hour cold proof?
The cold proofing stage (8-12 hours in the fridge) is crucial for developing complex flavors and improving texture. The slow fermentation enhances gluten relaxation, creating a lighter crumb and deeper tang. It also gives you flexibility—just shape the dough in the evening and bake in the morning without rushing.
Can I make this without a Dutch oven?
Yes! If you don’t have a Dutch oven, bake the loaf on a preheated baking sheet at 475°F for 30 minutes, then cover with a metal bowl or foil tent for another 15 minutes. For extra crispiness, finish uncovered. The crust won’t be as dramatic, but the bread will still have great flavor and structure.
What if my dough doesn’t rise during bulk fermentation?
Check your starter first—it should be bubbly and active. If not, feed it 1:1:1 (flour:water:starter) by weight and wait 4-6 hours before using. Cold temperatures slow fermentation: if your kitchen is below 70°F, extend bulk fermentation to 24 hours. For future bakes, try a warmer spot (like near the oven with light on) for consistent results.
How do I know when the bread is fully baked?
Look for a deep golden brown crust and listen for a hollow sound when tapped on the bottom. The internal temperature should reach 205-210°F. If unsure, bake 5 more minutes—the bread can continue cooking slightly after removal. Always cool completely before slicing to prevent a gummy texture.
Can I add seeds or nuts to this recipe?
Add 1-2 tablespoons of seeds (like sesame or flax) or chopped nuts directly to the dough during mixing. For extra flavor, mix them into the flour before combining with other ingredients. Just reduce the water by 1-2 teaspoons to account for the extra absorption from the add-ins.

- Baked Potatoes in Crock Pot Recipe: Buttery Interiors and Crispy Top Magic - November 1, 2026
- Braised Beef Short Ribs Recipe: Crock Pot Fall-Off-Bone Magic in 6 Hours - November 1, 2026
- Crock Pot Cocoa Recipe: Velvety Warmth With Hidden Spice Magic - November 1, 2026