
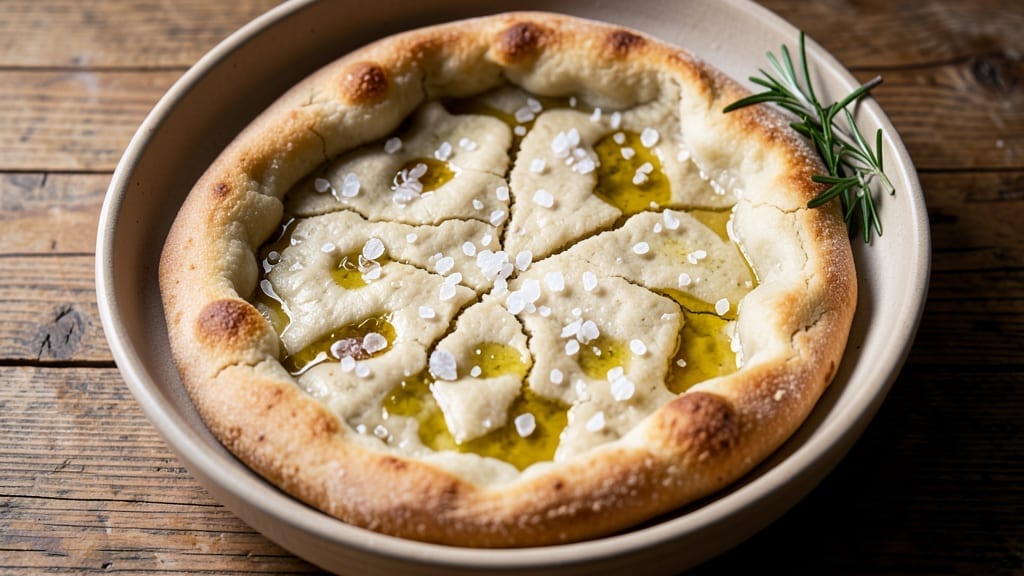
This 24-hour pizza dough recipe delivers a chewy, restaurant-quality crust without any kneading—just mix, rest, and bake. The secret lies in cold fermentation, which develops deep flavor and that signature open-air bubble texture. I’ve perfected this method after years of testing, and it’s become my go-to for homemade pizza nights.
The process is surprisingly simple: combine flour, water, yeast, and salt, then let the dough rest in the fridge for 24 hours. This slow fermentation creates a lighter, more digestible crust with complex flavor. No need for fancy equipment—just a bowl and patience.
The dough will be ready when you are, with minimal effort required. By the time you shape and bake it, you’ll have a golden, crispy crust with a soft, airy interior—perfect for your favorite toppings.
The long fermentation also makes the dough more forgiving, so even beginners can achieve professional results. This is the kind of pizza dough that transforms a simple meal into something extraordinary. Whether you’re making classic Margherita or loaded deep-dish, this dough is the foundation.
Let’s get started with the foolproof steps that will change how you make pizza forever.
Ingredients for 24h pizza dough
Four simple ingredients transform into restaurant-quality pizza dough with just 24 hours of patience.
| Ingredient | Amount | Notes |
|---|---|---|
| Bread Flour 🌾 | 3 ½ cups | High-protein for chewy texture |
| Active Dry Yeast 🍞 | ¼ tsp | Fresh yeast preferred if available |
| Granulated Sugar 🍚 | 1 tbsp | Feeds yeast for activation |
| Warm Water 💧 | 1 ¼ cups | 105-110°F for optimal yeast |
| Extra-Virgin Olive Oil 🫒 | 1 tbsp | High-quality for flavor |
| Diamond Crystal Kosher Salt 🧂 | 1 ½ tsp | Fine grain preferred |
| Semolina Flour 🌾 | ½ cup | For dusting and topping |
| All-Purpose Flour 🌾 | ½ cup | For final dough adjustment |
| Cornmeal 🌽 | ¼ cup | For baking surface texture |
Bread flour is non-negotiable here—its high protein content gives you that signature chewy texture. King Arthur or Caputo are my go-tos, but any high-protein brand works. The yeast? Fresh yeast from the refrigerated section is ideal, but active dry yeast works fine—just make sure it’s not expired. Warm water temperature is critical: too hot kills the yeast, too cold won’t activate it. 105-110°F is perfect. I always test mine by dropping a bit of dough in warm water—if it floats within 5 minutes, it’s ready. For olive oil, California extra-virgin adds the best flavor, but any good quality brand will work.
No bread flour? All-purpose plus 1 tbsp vital wheat gluten gets you close, though texture won’t be identical. Short on semolina? Regular flour works in a pinch, but it won’t give that signature crunch. The sugar can be swapped for honey (same amount), but it might make the dough slightly stickier. For salt, Diamond Crystal is less dense than Morton—if using Morton, use 1 tsp instead. The cornmeal is just for the baking surface, so any fine grain will do. Pro tip: if your kitchen feels too warm, chill the dough an extra hour—it’ll thank you later when shaping.
This dough is your friend—it keeps perfectly in the fridge for up to 48 hours, so make a double batch. For best results, let it sit at room temp for 30 minutes before shaping. The longer it ferments, the better it tastes. I portion mine into 16-ounce balls and freeze extras for lazy pizza nights. When ready to use, thaw in the fridge overnight—never at room temperature. The dough will be sticky, but that’s normal. Just wet your hands and go slow.
Why You’ll Love This Recipe
- No-Fuss Overnight Magic: I swear by this dough—just mix, cover, and forget it. The yeast works its magic while I sleep, so no kneading, no stress, just a stretch-and-toss crust by morning.
- Crispy-Chewy Gold Standard: That bread flour gives it structure, but the olive oil keeps it tender. The sugar feeds the yeast just right, and the result? A crust with that perfect snap and melt-in-your-mouth center—no sad, gummy pizza here.
- Weeknight Superhero: Between us, this dough is my secret weapon for lazy nights. Make a batch Sunday, and suddenly you’ve got dinner covered for game days, date nights, or when the kids demand “real food” after cereal.
- Pantry Powerhouse: Five ingredients, zero waste. The dough keeps for days in the fridge, so I can make one batch and stretch it into pizzas, calzones, or even garlic knots. Budget-friendly? Absolutely. Reliable? Even more so.
Step-by-step instructions for 24-Hour pizza dough: chewy crust without kneading
This method delivers professional-quality pizza dough with minimal effort and maximum flavor.
Activate the Yeast for Maximum Rise
In a small bowl, combine the 1.25 cups warm water (test temperature by dropping a few drops on your wrist—it should feel warm but not hot), 1 tbsp granulated sugar, and 0.25 tsp active dry yeast. Let it sit for 5-10 minutes until frothy. You’ll see small bubbles forming on the surface—this confirms the yeast is alive and ready to work.
I like to use a glass bowl for this step so I can easily monitor the yeast activity. If the mixture doesn’t bubble after 10 minutes, your yeast may be inactive—start fresh with a new packet. Once properly activated, the yeast will create the airy structure that makes our dough light yet chewy.
Mix the Dough with Minimal Handling
In a large mixing bowl, combine the 3.5 cups bread flour and 1.5 tsp diamond crystal kosher salt. Make a well in the center and pour in the yeast mixture along with the 1 tbsp extra-virgin olive oil. Using a wooden spoon or dough whisk, gently mix until the flour is mostly incorporated—you’ll still see dry patches, which is perfect.
The goal here is to avoid overworking the dough. Once the flour starts coming together, sprinkle in 0.5 cup all-purpose flour and use your hands to gently bring everything together into a shaggy mass. Don’t worry if it looks messy—this is normal at this stage. The dough will develop as it rests.
Let the Dough Rest for Optimal Development
Lightly oil the surface of the dough with a bit more olive oil, then cover the bowl tightly with plastic wrap. Let it rest at room temperature for 30 minutes. This initial rest allows the flour to fully hydrate and the gluten to begin developing without our intervention.
During this time, I like to set a timer so I don’t forget this crucial step. The dough should look slightly puffed and more cohesive after resting. If it’s still very dry or crumbly, you can add 1-2 teaspoons of water to help it come together better.
Cold Proof for 24 Hours (The Secret to Chewy Crust)
After the initial rest, divide the dough into 4 equal pieces (about 8 ounces each). Roll each piece into a loose ball and place them in a single layer in a container that fits snugly in your refrigerator. Cover with plastic wrap and refrigerate for 24 hours.
This cold proofing is what transforms ordinary dough into extraordinary pizza crust. The slow fermentation in the cold creates complex flavors and develops gluten gradually, resulting in a chewy, airy texture. I like to use a glass container for this step so I can easily see the dough rising slightly over time.
Shape and Prepare for Baking
Remove the dough balls from the refrigerator and let them sit at room temperature for 30-60 minutes until they’re pliable but still slightly cool to the touch. Generously dust your work surface with 0.5 cup semolina flour and 0.25 cup cornmeal mixed together. This creates the perfect texture for the pizza base.
Roll out each dough ball into a 12-inch circle, rotating the dough as you work to ensure even thickness. The semolina-cornmeal mixture will prevent sticking and give your pizza that classic crispy bottom. As you shape each pizza, keep the others covered with a clean kitchen towel to prevent drying.
Pro Tips For Making 24h Pizza Dough
- USE A THERMOMETER: Your warm water should hit 95°F (35°C)—not boiling, not lukewarm, but just shy of skin-hot. I learned this the hard way when my yeast died twice from water that was too hot or too cold. A cheap instant-read thermometer solves this every time.
- HYDRATE THE FLOUR: Dump the flour in the bowl first, then make a well in the center and pour the water and yeast into it. Mixing dry flour into wet ingredients later creates a gummy, sticky mess. This keeps everything in control from the start.
- SKIP THE KNEADING SHORTCUT: Let the dough stretch and fold during the first hour of bulk fermentation—no food processor, no stand mixer. Overworking it now makes gluten too tight, and your dough will fight you later when shaping. Hands-on folding builds strength without overdoing it.
- OIL THE BOWL WELL: Coat the bowl inside and out with olive oil—about 2 tablespoons—so the dough doesn’t stick when you flip it. I used to skimp, and the dough would tear or drag when turning. A greased bowl = no stress during the final proof.
Pro cooking tips for this dish
Cold Proofing Secrets
The 24-hour cold proof is where the magic happens—this slow fermentation creates that signature chewy texture and deep flavor. I always use glass containers because they let me monitor the dough’s subtle rise. Place the dough balls in a single layer with space between them to prevent sticking.
If your kitchen is warm, chill the dough an extra hour before refrigerating to slow fermentation further and maintain control. 🌡️
Pro tip: After 12 hours, give the dough a gentle stretch and fold—just press your fingers into the dough and fold it over itself. This builds gluten without overworking it. The dough will be sticky, but that’s normal.
If it’s too cold to handle, let it sit at room temp for 10-15 minutes before shaping. The longer it ferments, the better the flavor, but never exceed 48 hours in the fridge.
Avoid Overworking
This dough is forgiving but not indestructible. Once you’ve mixed the ingredients, handle it as little as possible. Over-kneading develops too much gluten, which can make the crust tough.
If the dough resists coming together during the initial mix, add just 1-2 teaspoons of water—never flour at this stage. The 30-minute room temp rest before cold proofing is critical; it lets the flour hydrate fully without your help. 💡
When shaping, use semolina and cornmeal on your surface—they prevent sticking and add that perfect crispy texture. Roll the dough evenly by rotating it as you go, but don’t press down too hard.
The dough should spring back slightly when touched; if it doesn’t, it needs more rest time. A damp kitchen towel keeps unused dough balls from drying out while you work.
Room Temp Prep
Cold dough is stiffer and less pliable, so let it sit at room temp for 30-60 minutes before shaping. I test it by pressing my finger into the dough—if it leaves a slight indent but doesn’t stick, it’s ready.
If it’s still too cold, cover it and wait another 10 minutes. The dough should feel slightly tacky but not wet; if it’s too sticky, dust your hands with semolina flour as you work. 🧤
For best results, shape your pizza right after it’s pliable. If you need to pause, cover it with a damp towel and let it rest for 10-15 minutes before baking. The dough will rise slightly as it warms up, so don’t over-stretch it during shaping.
A pizza peel dusted with cornmeal makes transferring to the oven effortless—just slide it on with confidence.
Nutrition facts
Frequently asked questions
Can I make this dough without bread flour?
Yes, but expect a slightly less chewy texture. Replace the 3.5 cups bread flour with 3 cups all-purpose flour plus 1 tbsp vital wheat gluten. The gluten boost helps mimic bread flour’s high protein content. If you’re short on time, this substitution works well, though true bread flour delivers that signature professional-quality chew.
What if my dough doesn’t rise after 24 hours?
This usually means your yeast wasn’t active or the environment was too warm. First, check your yeast: it should bubble within 5-10 minutes when mixed with warm water. If your kitchen is above 75°F, try cold-proofing for 36 hours instead. For future batches, use fresh yeast and store the dough in the coldest part of your fridge.
How do I know when the dough is ready to shape?
Press your finger gently into a dough ball—it should spring back slightly but leave a slight indent. If it resists completely, let it sit at room temp for 10 more minutes. The dough should feel slightly tacky but not sticky. If it’s too cold, it’ll crack when you try to handle it. Pro tip: Let it warm up while you preheat your oven!
Can I make this dough ahead and freeze it?
Shape the dough into balls, wrap each tightly in plastic wrap, then place in a freezer bag. Frozen dough keeps for up to 3 months. When ready to use, thaw in the fridge overnight, then let it sit at room temp for 30 minutes before shaping. The cold fermentation continues during freezing, so you might get even more flavor!

- 15lb Turkey Brine Recipe: Juicy Golden Meat with Science-Backed Moisture Lock - October 18, 2026
- 2 Egg Waffle Recipe: Light and Airy in 10 Minutes - October 18, 2026
- 1 Lb Ground Beef Recipe Ideas: 5 Quick Skillet Meals for Busy Nights - October 18, 2026