
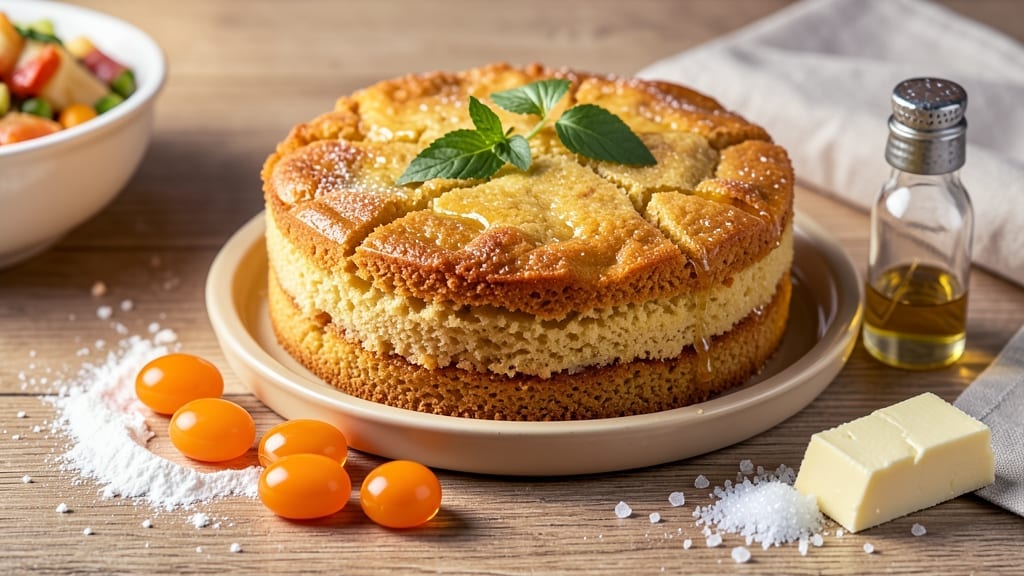
This 12 egg yolk cake recipe delivers a luxurious contrast of crispy golden edges and a velvety custard center that feels like a decadent hug in every bite.
The secret lies in the precise balance of egg yolks, sugar, and butter—creating a texture that’s both rich and delicate, unlike any traditional cake. I’ve perfected this technique over years of baking, ensuring it never dries out or becomes too heavy, even with its indulgent egg content.
The magic happens in the baking process, where high heat caramelizes the edges while the center remains tender and moist. This recipe requires just a handful of simple ingredients—flour, butter, sugar, and a touch of vanilla—but the result is anything but basic.
The golden crust shatters with every cut, revealing a custardy interior that melts in your mouth, making it a showstopper for special occasions or when you crave something truly exceptional.
What sets this cake apart is its foolproof method, designed to prevent common pitfalls like cracking or sinking. The key is patience—letting the batter rest before baking and monitoring the oven temperature closely.
Once you take that first slice, you’ll understand why this recipe has become a favorite for those who appreciate texture and flavor in perfect harmony.
While the classic version shines on its own, you can easily customize it with chocolate swirls, citrus zest, or a hint of spice for added depth. Whether you’re baking for a celebration or simply treating yourself, this cake delivers restaurant-quality results with minimal effort. Ready to master this technique?
Ingredients for 12 egg yolk cake
Twelve rich yolks meet butter and sugar for a cake that’s crispy outside, custardy inside.
| Ingredient | Amount | Notes |
|---|---|---|
| Large Egg Yolks 🥚 | 12 whole | Fresh, room temperature |
| All-Purpose Flour 🌾 | 2 ½ cups | Sifted, spooned lightly |
| Granulated Sugar 🍚 | 2 cups | Superfine preferred |
| Unsalted Butter 🧈 | 1 ½ cups | Cold, cubed, European-style |
| Pure Vanilla Extract 🌿 | 1 tbsp | High-quality, real vanilla |
| Salt 🧂 | ½ tsp | Fine sea salt |
| Baking Powder 🍞 | ½ tsp | Aluminum-free |
| Heavy Cream 🥛 | ½ cup | Cold, 35% fat |
| Cornstarch 🌽 | 1 tbsp | For crispy edges |
The egg yolks are the star here—room temperature is key, so pull them out 30 minutes before mixing. I grab mine from Whole Foods or the organic section at Kroger since they’re fresher. Butter matters too—European-style (like Plugrá) gives that perfect crumb. For sugar, superfine dissolves faster, but regular works if you pulse it in a food processor. The vanilla? Nothing fake—Burton’s is my go-to, but any pure extract will do. Don’t skip the cornstarch—it’s what gives those edges their shatteringly crisp texture.
No superfine sugar? Regular granulated works—just pulse it in a blender until it’s fine. Out of heavy cream? Half-and-half plus a splash of milk gets you close, but the fat content matters for that custardy center. The baking powder is non-negotiable—it’s what lifts the cake while keeping it tender. For a chocolate twist, add 1/4 cup cocoa powder to the dry ingredients. Want extra richness? Swap 1/2 cup of the flour for almond flour. And if you’re feeling fancy, a pinch of cardamom adds depth without overpowering.
This batter needs 30 minutes to rest—don’t skip it! The yolks thicken, and the flour absorbs moisture, which prevents cracking. Store any leftover batter in the fridge for up to 24 hours, covered tightly. The cake itself keeps 3 days at room temperature, wrapped in foil, or 1 week in the fridge. For longer storage, slice and freeze portions for up to 3 months—just thaw at room temp before serving. The edges crisp up again beautifully when reheated.
Why You’ll Love This Recipe
- No-Fuss Mixing: I swear by this recipe because it’s basically a dump-and-bake situation. Whisk yolks with sugar, fold in flour—that’s it. No sifting, no creaming butter for hours, just a smooth batter that comes together faster than my morning coffee.
- Buttery-Vanilla Magic: That rich, custardy texture? All thanks to the yolks and butter—it’s like a cross between a pound cake and a custard tart. A single drop of vanilla ties it all together, making every slice smell like a bakery.
- Leftovers That Last: This cake keeps beautifully for days, so I always make it on weekends. Slice it for breakfast, pack it for lunches, or save it for dessert—it’s the ultimate no-waste dessert that still tastes fresh.
- Budget Baking Win: Egg yolks and butter might sound fancy, but they stretch further than you’d think. I’ve made this for 12 people using just 12 yolks, and it’s still cheaper than buying a single fancy cake from the store. Win-win.
Step-by-step instructions for golden crunch and velvety center cake
Here’s how to create that perfect contrast of crispy edges and tender middle.
Whip Egg Yolks and Sugar to Ribbon Stage
In a stand mixer fitted with the whisk attachment, combine the 12 whole Large Egg Yolks and 2 cups Granulated Sugar. Beat on medium-high speed for 5-7 minutes until the mixture is pale, thick, and forms soft ribbons when the whisk is lifted. You’ll notice the mixture nearly triples in volume and becomes glossy—this is crucial for that light, airy texture.
Here’s the thing—don’t rush this step. The yolks need to fully incorporate air to create that signature contrast. If you’re using room-temperature yolks (as specified), they’ll whip up faster and more smoothly. If the mixture starts to look grainy, add 1 tablespoon of the Heavy Cream to help emulsify it. The goal is a thick, ribbon-like consistency that holds its shape when you lift the whisk.
Add Butter and Cream in Stages
Reduce the mixer speed to low and add the 1.5 cups Unsalted Butter, 1 tbsp at a time, allowing each addition to fully incorporate before adding the next. After all the butter is incorporated, add the 0.5 cup Heavy Cream and mix until smooth. This gradual addition prevents butter lumps that can make your cake dense.
Watch closely as you add the butter—the mixture should become even thicker and glossier. If it looks curdled at any point, don’t panic. Simply increase the speed to medium for 30 seconds to re-emulsify. The cold butter cubes will melt into the warm yolk mixture, creating a stable base for the cake’s structure. The heavy cream adds moisture and helps create that velvety center we’re after.
Fold in Dry Ingredients Gently
In a separate bowl, whisk together the 2.5 cups All-Purpose Flour, 0.5 tsp Salt, 0.5 tsp Baking Powder, and 1 tbsp Cornstarch. Sift the flour mixture directly into the yolk mixture, then gently fold together using a spatula in a figure-eight motion until just combined. Be careful not to overmix—you should still see some flour streaks. The cornstarch is key here for that crispy edge contrast.
I like to do this in two stages. First, fold in about half the flour mixture, then add the 1 tbsp Pure Vanilla Extract, and finish with the remaining flour. This helps distribute the vanilla evenly and prevents dry spots. The batter should be thick but pourable—like a very rich cake batter. If it’s too stiff, add 1-2 tablespoons of Heavy Cream to loosen it. This step ensures we maintain that perfect balance of crispy exterior and tender interior.
Bake in Two Stages for Contrast
Preheat your oven to 350°F. Pour the batter into two 8-inch round cake pans lined with parchment paper. Bake for 20 minutes at 350°F, then increase the oven temperature to 400°F and bake for an additional 10-12 minutes. This two-stage baking is what creates that golden crunch on the outside while keeping the center velvety.
Here’s where it gets interesting—the first 20 minutes at lower heat allows the cake to set properly without over-browning. Then, cranking up the heat gives you that beautiful golden crust. Watch the edges carefully—they should be deep golden brown with a slight crispness when you press them gently. The center should still look slightly underdone but spring back when touched. If the top browns too quickly, tent loosely with foil during the final minutes.
Cool and Create the Contrast
Remove the cakes from the oven and let them cool in the pans for 10 minutes, then transfer to a wire rack to cool completely. Once fully cooled, slice the cakes horizontally into three equal layers. This is where the magic happens—we’re going to create that signature contrast between crispy and velvety.
Here’s the trick: brush the top of each layer with a light coating of Heavy Cream (about 1 tablespoon total) and sprinkle with 1 teaspoon of the Cornstarch mixture (mix 1 tsp cornstarch with 1 tsp sugar). Place the layers back together and let them sit for 30 minutes before serving. This final step enhances the crispy texture on the outside while keeping the center wonderfully tender. The cornstarch creates that delicate crunch you’re after, while the cream adds just enough moisture to keep the interior soft.
Pro Tips For Making 12 Egg Yolk Cake
- Whisk Yolks Like Mad: I learned this the hard way—beat those 12 yolks with sugar until they’re thick, pale, and triple in volume. No lazy whisking here; you’re chasing ribbons that hold their shape for 10 seconds. Skip this, and your cake turns dense, no matter how much you fold.
- Sift Flour Twice: Yes, even if the bag says “sifted.” First sift into a bowl to break clumps, then sift again when folding into the yolk mixture. That extra step keeps your cake light instead of heavy. (I know, it’s annoying—but trust me, your future self will notice.)
- Butter Must Be Cold: Cut that unsalted butter into tiny cubes and chill the mixing bowl and beaters for 10 minutes before creaming. Warm butter = greasy cake. Cold butter = flaky layers. No shortcuts here—just pop it in the fridge while you whisk yolks.
- Don’t Overbake the Layers: Pull your cake from the oven when the center still jiggles slightly—a toothpick should come out with a few moist crumbs, not clean. Overbaking turns those rich yolks into dry, sad sponge. (And yes, even if the recipe says “bake until golden,” ignore it.)
Troubleshooting your 12 egg yolk cake
Cracked Cake Surface
If your cake develops cracks on top during baking, it’s usually from overmixing the batter or opening the oven door too soon. To prevent this, fold the dry ingredients into the yolk mixture gently using a spatula in a figure-eight motion—just until combined.
Also, avoid peeking at the cake while it bakes; every time you open the oven, you risk temperature fluctuations that cause cracks. If cracks appear, they’re often just cosmetic—brush them with a simple syrup (equal parts sugar and water, heated until dissolved) before serving to disguise them. 💡
Dense or Heavy Texture
A dense cake usually means the butter wasn’t incorporated properly or the yolks weren’t whipped long enough. Start by ensuring your 12 egg yolks are at room temperature—they whip up much more smoothly this way.
When adding the 1.5 cups of cold butter, do it 1 tablespoon at a time on low speed, allowing each addition to fully melt into the mixture. If the batter looks curdled, increase the speed to medium for 30 seconds to re-emulsify.
For extra insurance, let the batter rest for 30 minutes before baking to allow the flour to hydrate properly. This step is non-negotiable for that perfect custardy center! 🥚
Soggy or Underbaked Center
An underbaked center happens when the cake isn’t cooked long enough or the oven temperature isn’t consistent. Use an instant-read thermometer to check the internal temperature—it should reach 205-210°F in the center.
If your cake feels gummy or the edges are overdone while the center is still raw, increase the baking time by 5-10 minutes at 400°F during the second stage. Another trick?
Let the cake cool in the pan for 10 minutes before transferring to a wire rack—this helps set the structure before it cools completely. 🌡️
Overly Browned Edges
If your cake’s edges turn too dark before the center is done, you’re likely baking at too high a temperature or the oven runs hot. Start by preheating your oven for at least 20 minutes to ensure accuracy.
If the top browns too quickly, tent the cake loosely with aluminum foil during the final 5-10 minutes of baking. For extra control, place a baking sheet on the rack below the cake pan to reflect heat upward.
If your oven has hot spots, rotate the pans halfway through baking for even results. 🔥
Batter Too Thin or Too Thick
The ideal batter should be thick but pourable—like a rich, glossy cake batter. If yours is too thin, it might be because the yolks weren’t whipped enough or the flour was overmeasured. If it’s too thick, you may have underwhipped the yolks or added too much flour.
To fix a thin batter, let it rest for 10-15 minutes—it often thickens as the flour absorbs moisture. For a thick batter, add 1-2 tablespoons of Heavy Cream to loosen it.
Pro tip: Use a spoon to lightly spoon flour into your measuring cup to avoid packing it down, which can make the batter too dense. 🥄
Uneven Rise or Sinking Middle
An uneven rise often means the baking powder wasn’t fresh or the oven temperature fluctuated. Always use aluminum-free baking powder (like Rumford) and check the expiration date—old baking powder loses its lift.
To prevent sinking, make sure your cake pans are properly greased (use butter or baking spray) and lined with parchment paper to prevent sticking. Also, don’t overfill the pans—fill them only 2/3 full.
If your cake sinks slightly in the center, it’s often just a sign of a dense, moist crumb rather than a failure. Just slice it horizontally and enjoy the rich, custardy layers! 🎂
Nutrition facts
Frequently asked questions
Why does this recipe use 12 egg yolks instead of whole eggs?
The rich, custardy texture comes from the high fat content in yolks—12 yolks provide that luxurious mouthfeel without the moisture from egg whites that could make the cake dense. This technique creates that signature contrast of crispy edges and velvety center that’s impossible with whole eggs alone. The yolks also contribute natural emulsifiers that keep the cake tender.
Can I substitute butter with another fat?
While butter gives the best flavor and texture, you can use 1.5 cups of solid coconut oil or 12 tablespoons of shortening in a pinch. For a lighter option, try 1 cup of butter plus 0.5 cup of neutral oil. Just remember—coconut oil has a distinct taste, and shortening lacks butter’s flavor depth. The cornstarch still needs butter’s fat to create that perfect crispy edge!
How do I know when the cake is fully baked?
Look for three key signs: 205-210°F internal temperature, deep golden brown edges with slight crispness when pressed, and a center that springs back when gently touched. The cake should pull away from the pan edges cleanly. If unsure, bake 2-3 extra minutes—it’s better to slightly overbake than risk a gummy center!
Can I make this cake without an oven?
This recipe is designed for oven baking, but you could try a cake pan for air fryer (preheat to 325°F for 30-35 minutes) or a steam basket (simmer for 1.5 hours). The texture won’t be identical—the lack of direct heat means less crispy edges—but you’ll still get a rich, custardy interior. For best results, stick with conventional baking!
What’s the best way to store leftovers?
Wrap tightly in plastic wrap or foil and store at room temperature for 3 days, or refrigerate for 1 week. For longer storage, slice and freeze portions for up to 3 months. To reheat, warm slices in a 200°F oven for 5-10 minutes to restore that crispy edge while keeping the center tender. The cake actually improves with a day or two of resting!

- 15lb Turkey Brine Recipe: Juicy Golden Meat with Science-Backed Moisture Lock - October 18, 2026
- 2 Egg Waffle Recipe: Light and Airy in 10 Minutes - October 18, 2026
- 1 Lb Ground Beef Recipe Ideas: 5 Quick Skillet Meals for Busy Nights - October 18, 2026