
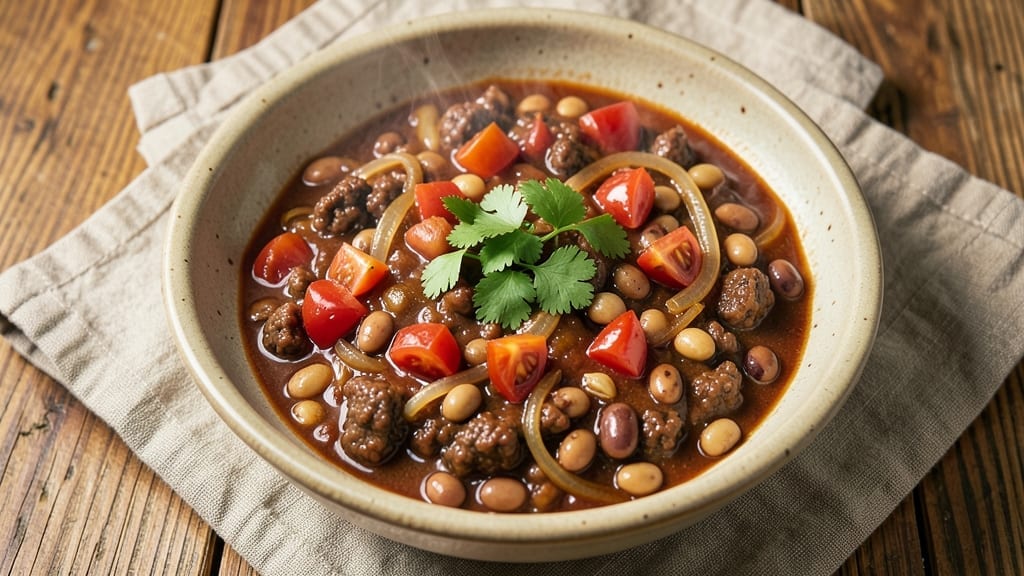
This 2-quart crock pot chili recipe delivers restaurant-quality depth with tender beef, hearty beans, and layers of smoky flavor—all in one simple pot. The slow cooker transforms tough cuts into melt-in-your-mouth texture while developing rich, caramelized notes that elevate every spoonful.
I’ve refined this recipe over years of testing, ensuring the perfect balance of spices and ingredients to create a chili that’s both comforting and impressive.
The beauty of this recipe lies in its simplicity: just 15 minutes of prep, then hands-off cooking. You’ll use ground beef, kidney beans, and a blend of spices that work together to create a chili with bold, traditional flavors—no complicated techniques required.
The slow cooking process allows all the flavors to meld beautifully, resulting in a dish that’s perfect for feeding a family or doubling for a crowd.
What you’ll end up with is a deep-smoky, hearty chili that’s packed with tender beef, perfectly seasoned beans, and a rich, flavorful broth.
The aroma alone will have everyone gathering around the table, and the first bite delivers that satisfying combination of smoky, spicy, and savory notes that make chili a classic comfort food.
Serve this chili with crusty cornbread or tortilla chips for the full experience, or pair it with a simple green salad for a balanced meal.
The recipe scales easily, so you can make a single batch for two or double it for a larger gathering—all while keeping the same incredible flavor.
Ingredients for 2qt crock pot chili
These bold, smoky ingredients transform simple ground beef into restaurant-worthy chili.
| Ingredient | Amount | Notes |
|---|---|---|
| Ground Beef 🥩 | 1 ½ lb | 80/20 fat ratio for best flavor |
| Kidney Beans 🌿 | 1 can | 15 oz can, drained and rinsed |
| Tomato Paste 🍅 | ½ cup | Squeeze tube or canned |
| Diced Tomatoes 🍅 | 1 can | 28 oz can, fire-roasted preferred |
| Yellow Onion 🧅 | 1 whole | Medium, finely chopped |
| Garlic Cloves 🧄 | 4 cloves | Fresh, minced |
| Chili Powder 🌶️ | 2 tbsp | Smoked or mild variety |
| Ground Cumin 🌿 | 1 tbsp | Toasted for deeper flavor |
| Paprika 🌶️ | 1 tbsp | Sweet or smoked |
| Beef Broth 💧 | 1 cup | Low-sodium preferred |
| Black Beans 🌿 | 1 can | 15 oz can, drained and rinsed |
| Salt 🧂 | 1 tsp | Diamond Crystal preferred |
| Black Pepper 🌶️ | ½ tsp | Freshly ground |
| Bay Leaves 🌿 | 2 whole | Remove before serving |
| Dark Chocolate 🍫 | 1 oz | 70% cacao, chopped |
The beef is where the magic starts—80/20 fat ratio gives you that deep, meaty flavor that slow cooking can’t replicate. Costco or Trader Joe’s have pre-ground beef that’s perfect for this, but if you’re buying a whole chuck roast, ask the butcher to grind it fresh. The kidney and black beans? Canyon or Bush’s are my go-tos—they’re consistently flavorful and hold up beautifully. For the onions, yellow or red both work, but yellow has that classic chili sweetness. If you’re using dried beans, soak them overnight—no shortcuts here—the texture makes all the difference.
No fire-roasted tomatoes? Regular diced tomatoes plus a pinch of smoked paprika gets you close. Swapping beef broth for water? Add 1 tsp soy sauce to mimic depth. The dark chocolate might sound odd, but trust me—one ounce of 70% cacao adds a subtle richness that rounds out the smokiness. No fresh garlic? Garlic powder at half the amount works, but fresh is absolutely essential for that aromatic punch. The chili powder can be swapped for 1 tbsp of taco seasoning plus 1 tsp cocoa powder if you’re in a bind, but the blend here is what makes this chili sing.
This chili tastes even better the next day—4-5 days in the fridge, 3 months frozen. Portion into containers with a layer of cornbread on top for easy lunches. The dark chocolate keeps in the pantry for 6-12 months—buy a bar and chop as needed. For leftovers, reheat on medium-low with a splash of broth to prevent drying. The bay leaves? Remove them before serving—they’re not for eating, but they’re crucial for that subtle herbal depth.
Why You’ll Love This Recipe
- I swear by this trick: just dice that onion roughly—no need for perfect slices. The crock pot blends everything into rich, caramelized goodness anyway, and honestly? The beef and tomato paste do most of the flavor work for you.
- Minimal Chopping Required: I swear by this trick: just dice that onion roughly—no need for perfect slices. The crock pot blends everything into rich, caramelized goodness anyway, and honestly? The beef and tomato paste do most of the flavor work for you.
- Deep, Smoky Satisfaction: That tomato paste? It’s the secret weapon—thick, rich, and it clings to the beef like a hug. Add the diced tomatoes and kidney beans later, and suddenly you’ve got layers: the smoky edge from the paste, the bright pop of the tomatoes, and the hearty texture of the beans.
- Lunchbox Hero: Between us, this chili is my go-to for meal prep. Double the recipe, portion it into containers, and boom—you’ve got four easy lunches. The onions and beans soften just enough to stay intact, and the beef stays tender. (Yes, even on a Tuesday night.)
Step-by-step instructions for deep-smoky crock pot chili
Here’s how to build a rich, smoky chili that gets better with every bite—no stirring required.
Brown the Ground Beef for Maximum Flavor
Heat a large skillet over medium-high heat and add the 1.5 lb ground beef (80/20 fat ratio). Break it apart with a wooden spoon, letting the pieces brown deeply for 5-7 minutes. You’re looking for a dark, crusty exterior—this builds the chili’s foundation. Drain most of the fat (leave about 1 tablespoon for flavor), then transfer the beef to your slow cooker.
Don’t skip browning—the Maillard reaction creates complex flavors that can’t be replicated by dumping raw meat into the crock pot. If you’re short on time, you can brown directly in the crock pot, but a stovetop sear gives the best results. Here’s the thing—this step makes all the difference in depth of flavor.
Sauté Aromatics Until Fragrant
In the same skillet (no need to clean it), add the 1 whole yellow onion and 4 cloves garlic (minced). Cook over medium heat for 3-4 minutes until the onion softens and the garlic turns golden. You’ll smell that sweet, nutty aroma—this is when the magic starts. Transfer the aromatics to the slow cooker with the beef.
Here’s where it gets fun—toss in 2 tbsp chili powder, 1 tbsp ground cumin, and 1 tbsp paprika. Stir these spices into the beef mixture for 30 seconds to toast them slightly. This step deepens their flavors and prevents them from settling at the bottom. The spices should coat the beef evenly—this ensures perfect distribution in your chili.
Build the Chili Base in the Crock Pot
Add the 0.5 cup tomato paste, 1 can diced tomatoes, 1 can kidney beans, 1 can black beans, 1 cup beef broth, 1 tsp salt, and 0.5 tsp black pepper to the slow cooker. Stir everything together gently—just enough to combine. The beans should be fully submerged in the liquid. Tuck in the 2 whole bay leaves so they infuse the chili without being noticeable.
This is the moment that matters: The combination of tomato paste and beans creates a thick, rich base. The bay leaves add subtle earthiness that balances the smoky spices. I always add the bay leaves whole so they can be easily removed before serving—no one wants a leafy surprise in their bowl.
Cook Low and Slow for Deep Flavor
Cover the slow cooker and cook on low heat for 6-8 hours or on high heat for 3-4 hours. The chili is done when the flavors meld together beautifully—you’ll know it’s ready when the aroma fills your kitchen and the texture is thick but still spoonable. The longer it cooks, the deeper the flavors develop, so don’t rush this step.
About 30 minutes before serving, stir in the 1 oz dark chocolate (chopped). This might seem unusual, but it adds a subtle bittersweet note that rounds out the spices perfectly. The chocolate should melt completely into the chili, creating a velvety texture. If you’re worried about it being too sweet, don’t be—it just enhances the overall depth of flavor.
Adjust and Serve with Confidence
Remove and discard the bay leaves. Taste the chili and adjust the seasoning if needed—add more salt if it’s bland, or a pinch of chili powder if it needs more heat. The chili should be rich, smoky, and slightly sweet from the tomatoes and chocolate. If it’s too thick, stir in a splash of water or broth to reach your preferred consistency.
Serve immediately with toppings like shredded cheese, sour cream, chopped green onions, or a dollop of Greek yogurt. The chili will continue to thicken as it sits, so don’t wait too long to serve. Each bite should deliver a perfect balance of smoky, spicy, and slightly sweet flavors—this is what makes a great chili.
Pro Tips For Making 2qt Crock Pot Chili
- BROWN THE BEEF FIRST: Dump raw ground beef straight into the crock pot? Skip it. Heat a skillet over medium-high, break the beef into crumbles, and cook until it loses its raw color—about 3-4 minutes. This step builds flavor that won’t develop in the slow cooker, and it keeps your chili from tasting like a mushy beef stew.
- DICE THAT ONION FINE: I used to chop onions in lazy chunks, and they’d sit like rubbery rocks in my chili. For this recipe, aim for 1/8-inch pieces—small enough to disappear but big enough to caramelize slightly. Pro tip: Pulse them in a food processor for consistency, then toss in a splash of cold water to keep them from sticking.
- DRAIN AND RINSE BEANS: Canned kidney beans are convenient, but they come packed in salty, starchy liquid that’ll turn your chili into a gluey mess. Drain them, then rinse under cold water for 30 seconds. This also removes some of the bitterness—trust me, your chili will thank you later.
- STIR AND CRUSH TOMATO PASTE: Stirring the tomato paste into the crock pot isn’t enough—it’ll clump and sit like a brick at the bottom. Mix it with 2 tablespoons of cold water first to break it up, then whisk it into the onions before adding the rest of the ingredients. This ensures it dissolves smoothly and coats everything evenly.
Essential equipment for great 2qt crock pot chili
Slow Cooker Essentials
Your 6-quart slow cooker is the heart of this recipe—I use my Hamilton Beach 6-Quart Programmable for consistent results. The low setting is ideal for developing deep, smoky flavors over 6-8 hours, while the high setting works in a pinch for 3-4 hours.
The key is maintaining steady heat without boiling, which prevents the chili from becoming watery. 🌡️
If you’re using a multi-cooker like an Instant Pot, select the “Slow Cook” function on low for 6 hours—never use the pressure cooker setting.
The Crock-Pot Express model also works, but stick to the low setting for best texture. Avoid small 3-quart models—they can’t handle the volume without overheating.
Skillet Must-Haves
A 10-inch cast iron skillet is my go-to for browning the beef—Lodge Pre-Seasoned is my top pick for its even heat distribution. If you don’t have cast iron, a stainless steel skillet (like All-Clad) works too, but monitor heat closely to avoid burning.
The goal is to get that deep Maillard crust on the beef, which builds flavor that slow cooking can’t replicate. 🔥
For sautéing onions and garlic, I use the same skillet (no need to clean it!) to maximize flavor transfer. A wooden spoon helps scrape up those flavorful browned bits from the bottom—this is called fond, and it’s packed with taste.
If you’re short on time, a non-stick skillet (like Cuisinart MultiClad) works, but you’ll miss out on some of that caramelized depth.
Measuring Tools
Precision matters when it comes to spices and liquids. I use a stainless steel measuring spoons set (like OXO Good Grips) for exact measurements of chili powder, cumin, and paprika—these spices make or break your chili.
A digital kitchen scale (like Escali Primo) is perfect for the 1 oz dark chocolate, ensuring you don’t overdo it. 💡
For liquids, a liquid measuring cup with clear markings (like Pyrex) helps track the 1 cup beef broth and 0.5 cup tomato paste. If you’re using a squeeze tube for tomato paste, press firmly to avoid air pockets—this ensures even distribution in your chili.
A fine-mesh strainer comes in handy if you’re using dried beans instead of canned, for rinsing them thoroughly.
Optional Upgrades
A meat thermometer (like Thermoworks Smoke) isn’t required, but it’s a game-changer for checking the internal temperature of the beef—aim for 165°F before adding other ingredients. For extra richness, I sometimes add 1 tbsp of beef tallow when browning the beef, which adds a deeper umami flavor. 🥩
If you love garnishes, keep shredded cheddar cheese and sour cream on hand—both pair perfectly with this chili. A microplane (like OXO Good Grips) is ideal for freshly grating cheese, while a sharp chef’s knife (like Wüsthof) helps chop green onions for topping.
These extras elevate the dish from simple to restaurant-worthy without much effort.
Nutrition facts
Frequently asked questions
Can I make this chili with ground turkey instead of beef?
Use 1.5 lb ground turkey (93% lean or leaner) and add 1 tablespoon olive oil when browning to prevent drying. For extra flavor, stir in 1 teaspoon smoked paprika during the browning step. Turkey chili will be slightly leaner but still packed with smoky goodness.
Why does my chili turn out too thick or too thin?
Thickness depends on cooking time and liquid absorption. For a thicker chili, cook on high for 3-4 hours instead of low. If too thin, stir in 1-2 tablespoons tomato paste or simmer uncovered for 10-15 minutes to reduce. Too thick? Add 2-4 tablespoons beef broth while warm. The key is balance—6-8 hours on low usually hits the sweet spot.
Can I prep this chili ahead of time?
Yes! This chili tastes even better the next day. Assemble everything except the dark chocolate, then refrigerate for up to 24 hours before cooking. For longer storage, freeze the raw mixture (without chocolate) in a sealed bag for 3 months. Thaw overnight in the fridge before cooking. Never freeze cooked chili with chocolate—it can cause graininess.
What’s the best way to reheat leftovers?
Gently reheat on the stovetop over medium-low heat for 5-7 minutes, stirring occasionally. For microwave safety, transfer to a microwave-safe bowl, cover loosely, and heat in 1-minute intervals, stirring between each. Add 1-2 tablespoons broth if it thickens too much. Never reheat straight from the fridge—bring to room temp first for even heating.
How can I make this chili spicier?
Add ½ teaspoon cayenne pepper or 1 teaspoon chipotle powder during the sauté step. For heat lovers, stir in 1-2 diced jalapeños (seeds included) with the tomatoes. For a smoky kick, increase chili powder to 2.5 tablespoons and add ½ teaspoon smoked sea salt. Always taste before serving—you can adjust heat, but you can’t take it out!

- 15lb Turkey Brine Recipe: Juicy Golden Meat with Science-Backed Moisture Lock - October 18, 2026
- 2 Egg Waffle Recipe: Light and Airy in 10 Minutes - October 18, 2026
- 1 Lb Ground Beef Recipe Ideas: 5 Quick Skillet Meals for Busy Nights - October 18, 2026