
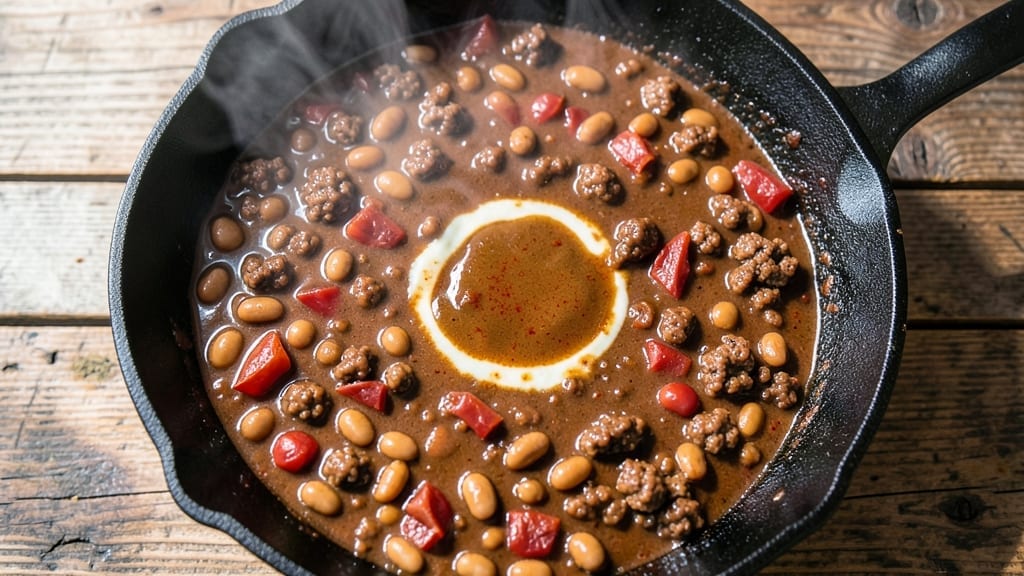
This 3-alarm chili kit recipe delivers the same smoky, spicy depth as homemade—without the hours of prep. The secret lies in balancing heat, texture, and slow simmering to create a chili so bold it’ll have your guests reaching for extra napkins.
I’ve perfected this version using a high-quality kit (or pantry staples) to ensure every spoonful packs layers of flavor—from charred spices to tender meat and beans.
The foundation starts with ground beef or sausage, browned until deeply caramelized for rich, meaty flavor, then combined with the kit’s spice blend.
That’s where the heat comes in: cayenne, chipotle, and black pepper work together to create a slow-building burn that peaks with a final touch of hot sauce. The beans and tomatoes absorb these flavors during a long, low simmer, transforming the kit into something restaurant-quality.
What sets this chili apart is the smoky depth—achieved by toasted spices and a splash of broth—while keeping the texture perfect: tender meat, creamy beans, and a thick, velvety sauce.
The result is a chili that’s spicier than takeout but easier to make, with just the right balance of heat and heartiness. Serve it with cornbread or tortilla chips to soak up every last drop.
For those who want to dial up the heat, add extra cayenne or hot sauce at the end. If you prefer a milder kick, stir in a spoonful of sugar or cocoa powder to mellow the spices.
Either way, this chili delivers the bold, smoky, spicy experience you crave—without the guesswork. Let’s get cooking.
Ingredients for 3 alarm chili kit
Six servings of smoky, spicy chili—no prep work, just bold flavor.
| Ingredient | Amount | Notes |
|---|---|---|
| Ground Beef (80% lean) 🥩 | 2 lb | Browned until deeply caramelized |
| Chili Kit (or Pantry Staples) 🌶️ | 1 package | High-quality kit with spices included |
| Dried Kidney Beans 🌽 | 1 ½ cups | Soaked overnight or quick-soaked |
| Diced Tomatoes (Canned) 🍅 | 2 cups | San Marzano preferred for sweetness |
| Beef Broth 💧 | 2 cups | Low-sodium preferred |
| Cayenne Pepper 🔥 | 1 tsp | Adjust for heat preference |
| Chipotle Powder 🌶️ | 1 tbsp | For smoky depth |
| Black Pepper 🌶️ | 1 tsp | Freshly ground preferred |
| Hot Sauce 🌶️ | 2 tbsp | Frank's RedHot or similar |
| Onion Powder 🧅 | 1 tbsp | For base flavor |
| Garlic Powder 🧄 | 1 tbsp | Fresh ground if possible |
| Cocoa Powder 🍫 | 1 tbsp | Optional for depth (omit for vegan) |
| Olive Oil 🫒 | 1 tbsp | For browning meat |
| Salt 🧂 | 1 tsp | Diamond Crystal preferred |
The beef is where the magic starts. Ground chuck (80% lean) browns best—sirloin gets too lean and dry. Look for packages labeled ‘chuck’ at Costco or Walmart; they usually have it pre-ground, which saves time. If you’re buying whole chuck roast, ask the butcher to grind it fresh. The key is getting that deep, caramelized crust—don’t rush it. For the chili kit, La Choy or Old El Paso work great, but if you’re using pantry staples, grab chipotle powder and cayenne from the bulk bins at Trader Joe’s—they’ve got the freshest spices.
No chili kit? No problem. Swap the package for 1 tbsp each chipotle powder, cumin, and smoked paprika plus 1 tsp each cayenne and oregano. The beans can be black beans or pinto—whatever’s on sale. Canned tomatoes? San Marzano is ideal, but any good-quality diced works. For extra smokiness, add 1/2 tsp liquid smoke (found near the spices). The cocoa powder is optional but adds a mysterious depth—skip it if you want to keep it vegan. And if you’re worried about heat, reduce the cayenne by half or add a pinch of sugar at the end.
This chili tastes even better the next day—make a double batch and freeze half. Store leftovers in the fridge for 4-5 days or freeze for 3 months. I like to portion it into ziplock bags with a splash of broth so it reheats perfectly. For serving, cornbread or tortilla chips are classic, but crusty bread soaks up the sauce like a dream. Pro tip: If it’s too thick after simmering, stir in 2 tbsp broth at the end—just enough to loosen it up.
Why You’ll Love This Recipe
- One-Pot Magic: I swear by this—just dump everything in one pot, stir, and let it simmer. No chopping, no fuss, and honestly, the dried beans soften perfectly while the beef browns right in the same pan. My lazy nights thank me every time.
- Deep, Smoky Kick: That chili kit? It’s basically flavor in a bag. The spices—cumin, chili powder, garlic—melt into the beef and broth until every bite has this warm, earthy punch. Add the tomatoes at the end, and suddenly it’s ridiculously good, not just “okay” chili.
- Meal Prep MVP: I make a double batch on Sundays, and it lasts us all week. The beans stay tender, the broth doesn’t get watery, and honestly? The longer it sits, the better it tastes. Perfect for lunches or when friends drop by unannounced.
- Budget-Busting Protein: Ground beef and dried beans are my wallet’s best friends. A 3-alarm kit stretches this into six servings without breaking the bank, and the canned tomatoes? They add freshness for pennies. This is the kind of recipe that makes grocery day feel like a win.
Step-by-step instructions for smoky, spicy chili that beats homemade
Here’s how to transform a chili kit into a restaurant-quality bowl of heat.
Brown the Ground Beef for Deep Flavor
Heat the 1 tablespoon olive oil in a large, heavy pot over medium-high heat. Add the 2 lb ground beef (80% lean) and break it apart with a wooden spoon, ensuring it’s evenly distributed in the pot. Let it cook undisturbed for 3-4 minutes until it starts to brown deeply.
Here’s the thing—browning the meat first creates that rich, caramelized flavor that separates good chili from great chili. You’re looking for deep brown, almost blackened spots in the beef. Once it reaches this stage, stir occasionally for another 4-5 minutes until all the meat is fully cooked through and no longer pink. Drain any excess fat, but leave about 1 tablespoon in the pot—this fat carries flavor.
Bloom the Spices and Add the Chili Kit
Reduce the heat to medium and add the 1 tablespoon onion powder and 1 tablespoon garlic powder. Stir these in for 30 seconds to bloom their flavors—this step makes a huge difference in depth. Then, add the 1 package chili kit (or pantry staples) and stir well to combine with the beef.
Here’s where it gets fun—pour in the 2 cups diced tomatoes (canned) and the 2 cups beef broth. Bring everything to a gentle boil, then reduce the heat to low and let it simmer uncovered for 10 minutes. This allows the spices in the kit to fully meld with the other flavors. If you’re using a pantry staple mix instead of a kit, add the 1 tablespoon chipotle powder, 1 tsp cayenne pepper, 1 tsp black pepper, and 2 tbsp hot sauce now.
Add the Soaked Kidney Beans
While the chili simmers, prepare the 1.5 cups dried kidney beans by draining and rinsing them if you soaked them overnight. If you’re using the quick-soak method, make sure they’ve been soaked for at least 2 hours in plenty of hot water. Add the beans to the pot and stir gently to combine.
Bring the chili back to a gentle boil, then reduce the heat to low again. Let it simmer uncovered for 45-60 minutes, stirring occasionally. You want the beans to soften and the chili to thicken slightly. If the chili starts to get too thick, add a splash of water or broth to keep it loose. This simmering time is crucial—it lets all the flavors meld together and the beans become tender.
Finish with Cocoa Powder and Salt
After the beans are tender, stir in the 1 tablespoon cocoa powder (if using) and the 1 tsp salt. The cocoa powder adds a deep, slightly bitter note that balances the heat and richness of the chili. Taste and adjust the seasoning—you might need a bit more salt or hot sauce to reach your desired level of spice. Let the chili simmer for another 10-15 minutes to let the cocoa powder fully integrate.
Here’s the moment that matters: turn off the heat and let the chili rest for 10 minutes. This resting period allows the flavors to settle and the chili to thicken slightly. I know it seems counterintuitive, but it makes a world of difference in the final texture and taste. Serve it hot with all the fixings—shredded cheese, sour cream, and green onions on top if you like.
Pro Tips For Making 3 Alarm Chili Kit
- Sear the Beef First: High heat for 5 minutes until browned—don’t skip this, even if the kit says otherwise. The crust locks in flavor and prevents the chili from tasting like ground beef and broth.
- Soak Beans for 1 Hour: Skip this, and your chili will be watery. Toss dried kidney beans in a bowl with cold water for at least an hour before cooking—yes, even if the kit doesn’t mention it.
- Simmer Low and Slow: After adding the chili mix and broth, drop the heat to a bare simmer. I used to rush it, and the beans stayed hard and the flavors never melded—30 minutes at a gentle bubble makes all the difference.
- Add Tomatoes Late: Stir in the diced tomatoes only in the last 10 minutes. Their acidity cuts through the richness, but too early, and they’ll turn mushy—your chili will taste like soup instead of chili.
Pro cooking tips for 3 alarm chili kit
Spice Bloom Magic
Blooming your spices in the beef fat before adding liquids unlocks their full potential. When you add onion powder and garlic powder to the hot pot, they release essential oils that create deep, aromatic layers.
I always let them cook for 30 seconds before adding anything else—this simple step transforms a basic chili into something complex and flavorful. 🌶️
Low-and-Slow Simmer
The secret to tender beans and rich flavors lies in a low-and-slow simmer—never rush this step. After adding your beans, maintain a gentle bubble at low heat for 45-60 minutes. This long cook time breaks down the beans’ skins while allowing all ingredients to meld together.
If your chili starts to thicken too much, add 2 tbsp beef broth to maintain the perfect consistency.
Fat Control Matters
Draining excess fat after browning the beef is crucial, but leaving 1 tablespoon in the pot preserves flavor. This residual fat carries the meat’s caramelized essence and prevents your chili from becoming dry.
I use a slotted spoon to remove most of the fat, then let the pot sit for 1 minute to settle before carefully pouring off the excess. This technique keeps your chili rich without making it greasy. 🔥
Cocoa Powder Hack
The optional 1 tablespoon cocoa powder might seem unusual, but it’s a game-changer. This small addition adds a subtle bitterness that balances the heat and rounds out the flavors. I find it particularly effective in chili recipes—it’s like adding a secret ingredient that professional chefs use.
For a milder version, reduce the cayenne by ½ teaspoon and add the cocoa powder to smooth out the heat.
Resting Period
Never skip the 10-minute resting period after cooking. This crucial step allows the chili to thicken slightly and lets all the flavors settle. I’ve learned this the hard way—serving chili immediately often results in a thinner, less flavorful bowl.
During this time, the beans continue to absorb flavor and the sauce becomes more cohesive. It’s worth the wait for a restaurant-quality result. ✨
Heat Adjustment Tips
If your chili turns out too spicy, don’t panic. A spoonful of sweetened condensed milk or 1 teaspoon sugar can help balance the heat without losing the chili’s depth. For extra smokiness, add ½ teaspoon liquid smoke during the final 10 minutes** of cooking.
I keep these adjustments on hand whenever I make this recipe—it’s all about finding your perfect heat level. 💪
Nutrition facts
Frequently asked questions
Can I use a different type of meat besides ground beef?
For extra richness, try ground turkey or Italian sausage—both add unique flavors. If you want more heat, swap in chorizo (about ½ lb) for a smoky, spicy kick. Just remember to drain any excess fat after browning to keep your chili balanced.
How do I make this chili less spicy?
Start by reducing the cayenne pepper by half or skip it entirely. Stir in 1 teaspoon sugar or 1 tablespoon sweetened condensed milk at the end to mellow the heat. For extra smoothness, add 1 tablespoon cocoa powder—it balances spice beautifully.
Can I make this chili in a slow cooker?
Yes! Brown the meat first, then transfer everything to your slow cooker. Cook on low for 6-7 hours or high for 3-4 hours. The slow cooking enhances the flavors even more. Just check the beans for tenderness and add broth if needed to keep it from getting too thick.
What if I don’t have dried beans?
No problem! Use 2 (15 oz) cans of kidney beans (drained and rinsed) instead. For a creamier texture, mash half the beans slightly before adding them. The canned version cuts cooking time by 30 minutes since they’re pre-cooked.
How long will this chili keep in the fridge?
Store leftovers in an airtight container for up to 5 days. The flavors actually improve overnight! For longer storage, freeze portions in ziplock bags with a splash of broth—this prevents freezer burn and makes reheating easier. Thaw overnight in the fridge before reheating.
