
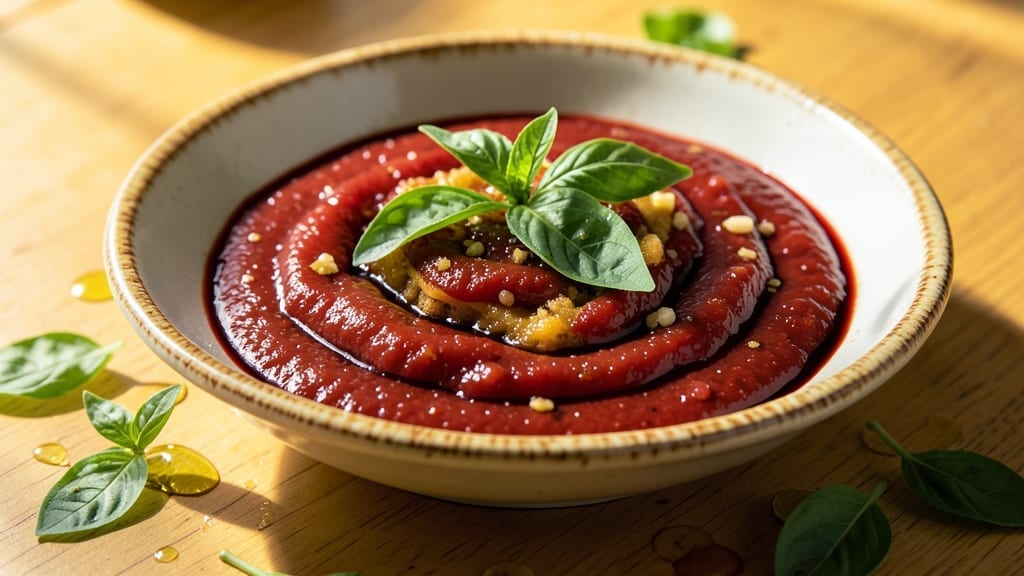
This 3-day pasta sauce recipe transforms simple ingredients into a rich, complex sauce that only gets better with time—perfect for meal prep and flavor-packed dinners. The secret lies in slow simmering and letting flavors meld over days, creating depth that store-bought sauces can’t match.
I developed this method after realizing how much better homemade sauce tastes when given room to evolve, and it’s now my go-to for effortless weeknight meals.
What makes this sauce special is its versatility and longevity—it keeps well in the fridge for up to 3 days (or 3 months frozen) and reheats beautifully, making it ideal for batch cooking.
The base of tomatoes, garlic, and herbs builds a flavor foundation, while a touch of red wine and Parmesan adds richness. Unlike quick sauces, this one develops layers of umami and sweetness as it sits, turning ordinary pasta into a restaurant-worthy dish.
By the time you’re ready to serve, you’ll have a silky, aromatic sauce with a perfect balance of acidity and depth—ideal for tossing with pasta, drizzling over grilled meats, or serving as a side.
The slow cooking process caramelizes the tomatoes and intensifies the garlic, resulting in a sauce that’s far more flavorful than anything you’d find in a jar. This is the kind of sauce that makes homemade meals feel like a gourmet experience.
Whether you’re prepping for the week or craving a quick dinner, this sauce delivers restaurant-quality results with minimal effort. Store it in the fridge for up to 3 days or freeze for longer storage—just thaw and reheat gently to preserve its texture. Here’s how to make it, step by step.
Ingredients for 3 day pasta sauce
Simple ingredients that build restaurant-quality depth over time—no shortcuts here.
| Ingredient | Amount | Notes |
|---|---|---|
| San Marzano Tomato Cans 🍅 | 28 oz | Whole peeled tomatoes, crushed by hand |
| Extra-Virgin Olive Oil 🫒 | ½ cup | High-quality, fruity variety |
| Red Wine 🍷 | 1 cup | Bold, dry variety like Cabernet Sauvignon |
| Garlic Cloves 🧄 | 6 cloves | Freshly minced, aromatic |
| Yellow Onion 🧅 | 1 whole | Medium size, finely chopped |
| Fresh Basil Leaves 🌿 | 1 ½ cups | Packed, stems removed |
| Fresh Oregano Leaves 🌿 | ½ cup | Packed, chopped fine |
| Parmesan Cheese 🧀 | ½ cup | Freshly grated from block |
| Sea Salt 🧂 | 1 ½ tsp | Diamond Crystal preferred |
| Freshly Ground Black Pepper 🌶️ | 1 tsp | Cracked peppercorns preferred |
The tomatoes make or break this sauce. San Marzano is worth hunting down—they’re sweeter and less acidic than regular canned tomatoes. I grab mine at Whole Foods or Trader Joe’s when they’re on sale, but any high-quality canned tomatoes work in a pinch. The red wine adds depth, so don’t skimp—any bold, dry red works here (Cab Sauv, Merlot, whatever’s open). Fresh garlic and onion are non-negotiable—they’re the flavor foundation. I always double-check my garlic isn’t sprouting (trust me, it makes a difference).
No San Marzano tomatoes? Crushed tomatoes in a jar work in a bind, but they won’t have the same sweetness. Running low on red wine? Dry sherry or even more tomato paste can bridge the gap. Fresh herbs are ideal, but dried oregano at half the amount gets you close. The Parmesan needs to be freshly grated—pre-grated gets clumpy and doesn’t melt right. For extra richness, I sometimes add a splash of balsamic vinegar at the end, but that’s optional. The key is letting everything simmer together for those three days.
This sauce gets better as it sits—honestly, it’s at its peak on day three. Store it in a glass jar in the fridge for up to 3 days, or freeze for 3 months. I portion mine into ice cube trays for easy single servings—just pop one in when you need sauce for pasta or grilled chicken. The texture thickens as it cools, so a quick stir with a splash of water brings it back to perfection when reheating. Make a double batch—you’ll want leftovers.
Why You’ll Love This Recipe
- No-Chop Nightmare: I swear by this sauce because the onion and garlic barely need attention—just a quick sauté until soft, then forget about them. The San Marzano tomatoes do all the work, simmering down into something rich without me hovering over the stove.
- Wine-Infused Magic: That splash of red wine? It’s not just for flavor—it’s the secret that makes this sauce sing after three days. The acidity cuts through the sweetness of the tomatoes, and the alcohol cooks off into this deep, savory backbone that’s ridiculously hard to resist.
- Meal Prep MVP: Between us, this is the only sauce I make in bulk because it only gets better with time. Toss it in the fridge, and three days later, it’s smoother, more concentrated, and still bright—perfect for lazy weeknights or when I’m feeding a crowd without stressing.
- Budget-Friendly Luxury: Honestly, the ingredient list won’t break the bank, but it tastes like I spent hours on it. Canned San Marzanos? Yes. A cheap bottle of wine? Also yes. The olive oil and garlic make it feel fancy, but the math adds up—especially when one pot stretches into four meals.
Step-by-step instructions for 3 day pasta sauce
Here’s how to build a sauce that gets richer and more flavorful with each passing day.
Sauté Onion and Garlic in Olive Oil
Heat the 0.5 cup extra-virgin olive oil in a large, heavy-bottomed pot over medium heat. Add the finely chopped yellow onion and cook for 8-10 minutes until soft and translucent, stirring occasionally. You’ll see the onion release its moisture and shrink down—this is your signal it’s ready for the next step.
Reduce heat to low and add the 6 minced garlic cloves. Cook for another 1-2 minutes until fragrant but not browned. Garlic burns quickly, so keep an eye on it—you want that sweet, nutty aroma, not bitter smoke. Remove the pot from heat and let the aromatics cool slightly before proceeding.
Deglaze with Red Wine
Return the pot to medium heat and pour in the 1 cup red wine, scraping up any browned bits from the bottom with a wooden spoon. These bits are packed with flavor—don’t miss them! Let the wine simmer for 3-4 minutes until reduced by about half, until it’s thickened slightly and the alcohol smell has cooked off.
Here’s the thing—this reduction step is what builds depth. The wine’s acidity cuts through the richness of the oil while adding complexity that will develop beautifully over the next three days. If you taste it now, it’ll be bright and slightly tart, but that’s just the beginning.
Add Tomatoes and Seasonings
Pour in the 28 oz San Marzano tomato cans (crushed by hand) and stir to combine with the wine mixture. Add the 1.5 teaspoons sea salt and 1 teaspoon freshly ground black pepper, then bring to a gentle simmer over medium-low heat. Let it cook uncovered for 30-45 minutes, stirring occasionally, until the sauce thickens slightly and the tomatoes break down.
This initial simmer helps release the tomatoes’ natural sweetness while allowing the flavors to marry. You’ll notice the sauce darkens and the aroma becomes more complex—this is the foundation that will only get better with time. Don’t rush this step; patience is key for that restaurant-quality depth.
Incorporate Herbs and Parmesan
Once the sauce has thickened, stir in the 1.5 cups fresh basil leaves and 0.5 cup fresh oregano leaves. Let the sauce simmer for another 5 minutes to infuse the herbs’ bright flavors. Then remove from heat and stir in the 0.5 cup freshly grated Parmesan cheese.
The herbs should wilt slightly in the hot sauce, releasing their oils and aromas. The Parmesan adds a salty, umami richness that will develop even more over the next few days. Let the sauce cool completely before transferring it to clean, airtight jars or containers for storage.
Store and Develop Flavor
Let the sauce cool to room temperature, then transfer it to sterilized jars or containers. Cover with lids and refrigerate. The magic happens over the next three days—the acidity mellows, the flavors deepen, and the texture becomes velvety smooth. Stir the sauce gently each day to redistribute the flavors and prevent a skin from forming.
When ready to use, reheat the sauce gently over low heat, stirring occasionally, until warmed through. The sauce should cling beautifully to pasta and deliver layers of flavor in every bite. This isn’t just a sauce—it’s a flavor journey that gets better with time.
Pro Tips For Making 3 Day Pasta Sauce
- Sweat the Onion Slow: After burning three batches of onions, I finally learned to cook them on medium-low with a splash of water—just enough to keep them soft and sweet, not crispy. This isn’t about color; it’s about flavor. If you rush it, you’ll taste raw onion in your sauce, and no amount of wine or garlic will fix that.
- Deglaze with Wine First: Once the onions and garlic are done, pour in the red wine immediately and let it reduce by half before adding tomatoes. This step locks in the alcohol’s depth—if you skip it, you’re just boiling wine into oblivion. (Yes, even if you’re impatient like me.)
- Crush Garlic Like a Boss: Don’t mince it—use a flat side of your knife to smash the cloves into a paste before cooking. This releases more flavor and prevents bitter garlic chunks from lurking in your sauce. (And no, you don’t need a garlic press. A knife works.)
- Simmer, Don’t Boil: After adding the San Marzano tomatoes, keep the heat at a gentle simmer—tiny bubbles, not a rolling boil. If it boils hard, the sauce will break down into a mushy, one-dimensional sludge. (Your future self will thank you.)
Storing and reheating your 3 day pasta sauce
Fridge Storage Secrets
Transfer your cooled sauce to sterilized glass jars or airtight containers—I swear by Ball mason jars for their airtight seal. Store in the fridge at 40°F or below for up to 3 days, with the sauce actually improving daily.
The acidity mellows, flavors meld, and texture becomes velvety. Stir gently before each use to redistribute settled herbs and prevent a skin from forming. 💫
Freezer Prep Tips
For longer storage, freeze in quart-sized freezer bags with 1-inch headspace—this prevents expansion cracks. Portion into ice cube trays for single servings, then transfer cubes to a bag.
Label with the date—this sauce stays delicious for 3 months without texture loss. Thaw overnight in the fridge for best results. ❄️
Reheating Like a Pro
Never microwave—it ruins the texture! Instead, reheat in a heavy-bottomed saucepan over low heat, stirring occasionally. Add 1-2 tablespoons water or pasta water if it thickens too much.
The sauce should reach 165°F for safety—use a thermometer if unsure. For extra richness, stir in 1 tablespoon butter or 1 teaspoon olive oil at the end. 🔥
Texture Rescue
If your sauce separates after refrigeration, simply stir vigorously or blend briefly with an immersion blender. The natural oils will re-emulsify, restoring that silky consistency. For extra insurance, add ½ teaspoon cornstarch mixed with 1 tablespoon water while reheating—just a pinch brings it back to perfection. 💡
Portion Control
Use 1/4-cup portions for single servings—this makes meal prep effortless. Store portions in small glass jars (like Le Parfait containers) for easy grab-and-go reheating. Label each with the date and flavor profile—trust me, you’ll forget which sauce is which after 3 days!
This system cuts down on waste and keeps flavors fresh. 📅
Flavor Boosters
Before serving, brighten the sauce with 1 teaspoon balsamic vinegar or 1 minced garlic clove (cooked for 30 seconds). For extra umami, add 1 teaspoon fish sauce or ½ teaspoon soy sauce. These final touches elevate the sauce from homemade to restaurant-quality in seconds. ✨
Nutrition facts
Frequently asked questions
Why does this sauce taste better after 3 days?
The magic happens through flavor development over time! The acidity from tomatoes and wine mellows, the herbs infuse deeper, and the Parmesan’s umami intensifies. The slow breakdown of ingredients creates complex layers that quick sauces miss. Stir daily to redistribute flavors and prevent separation.
Can I use dried herbs instead of fresh?
Yes, but use half the amount—dried herbs are more concentrated. For example, ¼ teaspoon dried oregano replaces ½ cup fresh. Fresh herbs add vibrant flavor, but dried works in a pinch. Just add them with the tomatoes rather than at the end to prevent bitterness.
How do I fix a skin that forms on top?
Stir gently before reheating, or blend briefly with an immersion blender to restore smoothness. For prevention, press plastic wrap directly onto the surface while cooling. The skin forms from concentrated oils—just a quick stir brings it back to perfection.
What’s the best pasta to pair with this sauce?
This sauce shines with al dente pasta like spaghetti, penne, or rigatoni. For extra texture, try whole wheat or chickpea pasta. The sauce’s richness pairs beautifully with meaty dishes too—try it over grilled chicken or beef. The key is undercooked pasta that finishes in the sauce.
Can I make this sauce without wine?
Replace the wine with 1 cup extra tomato paste or 1 cup chicken/vegetable broth. For depth, add 1 teaspoon balsamic vinegar or ½ teaspoon soy sauce. The sauce will still develop rich flavors—just expect slightly less complexity.

- 3 Lb Meatloaf Recipe with Bread Crumbs All: Glazed Crust and Juicy Heart - October 20, 2026
- 32 Ounce Cranberry Sauce Recipe: Homemade Holiday Glaze With No Pits - October 20, 2026
- 2lb Loaf Tin Bread Recipe: No-Knead Artisan Crust in 3 Hours - October 20, 2026