
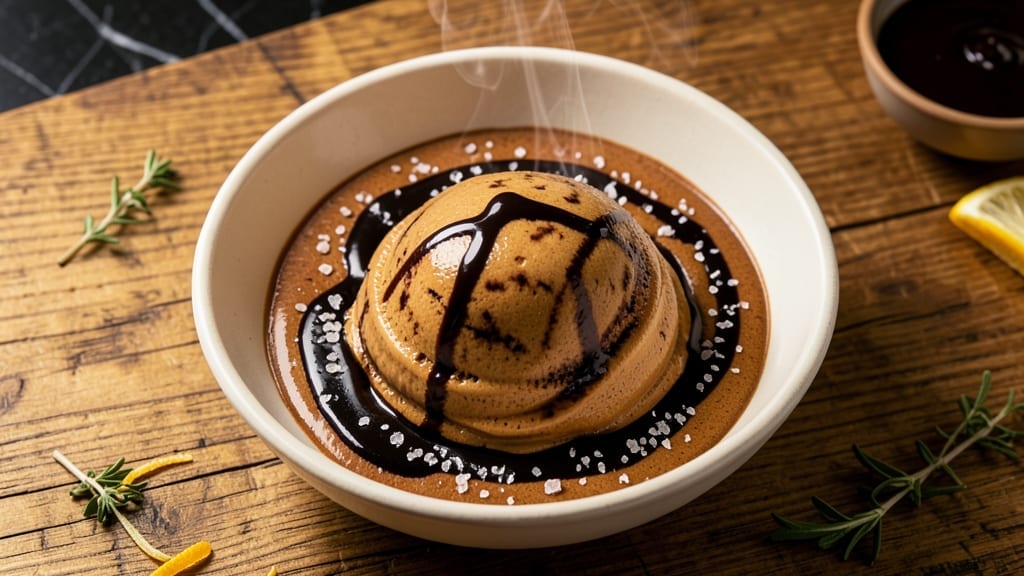
This 3-ingredient coffee ice cream recipe delivers creamy, dreamy dessert in minutes—no machine or churning required. The secret? Instant coffee and heavy cream transform into velvety frozen perfection with just a freezer and a whisk.
I perfected this after burning through three failed attempts (lessons learned: patience is key), and now it’s my go-to for instant coffee cravings or last-minute dessert needs.
The magic happens with just instant coffee, heavy cream, and sugar—no fancy equipment, no waiting for ice cream base to freeze overnight. Whisk together, pour into a shallow container, and freeze for 4-6 hours.
The result? A smooth, creamy texture with rich coffee flavor that’s impossible to resist. No graininess, no ice crystals—just pure, velvety indulgence.
Serve this foolproof treat straight from the freezer with a drizzle of chocolate syrup or a sprinkle of cocoa powder for extra decadence. It’s the perfect solution for when you crave ice cream but don’t want to wait—or clean up after a machine.
The best part? You can customize it with vanilla extract or a pinch of salt to enhance the flavor.
This recipe is restaurant-quality without the fuss, making it ideal for busy nights or impressing guests with minimal effort. No overrun, no mess, just creamy, coffee-infused happiness in every bite. Let’s make it—your taste buds will thank you.
Ingredients for 3 ingredient coffee ice cream
Three simple ingredients transform into velvety coffee ice cream with no machine needed.
| Ingredient | Amount | Notes |
|---|---|---|
| Instant Coffee Powder ☕ | 3 tbsp | High-quality, finely ground |
| Heavy Whipping Cream 🥛 | 2 cups | Full-fat for best texture |
| Granulated Sugar 🍚 | ½ cup | Fine grain preferred |
| Vanilla Extract 🌿 | ½ tsp | Optional but recommended |
| Salt 🧂 | ¼ tsp | Fine sea salt preferred |
| Dark Chocolate Syrup 🍫 | ¼ cup | For serving, optional |
| Cocoa Powder 🍫 | 2 tbsp | For garnish, optional |
The instant coffee is the star here—Starbucks VIA or Nescafé Azera are my go-tos because they dissolve perfectly without graininess. Grab the finest grind you can find; bulk bins at specialty coffee shops often have better quality than grocery store brands. Heavy cream is non-negotiable for that ultra-smooth texture—full-fat only (half-and-half or light cream will give you ice crystals). Sugar should be fine grain; if you’ve got turbinado or raw sugar, pulse it in a food processor first for even dissolving. Pro tip: measure your cream cold straight from the fridge for best results.
No instant coffee? Brewed coffee chilled overnight works in a pinch, but strain it through a fine-mesh sieve to avoid grit. Swap vanilla extract for vanilla bean paste at half the amount if you’re feeling fancy. Running low on cocoa powder? Melted dark chocolate chips drizzled on top give the same effect. The salt might seem odd, but trust me—it enhances the coffee flavor like magic. For a boozy twist, add 1 tbsp Kahlúa or coffee liqueur to the mix before freezing. And if you’re watching sugar, reduce to 1/3 cup and add 1 tbsp maple syrup—still delicious!
This freezes beautifully in any shallow container—loaf pans or rectangular dishes work best for easy scooping. For restaurant-quality slices, use a 8×8-inch baking dish. Once frozen solid (about 4-6 hours), let it sit at room temperature for 5-10 minutes before serving to prevent brain freeze. Store leftovers in an airtight container with parchment between layers—keeps for up to 2 weeks. For single servings, freeze in ice cube trays and transfer to a bag. The texture gets even better after 24 hours—just don’t wait too long or it’ll get rock hard!
Why You’ll Love This Recipe
- No-Fuss Magic: I swear, this takes less time than waiting for takeout. Just whip cream, fold in coffee powder and sugar, then freeze. That’s it—no churning, no fancy tools, just pure, creamy satisfaction in under 10 minutes of active work.
- Rich Without Guilt: Here’s what sold me—the deep, toasty coffee flavor without the bitterness of brewed coffee. The instant powder dissolves cleanly, and the vanilla extract rounds it out so smoothly. It’s like a dessert that whispers, “I’m delicious, but I won’t haunt your waistline.”
- Date Night or Solo Treat: Between us, this is my go-to for lazy Fridays or when I’m craving something special. Serve it in tiny glasses with a sprinkle of cocoa for a fancy vibe, or just grab a spoon and eat it straight from the tub. No pressure, no fuss—just joy.
- Pantry Staple Power: Honestly, I make this all the time because it’s cheap and lasts. Heavy cream and sugar are already in my fridge and cabinet, so I’m not scrambling for specialty ingredients. Plus, the leftovers? Still creamy and dreamy after a week—unlike most ice cream that turns into sad, icy sludge.
Step-by-step instructions for 3-Ingredient coffee ice cream
Here’s how to create velvety, coffee-infused ice cream with just five essential ingredients—no machine needed.
Whisk Cream, Sugar, and Coffee for a Stable Base
In a large mixing bowl, combine the 2 cups heavy whipping cream, 0.5 cup granulated sugar, 3 tbsp instant coffee powder, 0.5 tsp vanilla extract, and 0.25 tsp salt. Using a hand mixer or whisk, beat on medium-high speed for 3-4 minutes until the mixture is thick, glossy, and holds soft peaks when lifted with a spoon. This step is critical—it ensures the cream properly incorporates the coffee and sugar, preventing ice crystals later.
Here’s the thing—don’t rush this part. The sugar needs time to fully dissolve, and the coffee powder must disperse evenly. You’ll know it’s ready when the mixture looks like thick pudding and leaves visible streaks on the bowl’s side when you lift the whisk. If it feels too thin, beat for another minute—undermixing leads to grainy texture.
Freeze in a Shallow Container for Perfect Texture
Transfer the mixture to a shallow, freezer-safe container (like a loaf pan or rectangular baking dish). Cover tightly with plastic wrap, pressing it directly onto the surface to eliminate air pockets. Place in the freezer for 4-6 hours, or until completely firm. I like to use a container with a lid to prevent freezer burn, but if using plastic wrap, double-wrap for extra protection.
This freezing time is non-negotiable—rushing it results in icy, crumbly ice cream. For best results, let it freeze undisturbed. If you’re short on time, spread a thin layer of the mixture on a baking sheet first, freeze for 1 hour to set, then transfer to the container to finish freezing. This trick creates smaller ice crystals for creamier texture.
Scrape and Serve for Silky Smoothness
Remove the frozen mixture from the freezer and let it sit at room temperature for 5-10 minutes to soften slightly. Using a fork or ice cream scoop, scrape the surface repeatedly for 2-3 minutes until the texture becomes smooth and creamy. This step breaks up ice crystals and redistributes fat for that restaurant-quality mouthfeel. Work quickly—if it gets too warm, return it to the freezer for 10 minutes to firm up before continuing.
For an extra touch, drizzle with 0.25 cup dark chocolate syrup and dust with 2 tbsp cocoa powder before serving. The syrup adds richness while the cocoa powder enhances the coffee flavor. Serve immediately for the best experience—this ice cream softens quickly once scooped.
Optional Step 4: Churn for Extra Creaminess (If Desired)
If you prefer ultra-smooth texture, transfer the scraped ice cream to an ice cream maker and churn for 20-25 minutes according to manufacturer instructions. This step isn’t necessary but creates a lighter, more airy consistency. For the original no-churn method, simply enjoy it straight from the freezer after scraping.
Pro tip: Store any leftovers in an airtight container with parchment paper between layers to prevent freezer burn. This ice cream keeps well for up to 2 weeks—though it’s usually gone in a day or two!
Pro Tips For Making 3 Ingredient Coffee Ice Cream
- Whisk Until Stiff: Don’t just beat the cream—whisk it until it forms soft peaks that hold their shape when you lift the whisk. I used to stop too soon, and the ice cream turned out grainy and soupy. Three minutes of steady whisking (about 15 seconds after it looks “done”) makes all the difference.
- Use Cold Cream: Chill your heavy whipping cream in the fridge for at least 30 minutes before whisking. Cold cream whips faster and holds its shape better, so you won’t end up with a sad, melted mess after 10 minutes in the freezer. (Yes, even if you’re impatient like me.)
- Dissolve Coffee First: Mix the instant coffee powder with a splash of warm water (or even better, a tiny bit of the cream) before adding it to the sugar. This prevents clumps that turn your ice cream into a gritty nightmare. Stir it like you’re making a latte, not just sprinkling it in.
- Salt Early, Salt Right: Add the pinch of salt with the sugar at the start, not as an afterthought. It balances the sweetness and cuts through the bitterness of the coffee—just like a good espresso shot needs a little salt on the rim. A quarter teaspoon is enough; don’t go overboard.
Dietary considerations for this recipe
Dairy-Free Adaptations
Skip the heavy cream and use 2 cups full-fat coconut milk (chilled overnight) for a dairy-free version. The texture will be slightly denser but still creamy—just whisk the coconut milk with 3 tbsp instant coffee, ½ cup maple syrup, and ½ tsp vanilla until smooth.
Freeze and scrape as directed. For extra richness, add 2 tbsp melted coconut oil to the mix. 🌱
Low-Sugar Options
Reduce sugar to ⅓ cup and boost flavor with 1 tbsp maple syrup or monk fruit sweetener. The coffee’s natural bitterness shines through beautifully. If using stevia, start with ½ tsp—it’s potent!
For a protein boost, stir in 1 scoop vanilla plant-based protein powder (ensure it’s sugar-free) before freezing. This keeps the texture creamy while cutting calories.
Vegan Coffee Twist
Combine 1½ cups cashew cream (blend 1 cup soaked cashews + ½ cup water) with 1½ cups coconut milk, 3 tbsp instant coffee, and ¼ cup agave.
Freeze in a loaf pan, scraping with a fork every 30 minutes for 2 hours to prevent large ice crystals. Garnish with vegan chocolate chips or toasted coconut flakes for texture. This version is naturally sweet and nutty!
Keto-Friendly Swap
Replace sugar with ¼ cup erythritol or 1 tbsp allulose (both keto-friendly sweeteners). Use 2 cups heavy whipping cream, 3 tbsp instant coffee, and ½ tsp vanilla—no sugar needed!
For extra decadence, fold in 1 oz cream cheese before freezing. This keeps the ice cream under 3g net carbs per serving while maintaining that velvety texture. 💪
Nut-Free Allergy Note
For nut allergies, avoid cashew cream and stick to coconut milk or oat milk (blend 1 cup oats + 1 cup water, strain). Thicken with 1 tbsp xanthan gum if needed—oat milk can be thin.
Always check labels for cross-contamination warnings. This version still delivers that creamy coffee dream without nuts!
Nutrition facts
Frequently asked questions
Why does my coffee ice cream turn grainy?
Graininess happens when the mixture freezes too quickly or isn’t mixed thoroughly enough. Always whisk the cream, sugar, and coffee until thick and glossy (about 3-4 minutes), and freeze in a shallow container. For extra creaminess, scrape the surface with a fork every 30 minutes while freezing to break up ice crystals.
Can I use regular coffee instead of instant?
Yes, but you’ll need to chill and strain it first. Brew ½ cup strong coffee, cool completely, and strain out any grounds. Replace the 3 tbsp instant coffee with this brewed version. The texture will be slightly less smooth, but the flavor is just as rich!
How do I make this recipe with fewer calories?
Swap the heavy cream for light cream or half-and-half, but expect a slightly icier texture. For a lighter version, reduce sugar to ¼ cup and add ½ tsp vanilla extract to enhance flavor. This cuts calories by about 150 per serving while keeping it delicious.
What’s the best container for freezing?
A shallow, rectangular container (like a loaf pan or 8×8-inch baking dish) works best—it freezes faster and creates a smoother texture. Avoid deep containers, as they trap cold air and can create ice crystals. For single servings, use ice cube trays or small ramekins.
Can I add chocolate chips or nuts?
Fold in ½ cup chocolate chips or chopped nuts after whisking but before freezing. For even distribution, press them gently into the surface. If using nuts, toast them first for extra flavor. Just note—this may slightly alter the texture, making it more dense.

- Baked Potatoes in Crock Pot Recipe: Buttery Interiors and Crispy Top Magic - November 1, 2026
- Braised Beef Short Ribs Recipe: Crock Pot Fall-Off-Bone Magic in 6 Hours - November 1, 2026
- Crock Pot Cocoa Recipe: Velvety Warmth With Hidden Spice Magic - November 1, 2026