
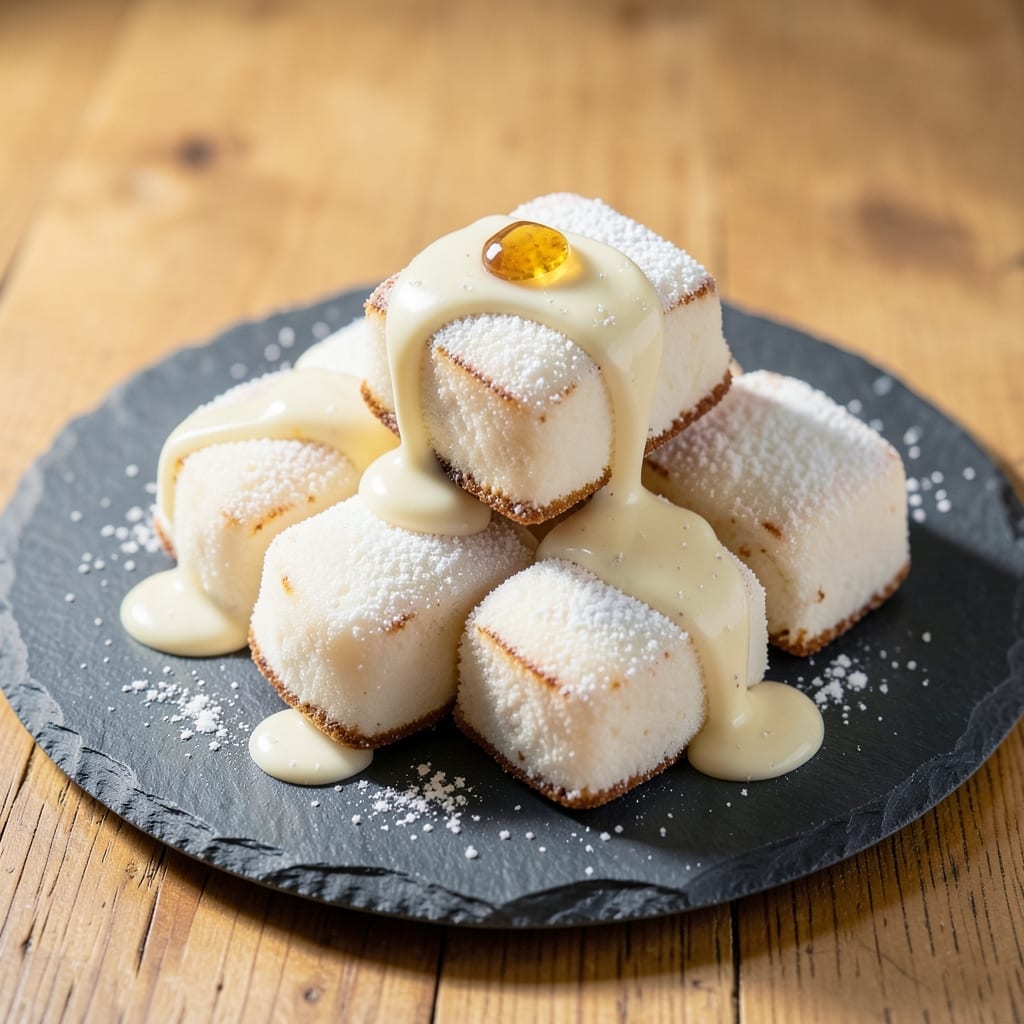
This 3-ingredient milk mochi recipe delivers restaurant-quality mochi with a silky cheesecake-like texture—no special equipment or complicated steps required.
The secret lies in a simple dough made from just mochiko (sweet rice flour), sugar, and water, which transforms into delicate, stretchy mochi that’s perfect for stuffing with sweetened milk or cream.
I developed this version after years of experimenting with traditional mochi recipes, finally simplifying them without sacrificing that signature chewy-yet-tender texture.
The process is straightforward: mix the dough ingredients into a smooth paste, steam it until translucent, then roll it into thin sheets before stuffing with your favorite filling.
The key to success is gentle handling—overworking the dough will make it tough, while proper steaming ensures that perfect balance between chewiness and softness. This recipe cuts out the guesswork, so even beginners can achieve professional results.
What you’ll end up with is milky, creamy mochi that melts in your mouth, offering a satisfying contrast between the delicate outer layer and the rich filling. The texture is surprisingly close to cheesecake, making it a unique treat that’s both nostalgic and innovative.
Serve these as a dessert, snack, or even a light breakfast—each bite is a little taste of comfort.
Perfect for special occasions or a simple treat, this recipe scales easily for parties or meal prep. The filling can be customized with flavors like matcha, red bean, or even Nutella for added variety. Let’s get started on creating these irresistible mochi bites!
Ingredients for 3 ingredient milk mochi
Three magical ingredients transform into restaurant-quality mochi with cheesecake-like silkiness.
| Ingredient | Amount | Notes |
|---|---|---|
| Mochiko (Sweet Rice Flour) 🍚 | 1 ½ cups | High-quality mochiko for chewy texture |
| Granulated Sugar 🍚 | ½ cup | Fine granulated preferred |
| Distilled Water 💧 | ¼ cup | Room temperature for smooth dough |
| Heavy Whipping Cream 🥛 | 1 cup | Full-fat for rich filling |
| Powdered Sugar 🍚 | ¼ cup | For sweetening cream mixture |
| Vanilla Extract 🌿 | 1 tsp | Pure vanilla for authentic flavor |
| Pinch of Salt 🧂 | ⅛ tsp | Enhances flavor balance |
| Cornstarch 🌾 | 1 tbsp | Prevents sticking during rolling |
| Vegetable Oil 🫒 | 1 tsp | Light coating for steam basket |
| Corn Syrup 🍯 | 1 tbsp | Optional for extra glossiness |
The mochiko is non-negotiable here—Bob’s Red Mill or Nishiki brands are the gold standard, but any quality mochiko will work. Sugar matters too: fine granulated dissolves better than coarse, giving you that smooth dough texture. I always grab organic cane sugar when possible for cleaner flavor. The water needs to be room temperature—cold water makes the dough gummy. If you’re in a hurry, just let it sit out for 10 minutes. For the filling, heavy whipping cream is essential—light cream won’t give that luxurious texture. Store-bought vanilla extract works fine, but if you’re feeling fancy, try Madagascar bourbon vanilla for deeper flavor.
No mochiko? Sweet rice flour from Asian markets is your best bet—it’s the same thing. Short on sugar? Honey or maple syrup can substitute, but reduce the water slightly since they’re more liquid. The cream filling can be swapped for coconut milk for a dairy-free version, though it won’t be as rich. If you’re making this ahead, the powdered sugar and vanilla can be mixed into the cream up to 2 days in advance—just refrigerate it. For extra shine, the corn syrup is optional but makes the mochi look restaurant-perfect. Want to get fancy? Add 1 tsp of matcha powder to the dough for a vibrant green version.
The dough keeps for 2 days in an airtight container at room temperature, but it’s best used fresh. Once steamed, the mochi sheets can be refrigerated for 3 days or frozen for 1 month between parchment paper. The filled mochi stays fresh for 24 hours at room temperature, but always refrigerate after that. Pro tip: Lightly toast the mochi before serving to bring back that fresh-from-the-steamer texture. These make amazing gifts—just package them in clear boxes with a ribbon for a special touch.
Why You’ll Love This Recipe
- No Pantry Stress: I swear by this recipe because it’s the only time I don’t panic if I forgot to stock up. Just mochiko, sugar, and water for the dough—plus cream and powdered sugar—and you’re golden. No weird spices, no obscure ingredients lurking in the back of your cabinet.
- Chewy-Creamy Magic: That first bite of the soft, pillowy mochi with the creamy filling? It’s like dessert hugs your taste buds. The mochiko gives it that signature chew, while the whipped cream inside makes it feel indulgent without being heavy.
- Party in a Box: Here’s what sold me—this is my go-to for gatherings because it’s easy to scale. Double the batch, wrap them in parchment, and boom: instant cute, portable treats. Kids love picking them up, and adults won’t complain about the flavor.
- Budget Sweet Tooth Fix: Between us, this is my secret weapon for satisfying cravings without breaking the bank. A bag of mochiko and a tub of cream last forever, and the sugar is the only splurge. Not the prettiest, but the taste makes up for it every time.
Step-by-step instructions for silky milk mochi
Here’s how to make these dreamy, cheesecake-textured mochi with just three core ingredients—plus a few secret weapons.
Create the Silky Dough Mixture
In a medium saucepan, combine the 1.5 cups Mochiko (Sweet Rice Flour), 0.5 cup Granulated Sugar, 0.25 cup Distilled Water, 1 tbsp Cornstarch, and 0.125 tsp Pinch of Salt. Stir vigorously with a silicone spatula until no dry spots remain—this ensures even cooking and prevents gummy mochi. Here’s the thing: you want the mixture to look like wet sandpaper, not thick batter.
Place the saucepan over medium-low heat and cook, stirring constantly with the spatula, for 5-7 minutes. You’re looking for the dough to pull away from the sides of the pan and form a thick, glossy ball that holds its shape when pressed between fingers. If it sticks, add 1 teaspoon distilled water at a time until it releases cleanly. Remove from heat immediately once it reaches this consistency—overcooking makes the mochi tough.
Shape and Steam the Mochi
Lightly grease a bamboo steamer basket with 1 teaspoon Vegetable Oil (this prevents sticking). Transfer the hot dough to the center of the steamer and immediately press it into a 1-inch thick round using oiled hands. I like to use a small plate as a guide for even thickness—this ensures uniform cooking.
Bring 2-3 inches of water to a boil in a pot, then place the steamer basket on top. Cover with a tight lid and steam over medium-high heat for 15-18 minutes. You’ll know it’s done when the mochi releases cleanly from the sides and has a faint jiggle in the center—like a firm jelly. The edges should be matte, not sticky, and the interior should be translucent when cut with a knife. Let it cool completely in the steamer before proceeding.
Prepare the Cream Filling
While the mochi steams, whip the 1 cup Heavy Whipping Cream to soft peaks in a chilled bowl. Add the 0.25 cup Powdered Sugar, 1 tsp Vanilla Extract, and 1 tbsp Corn Syrup (if using), then whip to stiff peaks. The filling should hold its shape when the whisk is lifted—this prevents it from oozing out later. For extra richness, I like to add a pinch of salt here to balance the sweetness.
Here’s where the magic happens: fold the whipped cream into the mochi using a spatula. Cut the cooled mochi into 4 equal wedges (like a pie) and gently press the cream into the center of each wedge. The mochi should absorb the cream without tearing—if it’s too dry, steam it for another 2 minutes. Wrap each filled wedge tightly in plastic wrap and refrigerate for at least 2 hours (overnight is even better). This chilling step ensures the cream sets properly and the mochi develops its signature silky texture.
Serve with Confidence
Unwrap the mochi just before serving. The exterior should be smooth and slightly tacky to the touch, with a faint sheen from the corn syrup. Cut each wedge into 4 equal pieces (total of 16 bite-sized mochi) and arrange on a platter. The interior should reveal a creamy, cloud-like filling that contrasts beautifully with the chewy mochi exterior.
Serve immediately for the ultimate texture experience—each bite should offer resistance at first, then give way to a melt-in-your-mouth cream center. If the mochi feels too firm after chilling, steam it for 1-2 minutes to restore its chewiness. Store leftovers in an airtight container in the fridge for up to 3 days, though I doubt they’ll last that long!
Pro Tips For Making 3 Ingredient Milk Mochi
- STEAM LOW AND SLOW: After burning my first batch by rushing the steaming, I learned to keep the heat at a gentle simmer—not a rolling boil. If your mochi looks underdone after 15 minutes, crank up the heat for the last 5 minutes, then drop it back down. The goal is tender, not mushy.
- SIFT THE MOCHIKO: Clumps in your mochi batter? Sift the sweet rice flour before mixing—it’s the only way to avoid lumpy texture. I used to just whisk it in, but sifting cuts down on lumps and makes the batter smoother. (Yes, even if you’re impatient like me.)
- CHILL THE CREAM: Cold heavy whipping cream whips faster and holds its shape better. Take it out of the fridge 10 minutes before you need it—no need to freeze it, just let it sit. Warm cream? You’ll end up with a sad, runny filling.
- DON’T OVERMIX THE BATTER: Once the mochi batter is smooth, stop stirring. Overworking it makes the texture dense and chewy instead of light and pillowy. I learned this the hard way—my first batch was more like a gluey brick than a cloud. Stir just until combined, then move on.
Best sauces and condiments for 3 ingredient milk mochi
Classic Vanilla Cream
This is the signature filling for milk mochi, and it’s already included in your recipe with the heavy whipping cream, powdered sugar, and vanilla extract. The key is whipping the cream to stiff peaks—this prevents it from oozing out while keeping the texture light and airy.
For extra richness, I like to add 1 teaspoon of corn syrup to the whipped cream mixture, which gives it that glossy, restaurant-quality finish. 🥛
Matcha Green Tea
For a vibrant twist, mix 1 tablespoon of high-quality matcha powder into the mochi dough before steaming. The filling remains the same vanilla cream, but the earthy, slightly bitter notes of matcha create a beautiful contrast.
I recommend Ippodo Tea matcha for its smooth flavor. Serve with a dusting of powdered sugar to enhance the green hue and balance the bitterness.
Red Bean Paste
Swap the cream filling for ½ cup of sweet red bean paste (anko) for a traditional Japanese flavor. Heat the red bean paste gently until it’s spreadable, then let it cool slightly before filling the mochi.
The contrast between the chewy mochi and the smooth, slightly grainy red bean is pure comfort. For extra decadence, drizzle with white chocolate sauce before serving. 🌱
Coconut Milk Filling
For a dairy-free version, replace the heavy cream with 1 cup of chilled coconut milk (full-fat for best texture). Add 2 tablespoons of powdered sugar and 1 teaspoon of vanilla extract, then whip to stiff peaks.
The coconut flavor pairs beautifully with the mochi’s natural sweetness, and it adds a tropical twist that’s perfect for summer. Store-bought coconut milk works, but Goya or Thai Kitchen brands give the best results. 🥥
Chocolate Ganache
Melt ½ cup of dark chocolate chips with ¼ cup of heavy cream over a double boiler, then let it cool slightly before filling. The ganache sets beautifully inside the mochi, creating a rich, fudgy center.
For extra indulgence, add 1 tablespoon of hazelnut spread to the ganache mixture. This filling is best served slightly warm—just let the mochi sit at room temperature for 10 minutes before enjoying. 🍫
Seasonal Fruit Compote
Use ½ cup of seasonal fruit compote (like strawberry, mango, or peach) as a lighter filling. Cook the fruit with 1 tablespoon of sugar and a pinch of salt until thickened, then cool before filling.
The fruit’s natural acidity cuts through the mochi’s sweetness, making each bite feel fresh and vibrant. This is my go-to for summer variations—just make sure the compote is fully cooled to prevent melting the mochi. 🍓
Nutrition facts
Frequently asked questions
Can I substitute regular rice flour for mochiko?
No, you can’t use regular rice flour—mochiko (sweet rice flour) is specifically made for mochi because it has a higher sugar content and creates that signature chewy texture. Regular rice flour will make your mochi gummy and less elastic. If you absolutely must substitute, try a mix of 50% rice flour and 50% cornstarch, but the texture won’t be as perfect.
Why did my mochi turn out too hard?
Overcooking or understeaming are the most common culprits. The mochi should have a faint jiggle in the center when done—like firm jelly. If it’s too hard, try steaming for 1-2 extra minutes next time, or reduce the sugar slightly (it draws out moisture). Also, make sure your steamer has enough water—2-3 inches of boiling water is ideal.
How do I prevent the filling from leaking out?
Whip your cream to stiff peaks and chill the filled mochi for at least 2 hours before serving. If the filling still leaks, try using a thicker filling like red bean paste or chocolate ganache, which hold their shape better. For extra security, wrap each piece tightly in plastic wrap while chilling.
Can I make this recipe gluten-free?
Yes! Mochiko is naturally gluten-free, so this recipe is already safe for gluten-free diets. Just double-check that your cornstarch and sugar are certified gluten-free. The texture will remain the same—chewy on the outside, silky inside. For added safety, use a dedicated gluten-free kitchen if you’re highly sensitive.
What’s the best way to store leftover mochi?
Store unfilled mochi sheets in an airtight container at room temperature for up to 2 days or freeze for 1 month between parchment paper. Once filled, refrigerate for no more than 24 hours—the cream filling can get too soft. To revive stale mochi, steam for 1-2 minutes to restore its chewiness.

- 3 Layer Eggnog Cake Recipe: Spiced Rum-Infused Frosting and Boozy Swirls - October 6, 2026
- 1800 Ultimate Margarita Mix Recipe: Frozen or On-The-Rocks Versatility - October 6, 2026
- 3 Eggs and Cabbage Recipe: Savory Scramble With Crispy Edges - October 6, 2026