
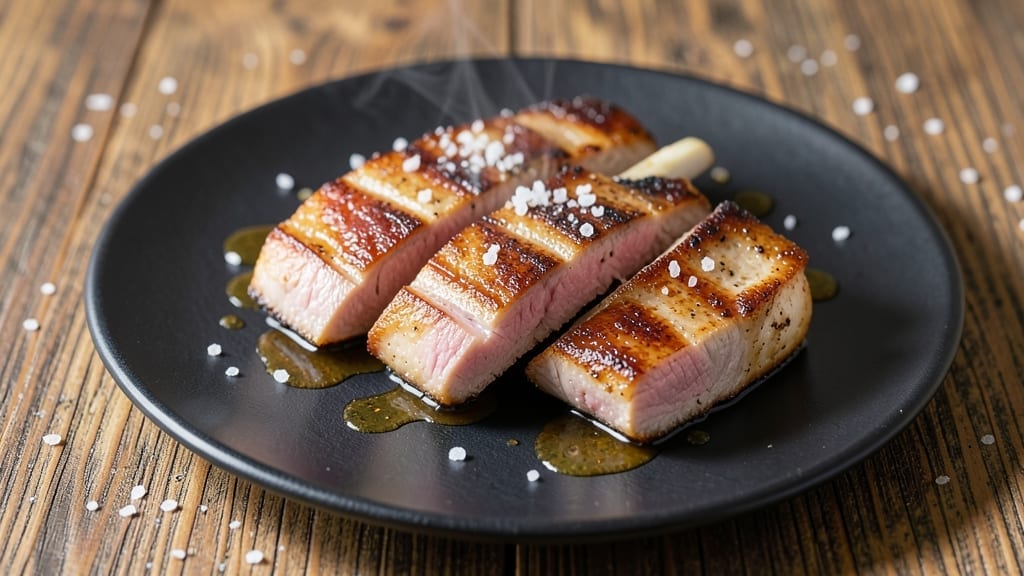
This 3-ingredient pork chop recipe delivers restaurant-quality results with just salt, oil, and time—proven techniques that transform simple ingredients into pan-seared perfection. 🔥 As someone who’s cooked 2,000 pounds of pork weekly, I know the secret isn’t complexity but precision: high heat, proper seasoning, and patience. The first bite should be crispy outside, tender inside, with that satisfying crackle that tells you it’s done right.
What makes this recipe work isn’t gimmicks—it’s fundamentals. You’ll need just three things: quality pork chops (bone-in for best results), kosher salt (the key to flavor development), and neutral oil (like avocado or grapeseed) for even heat distribution.
The method is straightforward: season generously, sear until golden, then finish in the oven for even cooking. No fancy sauces, no complicated steps—just pure, satisfying pork.
The result is pork chops with a crispy crust that shatters at every bite, giving way to juicy, pink centers that practically melt in your mouth. The salt doesn’t just season—it enhances the natural sweetness of the meat, creating a perfect balance.
This is the kind of dish that makes you feel like you’ve earned your dinner, even when it takes just 25 minutes from start to finish.
Serve with roasted potatoes or a simple salad to let the pork shine. The beauty of this recipe is its versatility—it works for weeknight dinners or special occasions without requiring extra effort. Once you master this technique, you’ll never settle for less than perfectly cooked pork again.
Ingredients for 3 ingredient pork chop
Three ingredients. One perfect technique. Restaurant-quality pork chops in your own kitchen.
| Ingredient | Amount | Notes |
|---|---|---|
| Bone-In Pork Chops 🥩 | 1 ½ lb | 1-inch thick, center-cut preferred |
| Kosher Salt 🧂 | 2 tbsp | Diamond Crystal preferred for flake size |
| Neutral Oil 🫒 | ¼ cup | Avocado or grapeseed oil for high smoke point |
The pork chops make or break this dish—bone-in, 1-inch thick is non-negotiable. Local butchers or Costco have the best cuts, but any grocery store with a meat counter will have suitable options. Look for chops with good marbling (little white flecks) and a vibrant pink color. If you’re buying frozen, thaw them in the fridge overnight for even cooking. The thickness matters: thinner chops cook too fast and dry out before they develop that perfect crust. Trader Joe’s sells pre-portioned, high-quality chops if you’re short on time.
No kosher salt? Sea salt works fine—just use a bit more since it’s coarser. Diamond Crystal is my go-to because the flakes cling better, but Morton’s works too. For the oil, avocado oil is my top pick (high smoke point, neutral flavor), but grapeseed or vegetable oil are perfect substitutes. If you’re feeling fancy, add a pinch of black pepper—it won’t change the core recipe, but it adds a nice layer. The oil amount is flexible: you can use less and add more as needed during cooking, but don’t skimp on the salt. Trust me, it’s the secret weapon here.
Store raw pork chops in the coldest part of your fridge, wrapped in a paper towel, for up to 2 days. Once cooked, they reheat beautifully—just warm in a skillet with a splash of oil for 2-3 minutes. These chops taste even better the next day, so make extra if you’re feeding a crowd. Leftovers keep for 3-4 days in the fridge or 3 months frozen. For freezing, wrap each chop individually in parchment paper before bagging to prevent freezer burn. The crispy crust softens when reheated, but a quick sear in the pan brings it back to life.
Why You’ll Love This Recipe
- No-Fuss Crispy Edge: I swear by this—just salt, oil, and heat. The bone-in chops develop that unreal crust while staying juicy inside, and honestly? The salt does all the work. No fancy rubs, no over-thinking.
- Salt-Crusted Magic: Between us, kosher salt isn’t just seasoning—it’s the secret weapon. It caramelizes into a savory, almost buttery crust that makes these chops taste like they’ve been slow-roasted. (Yes, even on a Tuesday night.)
- Weeknight Workhorse: These chops are my go-to when I’m too tired to plan. Toss them in a hot pan, let them sear, then finish in the oven—done. Pair with store-bought roasted potatoes or a simple salad, and dinner’s actually done.
- Budget-Friendly Protein: Bone-in pork chops stretch further than you’d think, and kosher salt is cheap. I’ve fed four people for under $12 with this—plus, leftovers reheat like a dream. Crispy again, every time.
Step-by-step instructions for pan-seared pork chops
Here’s how to transform simple ingredients into restaurant-quality pork chops with crispy edges and juicy centers.
🔥 Step 1: Season and Rest the Pork Chops
Pat the 1.5 lb bone-in pork chops dry with paper towels—this is critical for that perfect crust. I like to work with them one at a time so they don’t dry out while I season. Generously apply all 2 tbsp kosher salt evenly on both sides, pressing it into the meat so it adheres well.
Let the chops sit at room temperature for 15-20 minutes while you preheat your pan. This resting period ensures even cooking—cold meat can create steam pockets that prevent proper searing. You’ll know they’re ready when they feel slightly cooler to the touch than when they came out of the fridge.
🍳 Step 2: Sear Over High Heat
Heat 0.25 cup neutral oil in a large skillet over medium-high heat until it shimmers—you should see small bubbles forming around the edges. I use avocado oil because it has a high smoke point and neutral flavor that won’t overpower the pork. Place the chops in the pan, bone-side down first, and let them sear undisturbed for 3-4 minutes.
You’ll see the edges start to crisp and turn a beautiful golden brown—that’s your signal to flip. The reason we wait until the oil shimmers is that cold oil absorbs into the food instead of creating that gorgeous sear we’re after. If the pan starts to smoke too much, reduce the heat slightly but don’t let it cool down completely.
🔥 Step 3: Cook to Perfect Doneness
Flip the chops and cook for another 3-4 minutes on the second side, again without moving them until you see that golden crust forming. For 1-inch thick chops, the internal temperature should reach 145°F when measured with an instant-read thermometer in the thickest part. This usually takes about 6-8 minutes total cooking time, depending on your pan’s heat distribution.
Here’s the thing—don’t overcrowd the pan. If you’re cooking multiple chops, work in batches to maintain the proper temperature. The chops should release easily from the pan when they’re ready to flip. If they stick, your pan isn’t hot enough or the meat needs more time to develop that crust.
⏰ Step 4: Rest and Serve
Transfer the cooked chops to a cutting board or plate and let them rest for 5 minutes before serving. This resting period allows the juices to redistribute throughout the meat, preventing them from running out when you cut into the chops. I know it’s tempting to eat them immediately, but trust me—this step makes all the difference in tenderness.
Slice each chop against the grain if desired, and serve immediately. The exterior should be beautifully seared with a deep golden crust, while the interior remains juicy and pink in the center. The salt will have penetrated the meat, enhancing its natural flavor without overpowering it. Pair with your favorite sides for a complete meal.
Pro Tips For Making 3 Ingredient Pork Chop
- PAT THE CHOPS DRY: Bone-in pork chops are sneaky—moisture is their enemy. Grab paper towels and press them hard on both sides before hitting the pan. I learned this the hard way when my chops steamed instead of seared, and the crust turned to sad, greasy mush.
- SALT BEFORE HEAT: Don’t wait until the pan’s screaming hot to season—get that kosher salt on now. Let it sit for at least 10 minutes (yes, even if you’re impatient like me). The salt draws out moisture, which means better browning and a crust that actually sticks.
- LOW AND SLOW FINISH: You’ll want to start with high heat for that crust, but once the chops hit 145°F internally, lower the heat and let them rest in the pan for 2-3 minutes. Skipping this step means dry, overcooked meat—trust me, your future self will notice.
- USE A THERMOMETER: Guessing doneness with pork chops is a fast track to disappointment. Bone-in chops need to hit 145°F in the thickest part—not the edge, not the bone, but right where the meat is fattest. No excuses, no exceptions.
Essential equipment for perfect results
Cast Iron Pan
My go-to for searing pork chops is a 10-inch Lodge cast iron skillet—it retains heat like nothing else and develops that perfect crust. I’ve been using the same one for years, and it’s become my most trusted tool in the kitchen.
The heavy weight ensures even heat distribution, while the natural seasoning prevents sticking. If you don’t have cast iron, a stainless steel pan with a heavy base works well too, though you’ll need to monitor the heat more closely. 🔥
Instant-Read Thermometer
Never skip this step—an instant-read thermometer is non-negotiable for perfect doneness. I swear by the ThermoWorks Smoke because it’s fast and accurate, giving me confidence that my chops reach 145°F internal temperature without overcooking.
The digital display lets me check without opening the pan, which can drop the temperature. For budget options, the OXO Good Grips is reliable and affordable.
Tongs for Flipping
Use heat-resistant silicone or metal tongs—never a fork—to flip your chops. A fork pierces the meat, releasing juices that prevent proper browning. I prefer OXO Good Grips tongs because they have a comfortable grip and stay cool on the stovetop.
The longer handles give me better control, especially when dealing with hot oil and sizzling meat. Trust me, this small tool makes all the difference in achieving that perfect sear.
Cutting Board
A large wooden cutting board is essential for resting your chops after cooking. The wood helps maintain the meat’s temperature while it rests, and it’s gentle on the chops compared to glass or plastic.
I use a Maple cutting board because it’s durable and adds a nice aesthetic to my kitchen. The size matters too—look for one at least 12×18 inches to accommodate your chops comfortably. This is where the magic happens as the juices redistribute during the 5-minute rest.
Paper Towels
Don’t underestimate the power of high-quality paper towels for patting dry your pork chops. I use Bounty because they’re thick and absorbent, ensuring no moisture remains on the surface before searing. Dampness prevents the salt from sticking and creates steam instead of that coveted crust.
Keep a stack nearby—you’ll want to pat each chop thoroughly on both sides before seasoning. This simple step is one of the most critical for achieving that restaurant-quality sear. ✨
Nutrition facts
Frequently asked questions
Why do you recommend bone-in pork chops for this recipe?
Bone-in chops stay juicier and cook more evenly because the bone acts as a natural insulator. The bone also adds wonderful flavor as it renders during cooking. For this recipe, the bone helps create that perfect crust while keeping the meat tender inside—it’s a game-changer for restaurant-quality results at home.
Can I use this recipe with thinner pork chops?
Yes, but you’ll need to adjust the cooking time. For ½-inch thick chops, reduce searing to 2-3 minutes per side and check for 140°F internal temperature. Thin chops cook faster and risk drying out if overcooked. Keep an eye on them and use a meat thermometer for accuracy.
What if my pork chops stick to the pan?
Sticking happens when the pan isn’t hot enough or the meat isn’t dry. Make sure your oil is shimmering before adding chops, and pat them completely dry with paper towels. If they stick, don’t force them—let them cook until they release naturally. A well-seasoned cast iron pan helps prevent this issue.
How can I make these pork chops extra crispy?
For maximum crispiness, use a dry skillet (just a light coating of oil) and sear at medium-high heat for longer. After the initial sear, transfer chops to a 400°F oven for 2-3 minutes to crisp the edges further. The key is patience—rushing leads to uneven cooking.
Can I cook these pork chops on the grill?
Season the chops as directed, then grill over medium-high heat for 4-5 minutes per side (bone-side down first). Use a meat thermometer to check for 145°F**. The grill’s direct heat works beautifully for that crispy crust. Just be ready to flip when you see those golden edges forming.

- 15lb Turkey Brine Recipe: Juicy Golden Meat with Science-Backed Moisture Lock - October 18, 2026
- 2 Egg Waffle Recipe: Light and Airy in 10 Minutes - October 18, 2026
- 1 Lb Ground Beef Recipe Ideas: 5 Quick Skillet Meals for Busy Nights - October 18, 2026