
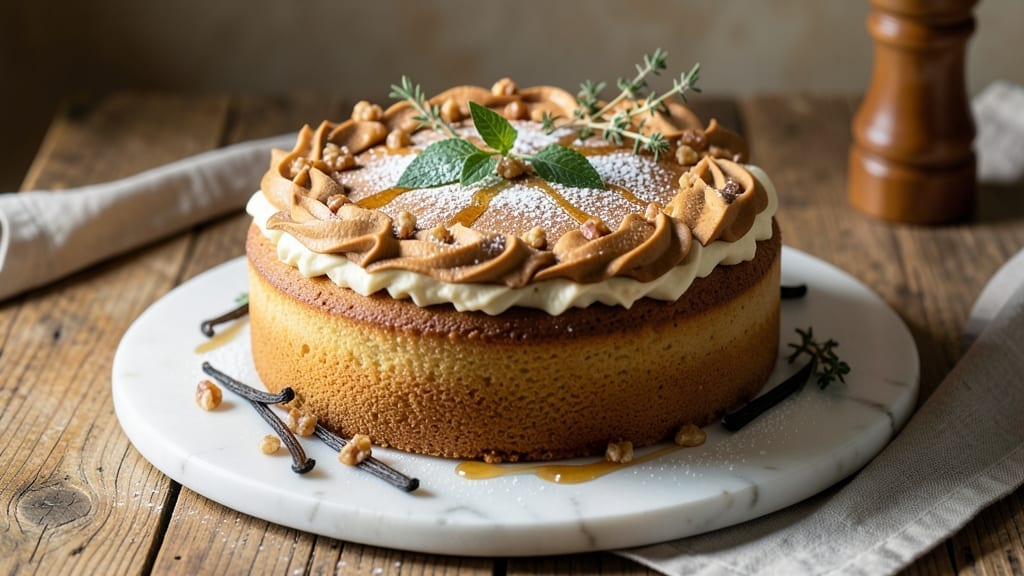
A 3-minute cake recipe that delivers restaurant-quality vanilla bliss without the oven?
That’s exactly what this microwave mug magic creates—foolproof, single-serving perfection in under three minutes. 💛 The secret lies in precise measurements and a quick microwave burst that transforms simple ingredients into a tender, moist cake with a golden crust.
No fancy equipment, no waiting, just pure convenience that still tastes like a bakery treat.
This recipe relies on three core ingredients—flour, sugar, and eggs—plus a splash of milk for richness, all mixed in a microwave-safe mug. The beauty of this method is its predictability: no overmixing, no guessing, just a strict 90-second microwave cycle that guarantees consistent results every time.
Even beginners can master it, and the texture—soft, cakey, and slightly crisp at the edges—is what makes it irresistible.
What you’ll end up with is a warm, fragrant vanilla cake that’s ready to enjoy as soon as it cools for 30 seconds. The simplicity doesn’t sacrifice flavor—each bite delivers that classic vanilla sweetness with a tender crumb that melts in your mouth.
Top it with whipped cream or a dollop of frosting for an instant dessert that feels like a celebration.
Perfect for last-minute cravings, quick breakfasts, or when you need a no-fuss treat without the oven’s delay. The best part? You can customize it with chocolate chips, cinnamon, or lemon zest—endless possibilities in just three minutes. Let’s get baking!
Ingredients for 3 minute cake
Nine simple ingredients transform into a golden, tender mug cake in minutes—no oven required.
| Ingredient | Amount | Notes |
|---|---|---|
| All-Purpose Flour 🌾 | ¼ cup | Sifted for even texture |
| Granulated Sugar 🍚 | ¼ cup | White or light brown |
| Large Eggs 🥚 | 1 whole | Room temperature preferred |
| Vanilla Extract 🌸 | ½ tsp | Pure, high-quality extract |
| Unsalted Butter 🧈 | 2 tbsp | Melted, cooled slightly |
| Milk 🥛 | ¼ cup | Whole milk for richness |
| Baking Powder 🍞 | ½ tsp | Aluminum-free preferred |
| Salt 🧂 | ¼ tsp | Fine sea salt |
| Vanilla Sugar 🍬 | 1 tsp | Optional for extra flavor |
The flour and sugar are the foundation—King Arthur all-purpose flour works best for a tender crumb, while Domino brand is a solid grocery store alternative. Grab the finest granulated sugar (like C&H) for even dissolving. Eggs should be at room temperature for perfect blending—pop them in warm water for 5 minutes if straight from the fridge. For the vanilla, Nielsen-Massey pure extract is my go-to, but any quality brand works. The butter matters too—Land O’Lakes unsalted melts smoothly and adds richness without overpowering. Milk? Whole milk (none of that skim nonsense) ensures a moist cake. Baking powder is non-negotiable for lift—Clabber Girl is my pantry staple.
No vanilla extract? Vanilla bean paste or seeds work beautifully—just scrape in the seeds. Short on butter? Coconut oil or olive oil are neutral substitutes (use same amount). Milk substitutes? Almond milk or heavy cream both work, but texture may vary slightly. The vanilla sugar is optional but adds that bakery-shop aroma—Trader Joe’s vanilla sugar is my favorite. For a chocolate twist, swap half the sugar for cocoa powder. Need it gluten-free? Bob’s Red Mill 1:1 baking flour does the trick. And if you’re in a pinch, oat milk plus 1 tbsp melted butter replaces regular milk.
Prep ahead by measuring everything into a microwave-safe mug (12 oz works best) before starting. The batter keeps for 2 hours at room temperature if sealed, but it’s best fresh. Once baked, let it cool for 30 seconds before diving in—it’s still warm inside. For storage, wrap cooled cake in plastic wrap and keep in the fridge for 3 days. Freeze for 1 month by wrapping tightly. Reheat in the microwave for 10 seconds to restore that fresh-baked warmth. Pro tip: Sprinkle powdered sugar on top right after baking for instant frosting.
Why You’ll Love This Recipe
- No Mixing Needed: I swear, this cake comes together with just a fork and a bowl—no stand mixer, no whisking arms. You’ll have batter in minutes, and honestly? That’s the kind of magic I need in my life.
- Butter-Sugar Bliss: That rich, creamy butter folded into the sugar? It’s like a hug for your taste buds. The vanilla ties it all together so smoothly, it’s the kind of flavor that makes you pause mid-bite.
- Party in a Bowl: Serve it at brunch with fresh berries, slice it for a last-minute dessert, or even pack it for a picnic. It’s the ultimate crowd-pleaser—no one will guess it took less time than boiling water.
- Pantry Staple Power: You’re already stocked for this. Flour, sugar, eggs, butter—it’s the kind of recipe that won’t break the bank or your fridge. Leftovers? They’ll disappear just as fast as the first slice.
Step-by-step instructions for microwave mug cake
Here’s the precise method for baking a perfectly moist mug cake in just minutes.
🍳 Step 1: Melt Butter and Mix Wet Ingredients
Place the 2 tablespoons unsalted butter in a microwave-safe mug and melt for 15-20 seconds on high power. The butter should be fully liquid but not hot to the touch—just warm enough to blend smoothly. Let it cool for 30 seconds to prevent cooking the egg immediately.
In a small bowl, whisk together the 1 whole large egg, 0.25 cup granulated sugar, 0.5 teaspoon vanilla extract, and 1 teaspoon vanilla sugar until fully combined. The mixture should be smooth with no visible streaks of sugar. This step ensures even distribution of flavor throughout the cake.
👨🍳 Step 2: Combine Dry Ingredients and Milk
In the same bowl, sift in the 0.25 cup all-purpose flour, 0.5 teaspoon baking powder, and 0.25 teaspoon salt. Gently fold these dry ingredients into the wet mixture using a small spatula, being careful not to overmix—just until no flour streaks remain. Overmixing develops gluten and can make the cake dense.
Pour in the 0.25 cup milk and stir until the batter is completely smooth and homogeneous. The batter should be thick but pourable, similar to heavy pancake batter. If it looks too thick, add 1 teaspoon more milk to ensure proper rising in the microwave.
🔥 Step 3: Prepare and Microwave the Cake
Pour the batter into your prepared microwave-safe mug, filling it about ¾ full. The mug should be clean and dry to ensure even heating. Place the mug in the microwave and cook on high power for exactly 90 seconds. The cake is done when the top appears set and springs back slightly when touched—no longer sticky to the finger.
Here’s a critical tip: If your microwave varies in power, start with 80 seconds and check after 10 seconds. The cake should be golden on top with a slightly domed center. If it’s still undercooked, microwave for 10-second intervals until fully set. Overcooking dries out the cake.
⏰ Step 4: Rest and Serve for Perfect Texture
Remove the cake from the microwave and let it rest for 1 minute before attempting to eat or serve. This resting period allows the internal heat to distribute evenly, preventing a gummy texture. The cake will pull away slightly from the edges of the mug as it cools.
For best results, serve immediately while still warm. The mug cake should be moist with a tender crumb and a slightly crisp top. If you prefer a firmer texture, let it cool completely for 5 minutes before serving. Enjoy your 2-serving mug cake with a dollop of whipped cream or fresh berries for a delightful treat.
Pro Tips For Making 3 Minute Cake
- WEIGH YOUR BUTTER: The recipe probably says “softened butter,” but that’s vague—aim for 65°F (18°C). Stick a butter knife in the stick, and if it leaves a slight indentation that holds, you’re golden. I learned this the hard way when my cake turned out dense because the butter was too cold (or worse, melted).
- WHISK EGGS FAST: Crack eggs into a separate bowl first—no shells in your batter. Then, whisk them until they’re actually frothy (about 30 seconds with a hand mixer). I was skeptical until I tried it; the texture of the cake is noticeably lighter when the eggs are properly aerated.
- DON’T OVERMIX: As soon as the flour disappears, stop stirring. I used to think more mixing = better cake, but this recipe relies on the butter’s fat to create tender layers. Overmixing develops gluten, and suddenly you’ve got a dense, chewy brick instead of a fluffy cloud.
- USE A TOASTER OVEN: If your oven runs hot or you’re impatient (like me), a toaster oven is your secret weapon. It heats up faster and cooks more evenly for small cakes. Preheat it to 375°F (190°C) and bake for 12–15 minutes—no waiting for a giant oven to warm up.
Serving suggestions for 3 minute cake
Classic Toppings
Whipped cream is my go-to topping—just whip ½ cup heavy cream with 1 tbsp powdered sugar and ½ tsp vanilla extract until soft peaks form. A simple dusting of powdered sugar adds sweetness without overpowering the vanilla.
For a fruity twist, add fresh berries like strawberries or blueberries on top—their juices soak into the warm cake beautifully. 🍓
Chocolate Variations
Swap ½ cup granulated sugar for ½ cup cocoa powder to make a chocolate mug cake. Add ¼ cup chocolate chips (I love Ghirardelli semi-sweet) for pockets of melted chocolate.
Top with a drizzle of chocolate syrup or a dollop of chocolate whipped cream for a decadent dessert. The chocolate pairs perfectly with a sprinkle of sea salt for contrast.
Warm Spiced Additions
Stir in ½ tsp cinnamon and ¼ tsp nutmeg to the batter for a spiced twist. Top with a pinch of cinnamon sugar or a dollop of caramel sauce for warmth.
Warm spices like cardamom or ginger also work beautifully—just ¼ tsp of either adds depth. Serve with a cup of hot coffee or chai tea for a cozy pairing. 🍫
Fun Presentation Ideas
Use a small ramekin or dessert cup instead of a mug for a more elegant presentation. Serve on a wooden board with a few edible flowers or a drizzle of honey. For a playful touch, add sprinkles or crushed cookies on top.
The mug cake’s simplicity makes it perfect for impromptu gatherings—just pop it out of the mug and serve on a plate. 🌸
Make It a Meal
Pair your mug cake with vanilla ice cream for a sundae-like treat. Add a scoop of homemade whipped cream and a drizzle of hot fudge sauce for a decadent dessert.
For a lighter option, serve with fresh fruit salad or a yogurt parfait. The cake’s warm, comforting texture balances the coolness of ice cream perfectly. 🍦
Nutrition facts
Frequently asked questions
Can I make this mug cake without eggs?
Yes! For a vegan version, replace the 1 egg with ¼ cup unsweetened applesauce or ¼ cup mashed banana. The texture will be slightly denser but still delicious. Add ½ teaspoon baking soda if using applesauce to help with rise. For a fluffier result, use ¼ cup aquafaba (chickpea brine) and whisk until frothy before adding.
Why did my mug cake come out gummy?
Gummy texture usually means undercooking or overmixing. Always microwave for the full 90 seconds (or 10-second intervals if needed) until the top springs back when touched. For extra moisture, add 1 teaspoon more milk to the batter. If your microwave is weak, try using a slightly larger mug or covering the cake loosely with a microwave-safe plate for 10 seconds at the end.
Can I double this recipe for a regular cake?
Not in a conventional oven—this recipe is designed for microwave mug cakes only! For a larger cake, try a microwave cake pan (available at kitchen stores) and increase all ingredients by 4x, baking in 30-second intervals for 2-3 minutes total. For an oven version, use a 9-inch round pan, bake at 350°F for 15-18 minutes, and adjust the flour to 1 cup with 1 extra egg.
How do I make this gluten-free?
Swap the ¼ cup all-purpose flour for ¼ cup gluten-free 1:1 baking flour (like Bob’s Red Mill). Add ½ teaspoon xanthan gum if your blend doesn’t contain it. For best results, let the gluten-free flour sit in the batter for 5 minutes before microwaving to hydrate properly. The texture will be slightly denser but still moist. Test with a toothpick—it should come out clean when fully done.
Can I prep the batter ahead of time?
Yes! Mix all ingredients (except butter) in a bowl and refrigerate for up to 2 hours. When ready to bake, melt the butter in the mug, add the pre-mixed batter, and microwave as directed. For longer storage, refrigerate the full batter (with melted butter stirred in) for 1 day. Bring to room temperature before microwaving. Freeze the batter in an airtight container for 1 month—thaw overnight in the fridge before baking.

- 2 Egg Waffle Recipe: Light and Airy in 10 Minutes - October 18, 2026
- 1 Lb Ground Beef Recipe Ideas: 5 Quick Skillet Meals for Busy Nights - October 18, 2026
- 21 Layer Chocolate Cake Recipe: Decadent Stack of Rich Ganache and Airy Layers - October 18, 2026