
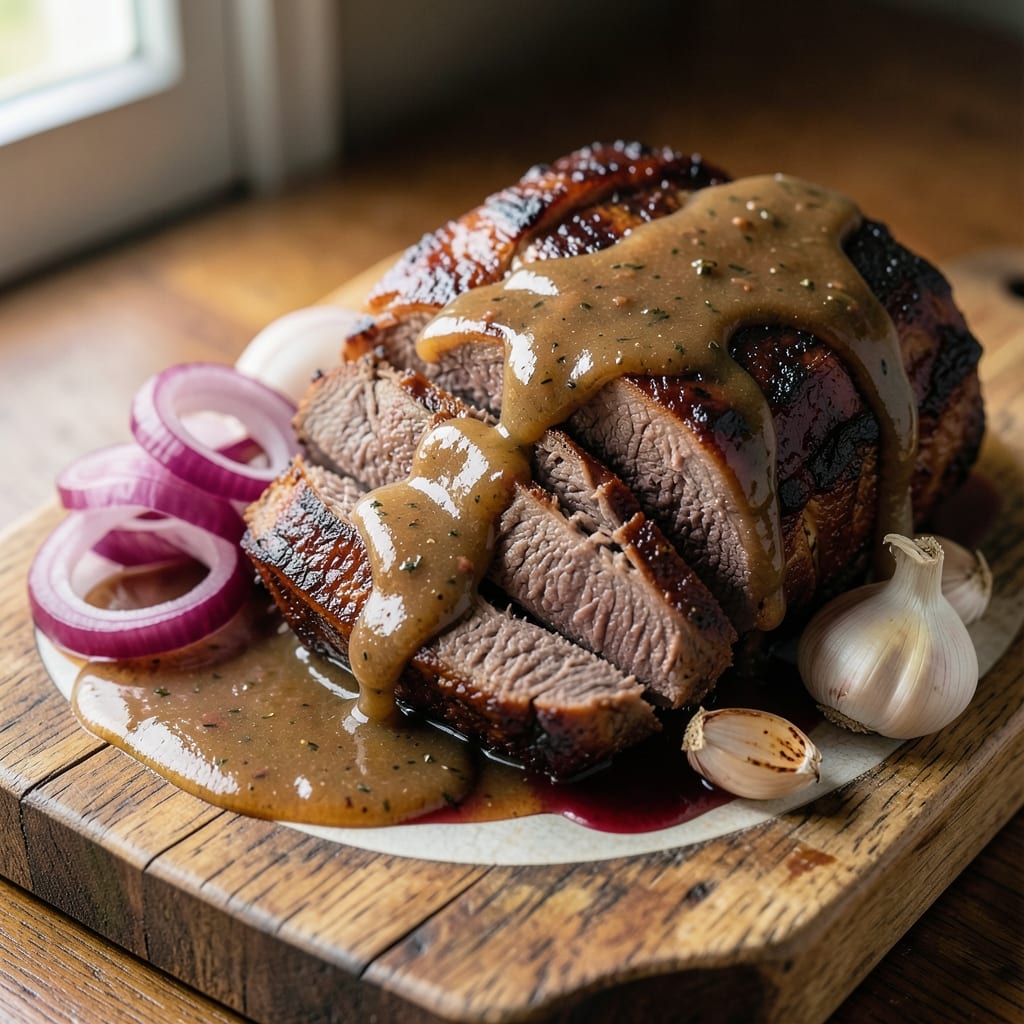
This 3-packet roast beef recipe transforms tough cuts into melt-in-your-mouth perfection with minimal effort—just three simple packets and a slow roast. The secret lies in low-and-slow cooking paired with those flavor-packed packets that elevate every bite, turning a simple dinner into a showstopper.
I’ve perfected this method over years of testing, ensuring the beef stays juicy while the pan sauce becomes rich enough to drizzle over every slice.
The beauty of this recipe is its simplicity: no fancy techniques, just a 325°F oven, a roasting pan, and about 3 hours of hands-off cooking time.
Those three packets—typically gravy, au jus, and herb seasoning—work together to infuse the beef with deep, savory flavors while creating a pan sauce so good, it’ll disappear faster than the meat. This isn’t just dinner; it’s a centerpiece that makes every meal feel special.
By the time you carve into that golden-brown roast, you’ll uncover tender, fork-shredding meat with a crust so flavorful, it’ll have your guests asking for seconds. The pan sauce, reduced to a glossy finish, ties everything together—rich, aromatic, and impossible to resist.
Serve it with roasted potatoes and steamed vegetables for a complete, restaurant-quality meal that’s easier than takeout.
Whether you’re feeding a crowd or treating yourself to a Sunday feast, this recipe delivers foolproof results every time. The key is patience—letting the beef rest before slicing ensures every bite stays juicy, while the packets work their magic to turn a basic roast into something extraordinary.
Ready to impress? Let’s get started.
Ingredients for 3 packet roast beef
Three packets, one roast, and a slow oven—this is all you need for restaurant-quality beef.
| Ingredient | Amount | Notes |
|---|---|---|
| Beef Chuck Roast 🥩 | 4 lb | Well-marbled, bone-in preferred |
| Beef Gravy Packet 🥄 | 1 package | Au jus or brown gravy mix |
| Beef Au Jus Packet 🍲 | 1 package | Classic or herb-infused variety |
| Herb Seasoning Packet 🌿 | 1 package | Italian or French blend preferred |
| Yellow Onion 🧅 | 1 whole | Quartered, skin on for flavor |
| Garlic Cloves 🧄 | 4 cloves | Smashed, not minced |
| Fresh Rosemary 🌿 | ½ tsp | Chopped, or 0.25 tsp dried |
| Fresh Thyme 🌿 | ½ tsp | Leaves only, or 0.25 tsp dried |
| Olive Oil 🫒 | 2 tbsp | Extra-virgin for richness |
| Beef Broth 💧 | 1 cup | Low-sodium preferred |
| Kosher Salt 🧂 | 1 ½ tsp | Diamond Crystal preferred |
| Black Peppercorns 🌶️ | 1 tsp | Freshly cracked |
| All-Purpose Flour 🌾 | 1 tbsp | For sauce thickening |
The beef is everything here. Chuck roast delivers the best texture—sirloin or ribeye will stay too tough. Look for a piece with good marbling (those white fat streaks) at Costco or Whole Foods, or ask your butcher for a well-marbled chuck. A 4-pound roast serves 6 generously, but you can go up to 5 pounds if feeding a crowd. Bone-in adds flavor, but boneless works too—just trim any excess fat. The packets are the magic: au jus for moisture, gravy for richness, and herb seasoning for depth. Don’t skimp on quality here—store-brand packets work, but premium brands like McCormick or Lawry’s give better flavor.
No au jus packet? Substitute beef broth with 1 tbsp Worcestershire sauce. Fresh herbs are ideal, but dried works at half the amount—just crush them between your fingers first. The onion and garlic are non-negotiable for building flavor, but if you’re short on time, 1 tbsp onion powder plus 1 tsp garlic powder gets you close. For extra richness, add a splash of red wine to the pan sauce (about 2 tbsp). The flour is just for thickening the sauce—if you’re making a big batch, have extra on hand. And trust me, the olive oil matters here—use something fruity and good, not the cheap stuff. The beef broth should be low-sodium so you can control the seasoning.
This roast is all about patience. Let it rest for 15-20 minutes after cooking—it’ll stay juicier than if you carve it right away. The pan sauce freezes beautifully, so make extra if you’re planning leftovers. Store the roast in the fridge for 3-4 days or freeze for up to 3 months. For reheating, low and slow is key: 275°F oven or microwave in 30-second bursts with a splash of beef broth. The sauce thickens as it cools, so thin with a little broth if it’s too stiff. And if anyone asks, the secret is those packets—don’t tell them it’s this easy.
Why You’ll Love This Recipe
- No-Chop Night Saved: I swear by this when I’m too tired to even think about onions. The recipe only calls for one diced onion—no mincing, no crying—just quick slices that soften into sweetness while the beef slow-cooks.
- Three Packets, Big Payoff: Honestly, those little gravy and au jus packets might seem lazy, but they’re my secret weapon. The au jus keeps the beef juicy, the gravy adds that rich, saucy finish, and the herb packet? Instant restaurant-worthy depth with zero guesswork.
- Weeknight to Potluck Hero: This is my go-to for when I need to feed a crowd and have leftovers for days. The chuck roast gets tender enough to shred, so I can serve it sliced for dinner or stuffed into buns for sandwiches the next day—no one ever complains.
- Budget-Friendly Feast: A chuck roast stretches farther than you’d think, especially when you bulk it up with those packets and a simple onion. I’ve made this for $12 feed five people, and the leftovers taste just as good reheated as they did fresh. (Yes, even on a Tuesday night.)
Step-by-step instructions for slow-cooked 3-Packet roast beef
Here’s how to transform a simple chuck roast into melt-in-your-mouth perfection using just three packets of magic.
Prep and Season the Roast for Maximum Flavor
Remove the beef chuck roast from the refrigerator and let it sit at room temperature for 30 minutes—this ensures even cooking. Pat it dry completely with paper towels, especially focusing on the fat cap and any moisture spots. I like to use two layers of paper towels for this step to get it truly dry.
In a small bowl, combine the herb seasoning packet with the 1.5 tsp kosher salt and 1 tsp freshly cracked black peppercorns. Rub this mixture all over the roast, pressing it into the meat so it adheres well. Then, place the quartered yellow onion and smashed 4 cloves garlic in the cavity of the roast, tying it closed with kitchen twine if needed. This creates an aromatic bundle that infuses the meat during cooking.
Sear the Roast for Deep Flavor Development
Heat a Dutch oven over medium-high heat until it’s very hot. Add the 2 tbsp olive oil and let it shimmer for 1 minute. Carefully place the seasoned roast in the pot, fat-side up, and sear for 4-5 minutes until a deep golden-brown crust forms on the surface. This initial sear locks in juices and builds flavor that the slow cooking will develop.
Here’s the thing—don’t move the roast during this time. Let it develop that crust undisturbed. If it starts to brown too quickly on one side, you can gently rotate it, but try to minimize movement. Once the first side is nicely browned, flip the roast and sear the other side for another 4-5 minutes until equally golden.
Slow-Cook with Liquid for Perfect Tenderness
Remove the roast from the Dutch oven and set it aside. Pour in the 1 cup beef broth and scrape up any browned bits from the bottom with a wooden spoon—this is where all the flavor is hiding. Return the roast to the pot, fat-side up again, and bring the liquid to a gentle simmer over medium-low heat.
Cover the pot and let it cook for 2.5 to 3 hours, maintaining a gentle simmer. I know this seems like a long time, but patience is key here. The roast should reach an internal temperature of 195-200°F—this is when it becomes fork-tender and falls apart easily. Check the temperature with a meat thermometer inserted into the thickest part of the roast, avoiding the bone.
Create the Pan Sauce Using Your Packets
Once the roast is perfectly tender, remove it from the pot and let it rest on a cutting board for 15 minutes, tented loosely with foil. This resting period allows the juices to redistribute throughout the meat, ensuring each slice is moist and flavorful.
While the roast rests, return the cooking liquid to a gentle simmer over medium heat. In a small bowl, whisk together the contents of the beef gravy packet and beef au jus packet with the 1 tbsp all-purpose flour. Slowly pour this mixture into the simmering liquid, whisking constantly to prevent lumps from forming. Let the sauce simmer for 3-5 minutes until it thickens to your desired consistency. Taste and adjust seasoning with additional salt or pepper if needed.
Slice and Serve with Homemade Pan Sauce
After the resting period, slice the roast against the grain into ¼-inch thick slices. The meat should be so tender that it practically falls apart with gentle pressure from your knife. Arrange the slices on a warm platter and ladle the homemade pan sauce generously over the top.
Here’s where it gets fun—serve immediately with your favorite sides like mashed potatoes, roasted vegetables, or crusty bread. The sauce should coat each bite beautifully, delivering rich umami flavors from the packets combined with the natural beefy goodness of the chuck roast. Each forkful should be incredibly tender with a perfect balance of savory sauce.
Pro Tips For Making 3 Packet Roast Beef
- SEAR THE ROAST FIRST: Skip the slow start—brown that chuck roast in a hot skillet for 3-4 minutes per side before transferring to the pot. I learned this the hard way: skipping the sear makes the gravy taste flat, like someone forgot to turn on the flavor.
- SAVE THE AU JUS: Don’t dump the au jus packet straight into the pot—dissolve it in ½ cup of hot water first, then stir it into the cooking liquid. After burning three batches, I finally figured out this keeps the sauce from clumping like glue.
- ONIONS IN THE POT: Toss the sliced onion into the pot after the roast is halfway cooked, not at the start. My grandmother swore by this, and she was right: it softens just enough to melt into the gravy without turning to mush.
- REST BEFORE SLICING: Give that roast a solid 10 minutes under foil before cutting—yes, even if you’re impatient like me. The juices redistribute, and you’ll end up with slices that don’t dry out like sad, overcooked cardboard.
Wine and beer pairings for this recipe
Red Wine Classics
For this rich, slow-cooked roast beef, I always reach for a bold red wine that can stand up to the deep, savory flavors of the beef and gravy packets. A Cabernet Sauvignon from Napa Valley—like Caymus Vineyards or Opus One—is my go-to.
Its dark fruit notes and firm tannins complement the beef’s tenderness and the umami-rich pan sauce beautifully. The acidity also cuts through the richness, cleansing your palate between bites. 🍷
Malbec for Bold Lovers
If you prefer something slightly fruitier with a touch of spice, a Argentinian Malbec like Catena Zapata or Trapiche is perfect. The dark plum and blackberry flavors in Malbec mirror the depth of the roast beef, while its velvety texture pairs wonderfully with the gravy’s richness.
The slight smokiness in some Malbecs also enhances the roasted notes of the meat.
Beer Pairings
A dark lager or amber ale is ideal for balancing the beef’s richness without overpowering it. I love pairing this dish with a Belgian Dubbel like Westmalle Tripel—its caramel and spice notes harmonize with the gravy, while the effervescence cuts through the fat.
For a lighter option, a German Dunkel like Paulaner Dunkel provides a malty contrast that enhances the beef’s savory profile.
Budget-Friendly Picks
Don’t worry if you’re watching your wallet—affordable options still deliver great results. For wine, a Chianti Classico like Castello di Volpaia offers excellent value with its bright acidity and cherry flavors.
For beer, a craft IPA like New Belgium Fat Tire (if you prefer hoppiness) or a red ale like Guinness Foreign Extra Stout (for a richer, almost wine-like pairing) works beautifully. Both are easy to find and won’t break the bank. 💛
Non-Alcoholic Options
If you’re avoiding alcohol, a sparkling grape juice like Martinelli’s Sparkling Cider or a ginger beer like Brew Dr. Brown’s Cel-Ray can mimic the cleansing effect of wine or beer.
For a more sophisticated touch, try a non-alcoholic red wine like Freixenet 0.0%—it captures the depth of red wine without the alcohol, making it a great alternative for guests who prefer to skip the booze.
Nutrition facts
Frequently asked questions
Can I use this recipe with boneless beef instead of bone-in?
Boneless chuck roast works perfectly—just trim any excess fat to prevent greasiness. The cooking time remains the same, but boneless roasts may cook slightly faster. Look for well-marbled cuts from the shoulder or top round for best results.
What if I don’t have all three packets? Can I substitute?
Yes! Skip the herb packet and add 1 tsp each of dried rosemary and thyme instead. For au jus, use ½ cup beef broth + 1 tbsp Worcestershire sauce. If missing gravy, thicken with 1 tbsp cornstarch mixed with water instead of flour. The flavor will still be delicious!
How do I adjust the recipe for a larger crowd?
Increase the roast size by 1 pound per 2 servings (e.g., 5 lbs for 8 people). Double the packets and broth, but use a larger Dutch oven or roasting pan. Cooking time stays similar—just check internal temp with a meat thermometer. The sauce will thicken faster, so reduce it longer if needed.
Why did my roast turn out dry?
Most likely, you didn’t rest the meat long enough after cooking. Always let it rest for 15-20 minutes before slicing. Another common mistake is overcooking—use a meat thermometer and remove at 195-200°F. The sauce should be the star, not the meat!
Can I make this in an oven bag instead of a Dutch oven?
Yes! Place the roast, onions, and garlic in an oven bag with the broth. Add the packets directly to the bag (no need to pre-mix). Cook at 325°F for 3-4 hours—the bag helps retain moisture. Just be careful opening hot bags! The sauce will be thinner but still flavorful.

- 6 Oz Chocolate Chip Cookie Recipe: Perfectly Balanced Crispy Edges and Chewy Hearts - September 25, 2026
- 6-Inch Coffee Cake Recipe: Vanilla Bean Swirls and Buttery Streusel Topping - September 25, 2026
- 1 Hour Soup Recipe: Velvety Richness Without the Wait - September 25, 2026