
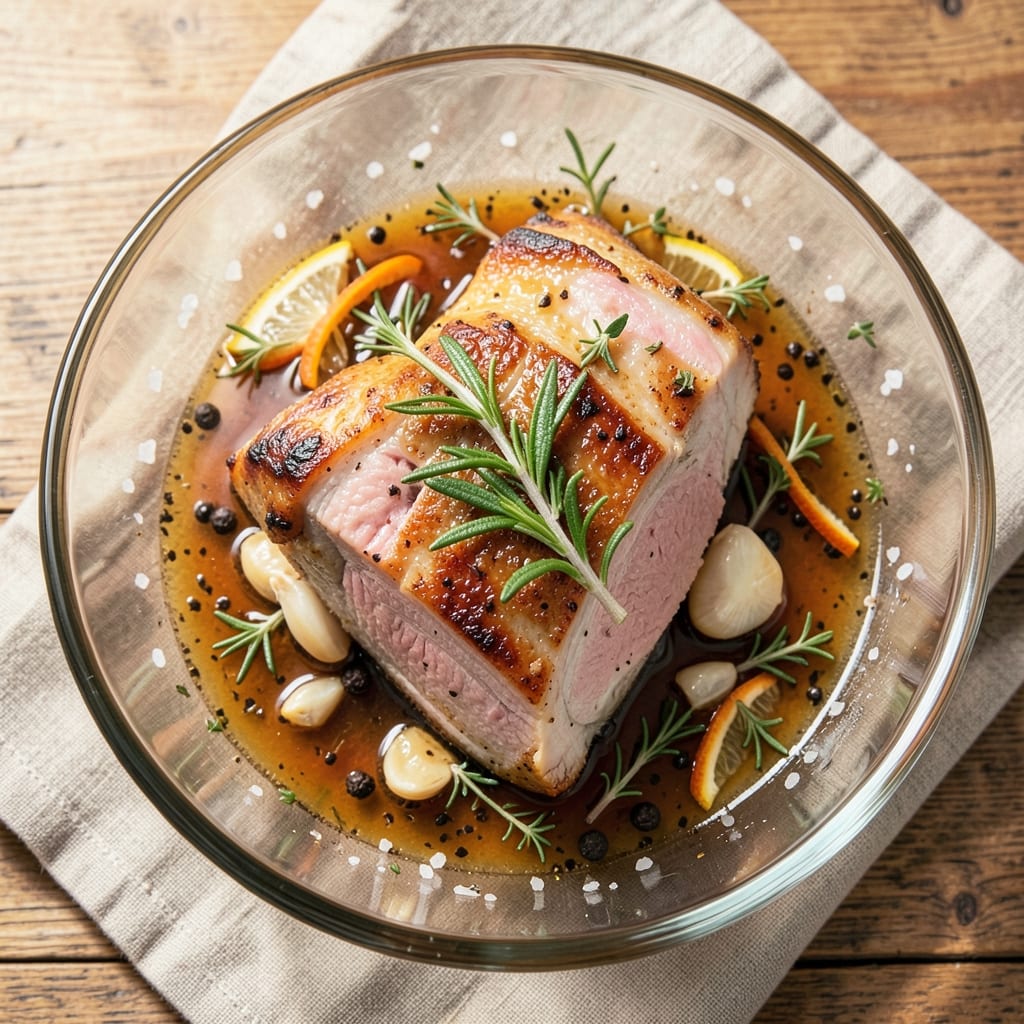
This 30-minute pork chop brine recipe transforms tough cuts into melt-in-your-mouth perfection without the usual overnight soak. As a pitmaster who grew up on slow-smoked ribs, I know the secret to juicy meat isn’t time—it’s technique.
The quick brine infuses flavor and tenderizes the meat in just half an hour, so you can have dinner on the table without waiting all day. The key? A balanced mix of salt, acid, and aromatics that works fast.
The magic happens in the brine itself—a simple blend of salt, vinegar, and herbs that penetrates the meat in minutes. You’ll sear the chops in a hot cast-iron skillet until they’re golden and crisp on the outside while staying tender inside.
This method delivers restaurant-quality results with minimal effort, making it perfect for weeknight dinners or weekend cookouts. No fancy equipment needed—just a good knife, a skillet, and patience for a few minutes of searing.
By the time you plate these chops, you’ll have a dish that’s juicy, flavorful, and impressive enough for guests. The crust will be perfectly crisp, the meat fork-tender, and the aromatics—garlic, rosemary, and a touch of citrus—will make your kitchen smell like a high-end steakhouse.
The best part? You’ll have the whole process wrapped up in under an hour, with time to spare for a side dish or a glass of wine.
Whether you’re grilling, pan-searing, or broiling, this brine works for any method. Pair the chops with roasted potatoes or a fresh salad for a complete meal. The technique is foolproof, and the results are always delicious—no matter how busy your schedule. Let’s get cooking!
Ingredients for 30 minute pork chop brine
Quick brine, bold flavors—no overnight wait for perfect pork chops.
| Ingredient | Amount | Notes |
|---|---|---|
| Bone-In Pork Chops 🍖 | 4 whole | 1-inch thick, rib or loin chops |
| Kosher Salt 🧂 | ½ cup | Diamond Crystal preferred |
| Apple Cider Vinegar 🍎 | ½ cup | Organic preferred for flavor |
| Fresh Rosemary 🌿 | ¼ cup | Chopped, stems removed |
| Garlic Cloves 🧄 | 6 cloves | Smashed, not minced |
| Lemon Zest 🍋 | 1 tbsp | From 1 large lemon |
| Black Peppercorns 🌶️ | ½ tsp | Freshly cracked |
| Olive Oil 🫒 | 2 tbsp | Extra-virgin for searing |
| Brown Sugar 🍚 | 1 tbsp | Light or dark |
| Fresh Thyme Leaves 🌿 | ¼ tsp | From 1 sprig |
| Ice Cubes ❄️ | 1 cup | For brining |
The pork chops are everything here. Rib chops have more marbling for flavor, but loin works too—just don’t go thinner than 1 inch or they’ll dry out. Grab them from the butcher counter if possible; they’ll cut them to your thickness. Look for chops with a good layer of fat on the edges—that’s where the flavor hides. If you’re using frozen chops, thaw them in the fridge overnight, but don’t skip the brine. Costco sells pre-portioned chops that save time, but I always check for freshness—meat should smell clean, not sour or metallic.
No apple cider vinegar? White vinegar or lemon juice works in a pinch, but the apple cider adds that subtle sweetness that balances the salt. Fresh rosemary is non-negotiable here—dried won’t give the same punch. Penzeys sells organic rosemary that’s perfect, but any grocery store’s fresh bunch will do. The garlic should be firm and clove-shaped, not soft or sprouting. Brown sugar isn’t just for sweetness; it helps caramelize the crust during searing. Skip it if you’re watching sugar, but trust me, it’s worth it. For the olive oil, Trader Joe’s has a great affordable extra-virgin that works perfectly for searing.
This brine keeps for up to 3 days in the fridge, so make extra if you’re feeding a crowd. The chops themselves? Use within 2 days for best texture. I like to portion the brine into quart-sized bags with the chops—just seal, massage, and refrigerate. When you’re ready to cook, no need to thaw; just pat dry and sear. The brine will make your kitchen smell amazing, but store it in an airtight container if you’re not using it right away. Leftovers? Slice the chops and use in sandwiches or tacos—they’re even better cold.
Why You’ll Love This Recipe
- No-Fuss Brine Magic: I swear by this trick—just toss the chops in a bag with salt, vinegar, and herbs, then let them sit while I make dinner. No fancy equipment, no stress, and the flavor? Chef’s kiss.
- Crispy-Creamy Payoff: That bone-in magic with the rosemary and garlic? You get a caramelized crust outside while the inside stays juicy—like a fancy restaurant bite, but made in my kitchen.
- Weeknight to Weekend: Same brine works for Tuesday dinners or Saturday BBQs. Double the batch, freeze half, and boom—you’ve got a backup plan for when life gets busy.
- Budget Hero: Pork chops on sale? Brine them. Leftovers? Toss them in sandwiches or tacos. The vinegar keeps them tender, so you’re not wasting a thing—just pure flavor for less.
Step-by-step instructions for 30-Minute pork chop brine
Here’s how to transform tough pork chops into juicy, flavorful perfection in just half an hour.
Prepare the Brine Mixture
In a large bowl, combine the 0.5 cup kosher salt, 0.5 cup apple cider vinegar, 1 tbsp brown sugar, 0.25 cup chopped fresh rosemary, 6 smashed garlic cloves, 1 tbsp lemon zest, 0.5 tsp cracked black peppercorns, and 0.25 tsp fresh thyme leaves. Stir everything together until the salt and sugar dissolve completely. You’ll notice the mixture starts to fizz slightly from the vinegar’s acidity—this is normal and helps distribute flavors faster.
Add the 1 cup ice cubes to the mixture. The ice helps lower the temperature of the brine, preventing the pork from cooking prematurely during the short soaking time. The cold also helps tenderize the meat by slowing down protein contraction. Stir again to ensure all ingredients are evenly distributed throughout the liquid.
Submerge the Pork Chops
Place the 4 whole bone-in pork chops in a large resealable plastic bag or shallow container. Pour the brine mixture over the pork chops, ensuring each piece is completely submerged. If using a bag, press out as much air as possible before sealing. For a container, use a plate to weigh down the pork chops and keep them fully immersed in the liquid.
Let the pork chops sit at room temperature for 15 minutes. This short marinating time is perfect for tenderizing without over-shrinking the meat. You’ll notice the surface of the pork starts to develop a slightly translucent appearance—this indicates the brine is beginning to work its magic on the muscle fibers. Don’t skip this step, as it’s crucial for achieving that juicy interior we’re after.
Pat Dry and Sear
After the 15-minute brine, remove the pork chops and pat them dry thoroughly with paper towels. This step is critical for developing that beautiful crust we want when we sear them. I like to press down firmly on each chop with the paper towels to remove as much moisture as possible—this helps create better contact with the hot pan.
Heat 2 tbsp olive oil in a large skillet over medium-high heat until it shimmers but doesn’t smoke. Add the pork chops and cook for 3-4 minutes per side, until they develop deep golden-brown crusts. You’ll know they’re ready to flip when they release easily from the pan—this happens when the edges start to crisp up. The internal temperature should reach 145°F when checked with a meat thermometer.
Rest and Serve
Transfer the seared pork chops to a cutting board and let them rest for 5 minutes before serving. This resting period allows the juices to redistribute throughout the meat, preventing them from running out when you cut into the chops. During this time, you can make a quick pan sauce by deglazing the skillet with a splash of apple cider vinegar and scraping up those delicious browned bits.
Slice each pork chop against the grain into ½-inch thick pieces for maximum tenderness. The result should be juicy, flavorful pork chops with a perfect balance of crispy exterior and tender interior. Serve immediately with your favorite sides—these chops pair beautifully with roasted vegetables or a fresh salad to let the flavors shine.
Pro Tips For Making 30 Minute Pork Chop Brine
- Trim the Fat First: Bone-in pork chops have that thick fat cap—slice it down to ¼-inch before brining. I learned this the hard way when my first batch rendered into greasy brine instead of crispy crust. A sharp knife and steady hand make all the difference.
- Use Cold Vinegar: Chill the apple cider vinegar in the fridge for 10 minutes before mixing with salt. Warm vinegar speeds up the brine’s acidity, which can make the pork chop’s edges turn mushy. Cold keeps the texture tight—trust me, your chop will thank you.
- Smash the Garlic: Skip the minced garlic—crush those cloves with the flat side of your knife first. It releases more flavor into the brine without turning bitter. (Yes, it looks like you’re prepping for a garlic festival, but the payoff is worth it.)
- Brine at Room Temp: Let the pork chops sit out for 20 minutes before adding them to the brine. Cold meat absorbs unevenly, leaving some parts bland. Room temp ensures every bite gets that tangy rosemary-kissed punch—no guessing, no regret.
Creative variations of these flavors
Citrus-Herb Twist
Swap the apple cider vinegar for orange juice and add 1 tbsp grated orange zest to the brine. The citrus brightens the rosemary and garlic, cutting through the richness of the pork. I like to use Navel oranges for their sweetness—just make sure to strain out any pulp.
This variation works especially well with loin chops since they’re leaner and benefit from the acidity. 🍊
Spicy Smoked Paprika
Boost the heat by adding 1 tbsp smoked paprika and ½ tsp cayenne pepper to the brine. This gives the chops a deep, smoky flavor that pairs perfectly with the sear. I often use Penzeys smoked paprika for its rich, complex flavor.
For extra smokiness, add ½ tsp liquid smoke (like Colman’s) to the brine. Serve with a cooling yogurt sauce to balance the heat.
Honey-Glazed Brine
Replace the brown sugar with 2 tbsp honey and reduce the apple cider vinegar to ¼ cup. The honey caramelizes beautifully during searing, creating a glossy, sweet-savory crust. I prefer local wildflower honey for its floral notes.
This variation is especially great for holiday dinners—the chops look stunning and taste even better. Pair with roasted root vegetables for a cozy meal.
Garlic-Butter Brine
Add ¼ cup melted butter (instead of olive oil for searing) and an extra 4 smashed garlic cloves to the brine. The butter infuses the meat with richness, while the garlic adds depth. After searing, brush the chops with extra melted garlic butter for a restaurant-worthy finish.
This works amazingly well with bone-in chops—the bone adds flavor that soaks into the meat during the short brine.
Beer-Brined Version
Replace the apple cider vinegar with ½ cup dark beer (like Guinness or Stout for malty sweetness). The beer adds a subtle bitterness that complements the pork beautifully. I like to use cold beer to keep the brine chilled.
This variation is perfect for game day or when you want to impress guests with a unique twist. Serve with beer-battered onion rings for a full pub-style meal. 🍺
Herb-Focused Variations
Swap rosemary for fresh thyme or sage in the brine. Thyme adds a slightly minty note, while sage brings earthy depth. For a Mediterranean twist, add ½ tsp dried oregano and ¼ tsp cinnamon to the brine.
These variations work especially well with loin chops and pair beautifully with lemon wedges. The herbs infuse quickly in the short brine, so you get maximum flavor without overpowering the meat.
Nutrition facts
Frequently asked questions
Why does the recipe use ice cubes in the brine?
The ice cubes serve two key purposes: they keep the pork chops from cooking prematurely during the short 15-minute brine, and the cold temperature helps tenderize the meat by slowing protein contraction. This ensures maximum juiciness when you sear the chops. Without ice, the brine could start cooking the meat before it even hits the pan!
Can I use bone-in or boneless pork chops?
This recipe works beautifully with bone-in chops (rib or loin cuts), which stay juicier due to the bone’s natural moisture. However, boneless chops will work too—just reduce the cooking time to 2-3 minutes per side since they cook faster. For best results, use chops that are at least 1-inch thick to prevent drying out.
What’s the best way to check doneness?
Use a meat thermometer to check the internal temperature—pork chops are safe to eat at 145°F. If you don’t have one, look for a juicy pink center and crispy edges. For extra safety, let the chops rest for 5 minutes before serving, which helps carryover cooking raise the temperature another 5°F.
Can I make this brine ahead of time?
Yes! Prepare the brine mixture (without the ice) up to 3 days in advance and store it in an airtight container in the fridge. When ready to use, add the ice cubes and pork chops just before brining. The herbs and spices will keep their flavor, though the vinegar’s acidity may mellow slightly over time.
What if my chops are too thin?
Thin chops (½-inch or less) will dry out quickly. To fix this, pound them gently between plastic wrap to even thickness, or cook them over lower heat for 2 minutes per side. For extra moisture, brush with melted butter during searing. Thin chops also work well sliced into cutlets—just reduce cooking time to 1-2 minutes per side.

- 3 Chocolate Fudge Recipe: Rich, Fudgy Squares With Perfect Snap - September 25, 2026
- 5 Star Tomato Sauce Recipe: Umami-Packed Depth Without the Canned Taste - September 25, 2026
- 5 Star Red Beans and Rice Recipe: Smoky-Spiced One-Pot Soul Food - September 25, 2026